Building a cinder block wall is a challenging task that requires expertise and precision. A well-constructed wall not only serves as a barrier but also enhances the aesthetic value of the property. The process of building a cinder block wall needs to be approached systematically, ensuring that each step is followed accurately to achieve the desired results.
As a masonry expert, I have seen many poorly constructed walls that fail to meet their intended purpose. To prevent such occurrences, it is essential to understand the fundamentals of building a cinder block wall. In this article, we will discuss the essential steps involved in constructing a sturdy and durable cinder block wall. Whether you are looking to secure your property or enhance its appearance, this guide will provide you with valuable insights on how to build a cinder block wall successfully.
Preparing The Site For Construction
Site preparation is an essential step in building a cinder block wall. Before starting the construction process, it is crucial to assess the site and ensure that it is ready for the project. One of the first things to do is to clear any vegetation or debris that might impede the construction process. This can be done by using a shovel, rake, or other excavation tools.
Next, it’s important to excavate the site properly. Excavation techniques depend on factors such as soil type, weather conditions, and local regulations. Generally, excavation should be done at least 12 inches deep and wide enough to accommodate the wall’s width. It is also important to ensure that the site has proper drainage to prevent water damage.
In addition to excavation, it’s essential to check for any underground utilities such as gas lines or electrical wires. Contacting your local utility company can help identify any potential hazards before construction starts. Proper site preparation ensures a smooth construction process and helps avoid costly mistakes along the way. Once the site is prepared, calculating materials and tools needed can begin without any delay.
Calculating Materials And Tools Needed
After the site has been cleared and leveled, it is time to move on to the next step of building a cinder block wall. The first thing to do is to estimate the cost of materials and tools needed for the project. This will include not only the cinder blocks themselves but also mortar, rebar, and any necessary tools such as a level, trowel, and wheelbarrow. It is important to have an accurate estimate in order to avoid running out of supplies mid-project or overspending unnecessarily.
Once the cost has been estimated, it is time to measure out the dimensions of the wall. This will involve determining both height and length, as well as any curves or angles that may be present in the design. Accurate measurements are essential for ensuring that the wall will be stable and level once completed. It may be helpful to consult with a masonry expert at this stage in order to ensure that all measurements are correct.
With an accurate estimate of costs and precise measurements in hand, it is time to move on to choosing the right type of cinder blocks for your project. There are many different options available on the market today, ranging from standard gray blocks to decorative colored or textured options. Consider factors such as durability, appearance, and price when making your selection, as well as any specific needs or requirements for your particular project. By taking these steps before beginning construction on your cinder block wall, you can ensure a successful outcome that meets all your needs and expectations.
Choosing The Right Type Of Cinder Blocks
While cinder blocks are a popular material for building walls, choosing the right type and size of block can be crucial to ensure that your wall is strong and durable. Some people may argue that all cinder blocks are essentially the same, but this simply isn’t true. There are a variety of different types and sizes available on the market, each with its own unique properties and advantages.
When it comes to selecting the right type of cinder block for your wall, there are two primary factors you’ll want to consider: strength and durability. Strength refers to how much weight or pressure a block can withstand before it breaks or cracks. Durability, on the other hand, refers to how well a block holds up over time in different weather conditions and environments.
The most common types of cinder blocks include standard weight, medium weight, lightweight, and high-density blocks. Standard weight blocks are the heaviest and strongest option, making them ideal for load-bearing walls or retaining walls. Medium weight blocks offer a good balance between strength and cost-effectiveness, while lightweight blocks are easier to handle but less durable overall. High-density blocks have a more solid core than other types of cinder blocks, making them particularly resistant to water damage and erosion over time. Ultimately, the best choice will depend on your specific needs and goals for your wall.
Transitioning into the subsequent section about creating a stable foundation: With your choice of cinder blocks in mind, you can now move on to creating a stable foundation that will support your wall for years to come.
Creating A Stable Foundation
Before starting to build a cinder block wall, it is essential to create a stable foundation. The first step in creating a foundation is excavation. The depth and width of the excavation will depend on the height and length of the wall. Typically, for walls that are up to four feet high, an excavation depth of at least 12 inches is necessary.
Once the excavation is complete, it is crucial to ensure that there are proper drainage solutions in place. Without proper drainage, water can accumulate behind the wall, causing damage over time. A common solution for drainage is to fill the bottom of the excavation with gravel or crushed stone. This will allow water to flow away from the wall and prevent any potential damage.
Nested Bullet Point List:
- Factors to consider during foundation excavation:
- Depth and width should match wall dimensions
- Soil type should be analyzed before beginning work
- Drainage solutions:
- Fill bottom of excavation with gravel or crushed stone
- Install perforated drain pipes if needed
With a stable foundation in place, you can move on to laying the first row of blocks. Ensuring that your foundation has been excavated correctly and has proper drainage solutions will ensure that your cinder block wall stays strong for years to come.
Laying The First Row Of Blocks
As we have seen in the previous section, having a stable foundation is crucial when building a cinder block wall. It is equally important to lay the first row of blocks correctly to ensure a sturdy structure. Coincidentally, the tools needed for this step are similar to those used for creating the foundation.
Firstly, you will need a level and a line level to make sure that each block is perfectly horizontal and aligned with the others. Common mistakes people make during this step include not using enough mortar or spreading it unevenly, resulting in an unstable row of blocks. Another mistake is rushing through the process and not taking enough time to ensure that each block is levelled and aligned correctly.
To avoid these mistakes, take your time when laying the first row of blocks. Use a trowel to spread mortar evenly on the footing before placing each block firmly into position. Make sure that each block is levelled using your level and aligned with your line level before moving onto the next one. By doing so, you will create a solid base for your cinder block wall.
Moving forward, leveling and aligning blocks should be done meticulously as it sets up your wall’s structural integrity. Neglecting this step can lead to an unstable wall which can be dangerous over time as it may collapse at any moment without warning.
Leveling And Aligning Blocks
Proper techniques for leveling and aligning blocks are crucial for the stability and aesthetic appeal of a cinder block wall. The first step is to ensure that the foundation is level, as this will determine the entire wall’s alignment. Use a long level or a laser level to check if there are any high or low spots in the foundation. If there are, use a shovel or a trowel to level them out.
Once you have confirmed that the foundation is level, start laying the first course of blocks. Use mortar to secure them in place, then use a level to check if they are aligned both horizontally and vertically. Adjust as necessary before the mortar sets. Common mistakes include relying solely on eyeballing or not using enough mortar, which can result in uneven courses and instability.
To ensure consistent alignment throughout the entire wall, it’s essential to use guides such as strings or snap lines. These will help you maintain straight lines while building up each course of blocks. Another technique is to use corner blocks as reference points for aligning each subsequent block in that row. By using proper techniques and avoiding common mistakes, you can create a sturdy and visually appealing cinder block wall that will stand the test of time.
Markdown list:
- Always check that the foundation is level before laying any blocks.
- Use guides such as strings or snap lines for consistent alignment.
- Corner blocks can be used as reference points for aligning subsequent blocks in each row.
Transition: Now that you have properly leveled and aligned your first course of blocks, it’s time to move on to cutting blocks to fit into specific areas of your wall design.
Cutting Blocks To Fit
- Accurately measuring the wall is essential for constructing a successful cinder block wall.
- A combination of power and hand tools will be required for cutting and shaping the blocks to fit the wall.
- To ensure uniformity, it is important to measure each block and mark them for cutting.
- A basic circular saw or masonry saw is ideal for cutting cinder blocks.
- When cutting the blocks, it is important to use a diamond-tipped masonry blade to avoid chipping the blocks.
- After cutting the blocks, the edges should be smoothed with a masonry grinder to ensure a clean and professional finish.
Measuring Wall
To ensure the wall’s structural integrity, measuring accuracy is of utmost importance. Before cutting any blocks to fit, it is essential to measure the area where the wall will be constructed thoroughly. Using a tape measure, take precise measurements of the length and height of the wall. It’s also crucial to consider uneven terrain when measuring accuracy for a cinder block wall.
When dealing with uneven terrain, adjustments must be made to ensure an even level for the wall. After measuring the length and height of the wall, check if there are any significant dips or rises in the ground where you intend to lay your first course of blocks. If so, make adjustments by digging into high spots or filling in low areas with gravel or sand until a level surface is achieved. This step is critical in preparing an even foundation for your block wall.
After ensuring proper measurements and adjusting for uneven terrain, you can begin cutting blocks to fit precisely. Cut each block using a masonry saw with a diamond blade designed explicitly for cutting concrete materials. Use caution while cutting as concrete dust can cause respiratory problems if inhaled. Always wear protective gear such as goggles and masks while cutting and handling cinder blocks to prevent injury or illness. With these steps completed successfully, you can now move onto building your cinder block wall accurately and securely.
Choosing Tools
When constructing a cinder block wall, cutting blocks to fit is an essential step. Choosing the right tools for this task is crucial in ensuring that the blocks fit precisely and securely into place. There are various types of cinder block wall designs, each requiring specific tools for cutting. Therefore, selecting the correct tool is essential in achieving the desired outcome.
When choosing tools for cutting blocks, safety must be a top priority. Masonry saws with diamond blades designed explicitly for cutting concrete materials are recommended. However, caution should be exercised while using these tools as concrete dust can cause respiratory problems if inhaled. Protective gear such as goggles and masks should always be worn while cutting and handling cinder blocks to prevent injury or illness.
In conclusion, when constructing a cinder block wall, choosing the right tools for cutting blocks is critical to achieve precise measurements and ensure structural integrity. Safety precautions during construction should also be given utmost importance to avoid any accidents or health hazards while working with concrete materials. By following these guidelines, you can construct a durable and well-built cinder block wall that will serve its purpose efficiently.
Cutting Blocks
When constructing a cinder block wall, cutting blocks to fit is an essential step. Properly cutting the blocks will ensure that they fit precisely and securely into place, resulting in a structurally sound wall. The tools used for cutting the blocks are crucial in achieving this outcome.
Tools for cutting cinder blocks include masonry saws with diamond blades designed explicitly for cutting concrete materials. Safety should be a top priority when using these tools. Concrete dust can cause respiratory problems if inhaled, so protective gear such as goggles and masks should always be worn while handling cinder blocks. Additionally, it is important to exercise caution while using the tools to prevent injury or accidents.
In conclusion, selecting the correct tool for cutting blocks when constructing a cinder block wall is essential in achieving precise measurements and ensuring structural integrity. It is also important to prioritize safety precautions during construction to avoid any accidents or health hazards while working with concrete materials. By following these guidelines, you can construct a well-built and durable cinder block wall that meets your needs and serves its purpose efficiently.
Reinforcing The Wall With Rebar
Cutting blocks to fit is an essential step in building a cinder block wall. However, it’s not the only step that requires attention to detail. Reinforcing the wall with rebar is equally important for ensuring that the structure has adequate structural integrity. Rebar placement should be carefully planned before beginning construction.
Proper rebar placement will provide the necessary support for your wall, helping it withstand lateral forces and prevent cracks from forming. The first step is to identify where you want to place the rebar within the blocks. Typically, rebar should be placed every third or fourth course, centered between two blocks. Make sure that each piece of rebar extends beyond both ends of the wall by at least six inches.
Once you’ve determined where to place your rebar, it’s time to insert it into the blocks themselves. Using a sledgehammer or mallet, gently tap each piece into place until it sits snugly in its designated spot. Remember to pay close attention to spacing and placement as any errors could compromise the structural integrity of your wall.
As important as cutting blocks and reinforcing with rebar are, they’re just two of many steps involved in building a cinder block wall. The next critical phase involves mixing and applying mortar – a process that requires skill and precision in equal measure. With careful attention paid to every aspect of construction, you’ll be able to create a sturdy and reliable structure that can stand up against even the toughest weather conditions for years to come.
Mixing And Applying Mortar
Did you know that the strength of a cinder block wall depends largely on the quality of mortar used? In fact, studies show that up to 75% of structural failures in masonry walls are due to poor mortar quality or improper application. This is why it’s important to pay careful attention when mixing and applying mortar for your cinder block wall.
To ensure a strong and durable wall, here are some best practices for mixing and applying mortar:
- Use the right type of mortar for your project, either Type N or Type S.
- Measure ingredients precisely according to the manufacturer’s instructions.
- Mix with a drill and paddle attachment until the mortar has a smooth consistency without lumps.
- Apply the mortar evenly to both the block and footing using a trowel.
Common mistakes when mixing and applying mortar include adding too much water, not mixing thoroughly enough, and failing to apply enough pressure when laying blocks. These errors can result in weak spots in your wall or even cause it to collapse over time.
Now that you have successfully mixed and applied your first row of blocks, it’s time to start building up additional rows. But before you do, make sure to allow sufficient time for the mortar to set before beginning work on each new layer. Following these steps will help ensure a strong and reliable cinder block wall that will last for years to come.
Building Up Additional Rows
When building up additional rows for your cinder block wall, it is crucial to ensure that the corners are constructed correctly. This is essential as it provides stability and support to the entire structure. To achieve this, you must place corner blocks at each end of the wall, ensuring that they are level and aligned with each other. Afterward, fill in the gaps between these blocks with mortar and continue laying the remaining blocks in a straight line.
As you build up your wall, you should also be aware of height limitations. Building codes typically dictate how tall a cinder block wall can be before requiring additional reinforcement or permits. It is essential to check with your local building authority before proceeding with construction to avoid any legal issues. Typically, cinder block walls may range from three to six feet high without reinforcement.
In summary, when building up additional rows for your cinder block wall, ensure that corner construction is done accurately and appropriately aligns with the rest of the structure. Additionally, keep in mind any height limitations set by building codes to avoid legal issues down the road. With these considerations in mind, you can continue to build your wall safely and effectively to achieve a sturdy and durable structure that meets your needs. The next section will cover filling in gaps and cracks between blocks during construction.
Filling In Gaps And Cracks
Repairing cracks and filling in gaps is an essential step to ensure the longevity and durability of your cinder block wall. Before starting, it is crucial to have all the necessary tools such as a chisel, hammer, trowel, and mortar mix. Begin by removing any loose debris or dirt from the crack or gap using a wire brush or vacuum.
One effective technique for repairing cracks is to use a mortar mix that matches the color of your cinder blocks. Apply the mix with a trowel, ensuring that it fills in all the nooks and crannies of the crack. Use a jointing tool to smooth out any excess mortar and create an even finish. It is important to let the repaired area dry completely before moving onto waterproofing techniques.
Waterproofing techniques are vital in protecting your cinder block wall from moisture damage. One approach is to apply a waterproof sealant directly onto the surface of your wall using a roller or sprayer. Another technique is to use a waterproof membrane such as asphalt coating or rubberized paint on top of the sealant layer. Be sure to follow manufacturer instructions for application and drying times before adding another layer or proceeding with other steps.
To repair cracks:
Remove loose debris using a brush or vacuum
Use mortar mix matching cinder block color
Smooth out excess with jointing tool
Waterproofing techniques:
Apply waterproof sealant directly on surface
Use waterproof membrane like asphalt coating
Follow manufacturer instructions
Incorporating these repair techniques and waterproofing methods will help keep your cinder block wall structurally sound while also preventing moisture damage from occurring. Once completed, you can move onto adding a finish to your wall for that final touch of style and protection.
Adding A Finish To The Wall
As the cinder block wall nears completion, attention turns towards adding a finish to enhance its appearance. Choosing colors and textures can evoke different emotions and moods, so it is important to consider the desired effect. Lighter colors reflect more sunlight while darker colors absorb it. Textures can add depth and dimension to the wall, ranging from smooth finishes to rougher surfaces.
When selecting a finish for your cinder block wall, consider the surrounding environment and aesthetic of the area. Neutral tones such as gray or beige work well in natural settings, while bold colors like red or blue can make a statement in urban environments. Textures such as stucco or exposed aggregate can add visual interest without overwhelming the space.
Applying texture to the wall can be accomplished using various techniques such as brushing, rolling or spraying. For a rougher surface, use coarse sand mixed with cement before applying the finish coat. Smooth finishes require a fine sand mixture or even a skim coat of plaster over the blocks. A skilled mason will know which technique to use based on the desired outcome and available materials.
As we move forward in protecting our newly finished cinder block wall from wear and tear, sealing becomes an essential step in ensuring longevity. By taking care of our structures today, we ensure they remain functional and pleasing tomorrow.
Sealing The Wall For Protection
After applying the finish to your cinder block wall, it’s important to protect it from potential damage. One way to do this is by applying sealant. Sealant is a protective coating that can be applied over the finished surface of the wall, helping to prevent water and other elements from penetrating the blocks.
Choosing the right type of sealant is important in ensuring that your cinder block wall remains protected. There are two main types of sealants: water-based and solvent-based. Water-based sealants are more environmentally friendly and easy to apply, while solvent-based sealants offer greater durability and resistance to weathering.
When selecting a sealant, consider factors such as climate, exposure to sunlight, and the intended use of your cinder block wall. It’s also important to follow the manufacturer’s instructions when applying the sealant, ensuring that you apply it evenly and thoroughly for maximum protection.
Protecting your cinder block wall with a sealant can help extend its lifespan and keep it looking great for years to come. However, maintenance is still necessary in order to ensure its long-term durability. In the next section, we will discuss some tips on how to maintain your cinder block wall and keep it in top condition for years to come.
Maintaining Your Cinder Block Wall
As the saying goes, prevention is better than cure. This holds true for maintaining your cinder block wall. Repairing damage can be costly and time-consuming. Thus, it is essential to take preventive measures to keep your wall in good condition.
One way to prevent damage is by ensuring proper drainage. Water can cause erosion, which weakens the foundation of your wall. You can prevent erosion by installing a drainage system or adding gravel behind the wall to improve water flow. Additionally, you can plant vegetation that absorbs excess water.
Regular inspections are also crucial in maintaining your cinder block wall. Inspect for any signs of damage such as cracks or bulges, which may indicate a structural issue. Addressing these issues early on will save you from more significant repair costs down the line. By following these preventive measures, you can ensure that your cinder block wall remains strong and durable for years to come.
Moving forward, it is important to troubleshoot common issues that may arise with your cinder block wall despite taking preventive measures. These issues include cracking due to settling or moisture accumulation behind the blocks. In the next section, we will explore ways to address these problems and keep your cinder block wall in excellent condition.
Troubleshooting Common Issues
Common mistakes can occur during the construction of a cinder block wall, which can result in a weak and unstable structure. One common mistake is insufficient base preparation, which can cause the wall to sink or tilt over time. To prevent this issue, it is essential to ensure that the base has been properly excavated and compacted before laying the first course of blocks.
Another common mistake is improper mortar mixing and application. If not mixed correctly, the mortar may not adhere well to the blocks, leading to gaps between them. Additionally, if applied too thinly or inconsistently, the mortar may not provide sufficient support for the blocks. To prevent this issue, it is crucial to follow proper mortar mixing instructions and use an appropriate amount on each block.
Using uneven or damaged blocks can also lead to problems with a cinder block wall’s stability. Blocks with cracks or chips may break under pressure or cause surrounding blocks to shift out of place. It is important to inspect each block carefully before use and discard any that are damaged or irregularly shaped. In addition, always use level blocks to maintain a straight and sturdy wall.
Preventative measures play a crucial role in avoiding these common issues when building a cinder block wall. Before starting construction, take the time to thoroughly plan out the project and gather all necessary materials. Properly prepare the base by digging deep enough and compacting soil layers until firm. Always mix mortar according to instructions and apply evenly on every block while ensuring they are levelled throughout installation. By following these preventative measures, you can ensure your cinder block wall will be stable and durable for years to come without problems arising frequently.
Remember that constructing a cinder block wall requires patience and attention to detail but taking your time will help you avoid costly repairs later on down the line while providing an aesthetically pleasing final product that will last for many years without incident!
Conclusion
In conclusion, building a cinder block wall can be a challenging but rewarding project for those with the right tools and knowledge. By following the steps outlined above, you can create a sturdy and durable wall that will last for years to come.
However, it is important to remember that even the most carefully constructed walls can experience issues over time. Cracks may form due to settling or other factors, and water damage can cause serious problems if not addressed promptly.
To avoid these issues, it is crucial to regularly inspect your wall for signs of damage and make any necessary repairs as soon as possible. With proper maintenance and care, your cinder block wall can continue to provide reliable protection and support for your property. As the old saying goes, “a stitch in time saves nine” – taking small steps now can prevent bigger problems down the line.
Image Credits
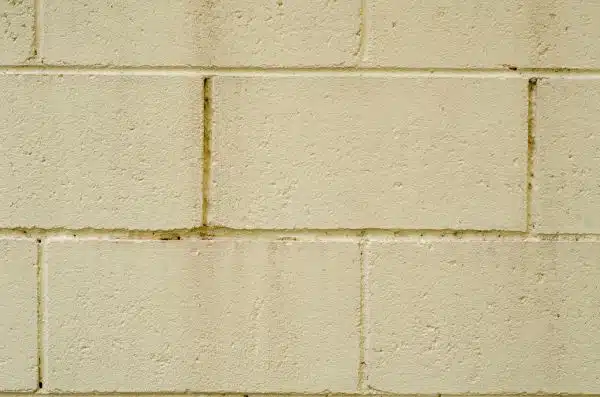
- “Texture – Yellow painted wall cinder blocks” by Andrew Beeston (featured)

