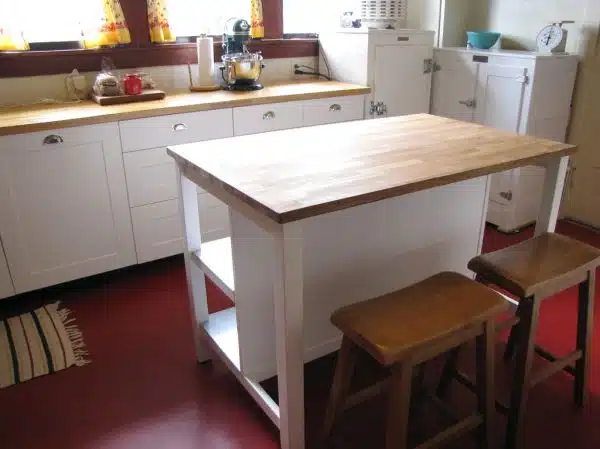
Designing and building a kitchen island is an art that requires careful consideration of several factors, including functionality, space, and style. A well-designed kitchen island can serve as a centerpiece that combines form and function to enhance the overall aesthetic value of any kitchen. In this article, we will discuss how to build a kitchen island that meets your unique needs and preferences, whether you are looking for additional storage or countertop space, seating options for guests or family members, or simply an eye-catching element that adds personality to your kitchen.
One of the main advantages of building a kitchen island is the flexibility it offers in terms of customization. Kitchen islands can be designed to match any decor style, from traditional to modern, depending on your personal taste. Additionally, incorporating specific features such as sinks, cooktops or built-in appliances can make your island more functional and efficient. However, before embarking on any construction project, it is essential to consider the existing layout of your kitchen and ensure that the island fits seamlessly into the available space while still allowing for easy movement around it. By following these guidelines and carefully planning out each detail of your design, you can create a kitchen island that not only meets but exceeds your expectations.
Determining Your Kitchen Island Needs
Assessing functionality and designing aesthetics are two essential factors to consider when building a kitchen island. Before beginning the construction process, it is crucial to determine your requirements for the island’s functions. Consider what you want the island to accomplish, such as additional storage or counter space, seating arrangements for guests, or even specialized cooking stations.
Aesthetics are equally important in designing your kitchen island. The design should complement the existing décor of your kitchen while also standing out as a distinct feature. There are several styles to choose from, including modern, rustic, and traditional designs. Additionally, the color scheme and materials used should match with the rest of your kitchen.
When assessing functionality and designing aesthetics for your kitchen island, keep in mind that this addition will serve as a focal point within your kitchen. The island’s location should be strategically chosen to create optimal flow while cooking and entertaining guests. In the next section, we will discuss how to select the right location for your island based on these considerations.
Choosing The Right Location For Your Island
Island placement is a crucial aspect of creating an efficient and functional kitchen space. When choosing the right location for your island, it’s important to consider the overall layout of your kitchen. Placing the island in a location that disrupts the natural flow of foot traffic can make cooking and entertaining difficult.
One popular approach is to center the island in the middle of the kitchen, directly opposite from the main work area. This allows for easy access from all sides and creates a focal point that draws attention to the island’s unique design features. However, if you have limited space, you may need to consider alternative placements such as positioning the island along one wall or in a corner.
When determining where to place your island, it’s also important to consider how it will fit into your overall kitchen layout. If you have an open-concept kitchen that flows seamlessly into other living spaces, you’ll want to ensure that your island doesn’t create any barriers or blockages. On the other hand, if you have a more traditional closed-off kitchen space, you may have more flexibility when it comes to placement. Ultimately, finding the perfect location for your kitchen island will depend on your specific needs and preferences.
Moving on from Island placement and its importance in creating an efficient and functional kitchen space, picking the perfect size and shape for your island is equally essential.
Picking The Perfect Size And Shape
Proper planning and preparation are crucial when building a kitchen island. Once you have determined the ideal location for your island, it’s time to consider the size and shape that will best suit your needs. The island shape can impact both the functionality of your space and its overall aesthetic.
When selecting an island shape, consider how it will fit into your kitchen layout. Islands that are square or rectangular tend to work well in larger spaces with plenty of counter space, while L-shaped or U-shaped islands are great options for smaller kitchens with limited counter space. Additionally, curved islands can add a unique flair to any kitchen design.
Counter space is another essential consideration when picking the perfect size and shape for your island. A larger island may provide ample room for food prep, cooking, and dining, but if it takes up too much floor space, it can be impractical. Conversely, a small island may not offer sufficient workspace unless it’s designed to maximize storage.
Incorporating an island into your kitchen design requires careful consideration of its shape and size. By thoughtfully assessing your needs for counter space and thinking about how the island will fit into your existing layout, you can create an element that’s both functional and visually appealing. Next up: deciding on materials and finishes to complete your dream kitchen!
Deciding On Materials And Finishes
When deciding on materials and finishes for your kitchen island, it’s important to consider the overall style of your kitchen. A well-designed kitchen island should complement the existing look and feel of your space. One way to achieve this is by selecting matching finishes for your island. For example, if you have stainless steel appliances, consider using a stainless steel countertop or adding stainless steel accents to the island.
Another factor to consider when choosing materials is cost-effectiveness. While it may be tempting to splurge on high-end materials, it’s important to remember that a kitchen island is a functional piece of furniture that will see daily use. Opting for cost-effective materials such as laminate or butcher block can help keep costs down without sacrificing quality or durability.
Ultimately, the materials and finishes you choose will depend on your personal preferences and budget. However, by keeping these factors in mind, you can create a beautiful and functional kitchen island that seamlessly integrates into your existing space.
As you move forward with designing your kitchen island, creating a blueprint will be an essential step in the process. This will not only give you a clear vision of what your finished product will look like but also ensure that all measurements are precise and accurate. With a solid plan in place, you’ll be ready to move on to the next stage of building your dream kitchen island.
Creating A Blueprint For Your Island
When deciding on materials and finishes for your kitchen island, there are a number of design elements to consider. The first is the overall style of your kitchen. If you have a modern or contemporary kitchen, you may want to opt for sleek and minimalist finishes such as stainless steel or concrete. Alternatively, if you have a more traditional kitchen, natural wood finishes can add warmth and character to your island.
Another important factor to consider when designing your kitchen island is its functionality. This includes determining the size and shape of the island, as well as any additional features such as built-in appliances or storage solutions. When it comes to construction tips, it’s important to ensure that your island is structurally sound and able to support the weight of any added features. Consider working with a professional contractor or designer to ensure that your island meets all safety requirements.
Once you’ve decided on your materials and finishes, it’s time to create a blueprint for your island. Gather measurements of the space where you plan to install the island and sketch out a rough draft of its size and shape. From there, you can begin gathering the necessary tools and supplies for constructing your dream kitchen island.
Gathering The Necessary Tools And Supplies
To begin building your kitchen island, you will need to gather the necessary tools and supplies. Having the right equipment is crucial for a seamless construction process. Start by creating a list of essential tools such as a circular saw, drill, jigsaw, measuring tape, and sandpaper. Make sure you have enough power tools and hand tools to complete the project efficiently.
Once you have your tool storage sorted out, it’s time to budget for your project. Kitchen islands come in different shapes and sizes, so it’s important to determine how much money you are willing to spend on materials. You can opt for more affordable options such as plywood or MDF boards or choose high-quality hardwoods like maple or cherry wood that may be more expensive but could last longer. Additionally, factor in costs for accessories such as cabinet handles or countertop materials.
Properly budgeting ensures that you purchase everything needed before starting. Without proper planning and budgeting, you may end up with a half-finished island due to insufficient funds or material shortages. Once you’ve gathered all your required equipment and materials with an established budget plan in place, it’s time to move on to the next step – building the frame of your island.
Building The Frame Of Your Island
As you move on to the next step of building your kitchen island, it’s important to ensure that you have accurate measurements for the frame. Measuring accuracy is crucial in the construction process, as even small discrepancies can cause issues later on. A common mistake is assuming that all surfaces are level or square, which can lead to uneven joints and an unstable structure. To avoid this, use a level and square tool to check all angles before beginning construction.
When constructing the frame, it’s important to use joinery techniques that will provide strength and stability. One such technique is using mortise and tenon joints, where one piece of wood has a protruding tenon that fits into a corresponding hole in another piece of wood. This creates a strong joint that can support weight and withstand pressure. Another option is using dowels or biscuits, which are small wooden pegs that connect two pieces of wood together. These techniques help to create a sturdy foundation for your kitchen island.
By following these guidelines for measuring accuracy and joinery techniques, you can create a solid frame for your kitchen island that will last for years to come. The next step in the process is installing countertops and cabinetry, which will add both functionality and aesthetic appeal to your island. With careful planning and attention to detail, you’ll soon have a beautiful new addition to your kitchen that will serve as a focal point for family gatherings and culinary creations alike.
Installing Countertops And Cabinetry
The next step in building a kitchen island is installing the countertops and cabinetry. When it comes to choosing your countertop options, you have a variety of materials to choose from such as granite, marble, quartz, and wood. Granite is a popular choice for its durability and resistance to scratches and heat while marble offers a luxurious look but requires more maintenance. Quartz is another durable option that doesn’t require sealing like granite or marble. Wood countertops provide a warm and natural feel but may require regular oiling to maintain their finish.
Once you have chosen your countertop material, the placement of cabinets should be considered. You will need to measure the space available for cabinets before purchasing them. Typically, base cabinets are installed first followed by upper cabinets if desired. For best results, use a level tool to ensure accurate placement of the cabinets. Cabinets can be installed using screws or brackets depending on the type of cabinet selected.
In conclusion, installing countertops and cabinetry is an important aspect of building a kitchen island. With various countertop options available such as granite, marble, quartz, and wood, you can choose one that suits your needs and aesthetic preferences. Additionally, careful consideration should be given when placing the cabinets to ensure they fit properly within the space provided. Next up is adding electrical and plumbing connections which we will cover in detail in the following section.
Adding Electrical And Plumbing Connections
One of the most important steps in building a kitchen island is determining necessary connections for electrical and plumbing. It’s crucial to decide what types of appliances and fixtures you will be incorporating into your island, such as a sink or dishwasher, and plan accordingly. Failure to do so can result in costly mistakes that require tearing apart the entire structure.
It’s highly recommended to hire a professional electrician or plumber to handle these connections. Even if you have experience with DIY projects, electrical and plumbing work can be dangerous and complicated. A licensed professional will ensure that all connections are up to code and safe for use.
When working with an electrician or plumber, make sure to communicate your vision clearly. Knowing what types of appliances and fixtures you plan on using will allow them to create a plan that meets your specific needs. Additionally, be prepared for potential changes in the project timeline as unexpected issues may arise during installation. By hiring professionals and communicating effectively, you can ensure a successful outcome for your kitchen island project.
With necessary connections in place, the next step is incorporating appliances and fixtures into your kitchen island.
Incorporating Appliances And Fixtures
- When choosing appliances for a kitchen island, consider size, function, and aesthetics to find the best fit for the space.
- Kitchen islands can be outfitted with many different types of practical fixtures like cutting boards, knife blocks, and storage drawers.
- Be sure to consider the amount of space available and how the fixtures will interact with the appliances.
- Placement of fixtures should be carefully considered to create a smooth workflow and functional kitchen island.
Choosing Appliances
The appliances are the heart of any kitchen, and choosing them can be overwhelming. As a kitchen design expert, I advise my clients to consider their lifestyle and needs when selecting appliances. Integrated appliances blend in with the cabinetry and provide a seamless look, while freestanding options offer flexibility in terms of placement. It’s important to weigh the pros and cons of each type before making a decision.
Energy efficiency is also a crucial aspect when selecting kitchen appliances. Energy Star rated appliances use less energy than standard models, which means lower utility bills for homeowners. Additionally, they help reduce carbon emissions and contribute to a healthier environment. As an expert in kitchen design, I always recommend energy efficient options to my clients because they offer both short-term and long-term benefits.
Incorporating appliances into a kitchen island is an excellent way to maximize space and functionality in the kitchen. When choosing appliances for this purpose, it’s essential to consider their size and compatibility with the island layout. With integrated or freestanding options and energy efficient models available, homeowners can create an island that suits their needs while keeping style and sustainability in mind.
Adding Fixtures
Incorporating appliances and fixtures into a kitchen design is an essential aspect of creating a functional and aesthetically pleasing space. While appliances are the heart of any kitchen, fixtures such as custom lighting can elevate the overall look and feel of the room. As a kitchen design expert, I advise my clients to consider both appliances and fixtures when planning their dream kitchen.
Custom lighting can add a touch of elegance to any kitchen while also providing essential task lighting. Pendant lights above an island or under-cabinet lighting can enhance the functionality of the space while also contributing to its overall ambiance. When selecting custom lighting fixtures for a kitchen, it’s important to choose ones that complement the style of the cabinetry and other design elements.
Built-in appliances such as ovens, microwaves, and refrigerators offer seamless integration with cabinetry and provide a streamlined look in any kitchen. Incorporating these appliances into the design allows for more floor space and creates a cohesive aesthetic throughout the room. Choosing built-in appliances requires careful consideration of size, placement, and compatibility with cabinetry. As a kitchen design expert, I always recommend consulting with professionals before making any major appliance or fixture decisions to ensure that they fit seamlessly into the overall vision for the space.
Creating Seating Options
When it comes to creating seating options for your kitchen island, there are a few things to consider. First and foremost, you want to ensure that your design is functional and provides enough space for people to sit comfortably. You also want to think about customizing the seating options to fit your specific needs and preferences.
One popular option for kitchen island seating is bar stools. These can be found in a variety of styles and materials, from traditional wooden stools to more modern metal designs. Consider the height of your island when selecting bar stools, as you want them to be at a comfortable height for eating or chatting with guests.
Another option for customizing seating on your kitchen island is built-in benches or banquettes. These can provide additional storage space underneath while also offering comfortable seating options for larger groups. When designing these types of seating options, consider adding cushions or pillows for added comfort.
Functional designs that incorporate customized seating options can truly elevate the overall look and feel of your kitchen island. By taking the time to carefully select the right type of seating and customizing it to meet your specific needs, you can create a space that not only looks beautiful but also functions well for all of your culinary endeavors.
As you move forward with designing your kitchen island, keep in mind that even small decorative touches can make a big impact on the overall style of the space. In the next section, we will explore ways to add decorative elements such as lighting fixtures, plants, and artwork that will help make your kitchen island truly shine.
Styling Your Island With Decorative Touches
Decorative accents can add personality and style to your kitchen island. When selecting decorative touches for your island, consider the overall color scheme of your kitchen. You may want to match the colors on your island to those of your cabinets or countertops, or choose a complementary color scheme to make your island stand out.
One way to add decorative accents is by using bar stools that complement your island design. Consider the height and style of the stools, as well as their color and materials. Another option is to use pendant lighting above the island. This not only adds a decorative touch but also provides functional lighting for food prep and dining.
When choosing decorative accents for your kitchen island, less is often more. Avoid cluttering the space with too many accessories that can take away from its functionality. Instead, focus on a few carefully selected pieces that enhance the overall look and feel of the space.
Moving on from styling your island with decorative touches, let’s explore ways to maximize storage space in your kitchen island.
Maximizing Storage Space
A kitchen island can be a valuable addition to any home, providing additional counter space and storage solutions. When designing your island, it’s important to consider how you can make the most of its storage potential. With some organizational tips, you can create an island that not only looks great but also functions efficiently.
One way to maximize storage space is by incorporating drawers into your island design. Drawers can be used to store utensils, linens, or even small appliances. Consider adding deep drawers for pots and pans or shallow drawers for baking sheets and cutting boards. You could also include a hidden drawer for storing valuables such as jewelry or important documents.
Another option for maximizing storage space is by installing shelves or cabinets underneath the countertop. Open shelves provide easy access to frequently used items such as cookbooks or decorative pieces while closed cabinets offer more discreet storage for less attractive items like cleaning supplies. Consider using pull-out shelves in lower cabinets to make accessing items at the back easier and avoid unnecessary bending and reaching.
By implementing these storage solutions and organizational tips, you can create a kitchen island that is both functional and stylish. The key is to assess your needs carefully and plan accordingly so that everything has its place. In the next section, we’ll explore strategies for maintaining and cleaning your island so that it remains a centerpiece of your kitchen for years to come.
Maintaining And Cleaning Your Island
- Regularly cleaning the surfaces of a kitchen island is essential in order to maintain the functionality of the kitchen.
- Deep cleaning should be done at least once a month in order to remove any built-up dirt and grime.
- Utilizing the correct cleaning products for the material of the island is important in order to ensure the longevity of the island.
- Kitchen islands should be wiped down with a damp cloth on a daily basis to prevent dust and dirt build-up.
- The use of a mild soap and warm water should be utilized when deep cleaning the island.
- Utilizing appropriate cleaning products will help to protect the finishes of the island, ensuring it remains in pristine condition.
Clean Surfaces
To ensure that your kitchen island remains a functional and hygienic space for food preparation, it is important to establish a regular maintenance routine. One crucial aspect of this routine involves keeping the island’s surfaces clean and free of debris. When it comes to cleaning products, it is best to use mild detergents or specialized cleaners that are specifically formulated for the type of material used on your island’s countertops.
When cleaning your kitchen island surfaces, start by removing any visible crumbs or debris with a damp cloth or sponge. Next, apply the cleaning solution to the surface and use a clean cloth to wipe it down thoroughly. Be sure to follow the manufacturer’s instructions for any specialized cleaners you may be using. Finally, rinse the surface with water and dry it off with a clean towel.
In addition to regular cleaning, it is important to address any spills or stains on your kitchen island as soon as possible. This will prevent them from setting in and becoming more difficult to remove over time. By staying on top of your maintenance routine and following these simple tips for keeping your surfaces clean, you can ensure that your kitchen island remains an attractive and functional space for years to come.
Deep Cleaning
Maintaining and cleaning your kitchen island is crucial to ensure its longevity and functionality. While regular cleaning can keep the surfaces looking clean, deep cleaning is necessary to get rid of tough stains and grime that accumulate over time. Deep cleaning involves using specialized cleaning tools and techniques to remove stubborn dirt, grease, and bacteria from the island’s surfaces.
To deep clean your kitchen island, start by removing any loose debris or crumbs with a damp cloth or sponge. Next, apply a specialized cleaning solution or a mixture of warm water and mild detergent to the surface. Use a scrub brush or an old toothbrush to gently scrub away any tough stains or grime. Be sure to pay attention to the corners, edges, and seams where dirt tends to accumulate. Rinse off the solution with water and dry the surface with a clean towel.
In addition to deep cleaning, there are some maintenance tips you can follow to keep your kitchen island looking pristine for longer. Avoid placing hot pots or pans directly on the surface as this can damage it over time. Use cutting boards when chopping food instead of cutting directly on the countertop. Wipe up spills immediately before they have a chance to set in. By following these simple tips for deep cleaning and maintenance, you can ensure that your kitchen island remains a functional and hygienic space for all your food preparation needs.
Cleaning Products
Maintaining and cleaning your kitchen island is essential to ensure its longevity and functionality. Deep cleaning is necessary to remove tough stains, grime, and bacteria that accumulate over time. However, using the wrong cleaning products can cause damage to your kitchen island’s surfaces. Therefore, it’s important to choose the right cleaning products that are safe for your island.
There are plenty of DIY cleaning recipes available online that you can use to clean your kitchen island naturally. These eco-friendly options are usually made with simple ingredients like baking soda, vinegar, and lemon juice. They’re not only safe for your kitchen island but also for the environment. These natural ingredients work effectively in removing tough stains and grime without causing any damage to the surfaces.
If you prefer using commercial cleaning products, make sure they’re specifically designed for your kitchen island’s surface material. For example, if you have a granite countertop, look for a cleaner that’s suitable for granite surfaces. Moreover, always read the label before purchasing any cleaning product to ensure it doesn’t contain any harmful chemicals that could potentially cause damage or health hazards. By choosing the right kind of cleaning products and following proper maintenance techniques, you can extend the life of your kitchen island while keeping it clean and hygienic for all your food preparation needs!
Enjoying Your Newly Built Kitchen Island
Maintaining and cleaning your newly built kitchen island is crucial to ensuring its longevity and functionality. However, once you have completed these tasks, it’s time to start enjoying your creation. There are many ways to make the most out of your kitchen island, including optimizing its organization and installing proper lighting.
Island organization is an essential element that can help you maximize the use of your space. Consider incorporating features like built-in storage units, shelves, or cabinets to help keep your tools and accessories organized. You can also add hooks or racks for frequently used items such as cooking utensils or towels. By taking advantage of these features, you can ensure that everything has a designated place and easy accessibility.
In addition to organization, proper lighting can transform your kitchen island into a functional centerpiece. Pendant lights are an excellent option for both task lighting and adding aesthetic appeal to the area. Alternatively, if you have an open floor plan or want a more ambient atmosphere, consider installing recessed lighting around the perimeter of the island. This will create a warm glow that will enhance the overall ambiance while still providing adequate light for food preparation.
By following these guidelines for island organization and lighting installation, you can fully enjoy your newly built kitchen island while maximizing its functionality. Remember that every aspect of this project should be tailored to meet your specific needs and preferences – so don’t be afraid to get creative! With a little effort and imagination, you’ll soon have a stunning new centerpiece in your home that will serve as a gathering place for years to come.
Conclusion
When it comes to building a kitchen island, there are several factors to consider. First, you must determine your needs and choose the right location for your island. Next, you should pick the perfect size and shape, as well as decide on materials and finishes. Creating a blueprint is crucial before any construction begins.
Styling your island with decorative touches is also important, but don’t forget about maximizing storage space. Lastly, maintaining and cleaning your island will ensure its longevity and functionality in your kitchen.
As the adage goes, “the kitchen is the heart of the home.” Building a kitchen island can enhance not only the functionality of your kitchen but also its aesthetic appeal. By following these steps and taking into account your personal style, you can create a beautiful and practical addition to your home that will be enjoyed for years to come.
Image Credits
- “Kitchen progress: the new ‘island’ is in!” by litlnemo (featured)

