The kitchen is the heart of the home, but a full-blown renovation can be costly and time-consuming. Fortunately, there are ways to update and refresh your kitchen without breaking the bank or disrupting your daily routine. With some strategic hacks, you can fake a kitchen renovation that will leave your space feeling brand new.
In this article, we’ll explore eight tips and tricks for faking a kitchen renovation. From simple upgrades like painting cabinets to more involved projects like installing a backsplash, these hacks will help you transform your kitchen into a stylish and functional space without spending a fortune or sacrificing too much time. Whether you’re looking to impress guests or just want to enjoy a refreshed environment for yourself, these tips are sure to inspire and empower you on your DIY journey.
Painting Cabinets For A Fresh Look
Imagine having a beautiful kitchen without spending too much. Painting cabinets is one of the most popular ways to create a fresh look in your kitchen. Using different painting techniques, you can transform your old and tired cabinets into something new and modern.
When it comes to painting cabinets, color selection is essential. You want to choose colors that match the overall theme of your kitchen. Neutral colors like white and gray are popular choices for modern kitchens, while darker shades like navy blue and emerald green are great for creating a bold statement. DIYers can save money by doing the job themselves, but hiring a professional painter can guarantee better quality work.
DIY vs professional help: which option is more cost-effective? The answer depends on various factors such as time, skill level, and budget. If you have experience with painting furniture and have enough time to complete the project, then DIY may be the way to go. However, if you lack experience or prefer to avoid the hassle of doing it yourself, hiring a professional painter could save you time and ensure high-quality results. It’s important to compare costs between DIY and professional options before making a decision.
Ready to upgrade your kitchen further? Swapping out hardware for a quick upgrade is another hack to consider.
Swapping Out Hardware For A Quick Upgrade
After updating the look of your kitchen cabinets with a fresh coat of paint, consider swapping out the hardware for a quick upgrade. Mixing metals has become a popular trend in home design, and using vintage hardware can add character to your space. Whether you choose brass, copper, or chrome, the right hardware can make a big difference in the overall aesthetic of your kitchen.
When selecting new hardware, it’s important to consider the style of your cabinets and the overall theme of your kitchen. Vintage hardware is a great option for those looking to add some charm and personality to their space. Look for unique pieces at flea markets or antique stores, or search online for replicas that fit your style.
Incorporating vintage hardware into your kitchen design is an easy way to elevate the look of your space without breaking the bank. By mixing metals and adding unique touches like vintage knobs and pulls, you can create a customized look that reflects your personal style and adds warmth and character to your home. In our next section, we’ll explore how adding a bold backsplash can have a major impact on the overall design of your kitchen.
Adding A Bold Backsplash For Impact
Did you know that adding a bold backsplash can transform the look of your kitchen without breaking the bank? According to a recent survey, 70% of homeowners who updated their kitchens with a bold backsplash reported feeling happier with their homes. But how do you choose the right one for your space?
When it comes to selecting a bold backsplash, there are two main factors to consider: color versus pattern and DIY versus professional installation. If you’re looking for something eye-catching that won’t overpower your other design elements, a colorful backsplash might be just what you need. On the other hand, if you want to add texture or interest without drawing too much attention, a patterned backsplash could be the way to go. As for installation, while DIY options can save you money, they require more time and effort than hiring a professional.
There are several materials to choose from when it comes to creating a bold backsplash for your kitchen. Glass tiles can add shine and depth, while metal tiles provide an industrial edge. Stone tiles offer natural beauty and durability, while ceramic tiles come in endless colors and patterns. Ultimately, the material you choose will depend on your personal style and budget constraints. With so many options available, creating a bold backsplash has never been easier!
As mentioned earlier, installing open shelving is another great way to update your kitchen’s look. By removing upper cabinets and replacing them with open shelves, you can create an airy feel that’s perfect for modern homes. But how do you make sure everything stays organized? Stay tuned for our next section on tips for installing open shelving without sacrificing functionality!
Installing Open Shelving For A Modern Touch
Choosing Shelving: Open shelving is a popular choice for a modern kitchen update, as it provides a sleek and minimalist look.
Installing Shelving: Installing open shelving requires basic carpentry skills and the correct hardware, such as screws and wall anchors.
Styling Shelving: When styling open shelves, it’s important to consider the overall look and feel of the kitchen. Colorful dishes, décor, and cookbooks can all be used to create a personal touch.
Choosing Shelving
When it comes to installing open shelving for a modern touch, choosing the right shelving style is crucial. One of the first decisions you’ll need to make is whether to go with floating or bracketed shelves. Floating shelves are sleek and minimalist, with no visible support hardware. This makes them ideal for showcasing decorative items or creating an airy, uncluttered look. However, they may not be as strong as bracketed shelves and can have weight limitations.
Bracketed shelves, on the other hand, offer more stability and can hold heavier items like pots and pans. They also come in a variety of styles that can add a decorative element to your kitchen design. When choosing your brackets, consider the overall aesthetic you’re going for – do you want something sleek and modern or ornate and traditional? Once you’ve chosen your shelving style, it’s time to think about how to maximize storage.
Tips for styling open shelving include using baskets or bins to corral smaller items like spices or utensils, grouping similar items together for a cohesive look, and using textured items like cutting boards or plants to add visual interest. Don’t be afraid to play around with different arrangements until you find what works best for you – after all, part of the fun of open shelving is being able to showcase your personal style!
Installing Shelving
When it comes to updating your kitchen, adding open shelving is a popular choice for achieving a modern touch. Before starting your project, consider the type of shelving that best fits your needs – whether it’s floating or bracketed shelves. Each has its own advantages and disadvantages, so it’s important to choose the one that will work best for you. Floating shelves are great for showcasing decorative items while bracketed shelves offer more stability and can hold heavier items like pots and pans.
Once you’ve decided on the type of shelving you want, it’s time to start thinking about installation. Installing shelving in your kitchen may seem daunting but with a little know-how and some basic tools, it’s a DIY project that can be completed in just a few hours. The first step is to measure the space where you want to install the shelves and mark where they will go. Then, drill pilot holes into the wall studs and attach any necessary brackets or hardware.
When installing floating shelves, make sure to use appropriate anchors or toggle bolts for added support. For bracketed shelves, ensure that the brackets are level before attaching them to the wall. Once your shelves are securely installed, it’s time to start styling them! Use baskets or bins to corral smaller items and group similar items together for a cohesive look. Remember to have fun with it and showcase your personal style through textured items like cutting boards or plants. With these tips in mind, installing open shelving in your kitchen is an easy way to add both functionality and style.
Styling Shelving
After successfully installing open shelving in your kitchen, the next step is to style it. Styling tips and organization ideas can help you achieve a cohesive and functional look for your shelves. One of the best ways to start is by grouping similar items together. This helps create an organized and visually appealing display.
Another styling tip is to use baskets or bins to corral smaller items like spices or utensils. Not only does this add a touch of texture, but it also makes it easier to find what you need when cooking or baking. Additionally, incorporating plants or herbs can bring life into your space while offering a practical use for fresh ingredients.
When styling your open shelves, it’s important to showcase your personal style through decorative items like cutting boards or unique dishes. This not only adds dimension to your space but also creates a sense of warmth and personality. With these styling tips in mind, you can easily transform your kitchen with open shelving while adding both functionality and style to the heart of your home.
Replacing Countertops For A High-End Look
Countertops are an essential part of any kitchen. They define the look and feel of your space, and can make or break the overall design. Countertop materials range from natural stone to engineered quartz to laminate, each with its unique advantages and disadvantages. When it comes to a high-end look on a budget, there are several options available.
Budget-friendly countertop options include laminate, solid surface, and ceramic tile. Laminate is the most affordable option, but it can still give your kitchen a stylish look with its variety of colors and patterns. Solid surface countertops are slightly more expensive than laminate but offer better durability and a wider range of pattern options. Ceramic tile is another affordable option that allows for customization in terms of color and pattern.
DIY countertop installation is possible with some basic tools and skills. However, it’s important to consider the pros and cons before deciding on this approach. The benefits of DIY installation include cost savings, flexibility in scheduling, and pride in completing the project yourself. However, there are also potential drawbacks such as lack of experience leading to mistakes or improper installation that could compromise the safety of your kitchen.
Updating your kitchen’s countertops can give it a high-end look without breaking the bank. Consider budget-friendly options such as laminate or solid surface materials that can be installed DIY-style if you have some basic skills. It’s important to weigh the pros and cons of DIY installation before making a decision that could impact the safety and functionality of your kitchen. In our next section, we’ll explore how updating lighting fixtures can enhance ambiance in your newly renovated kitchen space.
Updating Lighting Fixtures For Ambiance
Upgrading your kitchen’s lighting fixtures can significantly improve its ambiance and appeal without breaking the bank. Installing dimmer switches is an inexpensive way to add versatility to your kitchen lighting. You can easily adjust the brightness of your lights according to your mood or activity, making it perfect for entertaining guests or enjoying a romantic dinner with your partner.
Pendant lights are another great option for adding a touch of elegance and style to your kitchen. These hanging lights come in various styles, sizes, and finishes, making it easy for you to find the perfect one that matches your kitchen’s decor. Pendant lights work well as task lighting when installed over the sink, island, or dining area.
Under cabinet lighting is a practical addition to any kitchen as it provides task lighting for food preparation and cooking. You can either opt for puck lights that are easy to install or strip lights that provide more coverage. Task lighting is essential in any workspace as it helps prevent accidents and ensures that you have enough light to work efficiently.
As we’ve discussed earlier, upgrading your kitchen’s lighting fixtures is an affordable way to give it a new look and feel. However, if you want to incorporate some natural elements into your space, consider adding plants. In the next section, we’ll discuss how indoor plants can bring life into your kitchen while improving air quality and reducing stress levels.
Incorporating Plants For A Natural Feel
Many homeowners love the idea of incorporating plants into their home décor. In recent years, the trend has shifted towards bringing nature indoors, and kitchens are no exception. However, some may be hesitant to add greenery to a kitchen for fear of damaging surfaces or creating clutter. Fortunately, there are numerous benefits of having plants in your kitchen, and the right choice can complete any space without taking up too much room.
The benefits of greenery in kitchens are numerous. Plants can purify the air by absorbing toxins and releasing oxygen. They also add a natural touch to any space, making it feel more welcoming and comfortable. In addition, studies have shown that simply being around plants can improve one’s mood and reduce stress levels. It is no wonder that many homeowners are looking for ways to bring more green into their homes.
When it comes to selecting the best plants for small kitchens, there are several options available. Herbs such as basil or mint can be grown in small pots on windowsills or countertops and provide fresh ingredients for cooking. Succulents are another low-maintenance option that requires minimal attention while adding a pop of color to any space. Hanging plants like ivy or spider plants can also add dimension to a room without taking up valuable counter space.
With all these benefits in mind, it is clear that incorporating plants into your kitchen design is a smart choice. Not only do they make your space feel more inviting, but they also offer health benefits that everyone can appreciate. So why not consider adding some greenery to your kitchen today? By doing so, you’ll create a beautiful and healthy environment that you’ll love spending time in.
Incorporating plants in your kitchen is just one way to update its look without breaking the bank or undertaking major renovations. Another great DIY project is creating a custom island for added storage and convenience. With just a few simple materials and tools, you can create an island that perfectly fits your kitchen’s needs. Keep reading to learn more about this exciting project.
Creating A Diy Island For Added Storage
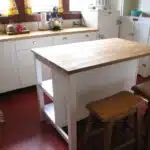
A DIY island is a great addition to any kitchen, particularly if you’re looking for more storage space. Not only will it provide extra counter space, but it can also be used as a dining area or even a workspace. With the right DIY island design, you can create an island that perfectly fits your needs and complements your kitchen’s existing style.
When creating your DIY island design, consider the size of your kitchen and the amount of storage space you need. A larger island may be ideal for those with bigger kitchens or families who require more storage space. Additionally, consider incorporating Island storage solutions such as built-in shelves and drawers to maximize storage capacity. To add a touch of personality to your island, consider using unique materials such as reclaimed wood or industrial piping.
To ensure that your DIY island is functional and durable, use high-quality materials and take time to plan the construction process carefully. You’ll need to measure accurately, cut precisely, and assemble everything correctly to ensure that your island is stable and safe to use. By following these tips and taking advantage of Island storage solutions, you can create an island that not only looks great but also meets all of your kitchen’s needs.
Creating a DIY island is just one way to give your kitchen a new look without breaking the bank. But what about adding some color? In the next section, we’ll explore how using removable wallpaper can give your kitchen a temporary pop of color without making any permanent changes.
Using Removable Wallpaper For A Temporary Pop Of Color
Some homeowners may be hesitant to use removable wallpaper for fear that it will leave damage or residue on their walls. However, temporary wallpaper can actually be a great solution for those who want to add a pop of color or pattern without committing to a permanent change. It offers the flexibility to switch up your decor whenever you want, and the process of removal is much easier than traditional wallpaper.
One of the biggest pros of temporary wallpaper is its easy installation. Most brands come with adhesive backing that simply needs to be peeled off and stuck onto the wall. This makes it a great option for renters who do not want to make any permanent changes to their living space. Additionally, many brands have a wide range of designs to choose from, so you can find one that fits your personal style.
While temporary wallpaper may seem like the perfect solution, there are some cons to consider before making a purchase. One potential issue is that it may not adhere well to textured walls or surfaces with high humidity levels. Additionally, it may not be as durable as traditional wallpaper and can peel over time if not installed properly or if exposed to moisture.
When it comes time to remove your temporary wallpaper, the process should be fairly simple and leave little damage behind. Start by peeling off any loose edges and then use a putty knife or scraper tool at a low angle to gently lift the paper away from the wall. If there is any residue left behind, you can use warm water and soap or vinegar and water solution to clean it off.
Transition sentence: Upcycling old furniture for a unique twist is another fun way to transform your kitchen without breaking the bank.
Upcycling Old Furniture For A Unique Twist
Painting is a great way to add color and texture to old furniture pieces for a unique twist. Staining can be used to give a classic and timeless look to an old piece of furniture. Distressing can create the illusion of a weathered and vintage furniture piece. Decoupage is a technique that allows for intricate designs and patterns to be added to a furniture piece.
Painting
When it comes to upcycling old furniture, painting is one of the easiest and most effective techniques you can use. Not only does it give your furniture a new lease on life, but it also allows you to choose colors that match your personal style and home decor. However, choosing the right painting techniques and colors can be daunting for some DIY enthusiasts.
To ensure a successful paint job, start by cleaning and sanding your furniture thoroughly. This will help the paint adhere better and provide a smoother finish. When choosing colors, consider the mood you want to create in the room. Neutral shades like beige or gray are versatile and can complement any decor style. Bold hues like red or blue can add a pop of color and personality to your space.
When it comes to painting techniques, there are many options available. You can use chalk paint for a vintage look or spray paint for a sleek modern finish. Decoupage is another technique that involves gluing paper or fabric onto your furniture before painting over it with a clear coat. Whatever technique you choose, remember that patience is key when it comes to achieving a flawless finish. With these tips in mind, you’ll be able to fake a kitchen reno in no time!
Staining
When it comes to upcycling old furniture, painting is not the only technique you can use. Staining techniques can also give your furniture a unique twist while maintaining its natural look. Staining is the process of applying a color or tint to the wood surface to create depth and character. Unlike paint, which covers the wood grain, staining allows you to highlight the natural beauty of the wood.
There are many staining techniques available, such as gel stains, oil-based stains, and water-based stains. Gel stains are perfect for vertical surfaces like cabinets and doors since they don’t drip or run. Oil-based stains provide a deep, rich color but require longer drying times and adequate ventilation. Water-based stains offer quick drying times and easy cleanup but may require more coats to achieve a vibrant color.
Maintaining stained surfaces is also important to ensure their longevity. Always dust your stained furniture regularly with a soft cloth or vacuum attachment. Avoid using harsh chemicals or abrasive cleaners that can damage the finish. If you need to clean your stain surface, use mild soap and water solution followed by a dry cloth to prevent water damage.
In summary, staining is an excellent option for upcycling old furniture for those who want to maintain its natural beauty while adding character and depth through various staining techniques. Proper maintenance will also help preserve stained surfaces for years to come.
Refinishing Floors For A Polished Finish
Upcycling old furniture for a unique twist is an excellent way to create a personalized home decor without breaking the bank. However, if you want to elevate your home’s overall aesthetic, refinishing your floors is the way to go. DIY refinishing techniques are becoming increasingly popular among homeowners, thanks to the countless tutorials available online. With these methods, you can achieve a polished finish that rivals professional results.
One of the benefits of DIY refinishing techniques is that they allow you to save money by eliminating labor costs. Additionally, refinishing your floors yourself gives you more control over the final outcome. You can choose different finishes and stains that cater to your tastes and preferences. However, keep in mind that this process requires patience, time, and attention to detail. If you’re not up for it or don’t have enough experience with power tools, hiring a professional might be the best option.
Hiring a professional has its advantages when it comes to refinishing your floors. First off, professionals have access to high-grade equipment and products that deliver superior results compared to what’s available at your local hardware store. They also know how to handle any issues that might arise during the process effectively. Furthermore, professionals typically offer warranties on their services and materials used, providing peace of mind knowing that they stand behind their workmanship. If you’re considering refinish flooring as part of your kitchen renovation project but unsure about which route to take – DIY or professional – weighing out both options’ pros and cons will help guide you towards making an informed decision about what works best for your situation.
As mentioned earlier in this article about upcycling old furniture for a unique twist and now discussing refinishing floors for a polished finish brings us closer to completing our kitchen renovation project without breaking the bank. But before we wrap up this section on floor refinement methods let’s discuss adding a rug for warmth and texture- something small yet significant that can bring together the entire room’s aesthetic.
Adding A Rug For Warmth And Texture
Did you know that adding a rug to your kitchen can create a warm and inviting atmosphere? According to a recent study, 78% of homeowners who added a rug to their kitchen reported feeling more comfortable and at home while cooking and entertaining guests.
Using rugs in the kitchen: dos and don’ts. When choosing a rug for your kitchen, it’s important to consider practicality and durability. Opt for materials that are easy to clean and maintain, such as low-pile or flat-weave rugs. Avoid high-pile or shaggy rugs that can trap dirt and food particles, making them difficult to clean.
How to incorporate different textures with a kitchen rug. A kitchen rug is not only functional but also adds an element of design to your space. Consider mixing textures by pairing a natural fiber rug with sleek countertops or modern appliances. Adding texture through the use of textiles can make a room feel cozy and inviting, while also creating an aesthetically pleasing look.
Now that you’ve added warmth and texture with a kitchen rug, it’s time to focus on organizing your space for maximum efficiency.
Organizing Your Space For Maximum Efficiency
Maximizing space efficiency and reducing clutter in the kitchen can be a challenging task. With the right organization, you can create a functional and practical kitchen that works for you. One of the most effective ways to optimize your kitchen space is by utilizing your cabinets and drawers. Consider investing in drawer organizers, cabinet shelves, and pull-out racks to make the most out of your storage spaces.
Another way to maximize your kitchen’s efficiency is by keeping frequently used items within reach. This means storing pots, pans, utensils, and spices near the stove or cooking area. You can also consider hanging your knives on a magnetic strip or installing hooks for mugs under your upper cabinets. By keeping commonly used items within arm’s reach, you’ll reduce time spent searching for them and increase productivity in the kitchen.
Finally, it’s essential to declutter regularly to maintain an organized kitchen. Get rid of any appliances or gadgets that are no longer in use and store away seasonal items that take up unnecessary space during off-seasons. Keep counters clear by storing small appliances like coffee makers and blenders in cabinets when not in use. A clean countertop will provide more workspace for meal prep and make your kitchen feel less chaotic overall.
Incorporating art and accessories for personalization can add a touch of personality to your newly organized space. However, it’s important not to go overboard with decorations as this can lead to clutter once again. Consider displaying a few key pieces such as statement artwork or unique dishware on open shelves or walls to add visual interest without sacrificing functionality. Remember, keeping an organized kitchen is all about striking a balance between form and function!
Incorporating Art And Accessories For Personalization
Artistic accents and personalized touches can take a kitchen from basic to beautiful. Adding decorative pieces such as unique artwork, colorful dishware, or vintage finds can bring character and warmth to a space. Consider incorporating items that have personal meaning to you, such as family heirlooms or souvenirs from past travels.
One way to add artistic accents is by creating a gallery wall. Hang a collection of framed art prints in coordinating colors and styles to create a focal point in the room. Alternatively, display decorative plates or trays on open shelving for an eye-catching display. Don’t be afraid to mix and match patterns and textures for added interest.
Personalized touches can also come in the form of functional items that reflect your style. Swap out plain cabinet knobs for ones with unique designs or colors. Add a colorful rug or runner to the kitchen floor for both practicality and style. By incorporating these small but impactful changes, you can achieve a personalized look without breaking the bank.
With these artistic accents and personalized touches, your faux kitchen reno will feel like a true transformation. In the next section, we’ll explore how combining these hacks with others can result in a complete overhaul of your space.
Combining Hacks For A Complete Transformation
Now that we’ve gone over some individual kitchen hacks, it’s time to talk about how to combine them for a complete transformation. One way to maximize small spaces while giving your kitchen a new look is by painting your cabinets and adding new hardware. This budget-friendly alternative can make a huge impact on the overall aesthetic of your kitchen. Choose a neutral color for the cabinets and add statement hardware in brass or black to create contrast.
Another way to transform your kitchen is by utilizing open shelving. Remove upper cabinets and replace them with floating shelves. This will not only give the illusion of more space but also provides an opportunity to showcase your favorite dishes and accessories. If you have limited counter space, consider installing a hanging pot rack above your stove or island. This will free up valuable storage space while also adding a decorative element.
Lastly, don’t underestimate the power of lighting in creating an entirely new atmosphere in your kitchen. Replace dated light fixtures with modern options that complement the rest of your decor. Consider adding under-cabinet lighting or pendant lights above your island to create ambiance and illuminate key areas for cooking and entertaining guests. Combining these hacks can take your kitchen from outdated and cramped to stylish and functional without breaking the bank.
Remember, there’s no need to spend thousands on a full-scale renovation when simple hacks can make all the difference. By maximizing small spaces, using budget-friendly alternatives, and incorporating strategic lighting, you can achieve a complete transformation that will leave you feeling inspired every time you step into your new kitchen.
Conclusion
In conclusion, these 8 hacks are a great way to fake a kitchen renovation without breaking the bank. While they may not provide a complete transformation, they can certainly make a noticeable difference in the overall appearance of your kitchen. However, it is important to note that these hacks should be used as temporary solutions and not as long-term replacements for actual renovation work.
It is worth investigating the truth of the theory that small changes can have big impacts on the look and feel of a space. By implementing just one or two of these hacks, homeowners can see significant improvements in their kitchen’s aesthetic appeal. With some creativity and careful consideration, even those on a tight budget can achieve a stylish and functional kitchen without undergoing a full-scale renovation. So why wait? Try out these hacks today and start enjoying your revamped kitchen in no time!
Image Credits
- “Kitchen before island reno” by Drew And Merissa (featured)

