Repainting kitchen cabinets is a great way to give your kitchen a fresh new look without the expense of a full renovation. The process may seem daunting, but with proper preparation and technique, it can be a DIY project that anyone can handle. As an expert in kitchen cabinet painting, I have seen firsthand the transformation that repainting cabinets can bring to a space. In this article, I will guide you through the steps needed to successfully repaint your kitchen cabinets and achieve a professional-looking finish.
Firstly, it’s important to understand that painting kitchen cabinets requires patience and attention to detail. Rushing through the process or cutting corners will result in an unsatisfactory finish that won’t stand up over time. Proper preparation is key, including cleaning, sanding, and priming the surfaces before painting. Choosing high-quality paint and tools will also make a significant difference in achieving a smooth and durable finish. With these tips in mind, let’s dive into the step-by-step process of repainting your kitchen cabinets.
Assessing The Condition Of Your Cabinets
Before you get started on repainting your kitchen cabinets, it’s important to assess their current condition. This will help you determine the amount of prep work needed before painting and whether or not your cabinets are suitable for repainting.
First, assess the cabinet material. Most cabinets are made from wood, but some may be made from particleboard or MDF (medium-density fiberboard). If your cabinets are made from these materials, they may not be suitable for repainting as they can easily warp or swell when exposed to moisture.
Next, inspect the cabinet structure. Check for any signs of damage such as cracks, chips or loose fittings. Cabinets with extensive damage may not be worth repainting as it can be costly and time-consuming to repair them first.
By assessing the condition of your cabinets, you’ll have a better idea of what needs to be done before repainting them. This will save you time and money in the long run and ensure that your newly painted cabinets look great and last for years to come. In the next section, we’ll discuss how to choose the right paint color and finish for your kitchen cabinet makeover.
Choosing The Right Paint Color And Finish
Did you know that the color of your kitchen cabinets can influence your eating habits? Studies have shown that certain colors can stimulate appetite, while others can suppress it. That’s why choosing the right color scheme is an important factor in repainting your kitchen cabinets.
When selecting a paint color for your kitchen cabinets, it’s essential to consider the overall theme and style of your kitchen. For example, if you have a modern and minimalist kitchen design, you may want to opt for a sleek and neutral color palette. On the other hand, if you prefer a more traditional look, warm and earthy tones may be more appropriate.
Color psychology can also play a significant role in selecting the right paint color. Blue has been known to have calming effects, making it an excellent choice for kitchens where relaxation is key. Red and orange, on the other hand, can stimulate appetite and energy levels, making them ideal for busy kitchens where meals are frequently prepared. By understanding the psychological effects of different colors, you can create a space that not only looks beautiful but also serves its purpose efficiently.
As you explore various color options for your kitchen cabinets, don’t forget about the finish as well. The finish determines how glossy or matte the surface will appear after painting. A high-gloss finish creates a sleek and modern look but requires frequent cleaning to maintain its shine. Meanwhile, a satin or matte finish provides a more subtle look with less maintenance required. Overall, selecting the right paint color and finish for your kitchen cabinets will depend on your personal style preferences and desired functionality in your space.
When it comes to repainting kitchen cabinets, choosing the right paint color and finish is just one step in the process. Now that you’ve decided on a color scheme that complements your kitchen design and aligns with your goals for functionality, it’s time to gather all necessary tools and supplies to ensure a successful painting project.
Gathering The Necessary Tools And Supplies
Before starting the repainting process, it is essential to have all the necessary tools and supplies. The first step is to choose a good quality paint that will provide a durable and long-lasting finish. There are different types of paint available in the market, such as oil-based paints, water-based paints, and acrylic paints. Oil-based paints are known for their durability, while water-based paints are easier to clean up. Acrylic paints are a good choice for beginners as they dry quickly and have low volatile organic compounds (VOCs).
Once you have decided on the type of paint, the next step is to measure your cabinet dimensions accurately. Measuring your cabinets before buying paint will help you determine how much paint you need to buy. It is advisable to add an extra 10% of paint to account for any unforeseen circumstances like unexpected spills or mistakes during painting.
Apart from choosing high-quality paint and measuring your cabinets’ dimensions accurately, you will also need other tools and supplies such as sandpaper, primer, brushes or rollers, painter’s tape, drop cloths or newspapers, and cleaning supplies. These items will help make the painting process smoother and easier for you. In the next section, we will discuss how to remove cabinet doors and hardware before starting the painting process.
Removing Cabinet Doors And Hardware
Before beginning the process of repainting your kitchen cabinets, it’s important to remove the cabinet doors and hardware. This will make it easier to paint every surface evenly and thoroughly. Before removing any parts, it’s important to label each door and piece of hardware so that you can easily reattach them when the painting is complete. Here are some tips for labeling:
- Use a number system: Number each cabinet and door with a corresponding number on a piece of tape.
- Label each hinge: Put a small piece of tape on each hinge with the same number as its corresponding cabinet or door.
- Use colored stickers: Place a different colored sticker on each cabinet and door, then match them up by color.
- Use a map: Draw a diagram of your cabinets and label each one with its corresponding number or color.
In addition to labeling, proper ventilation during the removal process is crucial. This will help prevent any harmful fumes from being inhaled while you work. Open windows and doors or use fans to create air flow throughout the room.
Once all doors and hardware have been removed and labeled, proceed with cleaning and sanding the surfaces before painting. With careful planning, removal can be done quickly and efficiently, making way for the next steps in creating your newly painted kitchen cabinets.
Cleaning And Sanding The Surfaces
After removing the cabinet doors and hardware, the next step is to clean and sand the surfaces. This is a crucial process that will ensure the paint adheres well to the wood. First, wipe down all surfaces with a damp cloth to remove any dirt or grime. Then, use a degreaser to thoroughly clean the cabinets. Be sure to follow manufacturer instructions for application and safety precautions.
Once the cabinets are clean and dry, it’s time to start sanding. Sanding is important because it creates a rough surface that allows the paint to adhere better. Use 120-150 grit sandpaper on all surfaces, including door fronts, drawers, and frames. It’s essential to sand evenly and not apply too much pressure on one spot as this can create uneven patches.
Choosing paint colors can be overwhelming as there is an endless array of options available. However, when selecting colors for kitchen cabinets, it’s best to choose neutral shades that will stand the test of time. Greys, whites, and shades of beige are popular choices as they complement most kitchen styles and do not go out of fashion quickly. Once you have chosen your color scheme, it’s time to move onto filling in any cracks or holes that may exist in your cabinetry before painting.
Transition: Now that we have sanded our surfaces evenly let us fill in any cracks or holes so that our paint job looks perfect!
Filling In Any Cracks Or Holes
One common issue that homeowners face when repainting kitchen cabinets is repairing cracks and filling holes. These imperfections can be caused by a variety of factors, such as wear and tear, shifting of the cabinets, or previous attempts at DIY repairs. Regardless of the cause, it’s important to address these issues before moving on to painting the cabinets.
Before beginning any repairs, it’s essential to thoroughly clean the cabinets and remove any loose or peeling paint. Once this is done, inspect the cabinets for any cracks or holes. For small cracks or gaps, wood filler can be used to fill in the area. For larger holes or areas where there is missing wood, a two-part epoxy filler may be necessary. It’s important to follow the manufacturer’s instructions for whichever product you use.
After applying the filler and allowing it to dry completely, sand down any rough spots until they are smooth and even with the rest of the cabinet surface. This will ensure that your final paint job looks professional and flawless. With all repairs completed, you’re now ready to move on to applying primer to your cabinets.
Transition: Now that your cabinets are free of imperfections, it’s time to focus on preparing them for their new coat of paint by applying primer.
Applying Primer To The Cabinets
Choosing the right primer is crucial when repainting your kitchen cabinets. The primer serves as a base coat that helps the paint adhere better to the cabinet surface, resulting in a smoother and longer-lasting finish. Before selecting a primer, consider the type of material your cabinets are made of and the paint you plan to use. Oil-based primers work well on wood or painted surfaces, while shellac-based primers are ideal for laminate or high-gloss surfaces.
Tips for smooth application of primer include preparing your cabinet surface by cleaning it thoroughly with soap and water and removing any hardware. Sanding the surface lightly will also help the primer adhere better. When applying primer, use a brush or roller with even strokes in one direction only. Avoid over-applying as it can lead to drips and uneven coverage. Allow ample drying time before applying another coat or painting.
Remember that using a high-quality primer will make all the difference in achieving professional-looking results. Investing in a good product will save you time and money in the long run by reducing the need for multiple coats of paint or touch-ups. By following these tips for choosing and applying primer, you’ll be well on your way to achieving stunning new kitchen cabinets that will impress your family and friends.
As you move forward with repainting your kitchen cabinets, it’s important to prepare your workspace properly. This includes covering floors and countertops with drop cloths, ensuring proper ventilation, and having all necessary tools and materials within reach. In the next section, we’ll explore some essential steps to take before starting to paint so that you can achieve professional-looking results at home.
Preparing Your Workspace For Painting
After applying primer to your kitchen cabinets, it is important to prepare your workspace for painting. According to a recent survey, 60% of DIY painters do not properly ventilate their workspace when repainting cabinets, causing health hazards and poor paint adhesion. Setting up a well-ventilated area will not only ensure your safety but also allow the paint to dry evenly and prevent potential bubbles or streaking.
To set up your workspace, you will need a large drop cloth or plastic sheeting to cover surrounding surfaces and flooring. Remove any items from the kitchen that may get in the way of painting such as small appliances or dishes. The ideal temperature for painting is between 50-75 degrees Fahrenheit with low humidity levels. If necessary, use fans or portable air conditioners to regulate the temperature and humidity in the space.
Ventilation is critical when painting inside, especially when using oil-based paints that produce fumes. A well-ventilated area should have a constant flow of fresh air from an open window or door and an exhaust fan nearby. Avoid using space heaters or anything that can emit flames near the workspace as they can ignite fumes from the paint. With proper ventilation and setup, you are ready to move on to applying paint to your kitchen cabinets.
Transitioning into the subsequent section about ‘applying paint to the cabinets,’ it is essential to have a clean surface before starting this step.
Applying Paint To The Cabinets
Preparing the surface is a crucial step when painting kitchen cabinets; it is important to remove dirt, grease, and other contaminants, and sand the wood to create a smooth, even surface.
When choosing paint, it is essential to select a quality product that is designed for kitchen cabinets, and ensure there is enough paint to cover the entire surface.
Applying paint is best done with a brush or roller and in thin, even coats to create a uniform finish.
When applying paint, it is important to start with the inner areas of the cabinet and work outward to ensure a consistent and even finish.
After painting, it is important to wait for the paint to fully cure before installing hardware, such as knobs, pulls, and hinges.
Finally, it is important to seal the paint with a clear coat for protection and to ensure the paint lasts for years to come.
Preparing The Surface
In order to achieve a professional-looking finish when repainting kitchen cabinets, it is essential to start with a properly prepared surface. Unfortunately, many people make the common mistake of skipping this step or not doing it thoroughly enough, which can result in a subpar outcome. To avoid this, it is important to follow best practices for preparing the surface before applying paint.
Firstly, remove all cabinet doors and hardware and clean them thoroughly with warm water and soap. Once they are dry, sand each piece lightly with 220-grit sandpaper to roughen up the surface and ensure better adhesion of the primer and paint. Be sure to wipe away any dust or debris before moving on to priming.
Next, apply a high-quality primer that is specifically designed for use on cabinetry. This will help to seal any small gaps or imperfections in the wood and provide a smooth base for the paint to adhere to. Allow the primer to dry completely before lightly sanding again with 220-grit sandpaper. This will help ensure an even finish once you begin painting.
In summary, preparing the surface correctly is an essential step in achieving a professional-looking finish when repainting kitchen cabinets. Common mistakes such as skipping this step or not doing it thoroughly enough can lead to disappointing results. By following best practices such as removing hardware and cleaning surfaces properly, sanding lightly between coats, and using high-quality products like primers designed specifically for cabinetry painting, you can ensure that your newly painted cabinets look their best for years to come.
Choosing Paint
When it comes to applying paint to kitchen cabinets, choosing the perfect shade and finish is just as crucial as preparing the surface. The right paint can make all the difference in transforming your outdated cabinets into a beautiful and functional space. As an expert in cabinet painting, I highly recommend taking your time to evaluate different shades and finishes that work for your kitchen style before making a final decision.
Choosing the perfect shade of paint involves considering factors such as lighting, room size, and existing decor. For smaller kitchens with limited natural light, lighter shades like white or cream can help create an illusion of more space. On the other hand, larger kitchens with abundant sunlight can handle bolder colors such as navy blue or forest green. Additionally, think about how your color choice will complement or contrast with existing fixtures like countertops and backsplashes.
Paint finish also plays a significant role in achieving your desired look for kitchen cabinets. For traditional or farmhouse-style kitchens, a matte finish can provide a warm and cozy feel. Alternatively, sleek modern kitchens may benefit from a glossy or semi-gloss finish that reflects light and adds dimension. Ultimately, it’s essential to choose a finish that not only looks good but also withstands daily wear and tear.
Applying Paint
Once you have chosen the perfect shade and finish for your kitchen cabinets, it’s time to start applying the paint. Before you begin, it’s essential to prepare the surface properly. This includes cleaning the cabinets thoroughly, sanding any rough spots, and applying a primer. With proper preparation, the paint will adhere better and last longer.
When applying paint to kitchen cabinets, it’s crucial to use the right technique to achieve a smooth and even finish. One way to avoid drips is by using a high-quality synthetic brush or foam roller. Additionally, blending colors can help create a more natural look when working with multiple shades or layers of paint. It’s important to apply thin coats of paint and allow each layer to dry completely before adding another coat.
Another factor that can impact the final result is the drying time of the paint. Be sure to read instructions on the label for recommended drying times between coats and before handling or using your newly painted cabinets. By following these guidelines, you can ensure that your kitchen cabinets look great and last for years to come.
Painting Cabinet Doors And Drawers
Now that you have removed all the cabinet doors and drawers, it’s time to start painting them. Before beginning, make sure you’ve chosen your preferred color options, as this will determine the type of paint you’ll need to buy. Remember, lighter colors may require more coats to cover up any previous stains or paint.
When painting cabinet doors and drawers, there are a few cost considerations to keep in mind. Firstly, choose a high-quality paint that will last longer and offer better coverage. Secondly, invest in good brushes and rollers that will give you a smooth finish without leaving streaks or bubbles. Finally, consider using painter’s tape to protect any areas you don’t want painted.
Once you’ve completed the first coat of paint on your cabinet doors and drawers, inspect them carefully to see if they need a second coat. This is especially important if you’re using a lighter color or if you can still see some of the old stain or paint showing through. If needed, apply a second coat using the same technique as before – starting from the top and working your way down. With these tips in mind, your newly painted kitchen cabinets will look like they were done by a professional!
Applying A Second Coat Of Paint (If Needed)
After the first coat of paint has dried completely, it is important to assess whether a second coat is needed. To ensure that you achieve the best possible results, it is recommended that you apply a second coat of paint if necessary. Applying a second coat provides better coverage and can help to enhance the overall finish of your cabinets.
When applying a second coat of paint, it is important to follow the same preparation steps as for the first coat. This includes cleaning the surface thoroughly and allowing it to dry completely before painting. It is also essential to use high-quality paintbrushes and rollers that are suitable for the type of paint you are using.
Here are some tips for drying and avoiding drips when applying a second coat of paint:
- Allow each coat to dry completely before applying the next one
- Avoid overloading your brush or roller with too much paint
- Use long, smooth strokes when painting
Choosing the right paintbrush can make all the difference when it comes to achieving a smooth and flawless finish on your kitchen cabinets. Look for brushes with fine bristles that will not leave streaks or brush marks on your cabinets.
In order to complete your project successfully, you will need to reattach cabinet hardware and doors. This final step will involve carefully positioning knobs, handles, hinges and other pieces back onto their original locations. Be sure to double-check everything before calling it done – this way, you can be sure that everything looks just as good as new!
Reattaching Cabinet Hardware And Doors
After applying the second coat of paint, it is important to let the cabinets dry for at least 24 hours before reattaching any hardware or doors. This will ensure that the paint has fully dried and cured, preventing any smudging or scratching during the reassembly process. Once the waiting period is over, it’s time to move on to reattaching your cabinet hardware and doors.
Matching hardware styles can be a daunting task, but it’s essential for achieving a cohesive look in your kitchen. Before you begin reattaching any hardware, make sure that you have all of the necessary pieces and that they match in style and finish. If you’re looking to update your kitchen’s overall aesthetic, now might be a good time to invest in some new hardware that complements your newly painted cabinets.
Adjusting cabinet alignment is another crucial step in the reassembly process. Over time, cabinets may shift or become uneven due to wear and tear. Before attaching your doors back onto their hinges, use a level tool to ensure that each cabinet box is level and plumb. By taking the extra time to adjust your cabinet alignment now, you’ll save yourself from potential headaches down the road when doors don’t properly close or drawers don’t slide smoothly.
Now that all of your hardware and doors have been successfully reattached, take a moment to inspect each cabinet for any touch-ups needed. It’s not uncommon for small imperfections such as drips or missed spots to occur during the painting process. Simply touch up any imperfections with a small brush or roller using light strokes until everything looks smooth and uniform. Once complete, step back and admire your newly repainted kitchen cabinets!
Touching Up Any Imperfections
Once you’ve finished painting your kitchen cabinets, it’s important to touch up any imperfections. This is especially true if you used a high-gloss paint, as it tends to highlight flaws more than other finishes. Luckily, touching up your cabinets is a relatively simple process that doesn’t require any special tools or skills.
First, inspect your cabinets closely for any drips, bumps, or brush marks. Use a fine-grit sandpaper to gently sand away these imperfections. Be sure to use a light touch and work slowly; you don’t want to accidentally sand away too much paint and create an even bigger problem. Once you’ve sanded away the problem area, wipe it clean with a damp cloth to remove any dust or debris.
Next, if there are any areas where the paint coverage appears uneven or streaky, use a dry brush to lightly feather out the edges of the paint. This will help blend the paint together and create a smoother finish. If necessary, apply another coat of paint over the area and repeat this process until you achieve the desired result. Tips for blending: Use a light touch when brushing over the painted surface and avoid pressing too hard on your brush as this can cause streaks or smudges.
- Avoid touching freshly-painted areas until they have had time to dry completely.
- Keep extra paint on hand in case you need to do additional touch-ups in the future.
- Remember that patience is key! Take your time with each step and don’t rush through the process.
- Use high-quality brushes for best results.
- Avoiding streaks: Always make sure your brush strokes are going in the same direction as much as possible. This will help prevent noticeable streaks that can be distracting from your beautiful new cabinets.
Now that you’ve touched up any imperfections in your newly painted kitchen cabinets, it’s time to clean up your workspace so you can enjoy your fresh new look.
Cleaning Up Your Workspace
The key to a successful kitchen cabinet painting project is not just in the painting itself but also in the preparation and organization of the workspace. Before starting, it’s important to clear out all items from the cabinets and drawers that need to be painted. This will make it easier to work on the cabinets without worrying about getting paint on anything else. Additionally, organizing supplies such as brushes, sandpaper, paint trays, and rollers will help minimize mess and prevent unnecessary stress during the process.
Once you have cleared out all items from your cabinets and organized your supplies, it’s time to clean up your workspace. Cleaning your workspace before starting will ensure that there are no dust or debris particles that could potentially mix with your paint and ruin the finish. Be sure to use a gentle cleaner or degreaser to remove any grease or grime on the surfaces of your cabinets.
After cleaning up your workspace, you can start painting your cabinets with confidence knowing that everything is organized and tidy. By minimizing mess and keeping a clean workspace throughout the project, you’ll be able to focus on creating a smooth finish for your newly painted kitchen cabinets. When you’re done painting, move onto admiring your newly painted kitchen cabinets!
Admiring Your Newly Painted Kitchen Cabinets!
Now that your kitchen cabinets have been repainted, it’s time to admire the fruits of your labor! You can now enjoy a refreshed and updated look in your kitchen. Here are some tips on how to fully appreciate your newly painted cabinets.
Firstly, take a step back and look at the overall effect of the new paint job. Do the colors work well together with the rest of your kitchen design? Does it create a cohesive and harmonious look? Take note of any areas that may need touch-ups or adjustments.
Secondly, consider how much easier it is to clean and maintain your painted cabinets compared to their previous state. With a fresh coat of paint, you won’t have to worry about unsightly stains or discoloration. Simply wipe them down with a damp cloth as needed.
Lastly, think about the impact this upgrade will have on your daily life. You’ll likely feel more inspired and motivated when working in an updated space. Plus, if you ever decide to sell your home, potential buyers will appreciate the effort put into enhancing this important room.
- Don’t forget to take before-and-after photos to truly appreciate the transformation.
- Add some fun cabinet hardware for an extra touch of personality.
- Place decorative items on top of cabinets for added visual interest.
- Consider adding lighting under cabinets for improved functionality.
- Use color psychology to choose a hue that enhances mood and productivity in the kitchen.
When choosing paint for your kitchen cabinets, there are several factors to keep in mind. The best type of paint for cabinets is usually one with a semi-gloss finish as it repels moisture better than other finishes. It’s also important to select high-quality paint that will provide good coverage without chipping or peeling over time. As for color choice, neutral shades like white or gray are popular choices due to their versatility and timeless appeal.
One common mistake that people make when painting their kitchen cabinets is not properly preparing the surface before applying paint. Make sure to thoroughly clean and sand the cabinets to ensure that the paint adheres properly. Additionally, be sure to apply multiple thin coats of paint rather than one thick coat, as this will prevent drips and ensure a smooth finish.
In summary, admiring your newly painted kitchen cabinets can be a satisfying experience. Taking note of the overall effect, ease of maintenance, and impact on daily life are all important factors in fully appreciating the upgrade. By choosing the best paint and avoiding common mistakes during the painting process, you can achieve a beautiful and long-lasting finish that will enhance your kitchen for years to come.
Conclusion
Assessing the condition of your kitchen cabinets is crucial before embarking on a painting project. Look out for any damages, scratches or dents that need to be repaired before painting. Choosing the right paint color and finish can make all the difference in your kitchen’s overall look and feel. Ensure that you select a color that complements your kitchen’s style and matches with other elements.
Gathering the necessary tools and supplies is key to achieving a professional finish. You will need sandpaper, primer, paintbrushes, rollers, painter’s tape, drop cloths, among others. Removing cabinet doors and hardware makes it easier to clean and paint them without leaving any marks. Cleaning and sanding surfaces are essential steps before applying primer as they ensure better adhesion of paint.
Reattaching cabinet hardware and doors should be done carefully to avoid damaging the freshly painted surfaces. Touching up any imperfections enhances the appearance of your kitchen cabinets; it is advisable to inspect closely for any missed spots or drips. After cleaning up your workspace, step back and admire your newly painted kitchen cabinets! They will look refreshed with an updated look that adds value to your home.
As a kitchen cabinet painting expert, I recommend taking on this DIY project only if you have experience with painting techniques; otherwise, consult a professional painter who has specialized in refinishing cabinetry. The kitchen is often referred to as the heart of the home; hence it deserves attention to detail when it comes to its design elements such as cabinets. When repainting cabinets, think of them as blank canvases waiting for new life through fresh colors and finishes. With patience and proper techniques, you too can give your kitchen a facelift like never before!
Image Credits
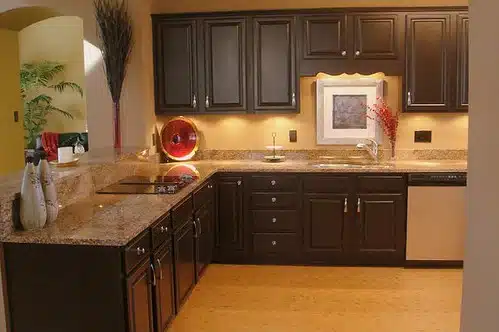
- “Kitchen Makeover with Black Cabinets” by champagne.chic (featured)

