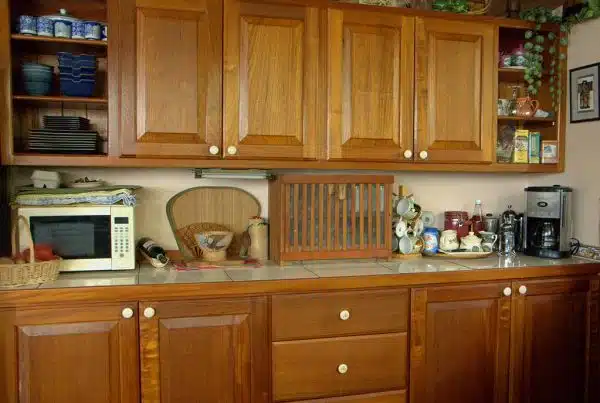
Kitchen cabinets, being one of the most used fixtures in a home, often show signs of wear and tear over time. However, replacing them can be an expensive and time-consuming process. Painting kitchen cabinets is a cost-effective way to give your kitchen a brand-new look without breaking the bank. In this article, we will discuss how to paint kitchen cabinets to look brand new.
Painting kitchen cabinets may seem like an easy job, but it requires preparation, patience, and attention to detail. Before starting the painting process, it is important to clean and sand the cabinets properly. Choosing the right type of paint and primer is also crucial for achieving a professional-looking finish. With the right tools and techniques, you can transform your outdated kitchen into a modern space that looks brand new. Follow our step-by-step guide to learn how to paint your kitchen cabinets like a pro.
Assessing Your Cabinets’ Condition
Did you know that the average lifespan of kitchen cabinets is around 15 years? However, with proper maintenance and care, they can last much longer. Before deciding to paint your kitchen cabinets, it’s important to assess their condition first. This will help you determine if they are still durable enough to withstand the painting process.
Assessing durability starts with checking how well your cabinets were constructed. If the wood is solid and there is no visible damage or warping, then you’re off to a good start. On the other hand, if your cabinets are made from particleboard or MDF (medium-density fiberboard), they may not be as durable and can easily get damaged during painting.
Identifying damage is another important factor in assessing your cabinets’ condition. Check for any cracks, holes, or water damage on your cabinets before proceeding with painting them. If there are any serious issues, you might need to consider replacing some parts or even the entire cabinet itself. With this in mind, let’s move on to preparing your workspace and tools so that we can begin revitalizing those tired old kitchen cabinets.
Preparing Your Workspace And Tools
Workspace organization and tool selection are two of the most important factors in achieving a professional finish when painting kitchen cabinets. Before starting the project, it is essential to organize your workspace, ensuring that you have enough room to work comfortably and access all the necessary tools easily. A well-organized workspace will also help you stay focused and reduce the risk of accidents.
When selecting tools for painting kitchen cabinets, quality should be your top priority. The right tools will make the job easier and faster, resulting in a more professional finish. Essential tools for this project include sandpaper, primer, paintbrushes, rollers or sprayers, painter’s tape, drop cloths or plastic sheeting, and safety gear like gloves and goggles.
Protecting the surrounding area is crucial when undertaking any painting project. Cover floors with drop cloths or plastic sheeting to protect them from paint drips and spills. Use painter’s tape to mask off areas around the cabinets that you don’t want to get painted such as walls and countertops. Consider ventilation options like opening windows and doors or using fans to ensure proper air circulation during the painting process.
- A well-organized workspace can increase efficiency and reduce stress during the project.
- Investing in high-quality tools will result in a more professional-looking finish.
- Protecting surrounding areas will prevent unwanted paint splatters on floors and other surfaces.
- Proper ventilation is essential for safety reasons while painting indoors.
To proceed with removing cabinet doors and hardware, take note of these steps…
Removing Cabinet Doors And Hardware
Before you begin painting your kitchen cabinets, it is essential to remove the cabinet doors and hardware. This step ensures that the painting process will be smoother, more efficient, and more effective. You can either do this yourself or hire a professional service to do it for you.
If you choose to go the DIY route, it might take longer than hiring a professional service, but it will save you money. However, if you have little experience with home improvement projects or lack the necessary tools, hiring a professional might be the better option. They have the right equipment and expertise to get the job done quickly and efficiently.
Once you’ve decided to tackle this project yourself, choosing the right paint stripper is crucial. Not all paint strippers are created equal; some are stronger than others and may damage your cabinets’ surface. Therefore, it’s important to read product labels carefully before making a purchase. Look for products that are specifically designed for removing paint from wood surfaces and follow their instructions carefully to avoid any mishaps or accidents during the stripping process.
| Pros of DIY Paint Stripping | Cons of DIY Paint Stripping |
|---|---|
| Cost-effective | Time-consuming |
| Control over process | Requires proper tools and equipment |
| Sense of accomplishment | Risk of damaging cabinets |
In conclusion, removing cabinet doors and hardware is an important step in painting your kitchen cabinets to look brand-new. It allows for easier access while painting and ensures a smooth finish. Whether you decide to go with a DIY approach or hire a professional service depends on your skill level and resources available. When choosing a paint stripper for DIY stripping, make sure to read product labels thoroughly before making a purchase. The next step in this project is cleaning your cabinets thoroughly before applying primer and paint for optimal results.
Cleaning Your Cabinets Thoroughly
With the cabinet doors and hardware removed, it’s time to focus on cleaning your kitchen cabinets thoroughly. This step is crucial in achieving a brand-new look for your cabinets. Choosing cleaning products that are safe for your cabinet material is important. Avoid using abrasive cleaners or chemicals that can damage the finish of your cabinets.
Preventing future buildup is also crucial in maintaining the new look of your painted kitchen cabinets. After cleaning, use a dry cloth or towel to wipe down the surfaces of your cabinets to remove any moisture. Moisture can cause damage and lead to unsightly mold growth. Additionally, avoid placing items on top of your cabinets that can leave residue or scratches.
Once you have thoroughly cleaned your cabinets, sanding them smooth is the next step towards achieving a professional-looking finish. Sanding helps rough up the surface of the cabinet so that paint will adhere better. Use a fine-grit sandpaper and work in a circular motion until all surfaces are evenly sanded. Wipe down all surfaces with a tack cloth to remove any dust before applying primer and paint.
Sanding Your Cabinets Smooth
Achieving a smooth finish on kitchen cabinets requires thorough sanding. Sanding roughens the surface, removes old stain or paint, and prepares the wood for new paint or stain. The first step in sanding your cabinets is choosing the right grit of sandpaper. For most surfaces, start with a coarse grit like 60 or 80 to remove any rough spots or imperfections. Then move onto a finer grit like 120 or 150 to smooth out the surface.
When sanding your cabinets, it’s important to pay attention to hard-to-reach areas such as corners and edges. These areas can collect dust and grime over time and may require extra effort to clean and prepare for painting. One tip for sanding these areas is to use small pieces of sandpaper folded into triangles or squares that fit comfortably into tight spaces. Another option is to use a sanding sponge that conforms to curves and angles.
Overall, sanding your kitchen cabinets is an essential step in achieving a professional-looking finish. Take your time, choose the right grits of sandpaper, and be thorough when tackling hard-to-reach areas. In the next section, we’ll discuss filling in any gaps or holes before moving onto priming and painting your cabinets for a fresh new look.
Filling In Any Gaps Or Holes
After sanding your cabinets, it’s time to fill in any gaps or holes to ensure that they look brand-new. One of the best fillers for this task is a two-part epoxy putty, which can be purchased at most hardware stores. This filler dries quickly and can be sanded down easily once it sets.
When applying the filler, make sure to use a putty knife to spread it evenly across the surface of your cabinets. You’ll want to apply enough so that it fills in any imperfections, but not so much that you create an uneven surface. Once the putty has dried, use a fine-grit sandpaper to sand it down until it’s smooth and level with the rest of your cabinet.
By using high-quality fillers and properly hiding imperfections on your cabinets, you’ll be able to achieve a professional-looking finish that will impress all who see it. After filling in any gaps or holes on your cabinets, you’re ready for the next step: priming them for paint.
Priming Your Cabinets For Paint
Before you start painting your kitchen cabinets, it’s crucial to prime them first. Priming is an essential step in the process because it helps the paint stick better and last longer. It also smooths out any imperfections on the surface of the cabinets, giving you a flawless finish.
Choosing the right primer for your cabinets is just as important as choosing the right paint. A high-quality primer will ensure that your paint adheres properly and doesn’t peel or chip over time. Look for a primer that’s specifically designed for use on cabinets and has good adhesion properties. Tinted primers are also an excellent option as they can help hide any dark stains or discolorations on your cabinets.
Using a tinted primer has many benefits, such as reducing the number of coats needed to achieve full coverage and improving color accuracy. Tinting your primer to match your chosen paint color will also help you avoid any surprises when it comes to the final result. Additionally, using a tinted primer can save you time and money since it cuts down on the number of coats needed, which means less time waiting for each coat to dry and fewer cans of paint required overall.
As you move forward with painting your kitchen cabinets, remember that choosing the right paint is just as important as priming them correctly. The type of paint you choose will depend on various factors such as durability, finish, and ease of application. In the next section, we’ll discuss how to choose the right paint for your cabinets so that you can achieve a beautiful brand-new look in your kitchen without breaking the bank or spending countless hours on DIY projects.
Choosing The Right Paint For Your Cabinets
After properly priming your kitchen cabinets, it’s time to move on to the next crucial step: choosing the right paint for your cabinets. When it comes to selecting the best paint for your kitchen cabinets, there are a variety of factors that you need to consider. From types of paint finishes to color options for cabinets, making informed choices can help you achieve a brand-new look for your kitchen.
One important factor when selecting paint for your cabinets is choosing the right finish. There are several types of paint finishes available, and each one has its own unique characteristics. For instance, glossy finishes reflect light and give off a shiny appearance, while matte finishes absorb light and appear non-reflective. Semi-gloss and satin finishes fall somewhere in between these two extremes. Ultimately, the type of finish you choose will depend on your personal preference and the overall design aesthetic of your kitchen.
Another important aspect to consider when painting your kitchen cabinets is color selection. Luckily, there are numerous color options available that can transform the look and feel of your space. When choosing a color, you’ll want to think about how it will complement other elements in your kitchen such as countertops, flooring, and backsplash tiles. Neutral colors like white or gray are a popular choice because they provide a timeless look that can easily be updated with accessories or décor changes down the road.
Now that you’ve selected the perfect paint finish and color for your cabinets, it’s time to start applying your first coat of paint. But before diving into this process, be sure to properly prepare yourself by gathering all necessary tools and equipment such as brushes or rollers, painter’s tape, drop cloths or plastic sheeting to protect surrounding surfaces from splatters or drips. With careful planning and execution at every step along the way–from priming through final topcoat application–you can achieve beautiful results that will make your kitchen feel brand-new again!
Applying Your First Coat Of Paint
Once the preparation work is done and you have a clean, smooth surface to work on, it’s time to apply your first coat of paint. Before diving into the actual painting process, make sure you have chosen the right paint colors for your kitchen cabinets. Bold colors can add a pop of personality to your space, while neutral hues can create a timeless appeal. Whatever color you decide on, choose high-quality paint that is specifically designed for cabinetry.
When it comes to actually applying the paint, there are a few tips for brush strokes that will help you achieve a professional-looking finish. First, use a good-quality brush with synthetic bristles that won’t leave behind stray hairs or fibers. Next, start by painting the edges and corners of each cabinet door or drawer front before moving on to fill in the larger areas. Use long, even strokes in one direction and try not to overwork the paint as this can cause unsightly brush marks.
To ensure an even coat of paint throughout your kitchen cabinets, consider using a spray gun instead of brushes or rollers. This method allows for an even application with fewer visible brush strokes. However, if hand-painting is your only option, be sure to apply thin coats and allow plenty of drying time between each layer. With patience and attention to detail during this step of the process, you’ll be well on your way to giving your kitchen cabinets a brand-new look.
Now that you have applied the first coat of paint onto your kitchen cabinets successfully let’s move onto allowing it dry off properly before applying another coat.
Allowing Your First Coat To Dry
Proceeding to the next segment of painting your kitchen cabinets, it is vital to ensure that the first coat has dried entirely before applying the second layer. Allowing the initial layer to dry ensures that you do not damage any areas with moist paint while working on other parts of the cabinet. Moreover, it will help you achieve a smooth finish and prevent paint drips.
Tips for preventing paint drips include using a high-quality brush, avoiding overloading your brush with paint, and wiping off excess paint on the side of your container before starting. These simple steps can significantly impact how neat and clean your final product looks. Using a roller can be tempting for larger surfaces, but it is best to stick with brushes when painting cabinets because they help maintain even coverage.
Best practices for ensuring even coverage involve brushing in parallel strokes, working from top to bottom, and allowing each stroke to overlap slightly. The goal here is to ensure that every inch of your cabinet gets painted evenly without leaving any gaps or blotches. Be patient and take your time during this process because it can be repetitive and tedious.
Moving forward, after letting the initial coat dry for at least 24 hours, it’s time to apply another coat of paint. This next stage will see you use all the skills learned earlier, including tips for preventing paint drips as well as best practices for ensuring even coverage. Remember that patience is key when painting kitchen cabinets; rushing through steps might lead to mistakes or require repeated work later on in the process.
Applying Your Second Coat Of Paint
Now that you have applied the first coat of paint on your kitchen cabinets, it’s time to move onto the second coat. This is a crucial step in achieving a brand-new look for your cabinets. However, it’s important to note that applying the second coat requires some finesse to ensure a smooth finish.
One of the biggest challenges when applying a second coat of paint is avoiding brush strokes. To prevent this from happening, use long, even strokes in one direction. Avoid going back and forth as this can create uneven brush marks. Also, be sure to lightly sand any rough spots or drips before applying the second coat.
Before starting with your second coat of paint, make sure to properly clean your paint brushes. Neglecting to do so can lead to clumps and uneven coverage. To clean your brushes, rinse them thoroughly with warm water and mild soap until all traces of paint are gone. Then gently shake off excess water and let them air dry before using them again.
Transitioning into allowing your second coat to dry, it’s important to give it ample time before moving on to any touch-up work or reinstallation of cabinet doors and hardware. Rushing this step can lead to smudging and even peeling of the fresh coats of paint. So make sure you allow enough drying time as indicated on the label of the paint can before proceeding with any further work on your kitchen cabinets.
Allowing Your Second Coat To Dry
After applying the first coat of paint, it is essential to allow it ample time to dry before adding a second coat. It is best to wait at least 24 hours between coats, giving the paint enough time to harden and cure fully. However, you can speed up the drying process by increasing ventilation in the room or using a fan.
To avoid common mistakes when allowing paint to dry, make sure that you do not stack wet cabinets on top of one another or close them together. This could cause the doors and drawers to stick together or leave marks on each other’s surfaces. Additionally, avoid touching the painted surfaces until they are entirely dry as this could ruin all your hard work.
Tips for speeding up drying time include using a hairdryer on low heat to gently blow air over the painted surface or placing freshly painted items in a warm location such as an airing cupboard. The faster you can get the first coat of paint to dry completely, the quicker you’ll be able to add additional coats and finish painting your kitchen cabinets. Once they are entirely dried, it’s time for reattaching cabinet doors and hardware.
Reattaching Cabinet Doors And Hardware
After allowing your second coat of paint to dry, it’s time to reattach your cabinet doors and hardware. Now, I know what you’re thinking: “But wait! What about admiring my freshly painted cabinets?” Well, fear not my fellow DIYers, we’ll get there soon enough. But first, let’s talk about the importance of alignment.
When attaching cabinet doors back onto their respective frames, it is important to ensure that they are levelled and aligned properly. Misaligned doors can be a nightmare, leading to creaking hinges and uneven closing action. To avoid this hassle, take the extra time to measure and align the door with its frame before screwing it in place. This little step will go a long way towards achieving a professional-looking finish.
While we’re on the topic of upgrades, let’s not forget about upgrading your cabinet hardware. Swapping out old knobs or handles for new ones can make a significant difference in giving your kitchen a fresh look without breaking the bank. With so many options available on the market these days, from vintage-inspired brass pulls to sleek modern chrome handles, you’re sure to find something that perfectly complements your newly-painted cabinets’ aesthetic.
Now that we’ve discussed the importance of alignment and upgrading cabinet hardware let’s get back to admiring your newly-painted cabinets. After all that hard work you’ve put into revamping your kitchen cabinetry, you deserve to enjoy the fruits of your labor! Step back and take in how bright and brand-new they look – it’s amazing how much difference a fresh coat of paint can make. Your kitchen is now ready for its close-up!
Admiring Your Newly-Painted Cabinets
Now that your kitchen cabinets have a fresh coat of paint, it’s time to admire the new look. Take a step back and appreciate how the color you chose has transformed the entire room. If you’re looking to make a bold statement, consider going with an unexpected color choice. Maybe a deep navy or forest green would be perfect for your space. On the other hand, if you prefer a more classic look, white or gray can never go wrong.
Accessorizing your newly-painted cabinets can also add an extra touch of personality to your kitchen. Consider adding decorative knobs or pulls that complement the color scheme. You could also incorporate open shelving to display your favorite dishes or cookbooks. Another idea is to add under-cabinet lighting for a warm ambiance during evening hours.
When it comes to admiring your new cabinets, remember that there are no rules! It’s all about what makes you happy and comfortable in your own home. Take some time to experiment with different accessory ideas and find what works best for you and your unique style. In the next section, we’ll discuss ways to maintain the longevity of your painted cabinets so that you can continue enjoying them for years to come.
Maintaining Your Painted Cabinets For Longevity
Once you’ve painted your kitchen cabinets to look brand-new, it’s important to maintain them properly to ensure they stay that way for as long as possible. Here are a few tips to keep in mind:
Firstly, avoid using harsh chemicals or abrasive materials when cleaning your cabinets. Instead, opt for a mild soap and warm water solution, and use a soft cloth or sponge to gently wipe down the surfaces. Harsh chemicals can strip away the paint and damage the wood underneath, while abrasive materials can scratch the surface.
Secondly, be mindful of moisture levels in your kitchen. Excess moisture can cause warping or cracking in wooden cabinets over time, so make sure to wipe up any spills or condensation immediately. You may also want to consider investing in a dehumidifier if your kitchen tends to be particularly humid.
Lastly, consider using products specifically designed for painted cabinets when doing touch-ups or repairs. These products will be formulated with the appropriate ingredients and finishes to match the existing paint on your cabinets, ensuring a seamless repair job.
By following these tips and using appropriate products, you can help ensure that your newly painted kitchen cabinets will look great for years to come.
Conclusion
When it comes to giving your kitchen a fresh new look, painting your cabinets is a cost-effective and practical solution. However, painting cabinets requires careful preparation and execution to achieve the desired outcome. Before starting any project, assess the condition of your cabinets thoroughly to determine whether they are good candidates for painting. Once you have confirmed that painting is feasible, prepare your workspace and tools properly, remove cabinet doors and hardware, clean your cabinets thoroughly, sand them smooth, apply two coats of paint with sufficient drying time in between, reattach cabinet doors and hardware, and maintain your painted cabinets for longevity.
According to a recent study by Houzz, 43% of homeowners who renovated their kitchens in 2020 chose to paint their cabinets as part of the process. This statistic highlights the popularity of cabinet painting as a kitchen renovation option. By following the steps outlined above, you too can give your kitchen cabinets a brand-new look without breaking the bank. With proper maintenance, painted cabinets can last for years to come.
As a professional painter/home improvement expert, I recommend taking the time to assess the condition of your cabinets before starting any project. Proper preparation is key to achieving a high-quality finish that will last for years. By following these steps carefully and maintaining your painted cabinets regularly, you can enjoy a refreshed kitchen space that looks brand new without spending a fortune on new cabinetry.
Image Credits
- “Kitchen Cabinets” by EcoIslandLife (featured)

