Painting countertops is an inexpensive and quick way to update the look of your kitchen or bathroom. It can be a DIY project that requires minimal effort and tools, but it can also be a bit tricky if you don’t know what you’re doing. In this article, we will discuss the steps involved in painting countertops, including preparation, application, and sealing. We’ll also answer the popular question: Can you paint quartz countertops?
Before starting any countertop painting project, it’s important to understand that not all surfaces are created equal. While some materials like laminate or wood are easier to paint over than others, such as granite or marble, with proper preparation and techniques even these surfaces can be successfully painted. The key is to choose the right type of paint and sealant for your specific surface and follow the correct steps in applying them. Additionally, some surfaces may require a primer before painting to ensure proper adhesion of the paint. In this article, we will provide a comprehensive guide on how to paint countertops and offer tips on how to achieve professional-looking results at home.
Understanding Your Countertop Surface
Countertops are a crucial component of any kitchen or bathroom, providing essential space for preparing food and storing items. Two popular materials for countertops are quartz and granite. Both have their pros and cons, so it’s important to understand which surface will best fit your needs. Granite is a natural stone that comes in various colors and patterns, making each countertop unique. It’s durable and heat-resistant but requires sealing every few years to prevent staining. Quartz, on the other hand, is engineered stone made from ground-up quartz and resin. It’s non-porous, easy to clean, and doesn’t require sealing like granite does.
When it comes to updating your countertops, there are two options: DIY or professional painting. A DIY project can save you money but may require more time and effort than hiring a professional. If you’re confident in your skills and have the necessary tools, you can paint your countertops yourself following specific instructions. However, if you don’t have experience with home improvement projects or want a more polished look, hiring a professional may be the better choice.
Now that you’ve determined which type of countertop surface is right for you and whether to take on the project yourself or hire a professional, it’s time to choose the right paint and sealant for the job. This step is crucial as selecting the wrong materials can lead to chipping or peeling paint over time.
Choosing The Right Paint And Sealant
Understanding your countertop surface is crucial before choosing the right paint and sealant. Countertops made of laminate and tile are perfect for painting, while natural stone surfaces such as granite and quartz require a more delicate approach. Painting on quartz countertops is not recommended, as it may cause damage to the surface. However, you can opt for faux finishes or epoxy coatings that mimic the look of natural stone.
When it comes to choosing the right paint and sealant, there are different options available in the market. Some popular paint brands that work well on countertops include Rust-Oleum, Giani Granite, and KILZ. These paints are specially designed to adhere to smooth surfaces like countertops and come in a range of colors to suit your taste. Color matching is an essential step when painting countertops. You can take a sample of your existing countertop material or choose a color that complements your kitchen décor.
Types of sealants also play an important role in ensuring the longevity of your painted countertops. Epoxy sealers provide a durable finish that resists moisture and stains, making them ideal for high-traffic areas like kitchens. Polyurethane sealers offer similar protection but have a softer finish that may show scratches over time. Texture options available for painted countertops include smooth, glossy finishes or textured finishes that mimic the look of natural stone. In the next section, we will discuss necessary tools and materials required to successfully paint your countertops at home.
Necessary Tools And Materials
What tools and materials do you need to paint your countertops? This is one of the most important questions to ask before starting any DIY project. Fortunately, painting your countertops is a budget-friendly alternative to replacing them entirely. You don’t have to spend a lot of money on expensive materials or tools.
First, you will need to gather some basic tools like sandpaper, painter’s tape, paintbrushes, and rollers. You can purchase these items at any home improvement store or online retailer. Next, you will need to choose the right type of paint for your countertop. There are eco-friendly options available that are safe for both your family and the environment.
Budget-friendly alternatives and eco-friendly options are great choices when it comes to painting your countertops. Not only will they save you money in the long run, but they also promote sustainability which is crucial in today’s world. In the next section, we’ll discuss how to prepare your countertop for painting so that you can achieve a professional-looking finish that lasts for years to come.
Preparing Your Countertop For Painting
Now that you have all the necessary tools and materials, it’s time to prepare your countertop for painting. The first thing you need to consider is the type of countertop surface you have. Different countertop materials require different preparation methods to ensure paint adhesion. Countertops made of laminate or wood may require sanding to create a rough surface for the paint to stick to. On the other hand, if you have a granite or quartz countertop, sanding may not be necessary.
Before painting any type of countertop, it’s crucial to clean it thoroughly. Any dirt, grease, or residue left on the surface can prevent the paint from adhering properly. Use a soap and water solution to clean the entire surface and let it dry completely before moving on to the next step. Once your countertop is clean and dry, use painter’s tape to cover any areas that you don’t want painted such as backsplashes or sink edges.
When preparing your countertop for painting, keep these factors in mind:
- Surface type: Different types of countertops require different preparation methods.
- Sanding: Some surfaces may need sanding for better paint adhesion.
- Cleaning: Thoroughly cleaning your countertop will ensure proper paint adhesion.
By taking these steps into consideration when preparing your countertop for painting, you’ll achieve better results with less likelihood of peeling or chipping over time. In the next section, we’ll discuss how to properly sand and clean your countertop before applying paint.
Sanding And Cleaning Your Countertop
Did you know that a dirty countertop can harbor up to 10 million bacteria? This is why it’s important to ensure that your countertop is thoroughly cleaned and sanded before starting any painting project. In this section, we will discuss the proper methods for sanding and cleaning your countertops to ensure a smooth and clean surface for painting.
Choosing the right sandpaper is crucial in prepping your countertop for paint. You’ll want to start with a coarse grit sandpaper, such as 60 or 80 grit, to remove any existing finish or rough patches on the surface. Once the surface is smooth, switch to a finer grit sandpaper, such as 220 or 320 grit, to create a uniform texture for the paint to adhere to. Be sure to wipe away any dust particles with a tack cloth before moving on.
Cleaning with the right products is also important in ensuring that your countertop is free of any contaminants that could affect the adhesion of the paint. Use a non-abrasive cleaner and warm water to clean the surface thoroughly, making sure all residue has been removed. Avoid using bleach or ammonia-based cleaners as they can react negatively with some paints. After cleaning, allow the surface to dry completely before moving on to applying primer for improved adhesion.
Applying Primer For Improved Adhesion
Prior to applying primer for improved adhesion, it is important to properly prepare the countertop surface by cleaning and sanding it. The surface should be free of dirt, dust and grease to ensure that the primer adheres effectively. When applying the primer, it is important to use the appropriate brush size and technique to ensure even coverage and avoid leaving brush strokes. Depending on the type of countertop, it may be possible to paint quartz and other non-porous surfaces, however, it is recommended to check with the manufacturer for specific instructions.
Preparing Countertop Surface
Before applying primer, it’s crucial to prepare the countertop surface. Different countertop surface types require different preparation methods. For laminate countertops, start by sanding the surface with 120-grit sandpaper to roughen it up and remove any glossiness. Next, clean the countertop with a degreaser and rinse it thoroughly with water. For granite or marble countertops, use a cleaner specifically designed for natural stone and wipe down the surface with a damp cloth.
The importance of surface preparation cannot be overstated when it comes to painting countertops. Without proper preparation, the primer won’t adhere properly and you’ll end up with a subpar finish that’s prone to chipping and peeling. In addition to cleaning and sanding the surface, make sure there are no cracks or chips that need to be filled in before priming.
It’s worth noting that although you can technically paint quartz countertops, it’s not recommended due to their non-porous nature. The paint is unlikely to adhere well and will likely chip or peel over time. If you’re set on changing the color of your quartz countertops, consider having them professionally resurfaced instead. With proper surface preparation and primer application, your painted countertops will have a flawless finish that lasts for years to come.
Applying Primer Properly
Proper application of primer is crucial for achieving improved adhesion when painting countertops. The right primer can help the paint adhere better and last longer, resulting in a more durable finish that withstands everyday wear and tear. Applying primer properly requires attention to detail and a bit of know-how, but it’s well worth the effort for a flawless finish.
When applying primer, it’s important to follow a few key tips to ensure optimal adhesion. Start by choosing the right type of primer for your countertop surface. For laminate countertops, a bonding primer is recommended to help the paint adhere better. For natural stone surfaces like granite or marble, use a sealer primer designed specifically for those materials. Be sure to read the manufacturer’s instructions carefully before applying.
Troubleshooting common issues with primer application can make all the difference in achieving proper adhesion. If you notice any rough spots or areas where the primer isn’t adhering well, lightly sand those areas with 220-grit sandpaper and apply another coat of primer. Allow ample drying time between coats and be sure to apply even, consistent coats across the entire surface. By following these tips and troubleshooting any issues that arise, you’ll be on your way to achieving improved adhesion with your painted countertops.
Choosing Your Paint Colors And Patterns
Now that you have applied primer to your countertops, it is time to move on to the fun part – choosing your paint colors and patterns. The color selection process can be overwhelming, but with a few tips, you’ll be able to choose the perfect shade for your space. Consider the overall color scheme of your room and choose a complimentary or contrasting color for your countertops. For example, if your walls are a neutral beige, consider a dark navy or forest green countertop for a pop of color.
When selecting patterns, look for inspiration in the existing decor of your room. If you have bold prints on your curtains or throw pillows, consider a solid-colored countertop to balance out the space. Alternatively, if you have plain walls and furniture, experiment with patterned countertops to add visual interest. Keep in mind that busy patterns can quickly become overwhelming, so choose wisely.
To help narrow down your options, create a mood board or gather samples of different colors and patterns to see how they look in your space. Once you’ve made your final decision, it’s time to start applying your first coat of paint.
Transition: Now that you’ve selected the perfect color and pattern for your countertops, it’s time to bring them to life by applying the first coat of paint.
Applying Your First Coat Of Paint
Now that you have prepared your countertops, it is time to apply the first coat of paint. Before you begin, make sure to choose a color that complements your kitchen or bathroom. You can choose from a variety of colors, including neutral shades or bright and bold colors.
Once you have chosen your color, it is important to let each layer dry completely before adding another coat. This drying time can vary depending on the type of paint you are using, so be sure to read the manufacturer’s instructions carefully. Generally, oil-based paints take longer to dry than water-based paints.
Color choices and drying time are two important factors to consider when painting your countertops. By taking the time to properly plan and execute each step of the painting process, you can achieve beautiful results that will last for years to come. In the next section, we will discuss how to apply your second coat of paint for an even more polished look.
Applying Your Second Coat Of Paint
Now that your first coat of paint is dry, it’s time to apply the second coat. Before you begin, make sure to inspect the surface for any imperfections or missed spots. If necessary, touch up these areas with a small brush before moving on to the second coat.
When applying your second coat of paint, it’s important to use light, even strokes in order to achieve a smooth finish. Avoid overloading your brush or roller with paint as this can lead to drips and uneven coverage. Instead, apply a thin layer of paint and use a brush or roller to blend it into the first coat.
Tips for blending:
- Use a dry brush or roller to lightly blend the edges of each section
- Work in small sections and blend before moving on to the next
- Use a light touch when blending to avoid removing too much paint
Once you’ve applied your second coat of paint and allowed it to dry completely, you may want to consider adding a protective topcoat. This will help protect your newly painted countertops from scratches, stains, and other damage.
Protective topcoat options:
- Polyurethane – provides durable protection but may yellow over time
- Acrylic sealant – easy to apply and dries clear but not as durable as polyurethane
- Epoxy – extremely durable but requires more prep work and can be difficult to apply evenly
- Wax – provides a natural-looking finish but requires frequent reapplication
With these tips for blending and protective topcoat options in mind, you’re well on your way to creating beautiful painted countertops that will last for years to come. In the next section, we’ll discuss how you can take things one step further by creating a faux stone or marble look.
Creating A Faux Stone Or Marble Look
Are you tired of the dull and boring countertop in your kitchen? Are you looking for a unique and modern way to spruce up your countertops? Why not try creating a faux granite or marble look! This technique will give your countertops a luxurious and sophisticated appearance without breaking the bank.
To begin, start by choosing paint colors and patterns that emulate natural stone. Earth tones such as browns, grays, and beige work well for a granite look while white and gray hues are perfect for emulating marble. Once you have chosen your color palette, it’s time to get creative with patterns. You can use sponges or crumpled paper to create texture on the surface of the countertop. Remember, each layer should be allowed to dry completely before adding another layer.
After you’ve created the desired pattern, it’s time to seal your countertop for durability. In the next section, we will discuss how to properly seal your countertop to ensure its longevity. Keep reading to learn more about this important step in creating a faux stone or marble look that will last for years to come.
Sealing Your Countertop For Durability
Countertop maintenance is a crucial aspect of ensuring the long-term durability and beauty of your painted countertops. One important step in maintaining your newly painted countertops is the application of a sealer. A good sealer will help protect against scratches, heat damage, and stains.
Before applying a sealer, it is important to make sure that your countertop surface is clean and dry. Any leftover debris or moisture could lead to an uneven sealant application. Additionally, it is recommended that you apply multiple coats of sealer for maximum protection. Be sure to follow the manufacturer’s instructions carefully for best results.
Sealer application tips include using a high-quality brush or roller for even coverage and working in small sections to avoid any missed spots. It is also important to remove any excess sealer immediately as it can leave behind streaks or discoloration if left to dry on its own. Once the sealer has been applied, be sure to give it ample time to dry before using your countertops again. In the next section, we will discuss how to properly cure and dry your newly sealed countertops.
Curing And Drying Your Countertop
After finishing painting your countertop, it is important to let it cure and dry properly. This process may take anywhere from a couple of days up to a week, depending on the type of paint used and the humidity levels in your home. Be sure to follow the manufacturer’s recommendations for curing and drying times.
During this period, it is essential that you avoid using your countertop as much as possible. This includes any contact with water or any other liquids that may cause damage to the paint. Failure to do so can result in smudging, cracking or peeling of the paint, which can be frustrating and time-consuming.
Countertop maintenance is crucial to ensuring its longevity. Avoid common mistakes such as using harsh chemicals, abrasive scrubbers or cutting directly on the surface. Instead, use mild soap and warm water for cleaning and consider using cutting boards when preparing food. By taking these precautions, you can maintain your newly painted countertop’s appearance for years to come.
Maintaining Your Newly Painted Countertop
After curing and drying your newly painted countertop, it is important to maintain its appearance and prevent damage. DIY cleaning is a great way to keep your countertop looking fresh without spending a lot of money. However, it is important to choose the right cleaning products and avoid harsh chemicals that can cause scratches or other types of damage.
When choosing a cleaning product for your painted countertop, make sure to read the label carefully. Avoid any products that contain bleach or ammonia, as these can cause damage over time. Instead, look for gentle cleaners that are specifically designed for use on painted surfaces.
Preventing scratches is also an important part of maintaining your newly painted countertop. To do this, always use a cutting board when preparing food and avoid placing heavy objects directly on the countertop. If you do accidentally scratch the surface, don’t panic! Many scratches can be easily repaired using simple DIY techniques.
- Here are five tips for maintaining your newly painted countertop:
- Use gentle cleaning products specifically designed for painted surfaces.
- Always use a cutting board when preparing food.
- Avoid placing heavy objects directly on the countertop.
- Repair scratches as soon as possible to prevent further damage.
- Consider using protective mats or coasters under items that may scratch the surface.
Now that you know how to care for your newly painted countertop, you may be wondering: can you paint quartz countertops? While it is technically possible to paint quartz countertops, it is generally not recommended. This is because quartz countertops are made from natural stone and painting them can alter their appearance and durability. If you’re looking to update your quartz countertops, consider alternative options such as resurfacing or replacing them altogether.
Can You Paint Quartz Countertops?
Symbolism can be a powerful tool in the world of home improvement. The idea of painting a quartz countertop may seem counterintuitive, since quartz is renowned for its durability and stain resistance. However, with the right painting techniques, it is possible to achieve a new look for your quartz countertops.
Pros and cons should be weighed carefully before deciding whether to paint a quartz countertop. One of the advantages of this option is that it can save homeowners money compared to replacing their entire countertop. Additionally, painting allows for greater creativity and customization than simply choosing from pre-existing options. However, there are also drawbacks to consider such as the possibility of chipping or peeling over time.
Alternative countertop refinishing options should also be explored before making any final decisions. For example, some homeowners may choose to refinish their countertops using concrete or epoxy coatings instead of paint. These methods offer different degrees of durability and aesthetic appeal, so it is important to do thorough research before committing to any one option. Ultimately, the decision about how to best refinish your countertops will depend on your specific needs and preferences.
Alternative Countertop Refinishing Options
Countertop resurfacing is a popular alternative to replacing entire countertops, as it can save homeowners a significant amount of money. This process involves covering the existing countertop surface with a new layer of material, such as laminate or granite. One of the most popular options for countertop resurfacing is DIY epoxy coating. Epoxy coatings are durable and long-lasting, making them ideal for high-traffic areas like kitchens.
To begin the process of resurfacing your countertops with an epoxy coating, you will need to first thoroughly clean and sand down the existing surface. This will ensure that the epoxy adheres properly and creates a smooth finish. Next, you will need to apply the epoxy coating in thin layers, allowing each layer to dry completely before adding another. Once you have applied several layers of epoxy, you can add any desired decorative elements or color pigments.
While DIY epoxy coating can be an effective way to refinish your countertops, there are some limitations to consider. For example, it may not be suitable for certain types of surfaces like quartz or stone. Additionally, if your countertops have deep scratches or cracks, resurfacing may not be enough to fully repair them. In these cases, it may be necessary to replace the entire countertop instead.
Alternative countertop refinishing options like DIY epoxy coating can provide homeowners with an affordable and easy way to update their kitchen without having to completely replace their countertops. However, it’s important to carefully consider your specific needs and limitations before beginning any home improvement project. By doing so, you can ensure that your finished product meets both your aesthetic preferences and functional requirements without breaking the bank.
Conclusion
Countertop painting is an affordable and easy way to give your kitchen a fresh new look. With the right tools, materials, and techniques, you can transform your outdated or worn countertop into a modern and stylish one. Understanding your countertop surface is crucial in choosing the right paint and sealant to ensure longevity. Preparation is key in sanding and cleaning your surface before applying paint. Curing and drying your countertop is essential to prevent any damage from everyday use.
Interestingly, according to a survey conducted by HomeAdvisor, homeowners who renovate their kitchen spend an average of $22,000 on the project. However, with countertop painting, you can achieve a similar effect for just a fraction of that cost.
While quartz countertops are known for their durability and resistance to scratches and stains, painting them may not be the best option as it can damage its unique features. Instead, consider alternative refinishing options such as resurfacing or replacing specific areas if needed.
As with any home improvement project, proper research and planning are essential to ensure success. By following these steps and utilizing the necessary tools and materials, you can achieve a beautifully painted countertop that enhances the overall aesthetic of your kitchen while saving money in the process.
Image Credits
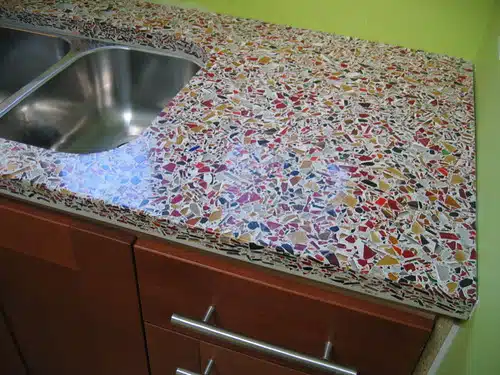
- “Concrete countertop” by paintchipdiaries (featured)

