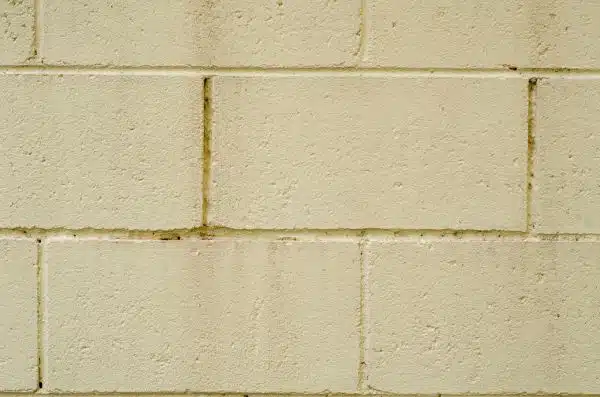
Cinder blocks are a popular building material used for constructing walls, foundations, and other structures. They are known for their durability, affordability, and strength. However, their grayish appearance can be unattractive and make them stand out in an otherwise well-designed space. By painting cinder blocks, you can transform their look and create a visually appealing environment that adds value to your home or commercial property.
Painting cinder blocks is not only an easy task but also an affordable way to enhance the appearance of your property. Whether you are looking to add some color to your garden wall or revamp the interior walls of your basement, painting cinder blocks offers endless possibilities. But before you embark on this project, it’s important to know the right techniques and tools needed for a successful outcome. In this article, we’ll guide you through the step-by-step process of painting cinder blocks like a pro, ensuring that you achieve a long-lasting finish that will make your property look stunning.
Preparing The Surface
Cinder blocks are a popular material used in construction for building foundations and walls. However, they are not the most aesthetically pleasing option available, which is why many people choose to paint them. Painting cinder blocks can give them a fresh and modern look, but it requires proper preparation of the surface.
Tools required for this task include a wire brush or scraper, a power washer or garden hose with spray nozzle attachment, drop cloths or plastic sheeting to protect surrounding areas from overspray, painter’s tape to cover any areas not being painted, as well as paintbrushes and rollers. Safety precautions should also be taken when preparing the surface. Wear gloves and protective eyewear to avoid injury from flying debris or chemicals.
Before painting cinder blocks, it is crucial to prepare the surface properly. Start by cleaning the area using a wire brush or scraper to remove any loose concrete or debris that may interfere with painting. Then use a power washer or garden hose with spray nozzle attachment to clean the surface thoroughly. Allow enough time for the surface to dry completely before proceeding with painting.
Cleaning The Cinder Blocks
Before you can start painting cinder blocks, it’s essential to clean them thoroughly. Cleaning the cinder blocks is a crucial step that ensures the paint adheres well and lasts longer. There are several ways to clean cinder blocks, but two of the most effective methods are pressure washing and using a vinegar solution.
Pressure washing is an excellent way to remove dirt, grime, and any other debris that may be stuck on your cinder blocks. To do this, rent or buy a pressure washer from your local home improvement store, connect it to a water source, and then turn it on. Start by spraying the blocks from top to bottom and then side to side until all dirt and grime have been removed.
Another option is using a vinegar solution to clean your cinder blocks. This method works best for removing stains or mildew. To make the solution, mix equal parts water and distilled white vinegar in a bucket. Dip a stiff-bristled brush into the solution and apply it to the stained areas of your cinder blocks. Allow the solution to sit for about 30 minutes before rinsing it off with clean water.
Now that you’ve cleaned your cinder blocks using either pressure washing or a vinegar solution, you’ll want to make sure there’s no debris left behind before painting. A simple way to do this is by running your hand over each block’s surface after cleaning. If there’s still some residue left behind, use a stiff-bristled brush or broom to sweep away any remaining debris. Once you’ve completed this step, you’re ready for the next stage of painting your cinder blocks!
Removing Any Debris
As the old saying goes, “a clean canvas makes for a beautiful painting.” This is especially true when it comes to painting cinder blocks. Before you can begin the painting process, it’s important to remove any debris from the surface of the cinder blocks. Not only will this ensure that your paint adheres properly, but it will also help improve the overall appearance of your finished project.
There are several cleaning techniques that are effective at removing debris from cinder blocks. One method involves using a pressure washer to blast away dirt and grime. However, caution must be exercised as high-pressure water can damage the surface of the cinder blocks. Alternatively, a stiff-bristled brush and mild detergent can be used to scrub away dirt and debris.
When undertaking any home improvement project, safety precautions should always be taken into consideration. When cleaning cinder blocks, make sure to wear protective eyewear and gloves to prevent injury. Additionally, if using a pressure washer or chemicals, make sure to follow all manufacturer instructions carefully and avoid contact with skin or eyes.
As you complete this important step in preparing your cinder blocks for painting, keep an eye out for any cracks or holes in the surface of the blocks. These imperfections should be addressed before moving on to the next step in the process. By taking care of them now, you’ll ensure that your finished project looks its best and lasts for years to come.
Filling Any Cracks Or Holes
- Prior to painting cinder blocks, any cracks or holes should be filled for a smooth and even finish.
- For cracks, use a masonry caulk or concrete patching compound to fill them in.
- For holes, use a masonry patching compound or a concrete patch mix to fill the holes.
- After the patching compound has been applied, sand the area and use a wire brush to remove any loose particles before painting.
Filling Cracks
Caulking cracks and patching holes are essential steps in painting cinder blocks. These materials help fill any gaps or spaces that may cause problems in the future. It is important to make sure that these areas are properly treated before painting to ensure a smooth and professional finish.
To start, use a caulking gun to fill the cracks with caulk. Make sure to apply enough pressure to fill the entire crack and create a flush surface. Use a putty knife or scraper to smooth out any excess caulk and create an even surface.
For larger holes or gaps, use patching material such as spackle or joint compound. Apply the material with a putty knife, making sure it fills the hole completely. Allow it to dry according to manufacturer instructions before sanding it down until it is flush with the rest of the wall.
Overall, filling cracks and holes is an important step in preparing cinder blocks for painting. By using caulking and patching materials, you can prevent future damage and create a smooth surface for paint application. Remember to follow all manufacturer instructions for best results.
Filling Holes
When it comes to painting cinder blocks, filling any cracks or holes is a crucial step in achieving a professional-looking finish. Not only does it help prevent future damage, but it also creates a smooth surface for the paint application. To ensure the best results, it’s important to use the best fillers and techniques for smoothing.
For small holes and cracks, using caulk is an effective solution. It’s easy to apply with a caulking gun and can be smoothed out with a putty knife or scraper. Make sure to apply enough pressure to fill the entire crack or hole and create an even surface. Any excess caulk should be removed before drying.
For larger holes or gaps, spackle or joint compound is recommended. Apply the material with a putty knife and make sure to fill the hole completely. Allow it to dry according to manufacturer instructions before sanding it down until it’s flush with the rest of the wall. This technique will create a smooth surface that’s ready for paint application.
In summary, filling any cracks or holes is an essential part of preparing cinder blocks for painting. Using the best fillers and techniques for smoothing will ensure that your finished product looks professional and lasts longer without any damages or issues. Remember to follow all manufacturer instructions for optimal results.
Choosing The Right Paint
When it comes to painting cinder blocks, selecting the right paint is crucial. Not all paints are made equal, and choosing the wrong one can lead to a subpar finish. When selecting your paint, consider factors such as color, finish options, and budget-friendly alternatives.
Paint color is an important consideration when painting cinder blocks. Lighter colors tend to make spaces feel larger, while darker colors create a cozy atmosphere. Additionally, keep in mind that cinder blocks are porous and may require additional coats of paint for full coverage. It’s a good idea to choose a paint that is specifically formulated for use on masonry surfaces to ensure the best results.
Finish options are another important consideration when selecting your paint. Matte finishes tend to be more forgiving of imperfections than glossy finishes but may not be as durable. Glossy finishes are highly durable and easy to clean but highlight any imperfections in the surface being painted. Consider the needs of your specific project when choosing between finish options.
If you’re working with a tight budget, there are plenty of budget-friendly alternatives to expensive paints available on the market today. Look for products like concrete stain or masonry sealer as an alternative to traditional paint. These products can provide a protective coating without breaking the bank.
When it comes time to start painting your cinder blocks, selecting the right brushes and rollers is just as critical as choosing the right paint. Keep reading for tips on selecting the best tools for your project.
Selecting The Right Brushes And Rollers
After selecting the right paint for your cinder blocks, your next step is to prepare for proper painting application. Just like any other surface, cinder blocks require a specific type of paint to ensure maximum adhesion and durability. Choosing the right paint types is crucial in achieving a smooth and long-lasting finish. For cinder blocks, it’s best to use masonry paint, which is specially formulated for porous surfaces like concrete and cement.
Proper paint application techniques are also essential in achieving a beautiful finish without compromising its structural integrity. First, make sure that the surface is thoroughly cleaned and free from dirt, dust, and debris. Any existing coatings or loose materials should be removed before applying new paint. Next, apply a primer specifically designed for masonry surfaces before painting to improve adhesion and ensure consistent color coverage.
To achieve optimal results when painting cinder blocks, here are some tips you can follow:
- Always use high-quality brushes or rollers specifically designed for masonry surfaces.
- Work in small sections to prevent the paint from drying out before you can blend it properly.
- Apply multiple thin coats of paint rather than one thick coat to avoid drips and uneven coverage.
By following these guidelines on choosing the right paint types and proper paint application techniques, you can achieve a beautiful finish that will last for years to come. Applying a primer is the next crucial step in preparing your cinder block surface for painting.
Applying A Primer
When it comes to painting cinder blocks, applying a primer is an essential step that should not be overlooked. Not only does it help the paint adhere better to the surface, but it also helps to hide any stains or discoloration on the blocks. There are different primer options available for cinder block surfaces, each with its own set of benefits.
One option is a masonry primer, which is specifically designed to adhere to rough and porous surfaces like cinder blocks. It creates a strong bond between the surface and the paint, ensuring that the paint won’t peel or flake off over time. Another option is a high-build primer, which fills in small cracks and gaps in the surface of the blocks. This type of primer can help smooth out any inconsistencies in the surface of the cinder blocks, resulting in a more even finish.
When applying primer to cinder blocks, it’s important to use proper technique to ensure that it adheres properly and provides adequate coverage. Start by cleaning the surface thoroughly with soap and water, then allow it to dry completely before applying primer. Use a brush or roller to apply an even coat of primer over the entire surface, making sure to work it into all of the nooks and crannies of the blocks. Allow the primer to dry completely before moving on to painting.
Moving on from applying a primer is painting your cinder blocks. After you have allowed your primer enough time to dry completely, you can start painting your cinder blocks with your desired color using similar techniques as when applying your primer. Make sure you have enough color at hand for proper application without running out halfway through your project. Apply two coats if necessary for full coverage depending on how dark/light you want your color scheme.
Painting The Cinder Blocks
Before beginning the painting process, it is important to thoroughly clean the cinder blocks and make sure to remove any dirt, debris, or existing paint.
The next step is to apply a primer to the cinder blocks in order to create a surface that will help the paint adhere better and last longer.
When choosing the right paint for the job, it is important to consider the type of material and if the paint needs to be exterior or interior grade.
Additionally, the desired finish should also be taken into consideration, as cinder blocks can be painted with glossy, satin, or eggshell finishes.
Preparing The Blocks
For novice painters, painting cinder blocks can be daunting. However, with proper preparation, the end result will be a smooth, professional-looking finish. The first step in preparing cinder blocks for painting is to clean them thoroughly. Use a wire brush or sandpaper to remove any loose debris or peeling paint. This ensures that the surface is free from dust and dirt, which may cause the paint to peel or flake.
Once the surface is clean, it’s time to prime the cinder blocks. Priming is crucial as it helps the paint adhere better to the surface and prevents uneven color distribution. When priming cinder blocks, use a high-quality primer that’s specifically designed for masonry surfaces. Apply an even coat of primer using a roller or brush and let it dry completely before applying paint.
One common mistake people make when preparing cinder blocks for painting is not allowing enough drying time between coats of primer or paint. Another mistake is using low-quality materials, such as cheap brushes or rollers that leave streaks on the surface. To avoid these mistakes, take your time and invest in quality materials that will help you achieve a flawless finish. With these tips in mind, you’ll be able to prepare cinder blocks like a pro and achieve impressive results when painting them.
Choosing The Right Paint
After properly cleaning and priming the cinder blocks, the next step is to choose the right paint for your project. When selecting a paint, consider the finish you want to achieve. For example, if you want a matte or flat finish, use a flat or eggshell paint. If you prefer a shiny or glossy finish, use a semi-gloss or high-gloss paint.
In addition to choosing the right paint finish, it’s important to consider color coordination. If you’re painting an outdoor wall or foundation, it’s best to choose colors that complement the surrounding landscape or architecture. For indoor projects, consider the overall color scheme of your space and select a paint color that complements your interior design.
When painting cinder blocks, it’s important to apply multiple coats of paint for an even and professional-looking finish. Allow each coat to dry completely before applying another layer. To avoid streaks or uneven coverage, use high-quality brushes or rollers designed for masonry surfaces. By taking these steps and choosing the right paint finish and color coordination, you can transform ordinary cinder blocks into beautiful features in your home or landscape.
Applying A Second Coat
After successfully applying the first coat of paint on your cinder blocks, it’s time to move on to the next step. Just like how a painter applies a second layer of paint to achieve better quality, you’ll need to do the same with your cinder blocks. Think of it as adding depth and complexity to your canvas – each layer adds more texture and character.
Before diving into the second coat, make sure that the first one has completely dried. This may take up to 24 hours depending on the type of paint and weather conditions. Once dry, use a roller brush with a different color for your second coat. Roller techniques are essential here – try using long strokes in one direction for an even finish. Avoid going over areas that have already been painted as this can cause unevenness.
Keep in mind that drying time is crucial between coats – if you add another layer before the previous one is fully dry, it could cause peeling or cracking later on. To ensure optimal results, wait at least two hours before applying another layer. Repeat this process until you’ve achieved the desired look and color intensity.
To add some flair to your cinder block wall, consider creating patterns or designs with your roller brush. Here are some ideas for inspiration:
- Stripes: Use painter’s tape to mask off sections of your wall and paint alternating stripes in different colors.
- Stencils: Cut out stencils from cardboard or plastic and use them as guides for painting shapes or patterns onto your cinder blocks.
- Ombré effect: Blend two or more colors together using a sponge or roller brush for a gradual fade effect.
- Geometric shapes: Create shapes such as triangles, circles, or diamonds by taping off sections and painting inside them.
By following these tips and techniques, you’ll be able to create a beautiful and personalized cinder block wall that will enhance any space!
Creating Patterns Or Designs
When it comes to painting cinder blocks, there are endless possibilities for creating unique patterns or designs. One option is to go with a geometric design, which can add a clean and modern look to any space. Geometric designs can be achieved by using painter’s tape to create sharp lines or masking off specific areas of the block before painting. It’s important to plan out the design beforehand and measure carefully to ensure that the lines are straight and even.
Another option is to go with an abstract design, which allows for more freedom and creativity. This style can involve layering colors or using different techniques like splattering or sponging. When choosing color combinations for an abstract design, it’s best to stick with colors that complement each other rather than clash. For example, shades of blue and green work well together while pairing red with orange might be too bold.
Overall, creating patterns or designs on cinder blocks is a fun way to add personality and character to any space. Whether you choose a geometric or abstract style, it’s important to take your time and plan out the design beforehand. With some patience and creativity, you can transform your cinder block walls into a work of art.
Transition: Using stencils for creative effects is another way to elevate your cinder block painting game. By incorporating stencils into your design, you can add intricate details and textures that would be difficult to achieve by hand alone.
Using Stencils For Creative Effects
As with any painting project, using the right tools and techniques can make all the difference. When it comes to painting cinder blocks, one way to add a unique touch is by using spray paint. Not only does spray paint provide a smooth, even finish, but it also dries quickly, making it ideal for outdoor projects like this.
To take your cinder block painting project up a notch, try creating custom stencils. This allows you to add personalized patterns or designs that are both eye-catching and easy to replicate. You can create your own stencils using cardboard or other materials, or purchase pre-made options at your local craft store.
Once your painted cinder blocks have dried completely, it’s important to seal them to protect against weathering and wear. A clear sealant will help keep the paint looking fresh for longer and prevent fading or chipping. Simply apply the sealant according to manufacturer instructions and allow sufficient drying time before handling or moving the cinder blocks. With these tips in mind, you’ll be able to create a stunning and durable painted cinder block project that will stand the test of time.
Sealing The Painted Cinder Blocks
After painting your cinder blocks, it is important to apply sealant to protect against moisture damage. Applying sealant will extend the life of your painted surface and keep it looking fresh for longer. It is recommended to use a clear acrylic sealer or a water-repellent sealer for better protection.
Before applying the sealant, ensure that the painted surface is completely dry to avoid any trapping of moisture under the sealant layer. Additionally, make sure there are no cracks or gaps in the cinder blocks as these can also lead to moisture penetration. Apply the sealant using a roller or sprayer, following the manufacturer’s instructions carefully.
Preventing moisture damage is crucial in maintaining the integrity of your painted cinder blocks. By applying sealant, you are taking a proactive step towards keeping your surface looking new and protecting it from damage caused by weather elements or other factors. In the next section, we will discuss how to maintain your painted surface to ensure its longevity and durability.
Maintaining The Painted Surface
When it comes to maintaining the painted surface of cinder blocks, it is important to keep the surface clean to ensure the paint lasts. Proper cleaning techniques include using a pressure washer to remove dirt, mold, and mildew. Sealing the painted surface of cinder blocks is also recommended, as it will help protect the paint and reduce the need for frequent cleaning. Sealants should be applied every two to three years to maintain a durable, long-lasting painted surface.
Cleaning
One of the most important steps in maintaining a painted cinder block surface is cleaning. Pressure washing and chemical cleaners are two effective methods for removing dirt, grime, and other debris from the surface prior to painting.
Pressure washing is a highly recommended method for cleaning cinder blocks. It uses high-pressure water to blast away dirt and other debris that has accumulated on the surface. Pressure washing can be done by renting or purchasing a pressure washer or hiring a professional to do the job.
Chemical cleaners are also an effective alternative to pressure washing. They work by breaking down and dissolving dirt, grime, and other debris on the surface. Chemical cleaners come in different types, such as acid-based or alkaline-based cleaners. It’s important to choose the right type of cleaner based on the type of stain you’re dealing with to avoid damaging the surface.
Sealing
Maintaining the painted surface of cinder blocks is not just limited to cleaning. Applying sealant is also an essential step in keeping the surface looking great for years to come. Sealing helps protect the paint from moisture and other damaging elements, improving its durability and longevity.
Applying sealant after painting is crucial to ensure that it adheres properly. The process involves using a roller or brush to apply the sealant over the painted surface. It’s important to choose a sealant that complements the type of paint used for the cinder block surface. Failure to do so may result in an uneven finish or even cause damage to the painted surface.
The importance of sealing properly cannot be overstated. A well-sealed surface not only enhances its appearance but also protects it from harsh weather conditions, moisture, and UV rays. With proper sealing, homeowners can enjoy their painted cinder block surfaces for years without worrying about costly repairs or repainting jobs.
Removing Paint From Cinder Blocks
Did you know that up to 10% of paint can be lost due to improper removal techniques? Not only is this a waste of money, but it also poses a health risk. Chemical options for removing paint from cinder blocks are readily available, but it is essential to take precautions when using them. The use of sandblasting methods is also a popular approach, but it requires specialized equipment and expertise.
Chemical options for paint removal include solvents and strippers that dissolve the paint’s bond with the surface. These chemicals can be hazardous if not handled correctly, so protective gear such as gloves, goggles, and respirators should be worn. It is also crucial to follow the instructions on the label carefully. Some chemicals require neutralization after use, while others may need several applications.
Sandblasting involves high-pressure blasting of abrasive materials such as sand or glass beads onto the painted surface to remove the paint. This method is effective but requires specialized equipment and expertise. Sandblasting can also generate dust and debris that must be contained and disposed of properly.
Now that you have an idea about chemical options and sandblasting methods for removing paint from cinder blocks, let’s move on to some tips and tricks for a successful project.
Tips And Tricks For A Successful Project
Color selection and surface texture are crucial elements when it comes to painting cinder blocks. Before starting the project, consider the overall color scheme of the room or area where the blocks will be used. Choose a color that will complement or contrast with the existing colors to create a cohesive look. Additionally, take into account the surface texture of the cinder blocks because this can affect how well the paint adheres to its surface.
To ensure a successful project, prepare the cinder block surfaces by cleaning them thoroughly and allowing them to dry completely before applying any paint. If there are any cracks or holes on the surface, fill them in with patching compound and sand them down until smooth. Applying a primer is also essential to help improve adhesion and increase durability of the paint over time.
When it comes to painting cinder blocks, using a high-quality acrylic latex paint is recommended as it provides excellent coverage and dries quickly. Apply two coats of paint, allowing each coat to dry completely before applying another layer. Once you have achieved your desired finish, consider using sealant or coating over your painted cinder blocks for added protection against moisture damage or scratches.
Remember that painting cinder blocks requires careful consideration of both color selection and surface texture. By properly preparing your surfaces and selecting high-quality materials for your project, you can achieve an attractive and long-lasting finish that will enhance any space.
Conclusion
To ensure a successful and long-lasting paint job on cinder blocks, proper preparation of the surface is key. Begin by cleaning the surface thoroughly and removing any debris. Fill any cracks or holes with a suitable filler before choosing the right paint for the job. A high-quality masonry paint will provide excellent coverage and durability.
Once the painting is complete, it is important to seal the painted cinder blocks to protect them from moisture and weathering. Regular maintenance will also help to maintain the integrity of the painted surface over time.
Remember that removing paint from cinder blocks can be a difficult and time-consuming process, so it is best to take extra care during preparation and painting to avoid any mistakes. With these tips and tricks in mind, anyone can achieve a professional-looking paint job on their cinder block surfaces.
As a professional painter or home improvement expert, it’s essential to prioritize proper preparation before embarking on any project. As the old saying goes, “measure twice, cut once.” This applies not only to measuring surfaces but also taking care to clean and fill any imperfections before painting. By investing time in preparation, homeowners can achieve beautiful results that stand up against time and weathering. Remember that sealing after painting will add an extra layer of protection against moisture damage. By following these steps, you’ll be well on your way to creating a stunning finish for your cinder block surfaces.
Image Credits
- “Texture – Yellow painted wall cinder blocks” by Andrew Beeston (featured)

