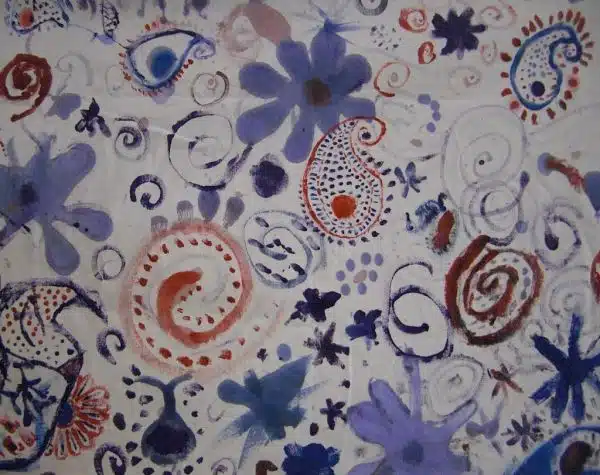
The art of painting on fabric has been around for centuries and is a versatile medium for creating unique designs, patterns, and color combinations. Textile painting can be used to enhance clothing, home décor items, and even accessories such as bags or scarves. The process of fabric painting involves applying color to the fibers of the material, which can create a variety of effects depending on the type of paint used and the application technique.
For those who are interested in exploring this art form, there are several techniques that can be employed to achieve beautiful results. From dyeing to printing to hand-painting, each method requires different materials and skills. In this article, we will delve into the basics of painting on fabric, including what materials you need, how to prepare your fabric for painting, and some popular techniques for achieving stunning results. Whether you are a beginner or an experienced artist looking to expand your repertoire, this guide will provide you with valuable insights into the exciting world of textile painting.
Understanding The Different Types Of Fabric
Understanding fabric composition is essential when it comes to painting on fabric. In general, there are two types of fabrics: natural and synthetic. Natural fibers come from plants or animals and include cotton, linen, wool, silk, and leather. Synthetic fibers are human-made and include nylon, polyester, rayon, and spandex. Each type of fabric has its own unique characteristics that determine how well it accepts paint.
Identifying fabric blends is also crucial in determining the correct paint to use. A blend is a mixture of different fibers that create a new fabric with unique properties. Polyester/cotton blends are the most common type of blend used for clothing, while cotton/polyester blends are often used for home décor fabrics. Knowing the composition of your fabric will help you choose the right type of paint that will adhere properly.
When it comes to textile painting, understanding these basics can make all the difference in achieving a successful outcome. By identifying the type of fabric you’re working with and its composition, you can choose the right paint for your project with confidence. In the next section, we’ll explore how to choose the right paint for your specific needs based on your desired outcome and fabric type.
Choosing The Right Paint For Your Fabric
Understanding the Different Types of Fabric is crucial when it comes to painting on fabric. The type of fabric you choose can affect the outcome of your painting. Natural fabrics like cotton, silk, and linen work best with textile paint while synthetic fabrics like nylon, polyester, and rayon may require a different approach. Understanding the properties of each fabric will help you decide the type of paint to use.
When it comes to choosing the right paint for your fabric, there are two main options: acrylic vs. fabric paint. Acrylic paints are versatile and can be used on various surfaces including fabric. However, they tend to stiffen the fabric and make it less flexible. On the other hand, textile or fabric paints are specifically designed for use on fabrics and do not affect the texture or flexibility of the material.
Tips for painting on delicate fabrics include using a light hand when applying paint to avoid saturating the fibers too much. Additionally, avoid using harsh chemicals during washing as this could cause fading or damage to the painted area. Lastly, always test your chosen paint on a small section of fabric before committing to painting an entire garment or piece.
Next up is preparing your fabric for painting. It’s essential to ensure that your fabric is clean and free from any residue before starting to paint. This ensures that your paint adheres well and doesn’t bleed or fade over time.
Preparing Your Fabric For Painting
Before you begin painting fabric, it is essential to prepare it adequately. Proper preparation ensures that the paint adheres well to the fabric and does not fade or wash out easily. The first step in preparing your fabric for painting is pre-washing it. This process removes any sizing or chemicals that may be present in the fabric, which can interfere with the paint’s ability to adhere properly.
After pre-washing your fabric, it is crucial to use a fabric medium. A fabric medium is a type of solution that mixes with acrylic paint to make it more flexible and durable. Without a fabric medium, the paint can become stiff and crack when dried, leading to an unsightly appearance. Using a fabric medium also helps the paint bond better with the fibers of the fabric, ensuring that it lasts longer.
In summary, preparing your fabric for painting involves two critical steps: pre-washing and using a fabric medium. These steps ensure that your painted design adheres properly to the fabric and lasts longer without fading or cracking. Once you have completed these steps, you can move on to deciding on a design for your textile project.
Deciding On A Design
After preparing your fabric, the next step in painting it is to decide on a design. This can be a daunting task for some, but with a few tips and tricks, it can become an enjoyable experience. One essential factor to consider when selecting a design is the color palette choices you want to incorporate into your fabric.
Color palette choices play a critical role in textile painting as they set the tone for the entire project. The colors you choose should be well thought out and blend well together. Consider using colors that complement each other or create contrast for visual interest. As an expert in textile painting, I recommend incorporating personal style into your color choices by using colors that speak to you and make you feel happy and inspired.
Once you have decided on your color palette, it’s time to sketch out your design. This can be done using pencil and paper or digitally on a tablet or computer program. As an audience that has a subconscious desire for serving others, it’s important to remember that your design should be something that brings joy and happiness to whoever will use or wear the finished product. Sketching allows you to experiment with different designs until you find one that speaks to you.
Incorporating personal style into your textile paintings is an essential aspect of creating unique pieces of art. Color palette choices are crucial in setting the tone for your project, while sketching allows you to experiment with different designs until you find one that resonates with you. In the next section, we will delve deeper into sketching your design without writing ‘step’.
Sketching Your Design
The first step in painting fabric is to develop your creativity and come up with a design that speaks to you. This can be a daunting task for some, but it is important to remember that the process of creating art is all about expressing yourself. You can start by gathering inspiration from different sources such as nature, fashion, or even other artists. Once you have an idea in mind, grab a sketchbook and start drawing rough sketches. Don’t worry about making mistakes; this stage is all about exploring different options until you find a design that resonates with you.
Once you have a rough sketch of your design, it’s time to enhance your artistic skills and refine your work. Take your time to go over the details of the sketch and make any necessary adjustments. You may want to experiment with different colors or textures to see what works best for your design. Remember, this is just the beginning stage of fabric painting, so don’t put too much pressure on yourself to create perfection at this point.
Developing creativity and enhancing artistic skills are crucial steps in fabric painting. It allows you to express yourself through art while also improving your craft. By taking the time to sketch out your designs and refining them until they’re perfect, you’re setting yourself up for success when it comes time to paint on fabric. In the next section, we’ll discuss how to transfer your design onto fabric seamlessly without losing any of its originality or detail.
Transferring Your Design Onto Fabric
Imagine you have a beautiful design that you want to transfer onto fabric. There are several ways to do this, but one of the most popular is using heat transfer. Heat transfer involves printing your design onto a special paper that can be ironed onto fabric. This method works well for designs with lots of detail and multiple colors.
Another option for transferring your design is free hand painting techniques. This method allows for more creativity and flexibility in terms of design and color choices. It also gives a more unique and handmade feel to the final product. To use this technique, start by sketching out your design on paper and then carefully paint it onto the fabric using textile paints.
Once you have transferred your design onto the fabric, you may want to create textures and patterns to add depth and interest to your piece. There are many techniques you can use to achieve different textures, such as stenciling, stamping, or even using household items like sponges or bubble wrap. Experiment with different tools and techniques until you find one that works best for your project. With a little practice and patience, you can create a truly unique textile masterpiece!
Creating Textures And Patterns
After transferring your design onto fabric, the next step is to create unique textures and patterns. The beauty of fabric painting lies in the freedom it gives to explore color combinations and create one-of-a-kind designs. There are various techniques that can be used to achieve different textures and patterns.
One technique for creating texture is using salt. This involves sprinkling salt onto wet paint, which creates a crystallized effect when it dries. Another way to add texture is by using wax or resist medium to create a barrier between layers of paint. When the wax or resist is removed, it reveals an interesting pattern that contrasts with the surrounding areas.
When exploring color combinations, it’s important to consider the overall aesthetic of your design as well as the emotions you want it to evoke. Complementary colors can create a bold impact, while analogous colors create a harmonious blend. Don’t be afraid to experiment with different shades and hues until you find the perfect combination for your project.
Using stencils for consistency in your designs is an effective way to ensure that each piece has a uniform look. Stencils come in various shapes and sizes, allowing you to easily replicate patterns or motifs multiple times. They can also be used as a guide for freehand painting, giving you more control over the final outcome of your design.
Using Stencils For Consistency
Picture this: you are a chef preparing to cook your signature dish. You have all the ingredients and the recipe, but you lack consistency in cutting the vegetables. Some are diced while others are chopped, making for an inconsistent taste and texture. The same goes for using stencils when painting fabric; placement is key to achieving a consistent design.
Before beginning, make sure your stencil is clean and free of any debris that could affect its adhesive properties. Place the stencil on the fabric with care and precision, ensuring it is level and straight. Once in place, secure it with tape or pins to prevent any movement during painting.
Maintaining your stencil during use is also important for achieving consistency. After each use, clean the stencil thoroughly to remove any excess paint that may have seeped through or accumulated on its surface. This will ensure that subsequent uses do not produce unwanted marks or smudges on your fabric.
Now that you have mastered stencil placement and maintenance, it’s time to move onto the next step: painting with a brush. With these techniques under your belt, you can achieve a consistent design every time you paint fabric using stencils as your guide.
Painting With A Brush
When painting fabric, using a brush can be a great technique to achieve a variety of effects. To begin, choose the right brush for your project. A flat brush is ideal for larger areas and creating smooth lines while a round brush is better for detail work or creating texture. Additionally, consider the type of paint you are using and select a brush that will work well with it.
When applying paint with a brush, there are several techniques you can use to achieve different effects. One technique is to blend colors together on the fabric by overlapping wet paint with another color. This creates a beautiful gradient effect that adds depth and interest to your piece. Another technique is to dry-brush, which involves barely dipping your brush in the paint and dragging it lightly over the surface of the fabric. This creates a subtle texture that can mimic natural fibers like linen or canvas.
To ensure success when painting with a brush, take your time and work in small sections. Start by applying light layers of paint and gradually build up to achieve your desired opacity. Remember to always clean your brushes thoroughly between colors and after use to prevent them from becoming stiff or damaged. By taking care in selecting your materials, practicing various painting techniques, and working methodically, you can create beautiful textile paintings that will last for years.
Moving onto another popular method of painting fabric: spray painting!
Spray Painting Fabric
Spray painting fabric can be a fun and creative way to add some color and personality to your textiles. It is an easy process that allows for a lot of creativity, but it can also be tricky to get right. To achieve the best results, it is important to use the right materials and follow some basic tips.
Tips for Even Coverage: When spray painting fabric, it is important to use even strokes and maintain a consistent distance from the surface. Start by spraying lightly and gradually build up the coverage until you achieve the desired look. Avoiding Over Saturation: It’s crucial to avoid over-saturating the fabric with paint as this can cause drips or streaks that will ruin the finished product. To prevent this problem, make sure you allow each layer of paint to dry thoroughly before applying another coat.
Table:
| Materials Needed |
|---|
| Fabric |
| Spray Paint |
| Drop Cloth |
As you can see in the table above, there are only three materials needed for spray painting fabric. This makes it an affordable option for anyone looking to add some flair to their textiles. With these tips and materials, you’ll be able to create beautiful and unique designs on your fabrics in no time.
Transition into Dyeing Your Fabric: While spray painting is a simple way to add color to your fabrics, dyeing them can offer more versatile options in terms of colors and patterns. In the next section, we’ll discuss how you can dye your fabric using different methods and techniques. By learning both methods, you’ll have more options when deciding how best to transform your textiles into works of art.
Dyeing Your Fabric
- There are many types of dye that can be used to paint fabric. Depending on the desired outcome and the fabric type, some dyes may be more suitable than others.
- Before dyeing fabric, it is important to prepare it by pre-washing the fabric to remove any natural oils and dirt that may interfere with the dyeing process.
- Furthermore, fabric should be dampened before dyeing to ensure an even application of color and to help the dye penetrate the fabric.
- Finally, it is important to use the appropriate fixative for the chosen dye to ensure the color is permanent and does not fade over time.
Types Of Dyes
As a textile painting expert, I believe that understanding the different types of dyes is crucial to achieving the desired results when dyeing your fabric. Natural and synthetic dyes are two main categories of dyes. Natural dyes come from plant, animal, and mineral sources, while synthetic dyes are chemically derived. Both have their pros and cons.
Natural dyes offer a wide range of colors and shades that can’t be achieved with synthetic dyes. They’re eco-friendly, non-toxic, and biodegradable. However, they’re often more expensive than synthetic dyes and require more time to prepare. Synthetic dyes are readily available and cost-effective. They also provide consistent color results, making them a popular choice for large-scale production. But they’re not eco-friendly and may contain harmful chemicals.
Different dyeing techniques offer unique benefits depending on the fabric type and desired outcome. Tie-dyeing creates vibrant patterns using rubber bands or string to restrict the flow of dye into certain areas. Batik involves applying hot wax to create designs before dyeing the fabric. Dip-dyeing allows for ombre effects by gradually submerging the fabric into increasingly deeper levels of dye. Each technique has its advantages but requires careful consideration of the fabric type, as some fabrics may not absorb dye evenly or at all.
Understanding the pros and cons of natural vs. synthetic dyes and different dyeing techniques will help you achieve beautiful results when painting your fabric while keeping in mind your desire for serving others who want to learn this craft too!
Preparing Fabric For Dyeing
To achieve the best results when dyeing your fabric, it is essential to prepare it properly. Preparing your fabric for dyeing involves removing any dirt, oil, or sizing that may interfere with the dye’s absorption. The first step in preparing your fabric is to wash it thoroughly using a mild detergent and warm water. This will remove any dirt or oil that may be on the fabric. For fabrics that are heavily soiled, you may need to soak them in warm water and detergent for several hours.
Once the fabric is clean, you’ll need to decide on the best dyeing technique for your fabric type. Different fabrics absorb dyes differently, and some require special treatment before dyeing. For example, cotton and linen fabrics require a mordant solution to help them absorb natural dyes better. On the other hand, silk and wool fabrics are more delicate and require gentle handling during preparation.
After selecting the appropriate dyeing technique for your fabric type, it’s time to start preparing it for dyeing. If you’re using a tie-dye or batik technique, you’ll need to stretch or iron your fabric to prevent wrinkles or creases from interfering with the design. For dip-dyeing techniques, it’s important to ensure that your fabric is evenly wetted before immersing it in the dye solution. Proper preparation of your fabric is crucial for achieving consistent color results while keeping in mind others who want to learn this craft too!
Printing On Fabric
Fabric printing techniques have become increasingly popular in recent years, allowing individuals to create unique and personalized designs on their clothing, home decor, and accessories. While there are many professional fabric printing services available, DIY fabric printing materials make it possible for anyone to try their hand at creating custom prints at home.
One of the most common fabric printing techniques is screen printing. This involves using a stencil or mesh screen to transfer ink onto the fabric surface. Another popular method is digital printing, which uses specialized printers and software to apply ink onto the fabric directly. Heat transfer printing is another option that involves transferring an image from a printed paper onto the fabric using heat.
When it comes to choosing DIY fabric printing materials, there are many options available depending on the chosen technique. For screen printing, one will need a mesh screen, squeegee, ink, and a design stencil. Digital printing requires specialized printers and software as well as compatible inks and fabrics. Heat transfer printing requires transfer paper and a heat press machine.
With so many options available for fabric printing techniques and DIY fabric printing materials, individuals can easily experiment with different methods to find what works best for them. However, if you prefer a more hands-on approach to creating your own custom fabrics beyond just prints or patterns then consider hand-painting your fabric.
Hand-Painting Your Fabric
Now that you have learned how to print on fabric, it’s time to explore techniques for hand-painting your fabric. This technique allows you to create unique designs and patterns that cannot be achieved with printing. Hand-painting your fabric also gives you the freedom to add details and accents that can make your work stand out.
Before starting, make sure you have the right supplies. Fabric paint is the most suitable type of paint for this technique as it adheres well and will not wash off easily. You will also need a soft brush or sponge, stencils (optional), masking tape, and a palette for mixing colors.
Tips and tricks for hand-painting your fabric include working on a flat surface to avoid any dripping or smudging of paint. Use light strokes when painting to avoid bleeding through the fabric. It’s also essential to let each layer of paint dry thoroughly before adding another layer or color.
Incorporate these tips into your hand-painting technique, experiment with different colors and textures, and take advantage of stencils or masking tape to add unique shapes and lines. Once you’ve mastered these techniques, it’s time to move onto adding details and accents that will bring out the full potential of your design.
Adding Details And Accents
To truly make your fabric painting stand out, adding details and accents is crucial. This step will give your piece depth and character. One effective way to do this is by incorporating shading techniques. Shading can be used to create the illusion of three-dimensionality on a two-dimensional surface. It can also help to define the contours of the shapes you have painted.
Another technique that can be used to add details and accents is blending. Blending involves mixing colors together in a subtle manner. This technique allows you to create more nuanced color variations that are not possible with flat colors alone. To achieve this effect, start with two colors that are similar in tone and blend them together by overlapping them or using a dry brush.
Remember that when adding details and accents, less is often more. It’s easy to get carried away with adding too many elements, which can clutter your design and detract from its overall impact. By using shading and blending techniques sparingly, you can create subtle yet effective visual interest throughout your painting.
Moving forward, it’s important to consider how you will care for your painted fabric once it’s complete. Proper care will ensure that your piece lasts for years to come without fading or deteriorating. In the next section, we’ll explore some best practices for caring for painted fabrics so that you can continue to enjoy your work well into the future.
Caring For Your Painted Fabric
After adding details and accents to your painted fabric, it is important to know how to care for it properly. One of the most common concerns when painting fabric is whether or not the design will last through multiple washings. Fortunately, there are several tips that can help extend the longevity of your painted fabric designs.
First and foremost, make sure you choose a high-quality fabric paint that is specifically designed for use on textiles. These paints are typically formulated to withstand washing and drying without fading or cracking. Additionally, pay close attention to the manufacturer’s instructions for washing and drying your painted fabrics. Some types of fabric paint may require special care, such as air-drying instead of using a clothes dryer.
Another tip for laundering painted fabrics is to avoid using harsh detergents or bleach. These can break down the paint over time and cause it to fade or peel away from the fabric. Instead, opt for a mild detergent that is gentle on both fabrics and colors. If you need to brighten up your painted designs, consider using a color-safe bleach alternative or vinegar in your wash water.
Taking proper care of your painted fabric will not only help ensure its longevity but also keep it looking vibrant and beautiful for years to come. By following these simple tips for washing and drying painted fabrics, you can enjoy your hand-painted creations with confidence knowing they will continue to look their best even after numerous uses and washings.
Conclusion
Understanding the various types of fabric, choosing the appropriate paint, and preparing the fabric for painting are crucial steps in creating a beautiful textile piece. Once these initial steps are taken, it is important to decide on a design and sketch it out before printing or hand-painting your fabric. Adding details and accents can enhance your artwork significantly.
Caring for your painted fabric is also essential to maintain its quality over time. Washing the fabric in cold water with mild detergent and avoiding bleach or harsh detergents will ensure longevity. Using a warm iron on the reverse side of the painted area can help set the paint.
In conclusion, textile painting requires patience, skill, and careful attention to detail. Understanding each step of the process is critical for producing a high-quality finished product that matches your vision. By following these guidelines and techniques, you can create stunning works of art on fabric that will be cherished for years to come.
Image Credits
- “Fabric painting” by maureencrosbie (featured)

