Popcorn ceilings were popular in the 1970s and 1980s to hide imperfections on the ceiling’s surface. However, as time has passed, these textured ceilings have lost their charm and become outdated. Painting a popcorn ceiling can be a daunting task due to the texture, which has a tendency to create a mess during the process. In this article, we will provide you with tips and tricks on how to paint your popcorn ceiling without making a mess.
Painting a popcorn ceiling requires careful preparation, patience, and attention to detail. It is essential to choose the right type of paint and tools for the job. Moreover, it is crucial to take certain precautions to prevent any mishaps or accidents that may occur during the process. Our step-by-step guide will help you navigate through each stage of painting your popcorn ceiling while minimizing any potential mess or damage that may occur. By following our expert tips, you will achieve a professional-looking finish that will add value and beauty to your home without creating unnecessary stress or chaos.
Preparing Your Space
Before painting a popcorn ceiling, it is essential to prepare your space properly. This step is crucial in ensuring that you do not make a mess while painting. Clearing clutter from the room will give you ample space to move around and prevent any obstacles that may hinder the painting process. Move all furniture and objects out of the room if possible or cover them with drop cloths.
Setting up tarps is another important step in preparing your space. Covering the floor with tarps will protect it from splatters and drips that may occur during painting. Ensure that the tarps cover every inch of the floor, including corners, to avoid paint stains on your flooring. Additionally, if you are going to paint walls as well, use painter’s tape to secure plastic sheeting along the wall edges.
To ensure that your popcorn ceiling painting project runs smoothly without making a mess, preparation is key. Clearing clutter and setting up tarps will create an ideal workspace for you to paint comfortably without worrying about damaging other items in the room. In the next section, we will discuss how gathering the right tools and materials can help you achieve a professional finish on your popcorn ceiling.
Gathering The Right Tools And Materials
To successfully paint a popcorn ceiling, it is essential to have the right tools and materials. The first step is to gather all of the necessary items before beginning the project. Shopping for these items can be done either online or in-store. Many home improvement stores carry everything needed for this type of project, such as paint rollers, drop cloths, and painters’ tape.
When deciding whether to do the project yourself or hire a professional, there are several factors to consider. DIY projects can save money but require more time and effort. On the other hand, hiring a professional may cost more but provides peace of mind knowing that the job will be done correctly. It is important to assess your skill level and available time before making a decision.
Where to shop for painting tools and materials can depend on personal preference and location. Online shopping offers convenience and access to a wider range of products, while in-store shopping allows you to physically inspect the items before purchasing them. Regardless of where you shop, make sure to compare prices and read reviews before making any purchases.
Choosing The Right Paint
Selecting the right paint is crucial in achieving a flawless finish when painting your popcorn ceiling. The paint finish and color you choose will determine not only the aesthetic appeal of your ceiling but also its durability, coverage, and resistance to wear and tear. Think of choosing the right paint as selecting a pair of shoes for a particular occasion. Just like shoes, different types of paint have specific purposes.
To make an informed decision when choosing a paint finish, consider the room’s lighting conditions and purpose. For instance, if you’re painting a bedroom with low natural light, go for satin or eggshell finishes that reflect light better than matte finishes. If you’re painting high-traffic areas such as hallways or kitchens where moisture is prevalent, opt for semi-gloss or gloss finishes that are easy to clean and maintain. Similarly, select a color that complements your décor and personal style. You can consult with professional painters or use online tools to match colors accurately.
Here are some tips to help you choose the right paint:
- Consider the room’s lighting conditions and purpose.
- Choose a finish based on durability requirements.
- Select colors that complement your décor.
- Use samples to test how the color looks under different lighting conditions.
In summary, selecting the right paint for your popcorn ceiling involves considering both form and function. Pay attention to aspects such as paint finish and color that not only complement your décor but also enhance durability, coverage, resistance to wear and tear while reflecting light appropriately. In our next section, we’ll discuss how to protect your floors and furniture during the painting process without compromising on quality or efficiency.
Protecting Your Floors And Furniture
- When painting a popcorn ceiling, it is essential to cover the floor and furniture to protect them from paint splatter.
- Drop cloths are a great way to cover floors and should be placed around the perimeter of the area to be painted, overlapping in the center.
- Furniture should be moved out of the room or covered with a plastic sheeting to protect it from paint splatter.
- All areas should be dusted and wiped down with a damp cloth to remove any dust particles that may interfere with the painting process.
- Masking tape should be used to cover any baseboards, door trim, or light fixtures to protect them from any paint that may get on them.
- All of these preparation steps will help to ensure that the painting process is easier and more efficient, as well as helping to keep your floors and furniture protected from paint splatter.
Covering Floors
When it comes to painting a popcorn ceiling, one of the most essential steps is to protect your floors and furniture. Floor coverings play a crucial role in preventing paint spills and splatters from damaging your belongings. As a professional painting expert, I recommend using drop cloths or plastic sheeting to cover the entire floor area. This provides an effective barrier between the paint and your flooring, ensuring that any accidental drips are caught by the protective layer.
It is also important to consider clean up methods when preparing to paint a popcorn ceiling. Even with the use of floor coverings, there is still a chance that some paint may make its way onto your floors or furniture. To avoid any permanent damage, be sure to have clean up supplies readily available, such as paper towels or rags and cleaning solution. In addition, it is a good idea to periodically check underneath the floor coverings for any paint that may have seeped through.
Overall, taking the time to properly protect your floors and furniture will save you from potential headaches down the road. By using appropriate floor coverings and implementing efficient clean up methods, you can ensure that your living space remains neat and tidy throughout the entire painting process. So before you begin painting your popcorn ceiling, be sure to take these necessary precautions.
Covering Furniture
Another important aspect of protecting your living space during the popcorn ceiling painting process is taking measures to safeguard your furniture. As a professional painting expert, I recommend starting with choosing furniture that is easy to move, lightweight and simple in design. This will make it easier for you to clear space and move around without worrying about damaging any items.
Clearing space is crucial because it helps ensure that paint does not accidentally splatter on any of your furniture. Be sure to move all decor away from the walls and cover them with drop cloths or plastic sheeting. Not only does this protect your belongings from unwanted paint drips, but it also allows for an unobstructed view of the ceiling for a more thorough job.
When it comes to protecting upholstery, using plastic sheeting or old bed sheets can be a cost-efficient solution. These materials can be draped over larger pieces of furniture, such as couches and chairs, preventing any accidental paint spills from ruining the fabric. By following these tips and tricks for protecting your floors and furniture while painting a popcorn ceiling, you can complete the project with confidence knowing that every precaution has been taken.
Cleanup Preparation
Now that we have discussed the importance of protecting your floors and furniture during popcorn ceiling painting, let’s move on to another crucial aspect: cleanup preparation. As a professional painting expert, I recommend taking measures to ensure that the cleanup process is as efficient and effective as possible.
One essential step is selecting the right drop cloths for your space. Drop cloths are an excellent way to protect your floors from paint drips and spills. They come in various materials such as canvas, paper, or plastic sheets, and it’s important to choose one that fits your needs. Canvas drop cloths are durable and reusable, while paper or plastic sheets are more affordable but may require frequent replacements.
Another key factor in cleanup preparation is dust control measures. During popcorn ceiling removal or painting, dust can easily spread throughout your home and settle on surfaces such as furniture or carpets. To minimize this issue, it’s crucial to cover any exposed items with plastic sheeting or old bed sheets. Additionally, using a vacuum cleaner with a HEPA filter can help capture any airborne particles before they settle on surfaces.
By following these recommendations for cleanup preparation alongside floor and furniture protection methods during popcorn ceiling painting, you can ensure a smooth and stress-free process from start to finish. Remember that taking these precautions will not only protect your belongings but also lead to a more professional-looking final result.
Covering Your Walls
To ensure that your popcorn ceiling painting project goes smoothly, it is essential to protect not just your floors and furniture but also your walls. Wall coverings such as wallpaper or paneling can be difficult to remove if they get painted over accidentally, so it’s best to take precautions beforehand. Apply painter’s tape around the edges of any wall coverings or trim, ensuring that the tape adheres firmly without leaving any gaps.
Once you’ve protected your walls, you can move on to covering them with a base coat or primer. A base coat will help seal and prep the surface for paint, resulting in a smoother finish. You can use a roller or sprayer to apply the base coat evenly across the walls. Remember to work in sections and avoid overlapping strokes to prevent streaks and blotches from forming.
If you’re planning on removing the popcorn texture from your ceiling before painting it, keep in mind that this process can be messy and time-consuming. DIY techniques such as scraping or sanding should only be done with caution, as they may release harmful asbestos fibers into the air. Alternatively, there are creative alternatives such as using joint compound or textured paint to mimic the look of popcorn texture without actually having to remove it.
Patching any imperfections on your walls is an important step towards achieving a flawless finish. Small dents or holes can be filled with spackle and sanded down until smooth before painting. If you have larger holes or cracks in your walls, consider using mesh tape or a patch kit for added reinforcement. With these tips in mind, you’ll be well on your way to completing a successful popcorn ceiling painting project!
Patching Any Imperfections
Repairing cracks in a popcorn ceiling requires special attention and materials in order to ensure a smooth finish.
Filling holes in a popcorn ceiling is a task that should not be taken lightly, as an even application of the filler is essential in order to achieve an aesthetically pleasing result.
Smoothing texture in a popcorn ceiling is best accomplished by creating a thin, even layer of compound over the entire surface.
Care must be taken when applying any materials to a popcorn ceiling in order to avoid large puddles of filler or compound that may cause a messy finish.
When painting a popcorn ceiling, it is important to use a primer before applying the paint in order to prevent any imperfections from showing through.
Taking the time to patch any imperfections in a popcorn ceiling before painting will ensure a flawless finish.
Repairing Cracks
To achieve a smooth and polished look in painting a popcorn ceiling, it is crucial to patch any imperfections beforehand. One of the most common issues with popcorn ceilings is cracking, which can be caused by various factors such as settling or humidity changes. Therefore, repairing cracks should be a top priority before painting.
The first step in repairing cracks is to clean the area thoroughly. Use a vacuum or a soft-bristled brush to remove any loose debris or popcorn texture around the crack. Next, apply spackling compound using an appropriate tool such as a putty knife. Ensure that the compound is evenly spread and allow it to dry completely before sanding it lightly.
To prevent future cracks from appearing, consider addressing the underlying causes. For instance, if the cracking is due to settling, reinforce the ceiling joists with additional screws or braces. If humidity changes are causing the issue, use a dehumidifier or improve ventilation in the room. By taking these preventive measures, you can avoid having to repair cracks frequently and maintain a flawless popcorn ceiling for years to come.
In summary, repairing cracks in a popcorn ceiling requires proper spackling techniques and preventive measures to ensure long-lasting results. By addressing any imperfections before painting and taking steps to prevent future issues from arising, you can achieve a professional-looking finish without making a mess or encountering headaches down the road.
Filling Holes
After repairing any cracks in a popcorn ceiling, it’s time to tackle another common issue: holes. Holes can be caused by various factors such as hanging fixtures or accidentally hitting the ceiling with a sharp object. To achieve a smooth and polished look, it is essential to fill these holes before painting. Using proper spackling techniques and sanding tips can help ensure that the filling is seamless and unnoticeable.
To begin filling small holes, use a putty knife to apply spackling compound over the area. For larger holes, consider using a patch or mesh tape first to reinforce the area before applying the compound. Ensure that the compound is evenly spread and allow it to dry completely before sanding it lightly with fine-grit sandpaper. Repeat this process until the hole is fully filled and level with the surrounding surface.
It’s important to note that filling large or numerous holes may require multiple coats of spackling compound, which will prolong drying time. Therefore, it’s best to plan ahead and allocate enough time for this step in your painting project. By taking care in filling any imperfections, you can achieve a flawless finish that will enhance the overall appearance of your popcorn ceiling.
Smoothing Texture
After patching any holes and cracks in a popcorn ceiling, the next step is to smooth out any texture inconsistencies. This is especially important if you plan on painting the ceiling, as uneven textures can make the paint job look unprofessional. Techniques for smoothing texture will vary depending on the type of texture your ceiling has, but there are general steps that can be taken to achieve a smoother finish.
One popular ceiling texture style is known as knockdown. To smooth out this type of texture, it’s recommended that you use a drywall sander with a fine-grit sandpaper. It’s important to sand lightly and evenly over the entire surface until it’s all level. Another technique for smoothing knockdown texture involves using a skim coat of joint compound over the entire ceiling. This requires more time and effort, but it can result in an even smoother finish.
Another popular texture style is known as orange peel. To smooth out this type of texture, consider using a spray-on drywall texture repair kit or skim coating with joint compound like with knockdown texture. Regardless of which technique you choose, it’s important to take your time and ensure that the surface is completely smooth before proceeding with painting or any other finishing touches.
In conclusion, smoothing out any imperfections in your popcorn ceiling can be achieved with proper techniques and patience. Whether you have knockdown or orange peel textured ceilings, there are various methods available to create a flawless finish. Taking care in this step will pay off in the end by providing an aesthetically pleasing look that enhances the overall appearance of your home or space.
Sanding Your Ceiling
If you have a popcorn ceiling, sanding it is an essential step in preparing it for painting. Sanding will help to smooth out any rough or bumpy areas and provide a better surface for the primer and paint to adhere to. However, sanding a popcorn ceiling can be tricky, so it’s important to use the right techniques and avoid common mistakes.
One of the most common mistakes people make when sanding a popcorn ceiling is using too much pressure on the sandpaper. This can cause the texture to come off in chunks, leaving large divots in the ceiling. To prevent this from happening, use a light touch when sanding and let the sandpaper do the work.
Another mistake people make is not using the right type of sandpaper. A fine-grit sandpaper is best for smoothing out a popcorn ceiling without damaging the texture. Start with 120-grit sandpaper and work your way up to 220-grit if necessary.
To ensure that your sanding efforts are successful, follow these best techniques:
- Wear protective gear such as goggles and a dust mask
- Use a pole sander or an electric sander with a vacuum attachment to minimize dust
- Sand in one direction only, either horizontally or vertically
- Use long strokes and avoid going over the same area too many times
Now that you’ve sanded your popcorn ceiling using proper techniques, it’s time to move on to applying primer. By following these guidelines, you’ll create a smooth surface that will look great once painted.
Applying Primer
Applying primer is an essential step in painting a popcorn ceiling. It helps to create an even surface for the paint to adhere to and provides better coverage. Before applying primer, make sure that the ceiling is clean and free of any debris. Use a broom or vacuum cleaner to remove dust and cobwebs.
Tips for even coverage include using a roller with a thick nap, which will help spread the primer evenly across the popcorn texture. Start at one end of the room and work your way towards the other side, making sure to overlap each section slightly with the previous one. Keep a wet edge by rolling in long strokes without stopping. This will prevent lap marks from appearing on the ceiling.
Troubleshooting common issues during priming can save you time and money in the long run. If you notice that the primer is not adhering properly or is peeling off, it could be due to moisture or grease on the ceiling. In this case, clean the area thoroughly before reapplying primer. If you have applied too much primer, wait for it to dry completely before sanding it down lightly with fine-grit sandpaper. This will create a smooth surface for painting.
Transition: Now that you have successfully primed your popcorn ceiling, it’s time to move onto cutting in with paint to achieve a professional finish.
Cutting In With Paint
Now that the primer has been applied to the popcorn ceiling, it is time to move on to the next step in painting without making a mess. The next section topic is cutting in with paint. This step requires precision and control, as it involves painting along the edges of the ceiling and walls where they meet.
To ensure that the cut-in lines are clean and crisp, it is important to use the proper technique and tools. Types of brushes commonly used for this step include angled sash brushes, which have bristles that are tapered at an angle, or flat brushes, which have straight bristles. It is recommended to select a brush size that matches the size of your project area.
When using a brush for cutting in, hold it like a pencil and use short strokes to apply paint along the edge of the ceiling/wall joint. Work slowly and carefully in small sections at a time, ensuring that you do not overload your brush with too much paint. Always start from where there isn’t any paint and work towards previously painted areas.
Moving forward into using a roller for the main surface of your popcorn ceiling will require focus on technique as well as adequate tools for reaching high areas without making a mess.
Using A Roller For The Main Surface
Did you know that using a roller for painting a popcorn ceiling can be 10 times faster than using a paintbrush? This method is not only efficient but also prevents the mess that usually comes with painting this type of ceiling. Before starting, make sure to wear protective gear such as goggles, gloves, and a mask to avoid inhaling particles from the popcorn texture.
When it comes to rolling technique, it’s essential to use a thick-nap roller cover, preferably one inch or more. The thicker the nap, the better it can hold enough paint and reach all nooks and crannies of the textured surface. Start by pouring paint into your roller pan and dip your roller in it. Roll back and forth on the ridges of the tray until you have an even coat of paint on the roller cover. When applying paint to the popcorn ceiling, use long strokes in one direction rather than random patterns. Avoid pressing too hard on the surface as it may cause damage or create drips.
Using an extension pole can come in handy for reaching high spots without having to climb up and down a ladder repeatedly. You can attach an extension pole to your roller handle through its threaded end for easy access. With this tool, you’ll achieve even coverage without straining your arms or neck muscles. When painting near walls or corners where rollers may not fit, use a brush to cut-in before rolling over with your thick-nap roller cover.
Transitioning into applying additional coats, remember that patience is key when it comes to painting popcorn ceilings. It’s crucial not to rush into adding another layer before letting the previous coat dry completely. Doing so will only result in uneven finish and may require more time and effort to fix later on. In the next section, we’ll discuss how many coats are needed for optimal coverage and how long they should be left untouched before proceeding with further application.
Applying Additional Coats
Tips and Techniques for Applying Additional Coats
When painting a popcorn ceiling, it is important to apply multiple coats of paint to achieve the desired finish. To avoid making a mess, it is recommended to use a high-quality roller with a long nap. This type of roller can hold more paint and will help you apply an even coat without splattering or dripping. Additionally, start by cutting in around the edges of the ceiling with a brush before using the roller. This will help you paint the ceiling more efficiently.
As you apply additional coats of paint to your popcorn ceiling, keep in mind that thinner coats are better than thicker ones. Thicker coats can lead to drips and uneven coverage, which can be difficult to correct later on. Therefore, focus on applying several thin coats rather than one thick one. You should also let each coat dry completely before applying the next one. This may take several hours or even overnight, depending on the type of paint and the conditions in your home.
One technique that can help you achieve better coverage when applying additional coats is called cross-rolling. Essentially, this involves rolling your roller over an area in different directions (e.g., north-south and then east-west) to ensure complete coverage. It is also important to maintain a consistent pressure when rolling and to avoid pushing too hard or too lightly. With these tips and techniques in mind, you should be able to achieve a smooth and even finish on your popcorn ceiling.
As you finish up with your final coat of paint, it’s important not to forget about cleaning up your tools properly. Neglecting this step can result in damaged brushes or rollers that won’t last as long as they should. Before putting away your tools, rinse them thoroughly with water or solvent (depending on the type of paint you used). Make sure all excess paint has been removed from the bristles or nap before drying them off completely with a clean cloth or paper towel. By following these steps, you can ensure that your painting tools are ready to use again the next time you need them.
Cleaning Up Your Tools
After applying additional coats to your popcorn ceiling, it is essential to clean up your tools properly. This step is crucial in maintaining the longevity of your painting tools and ensuring that they work correctly for future projects. Cleaning techniques vary based on the type of tool you used, so make sure to read the manufacturer’s instructions carefully.
For brushes and rollers, use warm water and soap to remove excess paint. Rinse them thoroughly, and then dry them with a clean cloth or paper towel. For more stubborn stains or dried paint, consider using a specialized cleaner or solvent recommended by the manufacturer. Always store your tools in a cool, dry place out of direct sunlight to prevent damage.
Maintenance tips are essential for keeping your tools in working order between projects. Before using any tool again, inspect it thoroughly for signs of wear and tear. Replace any damaged or worn parts immediately to prevent further damage or injury during use. Additionally, regular cleaning after each use will help maintain their quality and extend their lifespan.
Inspecting your work is crucial after completing any painting project. Take a step back and look at your popcorn ceiling from different angles and lighting conditions to ensure that you achieved the desired result. If there are any imperfections or missed spots, touch them up immediately before allowing the paint to dry fully. With these cleaning techniques and maintenance tips in mind, you can be confident that your painting tools will last for years to come while achieving professional-quality results every time.
Inspecting Your Work
The inspecting technique is crucial when it comes to painting a popcorn ceiling. Inspecting the work allows you to identify areas that need touch-ups or additional coats of paint. It also helps in ensuring that you have covered all areas evenly, which is essential for a smooth and uniform finish. When inspecting your work, it’s best to use natural light as artificial lighting can sometimes be deceptive.
One of the common mistakes that many people make when painting popcorn ceilings is not taking their time to inspect their work. Rushing through the process can lead to missed spots, uneven coverage, and other flaws that will be visible once the paint dries. Therefore, it’s essential to take your time during the inspection process and carefully examine every inch of the ceiling.
Another mistake is assuming that one coat of paint will be enough for a perfect finish. In most cases, two coats are necessary for full coverage on popcorn ceilings. The first coat acts as a base layer while the second coat evens out any inconsistencies and provides a smoother finish. By taking your time and applying two coats correctly, you’ll achieve an even finish without any mess or damage.
Moving forward, let’s explore some tips for avoiding mess and damage while painting a popcorn ceiling.
Tips For Avoiding Mess And Damage
After inspecting your work, it’s time to move onto the next step of painting a popcorn ceiling – pre painting preparation. This is an essential part of the process as it sets the foundation for a successful paint job. To minimize mess and maximize results, there are a few things you can do before starting to paint. Firstly, make sure to cover all furniture and floors with drop cloths or plastic sheeting to protect them from any potential paint splatters. Secondly, use painter’s tape or masking tape to cover any fixtures or edges that you don’t want to be painted. Lastly, wear protective gear such as goggles and a mask to prevent any paint particles from entering your eyes or lungs.
Once you’ve completed the pre painting preparation, it’s time for the actual painting process. To ensure minimal mess during this stage, use an extension pole with a roller brush to reach high areas of the ceiling without having to climb up on a ladder. Additionally, start by using a small amount of paint on your roller brush and gradually build up coverage as needed. This will help prevent excess paint from dripping or splattering onto surrounding surfaces. Remember to take breaks if necessary and check your work regularly for any missed spots.
Finally, after completing the painting process, it’s important to focus on post painting cleanup. This involves removing all drop cloths and tape carefully so as not to damage any surfaces underneath. Dispose of any used materials properly and wipe down all surfaces that may have come into contact with paint using a damp cloth. By following these steps for both pre painting preparation and post painting cleanup, you can achieve professional-looking results while minimizing mess and avoiding damage.
In conclusion, painting a popcorn ceiling doesn’t have to be messy or difficult if you take the proper precautions before beginning the process. With careful pre-painting preparation such as covering furniture and floors with drop cloths or plastic sheeting and wearing protective gear like goggles and masks, you can minimize mess and maximize results. Additionally, using an extension pole with a roller brush and starting with a small amount of paint will help prevent excess paint from dripping or splattering onto surrounding surfaces. Finally, post painting cleanup involves removing all drop cloths and tape carefully, disposing of used materials properly, and wiping down all surfaces that may have come into contact with paint using a damp cloth. With these final thoughts and inspiration, you can successfully complete the task of painting a popcorn ceiling without making a mess.
Final Thoughts And Inspiration
Painting a popcorn ceiling may seem like an impossible task, but with the right techniques and tools, it can be done without making a mess. As a painting expert, I have seen countless homeowners struggle with this task, often resulting in paint drips and splatters all over their furniture and floors. However, fear not! With some careful planning and execution, you too can achieve a clean and beautiful finish on your popcorn ceiling.
When it comes to choosing color schemes for your popcorn ceiling, there are a few things to keep in mind. First and foremost, consider the overall style of your home. If you have a more traditional or classic aesthetic, neutral colors like white or beige will work best. For those with a more modern or eclectic taste, bolder colors like navy or emerald green can add a pop of personality to the room. Additionally, don’t be afraid to experiment with different DIY techniques such as stenciling or adding texture for a truly unique look.
As you embark on your popcorn ceiling painting journey, remember to take your time and approach the job with patience and care. Use high-quality rollers and brushes to ensure even coverage and minimize drips. And always cover any nearby furniture or flooring with plastic sheets or drop cloths to prevent any accidental spills or splatters. With these tips in mind, you’ll soon have a beautifully painted popcorn ceiling that adds character and charm to your home.
Conclusion
Popcorn ceilings can be a challenge to paint without making a mess, but with the right tools and materials, it can be done with ease. Preparation is key to avoiding a messy situation. Covering your floors and furniture with plastic sheets will protect them from any drips or spills. Use painter’s tape to cover walls and trim that you don’t want to get paint on.
Choosing the right paint is also essential for success. Use a paint designed specifically for popcorn ceilings, as they tend to be thicker and will cling better to the textured surface. Once you’ve finished painting, be sure to clean your tools thoroughly to avoid any leftover paint drying on them.
Finally, inspect your work carefully before removing any protective coverings. Look for areas that may need touch-ups or where the texture of the ceiling has been affected by the addition of new paint. With these tips in mind, painting a popcorn ceiling can be an enjoyable project that doesn’t require professional help.
In conclusion, painting a popcorn ceiling can seem daunting at first but it doesn’t have to be messy or difficult with these simple steps. Preparing your space properly, gathering the right tools and materials, choosing the correct type of paint, protecting your surfaces and cleaning up after yourself are all crucial elements in achieving success. Remember to inspect your work carefully before removing any protective coverings and enjoy the satisfaction of completing this DIY project on your own!
Image Credits
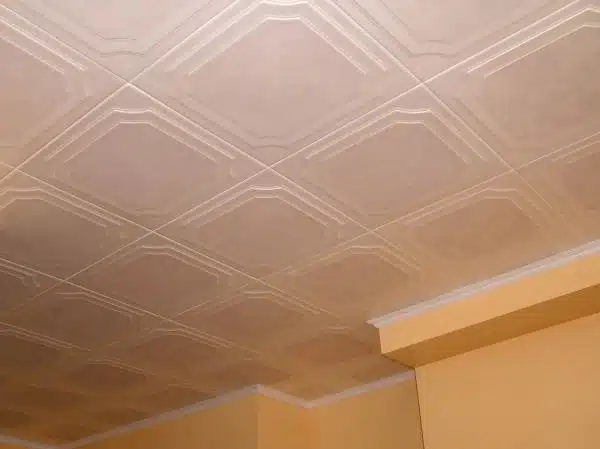
- “Covered popcorn ceiling – Marble Beige Polystyrene ceiling tiles” by Talissa Decor Ceilings (featured)

