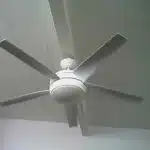
Ceiling fans are a great addition to any household as they help circulate air and keep the room cool. However, over time, these fans can accumulate dust, dirt and other debris which can affect their performance and appearance. Cleaning your ceiling fan is essential in maintaining its functionality and prolonging its lifespan.
In this article, we will guide you through a few easy steps on how to clean your ceiling fan effectively. We will provide you with tips on the best tools to use and the safest way to handle them. Whether it’s a dusty bedroom or a kitchen covered in grease, we’ve got you covered with our comprehensive guide on how to clean a ceiling fan in no time. So sit back, grab your cleaning supplies and let’s get started!
Importance Of Regular Ceiling Fan Maintenance
Ceiling fans are an essential part of our homes, providing comfort and air circulation. However, they can also be a source of dust and allergens if not maintained properly. Regular ceiling fan maintenance is crucial not only for the longevity of the fan but also for energy savings and air quality.
Cleaning your ceiling fan on a regular basis is an effective way to reduce allergens in your home. Dust accumulation on the blades can worsen allergies and respiratory problems, especially for those with asthma or other breathing issues. By regularly dusting off the blades, you can remove these particles from circulating in your home’s air, leading to improved indoor air quality.
Regular cleaning of ceiling fans can also prolong their lifespan. Dust buildup on the blades can cause them to become unbalanced, which puts additional stress on the motor and bearings. Over time, this can lead to premature wear and tear on the fan’s components, shortening its lifespan. Therefore, by maintaining your ceiling fan regularly, you will extend its lifespan while keeping it working efficiently.
As important as regular cleaning is, it is equally crucial that you take precautions when cleaning your ceiling fan. Before starting any cleaning process on your ceiling fan, ensure that you turn off power at both the wall switch and at the breaker box to avoid electrocution. Additionally, before climbing up a ladder to access hard-to-reach areas of the fan or light fixtures attached to it ensure that they are stable and secure enough for use without tipping over or falling off accidentally.
Safety Precautions To Take Before Cleaning
Regular maintenance of your ceiling fan is crucial for its longevity and efficient performance. But before you start cleaning, it’s essential to take some safety precautions. Ceiling fans can be located in high places, and the importance of height cannot be overstated. So, use a ladder or step stool that is stable and secure to reach the fan safely.
When it comes to cleaning agents, avoid using harsh chemicals as they may damage the motor or blades. Instead, opt for mild detergents mixed with warm water to clean the blades gently. Avoid applying too much pressure while cleaning as it may bend or warp the blades. Also, make sure that the cleaning solution doesn’t drip inside the motor housing.
Another thing to keep in mind is choosing the right cleaning tools for your ceiling fan. A soft-bristled brush or microfiber cloth is ideal for wiping off dust and grime from blades without leaving scratches behind. You can also use a vacuum cleaner with an attachment designed explicitly for cleaning ceiling fans. By following these simple yet effective tips, you can keep your ceiling fan looking brand new and ensure its smooth functioning all year round!
Choosing The Right Cleaning Tools
When choosing the right cloth to clean a ceiling fan, it is important to select one that is soft and lint-free. It is also important to identify a cleaning agent that will not damage the fan, such as a mild soap or a specialized cleaning product. A ladder should also be chosen that is tall enough to reach the fan, while also being safe and stable. Additionally, it is important to select a ladder with a wide base and an attached stability bar. Finally, when selecting a ladder, it is important to check for any safety labels or certifications.
Choosing The Right Cloth
When it comes to cleaning ceiling fans, choosing the right cloth is just as important as selecting the appropriate cleaning technique. The wrong type of cloth can leave behind lint or scratches on your fan blades and motor, while the right one can make the process quick and easy. As a home cleaning expert, I recommend using a microfiber cloth for this task.
Microfiber cloths are made of synthetic materials that trap dust and dirt particles instead of spreading them around. They are also gentle enough not to scratch surfaces, making them perfect for cleaning fan blades without damaging them. To ensure that your microfiber cloth is clean before use, wash it in warm water with mild detergent and let it air dry.
Avoid using cotton or paper towels as they tend to leave behind fibers that can clog your fan’s motor or spread dust around. A damp cloth would also work well in removing dust but be careful not to saturate it too much as water droplets could drip onto the floor or furniture underneath the fan. By choosing the right cloth for cleaning your ceiling fan, you’ll be able to keep your space clean and comfortable with ease.
Identifying Cleaning Agents
When it comes to cleaning, choosing the right tools is essential for achieving optimal results. However, selecting the right cleaning agent is equally important. With so many cleaning agent alternatives available on the market, identifying the right one can seem overwhelming. As a home cleaning expert, I recommend using eco-friendly cleaning options that are safe for both your family and the environment.
Firstly, consider using vinegar as an alternative to harsh chemicals when cleaning various surfaces in your home. This natural cleaning agent is effective against dirt and grime while being gentle on surfaces such as countertops and floors. Additionally, it’s a cost-effective option that won’t break the bank.
Another eco-friendly alternative you might want to consider is baking soda. It’s a versatile cleaner that can be used in various ways such as removing stains and deodorizing carpets. When combined with vinegar or lemon juice, it forms a potent solution that can remove stubborn stains without damaging surfaces.
By identifying eco-friendly cleaning agents that work best for your specific needs, you’ll not only keep your home clean but also play a part in protecting the environment. Making small changes to your cleaning routine can make a significant impact in reducing waste and preserving our planet for future generations.
Selecting A Ladder
When it comes to cleaning, choosing the right tools is crucial for achieving optimal results. However, many people overlook one of the most important tools in their cleaning arsenal: a ladder. Choosing the right ladder can ensure that you can access hard-to-reach areas safely and efficiently. When selecting a ladder, consider the height you need to reach and the weight capacity required for your specific task.
Ladder safety should always be a top priority when using this tool in your home cleaning routine. Before using a ladder, ensure that it’s stable and secure on a level surface. Always climb facing the ladder, holding onto both sides with both hands. Avoid leaning too far to one side or overreaching while on the ladder as this can cause it to become unstable.
In conclusion, selecting the right ladder and following proper ladder safety tips are essential steps to take when choosing the right cleaning tools for your home. By doing so, you’ll be able to clean hard-to-reach areas safely and effectively, keeping your home clean and tidy without risking injury or harm.
Step 1: Turn Off The Power
As you begin to clean your ceiling fan, it is crucial to prioritize safety. Before moving forward with any cleaning procedures, it is important to turn off the power source for the fan. This step ensures that you do not accidentally turn on the fan while cleaning it, which can pose a significant risk of injury.
To turn off the power source for your ceiling fan, locate the circuit breaker connected to your fan and switch it off. Alternatively, you can use the wall switch connected to your fan to turn it off. It is essential that you take this step seriously because attempting to clean a ceiling fan while it is turned on can lead to electrocution or other serious injuries.
Aside from turning off the power source, there are other safety measures that you should take when cleaning a ceiling fan. For instance, wearing protective gear such as gloves and eye goggles can prevent dust particles or debris from causing discomfort or harm. Additionally, ensure that you use a sturdy ladder or stool when reaching up to clean the blades of your ceiling fan.
- Remember to always turn off power sources before cleaning
- Locate circuit breaker or wall switch connected to your fan
- Wear protective gear and use sturdy equipment during cleaning
Now that you have turned off the power source and taken necessary safety precautions, it’s time to move on to Step 2: Covering the Area Below The Fan.
Step 2: Cover The Area Below The Fan
Tips and best practices for cleaning a ceiling fan include covering the area below the fan before starting any cleaning. This is important because as you clean, dust and grime may fall from the blades and accumulate on your furniture or flooring. A simple way to cover the area beneath the fan is by using a large drop cloth or old bedsheet.
It’s also crucial to take safety precautions when working with a ceiling fan. Turn off the power source before cleaning and never use water or liquid cleaners directly on the fan. Use a damp cloth to wipe down the blades and motor housing, being careful not to let any water drip onto electrical components. Additionally, wear protective gear such as gloves and goggles to avoid injury.
When it comes to supplies and tools, keep in mind that different methods might require different items. For example, if you’re using a vacuum cleaner with an attachment tool to remove dust from your ceiling fan blades, make sure that it’s suitable for use on delicate surfaces like your ceiling fan blades. Other techniques may require more specialized tools like microfiber cloths or compressed air cans. Always read instructions carefully before using any new products or tools so that you can avoid making mistakes that could damage your ceiling fan.
Transition: With the area covered below the ceiling fan and safety precautions taken into account, it’s now time to move on to step three: removing the blades.
Step 3: Remove The Blades
To properly clean a ceiling fan, it’s important to remove the blades. This will allow you to get into all the nooks and crannies that would otherwise be difficult to reach. Before removing the blades, make sure that the fan is turned off and unplugged.
To remove the blades, you’ll need a screwdriver. Locate the screws on each blade bracket and carefully unscrew them. Once all of the screws are removed, gently pull each blade away from the motor housing.
Blade cleaning techniques vary depending on your preferences and what materials you have available. Some common methods include using a damp cloth with mild soap or vinegar, using a feather duster, or using compressed air to blow away dust and debris. Whatever method you choose, take care not to bend or damage the blades in any way.
- Removing blade brackets can make cleaning easier
- Use caution when handling blades so as not to damage them
- Choose a cleaning technique that works best for your specific fan
- Don’t forget to clean both sides of each blade
- Consider wearing gloves or using a mask if you have allergies or sensitivities
Now that you’ve successfully removed your ceiling fan blades, it’s time to clean them thoroughly. But before we get into that, let’s talk about why it’s important to clean them in the first place. Dust and other particles can accumulate on your fan over time, which can lead to decreased efficiency and even potential health hazards if left unchecked.
Transitioning into step 4: To ensure optimal performance and safety of your ceiling fan, it’s crucial that each blade is cleaned properly.
Step 4: Clean The Blades
With the blades removed, now it’s time to tackle the dirt and dust buildup. Cleaning ceiling fan blades can be a daunting task, but with the right tools and approach, it can be done quickly and easily. Before you start cleaning, you need to decide on which cleaning solution option works best for you.
Cleaning solution options include using warm soapy water or an all-purpose cleaner. If you opt for the latter, make sure to read the instructions carefully before use. DIY blade cleaning hacks also work wonders. For example, mixing baking soda and vinegar creates a powerful cleaning agent that removes stubborn stains. Another hack is using microfiber cloths or old pillowcases as they trap dust particles instead of just moving them around.
Once you have your cleaning solution ready, dip a soft cloth or sponge into it and wipe each blade thoroughly until clean. Be careful not to apply too much pressure as this may damage the blades or their finish. Once complete, dry each blade with a clean towel before reattaching them back onto the motor housing. With step 4 done, we now move onto step 5: Clean the motor housing without getting any excess liquid into it!
Step 5: Clean The Motor Housing
- To prepare to clean the motor housing, all blades should be removed and the power to the fan should be turned off.
- To effectively clean the housing, use a damp cloth and a mild detergent to remove dirt and dust.
- After cleaning the housing, use a dry cloth to remove any remaining residue.
- If necessary, use a vacuum cleaner to remove more stubborn dirt and dust.
- After cleaning the housing, lubricate the motor with a few drops of oil to ensure proper operation.
- Finally, reinstall the blades and turn on the power to the fan to complete the cleaning process.
Prepare To Clean
Before starting to clean the ceiling fan’s motor housing, it is essential to prepare adequately. Gather all the necessary cleaning supplies, such as a ladder or stool to reach the fan safely, a microfiber cloth for dusting, and a vacuum cleaner with an attachment for removing debris. If you opt for DIY cleaning of your ceiling fan, make sure you have ample time to dedicate to the task. A dirty ceiling fan can harbor germs and allergens that may lead to respiratory problems. Therefore, set aside enough time to clean thoroughly.
Time-saving techniques can come in handy when cleaning your ceiling fan’s motor housing. One of these techniques is using a pillowcase instead of a microfiber cloth to dust off the blades. Slip the pillowcase over each blade and wipe it down with gentle pressure from both sides before emptying its contents into your trash can. This technique saves time as it captures all the dust particles without spreading them around your room.
When deciding whether to opt for professional or DIY cleaning of your ceiling fan’s motor housing, consider your budget and convenience carefully. Hiring professionals can be costly but may be necessary if you don’t have adequate knowledge on how best to clean your ceiling fan or if you don’t have enough time on hand. However, if you’re comfortable with DIY cleaning and have enough time on hand, then go ahead and do it yourself! DIY cleaning not only saves money but also gives you control over what products are used in your home.
By following these simple preparation steps before cleaning the motor housing of your ceiling fan, you can save time and ensure optimal results. Remember always to prioritize safety when working at height and use appropriate equipment such as gloves or goggles where necessary. A well-maintained ceiling fan will not only keep your space comfortable but also improve indoor air quality by circulating fresh air without distributing unwanted dust throughout your home!
Clean The Housing
Now that you have prepared adequately, it is time to focus on the motor housing of your ceiling fan. Cleaning the housing is an essential step in maintaining the overall performance and lifespan of your fan. Over time, dust and dirt can accumulate inside the housing, leading to poor airflow and increased energy consumption. Therefore, it is crucial to clean the motor housing regularly.
To begin cleaning the housing, turn off the power supply to your ceiling fan. Next, remove the fan blades carefully using a screwdriver or other appropriate tools. Set them aside in a safe place. Once you have access to the motor housing, use a microfiber cloth or vacuum cleaner with an attachment to remove any loose debris and dust from inside. You can also use DIY cleaning hacks such as mixing water and vinegar or dish soap to create cleaning solutions that effectively remove stubborn stains.
After removing all visible dirt and debris, use a damp cloth or sponge to wipe down the interior surfaces of the motor housing thoroughly. Be sure not to get any electrical components wet during this process. If you encounter any tough stains that won’t come off with regular cleaning solutions, consider using specialized cleaners designed for ceiling fans’ motor housings. Once everything is clean and dry, reattach the fan blades securely and turn on your ceiling fan’s power supply.
By taking these steps to clean your ceiling fan’s motor housing regularly, you can ensure optimal performance while improving indoor air quality in your home. A well-maintained ceiling fan circulates fresh air throughout your space without spreading unwanted dust or allergens around. So take some time today to give your ceiling fan some TLC!
Lubricate The Motor
After cleaning the motor housing of your ceiling fan, it is important to lubricate the motor. Lubricating the motor can significantly improve its performance and extend its lifespan. When the motor is not lubricated, it can become noisy, overheat quickly, and even stop working altogether. Therefore, it is essential to make sure that you lubricate your ceiling fan’s motor regularly.
Before you start lubricating the motor, make sure to turn off the power supply to your ceiling fan. Next, remove the fan blades carefully using a screwdriver or other appropriate tools. Once you have access to the motor, use a soft brush or cloth to remove any dust or debris that may have accumulated on its surface. This will ensure that the oil penetrates deep into all moving parts of the motor.
Now that you have cleaned and prepared the motor for lubrication, it’s time to choose a suitable lubricant. The best lubricants for ceiling fans are silicone-based or Teflon-based oils because they are non-conductive and do not attract dust. Apply a few drops of oil to each bearing on both ends of the shaft and let it soak in for a few minutes before turning on your ceiling fan’s power supply again. By following these simple steps regularly, you can enjoy quiet and efficient operation from your ceiling fan while ensuring optimal performance and extending its lifespan.
Step 6: Clean The Fan Mounting
Once you have cleaned the blades of your ceiling fan, it is important to give its mounting some attention as well. Fan mounting maintenance helps ensure that your fan is secure and stable, which is important for both safety reasons and optimal performance. Moreover, cleaning hard-to-reach areas like the fan mounting can prevent dust buildup and prolong the life of your fan.
To clean the fan mounting, start by turning off the power to the fan at the circuit breaker or fuse box. Then, remove any screws or bolts that hold the mounting bracket in place. Lower the bracket carefully so that you can reach all parts of it easily. Using a soft-bristled brush or a vacuum cleaner attachment, gently remove any dust or debris from the bracket’s surface, paying special attention to corners and crevices.
Next, wipe down the bracket with a damp cloth or sponge dipped in mild soap solution. Rinse with clean water and dry thoroughly with a clean towel. Be careful not to get water on any electrical components of the fan while cleaning. Finally, reattach the bracket securely using screws or bolts and turn on power to test that everything is working correctly.
- Use a ladder or step stool to reach high ceilings safely.
- Wear protective gear such as gloves and goggles when cleaning ceiling fans.
- Check for loose screws or damaged parts while cleaning.
- Schedule regular maintenance checks for your ceiling fans with a professional electrician.
With proper cleaning and maintenance, your ceiling fan will continue to provide comfort and energy savings for years to come. Once you have cleaned both blades and mounting bracket thoroughly, move onto step 7: reassemble the fan by following manufacturer’s instructions carefully for best results.
Step 7: Reassemble The Fan
Did you know that a clean ceiling fan can improve indoor air quality and reduce allergies? According to a study conducted by the American College of Allergists, dust accumulation on ceiling fans can cause respiratory problems for people with allergies or asthma. That’s why it’s important to keep your ceiling fan clean.
Now that you have cleaned the blades and motor housing, it’s time to reassemble the fan. Begin by attaching the blades back onto the brackets in their original positions. Make sure each blade is secure and tightened properly. Fan reassembly is an essential step in maintaining your fan’s longevity and efficiency.
Next, check the alignment of the blades. Use a level to ensure that each blade is aligned correctly and adjust accordingly if necessary. Proper blade alignment ensures smooth operation and minimizes noise during use. Refer to the table below for quick tips on fan reassembly and blade alignment.
| Tips for Fan Reassembly | Tips for Blade Alignment |
|---|---|
| Tighten screws securely | Check angle of each blade |
| Use a screwdriver for better grip | Adjust if necessary |
| Double-check all connections before turning on | Use a level for accuracy |
| Follow manufacturer’s instructions carefully | Test run for smooth operation |
With your fan successfully reassembled, it’s time to move onto cleaning hard-to-reach ceiling fans. Don’t worry; we’ve got you covered with some helpful tips coming up next!
Tips For Cleaning Hard-To-Reach Ceiling Fans
Cleaning a ceiling fan can be a tedious task, especially when it comes to hard-to-reach areas. However, with the right tools and techniques, it can be done in no time. Here are some tips for cleaning hard-to-reach ceiling fans that will make the process easier and more efficient.
Firstly, invest in a good quality ceiling fan duster. This tool is designed to reach high places and remove dust from the blades without leaving any streaks or scratches. It usually comes with an extendable handle that can be adjusted to the height of your ceiling fan. Using a duster also eliminates the need for a step ladder, which can be dangerous.
Secondly, create your own DIY cleaning solution by mixing equal parts of water and vinegar in a spray bottle. Vinegar is known for its disinfecting properties and will help to remove stubborn stains and odors from your ceiling fan blades. Simply spray the solution onto the blades and wipe them down with a microfiber cloth.
Thirdly, use a vacuum cleaner attachment to remove any loose dust or debris from the surrounding area before cleaning your ceiling fan. This will prevent any dirt from falling onto your furniture or flooring while you clean.
Here are some additional tips for making cleaning your ceiling fan easier:
- Use a pillowcase to cover each blade before wiping it down. This prevents dust from falling onto the floor or furniture.
- Wear safety goggles to protect your eyes from debris.
- Clean your ceiling fan once every three months to maintain good indoor air quality.
- Turn off power supply of the fan before starting cleaning work.
By following these tips, you’ll be able to clean hard-to-reach ceiling fans quickly and efficiently without putting yourself at risk of injury or damaging your property. In our next section, we will discuss common mistakes people make when cleaning their ceiling fans and how to avoid them for optimal results.
Common Mistakes To Avoid When Cleaning A Ceiling Fan
When cleaning a ceiling fan, it is important to use the right tools, such as a soft cloth or duster, in order to properly remove dust and debris from the blades. Failure to do so can result in a layer of dust buildup, which can compromise the fan’s efficiency and longevity. Additionally, some people may overlook the need to clean the blades, resulting in dirt and grime accumulation. Lastly, it is vital to pay attention to any dust or dirt buildup in between the blades and the housing unit, as this can also affect the fan’s performance.
Not Using The Right Tools
Using alternative methods to clean a ceiling fan often results in the common mistake of not using the right tools. This can be detrimental not only to the longevity of your ceiling fan but also to your safety. Avoid using a feather duster or cloth as they tend to push dust and debris around instead of trapping it. Instead, opt for a microfiber duster with an extendable handle that can easily reach high areas without straining yourself or risking injury from standing on unstable surfaces.
Another common mistake to avoid when cleaning a ceiling fan is not taking proper precautions before starting. Always turn off the power supply to your ceiling fan before attempting to clean it thoroughly. This will ensure that you don’t accidentally turn on the fan while cleaning, which could lead to accidents and injuries. Additionally, place a drop cloth or old towel on the floor beneath the fan to catch any falling dust and debris.
Finally, not cleaning your ceiling fan regularly is another mistake that most people make. Ceiling fans collect large amounts of dust and dirt over time which can lead to allergies and other respiratory problems if left unattended for too long. It’s advisable to clean your fan at least once every two months or more frequently if you live in an area with high humidity or have pets in your home. By following these simple steps and avoiding these common mistakes, you can keep your ceiling fan running smoothly for years while maintaining indoor air quality in your home.
Ignoring Dust Buildup
Now that we’ve discussed the common mistakes of not using the right tools and not taking proper precautions when cleaning a ceiling fan, let’s move on to another mistake: ignoring dust buildup. Neglecting to clean your ceiling fan regularly can lead to a significant amount of dust and dirt accumulating on the blades, which can cause health hazards such as allergies. This is because these particles can be released into the air as the fan circulates, making it difficult to breathe in the room.
To prevent allergies and other respiratory problems, it’s crucial to regularly clean your ceiling fan. Dust buildup also affects the performance of your ceiling fan by weighing down its blades and causing them to become unbalanced, which can lead to unnecessary wear and tear on the motor. This can reduce its lifespan significantly, leading to costly repairs or replacements.
In conclusion, it’s essential to take regular care of your ceiling fan by cleaning it at least once every two months or more frequently if you live in an area with high humidity or have pets in your home. By avoiding these common mistakes and maintaining your ceiling fan properly, you’ll ensure that it operates efficiently while maintaining excellent indoor air quality in your home.
How Often Should You Clean Your Ceiling Fan?
Have you ever looked up at your ceiling fan and noticed a thick layer of dust on the blades? Cleaning your ceiling fan may not be at the top of your cleaning to-do list, but it’s important to keep it clean for both aesthetic and health reasons. A dirty ceiling fan can spread dust and allergens throughout the room, leading to respiratory issues.
The frequency of cleaning your ceiling fan depends on how often you use it. If you use it frequently, it’s recommended to clean the fan every three months. However, if you don’t use it as much, cleaning it once or twice a year should suffice. Signs that indicate a dirty fan include visible dust accumulation on the blades, an unusual noise when turned on, or wobbling when in operation.
Don’t wait until your ceiling fan is visibly dirty before cleaning it. Regularly cleaning your ceiling fan ensures that the air quality in your home remains healthy and reduces the amount of dust present in the room. In addition to avoiding respiratory issues, a clean ceiling fan improves its efficiency by allowing air to circulate more freely throughout the room. So make sure to add “cleaning my ceiling fan” to your home maintenance routine!
Benefits Of A Clean Ceiling Fan
- Regularly cleaning your ceiling fan can result in improved air circulation in your home.
- By removing excess dust and debris from the blades of your ceiling fan, you can reduce the amount of allergens in your air.
- Keeping your ceiling fan clean can also help reduce energy costs by allowing the fan to run more efficiently.
- It is important to use the correct tools and products when cleaning your ceiling fan, as incorrect cleaning materials can damage the fan blades.
- For best results, it is recommended to clean your ceiling fan every few months to ensure optimal air circulation and energy efficiency.
- Cleaning a ceiling fan is relatively simple, and can be done in just a few easy steps.
Improved Air Circulation
Improved air circulation is one of the key benefits of having a clean ceiling fan. Not only does it improve the overall comfort level in your home, but it also helps to promote better health by removing dust and other airborne particles from the air. By improving sleep with ceiling fan, you can enjoy a more restful night’s sleep as well as reduce symptoms associated with allergies and asthma.
Better air circulation provided by a clean ceiling fan promotes good health in several ways. Firstly, it helps to remove stale air and odors from your home while circulating fresh, clean air throughout. This can help to reduce the risk of respiratory illnesses and improve overall lung function. Secondly, it keeps the air moving which reduces humidity levels in your home, which can help prevent mold growth and reduce the risk of respiratory infections that thrive in damp conditions.
In conclusion, a clean ceiling fan offers numerous benefits to homeowners who are looking for ways to improve their indoor environment. By promoting improved air circulation through effective cleaning practices, you can enjoy better sleep quality while reducing the risk of respiratory illness and other health issues associated with poor indoor air quality. So why not give your ceiling fan a thorough cleaning today?
Reduced Dust And Allergens
Reduced dust and allergens are other benefits of having a clean ceiling fan. Over time, dirt and dust can accumulate on the blades of your ceiling fan, which can create a breeding ground for allergens like pollen and pet dander. This can cause respiratory issues and allergies, especially for those who are sensitive to airborne particles.
By cleaning your ceiling fan regularly, you can significantly reduce indoor pollutants like dust, pet hair, and other airborne allergens. A clean ceiling fan helps to keep your home’s air cleaner, which is essential for people with allergies or asthma. It also helps to reduce the risk of respiratory infections by keeping the air free from bacteria and other harmful microorganisms.
In conclusion, a clean ceiling fan is an essential aspect of maintaining a healthy indoor environment. Not only does it promote better sleep quality by improving air circulation, but it also helps to reduce allergies and dust in your home. So make sure to include cleaning your ceiling fan as part of your regular home cleaning routine – your lungs will thank you!
Energy Efficiency
Energy efficiency is another benefit of having a clean ceiling fan. With energy-saving techniques becoming increasingly popular, it’s important to note that a dirty ceiling fan can lead to higher energy bills. When dust and debris build up on the blades, it can cause the fan to work harder than necessary, leading to increased energy consumption and higher electricity bills. By keeping your ceiling fan clean, you can ensure that it runs efficiently and helps you save money in the long run.
Proper ventilation is also essential for maintaining an energy-efficient home. A clean ceiling fan plays an important role in this by improving air circulation throughout the room. This helps to distribute cool or warm air evenly, reducing the need for excess heating or cooling systems. As a result, you can save even more on your energy bills while keeping your home comfortable all year round.
In addition to saving money on your electricity bill, an energy-efficient home also has a positive impact on the environment by reducing carbon emissions. By incorporating proper ventilation and regularly cleaning your ceiling fan into your home cleaning routine, you are not only benefiting yourself but also contributing towards a healthier planet.
Conclusion: Enjoy A Clean And Efficient Ceiling Fan
Maintaining a clean and efficient ceiling fan is essential to ensure that it functions optimally. Regular cleaning of the fan can also help prevent the accumulation of dust and other debris, which can cause health problems for individuals with allergies or respiratory issues. Fortunately, cleaning your ceiling fan is not a daunting task, and anyone can do it.
If you prefer DIY cleaning solutions, there are several options available to clean your ceiling fan. You can use a mixture of water and vinegar or mild dish soap to wipe down the blades and motor housing. Alternatively, you can use a microfiber cloth or brush attachment on your vacuum cleaner to remove any dust and dirt from the blades. Be sure to turn off the power supply before cleaning the fan, and avoid using harsh chemicals that may damage the blades.
Hiring professional cleaners is another option if you don’t have time or are unsure how to clean your ceiling fan properly. Professional cleaners have specialized tools and equipment that can get rid of tough dirt and grime on your fan’s blades without damaging them. They also know how to handle electrical components safely when cleaning the motor housing. Ultimately, whether you choose to clean your ceiling fan yourself or hire professional cleaners will depend on your preferences, budget, and time constraints.
Conclusion
Regular maintenance of your ceiling fan is essential for its longevity and efficiency. Neglecting it can lead to dust accumulation, which can cause allergies and respiratory problems. However, cleaning a ceiling fan can be a daunting task, especially if you don’t know where to start. In this article, we have provided easy steps to clean your ceiling fan effectively.
Before cleaning your ceiling fan, ensure that you take safety precautions such as turning off the power and covering the area below the fan. Choose the right cleaning tools such as a ladder, microfiber cloth or vacuum cleaner. Avoid common mistakes such as using water or harsh chemicals that can damage the motor.
Cleaning your ceiling fan once every three months is recommended for optimal performance. A clean ceiling fan not only reduces allergens but also saves energy by improving airflow efficiency. By following these simple steps, you can enjoy a clean and efficient ceiling fan in no time.
In conclusion, taking care of your home appliances is crucial for their functionality and durability. Cleaning your ceiling fan regularly will not only improve its performance but also contribute to a healthier living environment in your home. Remember to stay safe while cleaning and avoid common mistakes that could potentially damage your appliance. Using imagery in our writing helps us create vivid pictures in our audience’s minds, thereby making it more enjoyable to read.
Image Credits
- “Ceiling Fan” by jeffk (featured)

