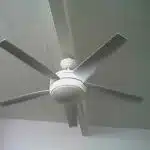
As a ceiling fan repair technician, I have seen my fair share of wobbly fans. A wobbling ceiling fan not only looks unsightly but can also be a safety hazard if left unattended. Fortunately, fixing a wobbly ceiling fan is a relatively simple process that does not require any specialized tools or skills.
In this article, we will explore the common causes of wobbly ceiling fans and provide step-by-step instructions on how to fix them. Whether you are a homeowner looking to save money on repairs or a handyman wanting to expand your knowledge, this guide will equip you with the necessary information to tackle any wobbling fan issue. So grab your tools and let’s get started!
Common Causes Of Wobbly Ceiling Fans
Ceiling fans are a common addition to homes for their functionality and aesthetic appeal. However, wobbly ceiling fans can be a nuisance and even pose safety risks if not addressed properly. Common causes of wobbly ceiling fans include improper installation and lack of proper fan maintenance.
Ceiling fan installation is crucial in ensuring that the fan operates smoothly without any wobbling. Improper installation, such as an uneven mounting or incorrect blade alignment, can cause the fan to vibrate and shake during operation. It is important to follow manufacturer instructions carefully during installation to avoid any potential issues.
Proper fan maintenance is also essential in preventing wobbling. Over time, dust and debris can accumulate on the blades, causing an imbalance that leads to shaking during operation. Regular cleaning of the blades with a soft cloth can prevent this buildup and ensure that the fan runs smoothly. Checking for loose screws or bolts on the motor housing or downrod can also prevent wobbling caused by loose connections.
It is important to note that addressing a wobbly ceiling fan should always be done with caution. Before attempting any repairs, it is crucial to take safety precautions such as turning off power to the fan at the circuit breaker and using a sturdy ladder or scaffold when accessing the fan. By understanding common causes of wobbly ceiling fans and taking proper safety measures, homeowners can effectively address this issue and enjoy a properly functioning ceiling fan once again.
Safety Precautions Before Fixing Your Ceiling Fan
Before you start fixing your wobbly ceiling fan, there are some safety precautions that you should follow to ensure your well-being. First, always wear goggles when working on the fan to protect your eyes from falling debris or dust. Second, turn off the power supply at the circuit breaker before touching any electrical component of the fan. This will prevent electrocution and other accidents that may occur due to live wires.
Aside from safety precautions, you should also consider doing some maintenance work on your ceiling fan. Regular cleaning of the fan blades is essential in preventing dust buildup that can affect its balance and performance. Use a soft cloth or duster to remove dirt and grime from each blade surface. Additionally, inspecting electrical connections can help identify any loose wires or damaged parts that may lead to a malfunctioning fan.
By following these tips, you can ensure a safer environment for yourself while working on your ceiling fan. Always prioritize safety over speed when it comes to fixing things around your home. In the next section, we will discuss the tools you will need to fix your wobbly ceiling fan and how to use them effectively.
Tools You Will Need
Like a surgeon with a scalpel, the ceiling fan repair technician must have the right tools to fix a wobbly ceiling fan. Without these tools, fixing the problem may take longer than expected or worse, cause additional damage to the fan and even injury to the repairer. That’s why it’s important for any handyman to have these tools ready before starting any job.
Tool maintenance is also critical for any technician. Whether it’s a screwdriver or pliers, keeping them in good condition ensures better performance and longevity. It’s not enough to have them lying around in a toolbox; proper care is necessary to avoid rusting and dullness of blades that can lead to improper function or even accidents while using them.
Safety gear is equally important when repairing a wobbly ceiling fan. Accidents happen even with careful handling of tools, so it’s vital for technicians to use safety goggles, gloves, and even hard hats if necessary. These gears help prevent eye injuries from flying debris and splinters as well as avoid cuts and bruises when working on sharp edges.
With all these tools in place and safety gear worn properly, the next step is checking the fan blades for damage. In this section, we’ll provide you with step-by-step instructions on how to do this quickly and efficiently.
Checking The Fan Blades For Damage
Inspecting blades is an essential step in fixing a wobbly ceiling fan. The reason behind this is that bent, warped, or damaged blades can cause the fan to wobble. Before inspecting the blades, turn off the power supply to avoid any unwanted accidents. Once you have done that, climb up using a ladder and check each blade for signs of damage.
If you find any signs of damage, it is time to replace them. Buying replacement blades is an easy task as they are readily available online or at your local hardware store. Make sure to get blades that match the size and shape of your current fan’s blades. Additionally, ensure that they are made of high-quality materials such as wood or metal to guarantee long-lasting performance.
In conclusion, inspecting the fan blades for damage is crucial in fixing a wobbly ceiling fan. If you notice any signs of damage, purchase replacement blades immediately to ensure proper functioning of your ceiling fan. Once you have replaced the damaged parts with new ones, move on to checking other components such as loose screws and bolts which we will discuss in detail in the subsequent section.
Tightening Loose Screws And Bolts
Fixing a wobbly ceiling fan can be frustrating, but it is an essential task to ensure the safety and comfort of your home. Loose screws and bolts are one of the most common causes of wobbling, and fixing them is relatively easy. Before starting, make sure to turn off the fan’s power source and use a sturdy ladder or step stool to reach the fan safely.
Using a level, check the alignment of the fan blades and ensure that they are all at the same height. Tighten any loose screws or bolts with a screwdriver or wrench while holding the blade in place. It is crucial to tighten all screws and bolts evenly to avoid creating new imbalances. Once you have tightened all screws and bolts, inspect the downrod for any signs of damage or bending.
Adjusting blade pitch can also help balance the blades and prevent future wobbling. To do this, gently bend each blade upward or downward until they are all at equal angles. Lubricating the motor can also improve stability by reducing friction between moving parts. After completing these steps, test for stability by turning on the fan gradually and observing its movement. If persistent wobbling persists after troubleshooting these issues, it may be time to seek professional assistance.
To prevent future wobbling, regular maintenance is necessary. Inspect your ceiling fan every few months for loose screws or bolts and adjust blade pitch as needed. Always follow safety precautions when working on your ceiling fan, such as turning off power sources and using appropriate tools and equipment. In the next section, we will discuss balancing the blades to further enhance your ceiling fan’s performance.
Balancing The Blades
Balancing the Blades:
One of the common reasons for a ceiling fan to wobble is due to unbalanced blades. This can be caused by differences in blade weight or blade angle. To balance the blades, you will need a balancing kit, which is available at most hardware stores.
Start by turning off the power to the fan and removing all light fixtures or fan shades. Then, use a ladder to access each blade and apply the adhesive-backed balancing weights provided in the kit. Place the weight on top of each blade and turn the fan on low speed. Observe if there is still wobbling, then adjust the weights until you achieve balance.
If your ceiling fan doesn’t come with a balancing kit or you don’t want to purchase it, another way to balance your blades is by trial and error method. You can try moving each blade up or down until it spins smoothly without any wobbling. It may take some time, but this method works well if done correctly.
Next step would be adjusting the blade pitch which will help maintain proper airflow while reducing wobbling of your ceiling fan.
Adjusting The Blade Pitch
One of the common causes of a wobbly ceiling fan is improper blade pitch. The blade pitch refers to the angle at which each blade is set in relation to the ceiling. A fan with blades that are not properly pitched will cause a wobbling motion, which can be dangerous if left unchecked. Adjusting the blade pitch is a simple process that can be done by following these steps.
Firstly, turn off the power supply to the ceiling fan before attempting any repairs. Use a ladder or step stool to access the fan blades and locate the screws or bolts that connect each blade to the motor housing. Loosen these screws with a screwdriver and adjust each blade’s pitch until they are level with one another. Finding proper blade balance is crucial in ensuring your fan operates smoothly.
Once you have adjusted each blade’s angle, tighten all screws or bolts securely using a screwdriver or wrench. Turn on your ceiling fan and observe its movement for any signs of wobbling. If it still wobbles, repeat this process until you find the correct pitch for each blade. Once you have achieved proper balance, your ceiling fan should operate smoothly without any wobbling motion.
Now that you have adjusted your ceiling fan’s blade pitch, it is time to inspect the downrod for any issues that may affect its smooth operation. It is important to check this component as it connects the motor housing and blades to the mounting bracket on your ceiling.
Inspecting The Downrod
- The downrod is the metal rod that connects the fan motor to the mounting bracket and can become loose over time.
- To check the downrod for damage, visually inspect it for any bends or signs of corrosion.
- If the downrod is damaged, it should be replaced with a new one of the same length and diameter.
- If the downrod is not damaged, the connections can be tightened by unscrewing the screws at the top and bottom of the downrod.
- When tightening the downrod connections, ensure that the screws are not over-tightened to prevent further damage.
- After tightening the downrod, the fan should be tested by turning it on to ensure that it is securely in place and not wobbling.
Checking The Downrod For Damage
When inspecting a wobbly ceiling fan, it is crucial to start by checking the downrod for damage. The downrod is the metal rod that connects the motor housing to the mounting bracket on the ceiling. This component can become bent or warped over time, leading to an unstable fan. To inspect the downrod, first, turn off the power to the fan and carefully climb up to reach it. Inspect the mounting at both ends of the downrod for any signs of damage or wear, such as cracks or dents.
If you notice any damage to the downrod, it may be necessary to replace it. Replacing a downrod involves removing the old one and installing a new one in its place. It is important to choose a replacement downrod that matches the length and diameter of your current one. Additionally, ensure that you use a high-quality replacement part that is designed for your specific ceiling fan model. If you are unsure about how to replace a damaged downrod, consult with a professional technician.
In conclusion, inspecting the downrod is an essential step when troubleshooting a wobbly ceiling fan. Checking for damage in both mounting points and replacing if necessary can help stabilize your fan and prevent further issues from arising. Remember always turn off power before attempting any repairs or inspections on your ceiling fan.
Replacing The Downrod
When inspecting a wobbly ceiling fan, one of the crucial components to check is the downrod. As a ceiling fan repair technician, I recommend turning off the power and carefully climbing up to inspect the mounting at both ends of the downrod for any signs of damage or wear. If there is any damage present, such as cracks or dents, replacing the downrod may be necessary.
Choosing the right downrod is essential when it comes to replacing damaged ones. It is important to choose a replacement that matches the length and diameter of your current one. Additionally, make sure to use a high-quality replacement part that is designed for your specific ceiling fan model. Using an incorrectly sized downrod can result in further instability and damage.
Installing a longer downrod may also help stabilize your ceiling fan if you have high ceilings. A longer downrod helps bring the fan closer to ground level, reducing its tendency to wobble while in motion. However, it is important to ensure that you are using a compatible and correctly sized longer downrod before installing it. If you are unsure about how to replace or install a new downrod, consult with a professional technician for assistance.
Tightening The Downrod Connections
After inspecting the downrod for any signs of damage, the next step in stabilizing a wobbly ceiling fan is to tighten the downrod connections. Loose connections can cause the downrod to wobble and shift, leading to an unstable fan. As a ceiling fan repair technician, I recommend turning off the power and carefully climbing up to check that all connections between the downrod and mounting hardware are securely tightened.
It is important to ensure that each connection is tightened evenly. Unevenly tightened connections can cause the fan blades to become misaligned, resulting in additional wobbling or noise during operation. If you notice any misalignment while tightening the connections, take the time to adjust the height of each blade using a balancing kit.
Once all connections are securely tightened and blades are aligned properly, turn on power and test your ceiling fan for stability. If issues persist or if you are unsure about how to perform this task safely, consult with a professional technician for assistance. Proper maintenance of your ceiling fan will ensure that it operates efficiently and safely for years to come.
Lubricating The Fan Motor
To lubricate the fan motor, you will need to first turn off the power supply to the ceiling fan. This is important for your safety and to prevent any accidents during the repair process. Next, remove the cover of the ceiling fan motor by unscrewing it with a screwdriver. You should be able to locate the motor easily as it is usually located at the center of the fan.
Once you have access to the motor, use a soft cloth to clean off any dirt or debris that may have accumulated inside it. This step is crucial as any contaminants present can cause friction and hence lead to further damage in your ceiling fan. After cleaning, apply lubricant oil onto the bearings of the motor. Be careful not to overdo it as excess oil can leak out and cause stains on your ceiling.
In some cases, lubricating your fan motor may not solve the wobbling issue. If that is so, you may need to consider replacing your fan motor instead of attempting more repairs. Remember also to clean your fan blades regularly as this can help reduce stress on your ceiling fan by ensuring that it operates smoothly and efficiently.
To ensure that you have done everything possible in fixing your wobbly ceiling fan, you should also check for loose mounting hardware. This is because even after lubricating or replacing parts of your ceiling fan, loose mounting hardware can still cause wobbling issues. To do this, use a ladder or stool and visually inspect all parts of your ceiling fan assembly for loose screws or bolts. Tighten these up carefully using a screwdriver or wrench if necessary before testing out whether your repairs were successful in stopping your wobbly ceiling fan woes!
Checking For Loose Mounting Hardware
To begin checking for loose mounting hardware on your wobbly ceiling fan, it is important to first turn off power to the fixture. This will ensure that no electrical accidents occur during the repair process. Once the power has been turned off, you can begin examining the fan mounting bracket and screws for any signs of looseness.
It is crucial to ensure that the mounting bracket is secured tightly to a level surface before proceeding with any repairs. A level surface will prevent any further instability or wobbling of your ceiling fan. Additionally, using lock washers when tightening screws will provide an extra layer of security and prevent them from loosening over time due to vibration.
By checking for loose mounting hardware and securing the bracket properly, you can eliminate one common cause of a wobbly ceiling fan. If this step does not resolve the issue, it may be necessary to move on to other potential causes such as replacing damaged fan blades.
Replacing Damaged Fan Blades
- To identify a damaged ceiling fan blade, it is necessary to inspect the blade to check for cracks, warping, or other indications of damage.
- In order to properly measure for a replacement fan blade, the length, width, and shape of the blade should be accurately measured.
- When installing new fan blades, it is important to ensure that they are securely attached to the fan motor and balanced correctly.
- Prior to installing a new fan blade, it is important to check that the blade is the correct size and shape for the fan.
- When replacing fan blades, caution must be taken to ensure that all screws, bolts, and other hardware are properly tightened for safety.
- After installing a new fan blade, the fan should be tested to ensure that it is operating correctly and is free from wobbling or other irregularities.
Identifying Damaged Blades
As a ceiling fan repair technician, identifying blade damage is crucial in ensuring that the fan operates safely and efficiently. It is essential to inspect each blade carefully for any signs of wear or damage before attempting to repair them. Some common indicators of blade damage include cracks, chips, warping, and discoloration. If left unattended, these damages can lead to significant problems such as wobbling and decreased airflow.
Once you’ve identified damaged blades, it’s essential to determine whether they require repairing or replacing. In some cases, minor damages like chips or cracks can be repaired with epoxy resin or wood filler. However, if the blades are severely warped or have deep gouges, it may be necessary to replace them entirely. It’s important to note that mismatched blades can cause further issues with the fan’s balance and performance.
If you’re unsure about how to repair or replace your ceiling fan blades safely, it’s best to leave the job to a professional technician. Attempting DIY repairs without proper knowledge and tools can result in injury or further damage to your fan. Remember that regular maintenance and inspections are key in preventing blade damage and prolonging the life of your ceiling fan.
Measuring For Replacements
As a ceiling fan repair technician, measuring for replacements is a crucial step in the process of replacing damaged fan blades. Measuring accuracy is essential to ensure that you purchase the correct size and type of replacement blades for your fan. Taking measurements of the blade length, width, thickness, and hole diameter are necessary to find the right fit.
When it comes to replacement options, there are a few things to consider before making a purchase. Firstly, it’s important to choose blades that match the original design and style of your fan. This ensures that your new blades will blend seamlessly with the existing ones and maintain the overall aesthetics of your room. Secondly, make sure to select blades made from quality materials that will last for years to come.
To accurately measure for replacements, it’s best to refer to your ceiling fan’s owner manual or contact the manufacturer directly. Some manufacturers may have specific guidelines or recommendations for replacement blades that differ from other brands. Professional technicians can also assist you in finding the right replacement blades and ensuring proper installation for optimal performance. By taking accurate measurements and selecting quality replacement blades, you can successfully replace damaged fan blades and restore your ceiling fan’s functionality.
Installing New Blades
After accurately measuring for replacement blades, the next step is installing them properly. Installing new blades can be a straightforward process with the right tools and techniques. Before you begin, ensure that your fan is turned off and that you have all necessary equipment on hand.
When it comes to blade material options, there are several to choose from, including wood, metal, and plastic. Each material has its own unique benefits and drawbacks. Wooden blades are popular for their aesthetic appeal but may require more maintenance than other materials. Metal blades are durable and long-lasting but may be more expensive than other options. Plastic blades are cost-effective and easy to maintain but may not be as aesthetically pleasing as other materials.
For cost-effective blade replacement options, consider purchasing universal replacement blades rather than brand-specific ones. Universal blades typically come in a variety of sizes and styles to fit different types of ceiling fans. They often cost less than brand-specific replacements while still providing quality performance. With proper installation techniques and the right blade material selection, you can successfully replace damaged fan blades without breaking the bank.
Testing The Fan For Stability
Having replaced the damaged fan blades, it is important to ensure that the ceiling fan is stable. Testing methods for stability include using a balancing kit and checking for loose screws or bolts. The importance of stability cannot be overstated, as an unsteady ceiling fan can cause damage to the motor and potentially lead to dangerous situations.
To test for stability, begin by using a balancing kit. This kit typically includes weights that can be attached to the blades to counterbalance any wobbling. It is important to follow the manufacturer’s instructions carefully when using this kit, as improper use can actually make the problem worse. Additionally, check for any loose screws or bolts and tighten them as necessary.
Stability is crucial when it comes to ceiling fans. Not only does it prevent damage to the motor, but it also ensures safety for those in the room. If testing methods do not resolve persistent wobbling, troubleshooting tips may be necessary to pinpoint the root of the problem.
Troubleshooting Tips For Persistent Wobbling
When it comes to troubleshooting a persistently wobbling ceiling fan, there are several tips that can help solve the issue. One of the first things to check is the weight of each fan blade. If one blade is significantly heavier than the others, it can cause an uneven distribution of weight and result in a wobbly fan. To fix this issue, you can try balancing the blades by adding or removing weights as necessary.
Another common cause of a wobbling ceiling fan is an uneven blade pitch. Blade pitch refers to the angle at which each blade is set in relation to the motor housing. If one or more blades have a different pitch than the others, it can create an imbalance that leads to wobbling. To fix this issue, you may need to adjust the angle of each blade using a pitch gauge or other specialized tool.
Finally, if these troubleshooting tips do not resolve your wobbly ceiling fan issues, it may be time to call in a professional repair technician. Attempting to fix more complex issues on your own could lead to further damage or injury if you are not familiar with electrical wiring or other technical aspects of ceiling fan repair. A qualified technician will have the knowledge and experience needed to diagnose and solve any underlying problems causing your ceiling fan to wobble.
When To Call A Professional
While it may be tempting to fix a wobbly ceiling fan on your own, there are situations where calling a professional is the best course of action. One benefit of seeking professional help is that they have extensive experience and knowledge in ceiling fan repair. A technician can quickly diagnose the root cause of the wobble and recommend the appropriate solution.
Another advantage of hiring a professional is that they have access to specialized tools and equipment that may not be readily available to DIY enthusiasts. These tools allow technicians to complete repairs more efficiently and effectively. Attempting to fix a wobbly ceiling fan without proper tools can result in further damage or injury.
Of course, there are also DIY alternatives for fixing a wobbly ceiling fan. However, these solutions may only provide temporary relief and can even exacerbate the problem if not done correctly. When in doubt, it’s always better to seek out professional assistance rather than risk causing more damage or harm.
Transition: While seeking professional help is ideal for immediate fixes, preventing future wobbling issues requires proactive measures that homeowners can take themselves.
Preventing Future Wobbling Issues
While it is important to know when to call a professional for your ceiling fan woes, there are some minor issues that can be easily fixed at home. One such issue is a wobbly ceiling fan, which can be caused by a number of factors such as imbalanced blades or loose screws. While it may seem like a daunting task at first, fixing a wobbly ceiling fan is actually quite manageable with the right tools and knowledge.
To prevent future wobbling issues, it is important to keep up with regular maintenance on your ceiling fan. This includes cleaning the blades regularly to remove any dust or debris buildup that could throw them off balance. Additionally, checking the tightness of all screws and bolts on a regular basis can help ensure that everything stays in place and prevents any potential wobbling from occurring in the first place.
Proper installation is also crucial in preventing wobbling issues down the line. When installing your ceiling fan, be sure to follow all instructions carefully and ensure that all parts are secure and balanced before turning it on. If you’re unsure about how to properly install your fan, don’t hesitate to call in a professional for assistance.
Tips for regular maintenance include:
- Cleaning the blades regularly
- Checking the tightness of all screws and bolts
- Ensuring proper balance during installation
- Lubricating moving parts every few months
- Replacing any worn or damaged parts as soon as possible
By following these tips for regular maintenance and ensuring proper installation, you can prevent future wobbling issues with your ceiling fan. As always, if you encounter any major issues or feel uncomfortable attempting repairs yourself, don’t hesitate to call in a professional for assistance.
Conclusion
Ceiling fans are not only functional but also provide an aesthetic appeal to any room. However, wobbling ceiling fans can be an annoying and even dangerous problem. As a ceiling fan repair technician, I have encountered various causes of wobbling fans such as unbalanced blades, loose screws or bolts, or even bent blade arms. Fortunately, fixing a wobbly ceiling fan is not rocket science and can be done with the right tools and safety precautions.
Before attempting to fix your wobbly ceiling fan, ensure that you turn off the power at the circuit breaker box. Safety should always come first in any electrical repairs. Once you have turned off the power, it’s time to gather your tools such as a ladder, screwdriver set, pliers and a balancing kit. Check the fan blades for damage and tighten any loose screws or bolts. After tightening the screws and bolts, test the fan for stability by turning it on.
If wobbling persists despite tightening all screws and bolts, try troubleshooting tips such as adjusting blade angles or using a balancing kit to balance each blade’s weight distribution. In some cases, persistent wobbling may indicate more severe underlying issues that require professional assistance. By taking preventive measures like regular cleaning maintenance and addressing issues promptly when they arise will prevent future wobbling problems.
In conclusion, fixing a wobbly ceiling fan requires patience and attention to detail while following safety protocols. As a repair technician, my advice is to take immediate action once you notice any signs of instability in your ceiling fan before it causes further damage or safety hazards. With these steps in mind, you can enjoy the cool breeze from your newly fixed stable ceiling fan for years to come!
Image Credits
- “Light & Air” by Editor B (featured)

