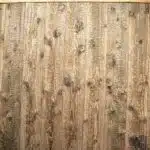
Installing shiplap on a ceiling can bring warmth and character to any room, creating a cozy and inviting atmosphere. Shiplap is a popular trend in home decor that has gained popularity in recent years due to its rustic charm and versatility. As a professional carpenter or home improvement contractor, you may be wondering how to install shiplap on a ceiling effectively. In this article, we will guide you through the steps required to achieve a flawless finish without compromising on safety or quality.
To begin with, it’s essential to understand what shiplap is and how it differs from other types of wood paneling. Shiplap refers to wooden boards with overlapping edges that slot together, creating a tight seal between each plank. This design provides excellent insulation and durability while also enhancing the aesthetic appeal of your living space. Installing shiplap on a ceiling can be challenging due to the height factor and requires careful planning and execution. However, with the right tools and techniques, you can transform your ceiling into an eye-catching feature that adds value to your home’s interior design.
Understanding The Benefits Of Shiplap On A Ceiling
Shiplap is a popular choice for interior design as it offers a range of benefits. It can be used on walls, ceilings, and even floors to create a durable and stylish finish. Shiplap design involves overlapping boards to form a tight seal that helps protect against moisture and drafts.
One of the key benefits of shiplap on a ceiling is its ability to add dimension and depth to a room. This can help make smaller spaces feel larger and more inviting. Additionally, shiplap can also help create an illusion of height in rooms with lower ceilings.
Ways to incorporate shiplap in interior design are endless. From modern farmhouse to coastal chic, shiplap provides a timeless look that can be customized to fit any style. Adding shiplap to your ceiling is an excellent way to achieve a cozy, rustic feel while still maintaining a clean and modern look. Overall, shiplap is an excellent choice for homeowners looking for an affordable yet elegant home improvement project.
In order to properly install shiplap on your ceiling, it’s essential that you choose the right materials for your project. This includes selecting the type of wood you want to use, as well as ensuring that you have all the necessary tools and supplies on hand before beginning work. By taking the time to plan out your project and gather the proper materials beforehand, you’ll be able to ensure that your shiplap ceiling looks beautiful and lasts for years to come.
Choosing The Right Materials For Your Project
When it comes to installing shiplap on a ceiling, choosing the right materials is crucial. You want to ensure that the materials you use are both cost-effective and sustainable. Cost considerations are especially important if you’re working with a tight budget. Fortunately, there are plenty of affordable options out there that won’t compromise on quality.
One of the most popular materials for shiplap ceiling installations is pine wood. Pine is relatively inexpensive and readily available at most hardware stores. It’s also a good option if you’re looking for sustainability options since it’s a fast-growing tree species. Another material to consider is PVC shiplap, which is made from recycled plastic and can be more durable than wood in certain environments.
If you’re willing to spend more money, there are other high-end materials available such as cedar, redwood, or teakwood. However, these options can be quite expensive and may not be necessary depending on your project’s scope and location. With that said, no matter which material you choose, make sure it fits within your budget and aligns with your values regarding sustainability.
When it comes to choosing the right materials for your shiplap ceiling installation project, there are plenty of factors to consider beyond just aesthetics. Cost considerations and sustainability options should be at the forefront of your decision-making process. By taking these factors into account, you’ll ensure that your project is both affordable and eco-friendly. Next up we will cover measuring the ceiling and calculating the needed materials so that you can get started on your installation with confidence!
Measuring The Ceiling And Calculating The Needed Materials
Measuring the ceiling is an important first step in installing shiplap on a ceiling, as it will determine the amount of materials needed for the project. Calculating materials involves taking accurate measurements of the walls and ceiling, and then determining the amount of shiplap and other supplies needed. Preparing the space is key before installation of the shiplap, including removing existing fixtures and cleaning the ceiling. Cutting the shiplap to fit the space must be done accurately and precisely. Installation of the shiplap requires precision to ensure the pieces fit together properly. Finishing the shiplap involves sanding, sealing, and painting, and requires time and care to ensure the best results.
Measuring Ceiling
To ensure a flawless installation of shiplap on your ceiling, measuring accuracy is essential. A slight variation in measurement can result in a crooked and unappealing finish. Therefore, it’s crucial to measure the ceiling accurately before starting the installation process. The first step is to gather all the necessary tools, including a measuring tape, ladder, level, pencil, and paper.
Next, begin measuring the length and width of your ceiling. It’s important to take measurements at various points on the ceiling to account for any irregularities that might be present. Use a level to ensure that your measurements are straight and accurate. Write down all measurements on paper to avoid confusion later.
Finally, calculate the total square footage of your ceiling by multiplying its length by its width. This will help you determine how much shiplap material you’ll need for the project. To ensure that you have enough material with no waste or shortage, consider adding an extra 10% to 15% of materials needed for unexpected cuts or damages during installation. Taking accurate measurements will significantly reduce errors during installation and guarantee a perfect finish for your shiplap ceiling project.
Calculating Materials
After measuring the ceiling accurately, the next step is to calculate the materials needed for the project. Calculating materials is an essential aspect of any home improvement project, as it allows you to estimate costs and prevent wastage. When it comes to shiplap ceiling installation, you’ll need to consider several factors when estimating materials.
The first factor to consider is the square footage of your ceiling, which you’ve already calculated in the previous step. The second factor is the type of shiplap material you plan to use. While many types of wood can be used for shiplap ceilings, each has its unique characteristics and price point. Therefore, it’s crucial to choose a material that suits your budget and aesthetic preferences.
Finally, it’s important to add an extra 10% to 15% of materials needed when calculating your overall costs. This ensures that you have enough material in case of unexpected cuts or damages during installation. Once you’ve calculated all these factors, you can go ahead and purchase your shiplap material with confidence, knowing that you have taken all necessary steps towards a successful installation process.
Preparing Space
After accurately measuring the ceiling and calculating the required materials, the next step in installing a shiplap ceiling is to prepare the space. Preparing the space involves several crucial steps that ensure a smooth installation process. First, it is essential to remove any existing ceiling fixtures such as fans or lights. This allows for easier access to the ceiling and prevents damage to these fixtures during installation. Additionally, removing these fixtures provides an opportunity to select new lighting options that complement your shiplap ceiling.
The second step in preparing the space is selecting paint colors for both the shiplap material and ceiling trims. It’s best to choose colors that create a cohesive look and feel with your overall home decor. This will help enhance the aesthetic appeal of your shiplap ceiling and give your room a modern yet classic touch.
Finally, it’s important to clean up the work area thoroughly before beginning installation. Removing any debris or dust from the room ensures a clean surface for installation and prevents any potential hazards during the process. By following these steps, you can ensure that your space is ready for shiplap installation, creating an inviting atmosphere that enhances your home’s value and charm.
Preparing The Surface For Installation
After measuring the ceiling and calculating the needed materials, the next important step is to prepare the surface for installation. This involves removing any existing ceiling fixtures or light fittings, and clearing out any debris or dirt from the ceiling. It’s important to ensure that the surface is clean and smooth, as this will help to ensure a secure and long-lasting installation.
To begin preparing the surface, you will need a few necessary tools. These include a ladder, safety glasses, gloves, a stud finder, a chalk line, a measuring tape, a level, sandpaper or an orbital sander, and primer if necessary. The ladder should be sturdy and tall enough to reach the ceiling comfortably. Safety glasses are essential when working overhead as they protect your eyes from falling debris. Gloves protect your hands from splinters while working with wood.
Once you have all of your tools ready, it’s time to start preparing the surface for installation. Begin by using your stud finder to locate any ceiling joists or beams. Mark these locations with chalk so that you can easily identify them later. Next, use your measuring tape and level to measure and mark out where each shiplap board will be installed on the ceiling. Finally, use sandpaper or an orbital sander to smooth out any rough spots on the ceiling surface before applying primer if necessary.
Transition: Now that you’ve prepared the surface for installation of shiplap boards on your ceiling by ensuring it is clean and smooth using essential tools such as safety glasses and gloves; we’ll move onto cutting those shiplap boards to size in our subsequent section.
Cutting The Shiplap Boards To Size
To cut the shiplap boards to size, it is important to have the necessary tools and knowledge of cutting techniques. The most common tools used for cutting shiplap boards are a circular saw, table saw or a jigsaw. Whichever tool you choose, make sure it has a sharp blade and is adjusted correctly before making any cuts.
Safety precautions must always be taken when working with power tools. Always wear safety glasses and ear protection, as well as gloves when handling the boards. It’s also important to secure the board in place before making any cuts to prevent it from moving around during the process. Taking these simple safety measures can prevent accidents and ensure that the job is done safely.
When cutting the shiplap boards, it’s important to know that each board will need to be measured individually as no two ceilings are exactly the same size. Once you’ve made your measurements, make sure to mark them on each board before making any cuts. This will help ensure that each board fits perfectly into its designated spot and you don’t waste any material.
- Remember: Measure twice, cut once.
- Take your time and work at a steady pace.
- Don’t rush through this step as precision is key for a professional-looking finish.
With proper cutting techniques and safety precautions in place, you’re now ready to move onto sanding and finishing the boards.
Sanding And Finishing The Boards
After cutting the shiplap boards to size, it is time to move on to sanding and finishing them. Proper sanding techniques are crucial for achieving a smooth and even surface. Start by using coarse grit sandpaper and gradually work your way up to a finer grit, ensuring that all rough spots and edges are smoothed out. Dust management is also important during this process. Use a dust collector or vacuum to keep the area clean and prevent inhaling harmful particles.
Once the boards have been sanded, it’s time to apply the finish of your choice. Staining techniques can vary depending on the desired outcome, so make sure to research which method will give you the best results. It’s important to apply the stain evenly and let it dry completely before adding any additional coats or finishes. Again, dust management is essential during this step as well.
After the boards have been sanded and finished, it’s time to start marking the joists and installing the first row of boards. This step requires careful planning and precision measurements in order to ensure that everything lines up correctly. Take your time during this process as mistakes can be costly and difficult to fix later on. With proper planning and execution, installing shiplap on a ceiling can be a beautiful addition to any room in your home.
Marking The Joists And Installing The First Row Of Boards
Locating the joists correctly is an essential step in installing shiplap on a ceiling. To accomplish this task, you will need to use a stud finder and mark the location of each joist on the ceiling with a pencil. Once all of the joists are marked, you can start to work on leveling the boards.
Before you begin installing the first row of boards, it is crucial to ensure that they are level. This can be done by using a level tool and adjusting the boards accordingly. Make sure to manage excess materials carefully and minimize waste by cutting them into smaller pieces that can be used for future rows or projects.
To install the first row of boards, place them perpendicular to the joists and nail them into place using a nail gun. Use longer nails if necessary to ensure that they are securely fastened. As you work your way down the row, make sure to check for levelness periodically and adjust as needed.
- Locate joists accurately with a stud finder.
- Mark each joist’s location on the ceiling with a pencil.
- Level boards using a level tool before installation.
- Manage excess materials carefully by cutting them into smaller pieces.
- Minimize waste by reusing cuttings for future rows or projects.
Next, we will move onto nailing the boards into place to complete your shiplap ceiling installation.
Nailing The Boards Into Place
- Measuring and marking the room is an important first step for installing shiplap on a ceiling, as it will help to ensure that the boards are cut correctly to fit the space.
- Cutting the boards to the correct length is essential for a successful installation; power saws or hand saws may be used to ensure accuracy.
- Nailing the boards into place is the most common method of installation, with both hammers and nail guns being suitable for the job.
- When installing shiplap on a ceiling, careful consideration must be taken to ensure that the boards are placed level and are adequately spaced apart.
- Board sealing is important to prevent moisture damage, and wall anchors may be used to provide extra stability.
- Safety must always be a priority when working with power tools, and appropriate safety precautions should be taken at all times.
Measuring
When installing shiplap on a ceiling, measuring accuracy is crucial for achieving a professional finish. To ensure that the boards fit perfectly, it is important to measure the ceiling accurately and adjust for any irregularities. This will help prevent gaps or overlaps between the boards, which can compromise the aesthetic appeal of your shiplap ceiling.
When measuring your ceiling, start by determining the length and width of each board you plan to install. Measure each section of the ceiling individually, accounting for any obstacles such as light fixtures or vents. Use a level to check for any uneven spots on the surface that may require adjusting before nailing in place. If necessary, use a stud finder to locate and mark the joists to ensure accurate nailing.
Adjusting for irregularities is an important step when installing shiplap on a ceiling. Depending on the condition of your ceiling, you may need to sand down high spots or fill in low spots with wood filler before installation. It is also important to make sure that each board fits snugly against its neighbor, making adjustments as necessary with a saw or sander. Taking these extra steps will help ensure that your shiplap ceiling looks polished and professional once installed.
Marking
After measuring and adjusting for any irregularities, the next step in installing shiplap on a ceiling is nailing the boards into place. Before doing so, it is important to mark where each board will be placed to ensure that they are installed evenly and accurately. This can be done using a chalk line or laser level to create a straight guide along the ceiling.
To use a chalk line, simply snap the string against the ceiling to leave a visible line where the board should be placed. This technique is effective for longer stretches of shiplap as it provides a clear visual guide for placement. A laser level, on the other hand, emits a laser beam that can help create an accurate level mark on the ceiling. This method is particularly useful when installing shorter sections of shiplap as it allows for precise placement without needing to snap several chalk lines.
Once you have marked where the boards will be placed, it’s time to start nailing them into place. Begin at one end of the ceiling and work your way across, making sure each board is level and flush with its neighbors before nailing it in place. Use finishing nails or a nail gun to secure each board to the joists above or directly onto furring strips if they were previously installed. With careful attention to detail and proper marking techniques, you can achieve a stunning shiplap ceiling that adds value and beauty to your home.
Cutting
After marking the boards’ placement, the next step in installing shiplap on a ceiling is nailing them into place. However, before doing so, it is essential to cut the boards to fit specific sizes and angles. The cutting tools and techniques necessary for this task vary depending on the project’s complexity and personal preference.
For simple straight cuts, a circular saw or miter saw can be used effectively. A circular saw with a fine-toothed blade is ideal for long straight cuts, while a miter saw can create precise angled cuts with ease. Additionally, coping saws or jigsaws can be used to make curved or irregular cuts if needed. It is important to remember that safety precautions should always be taken when using power tools. Wear safety glasses and gloves and ensure that the board is securely clamped before making any cuts.
Once you have cut the boards according to your markings and specifications, they can then be nailed into place. Take note of any boards that require special attention due to their length or angle positioning as they may need additional support from furring strips or joists. With careful planning and execution of both cutting tools and nailing techniques, you can achieve an even and attractive shiplap ceiling that will add value to your home for years to come.
Cutting And Installing The Remaining Rows Of Boards
Despite the challenges encountered when installing shiplap, it remains an excellent way to add rustic charm to any ceiling. In this section, we will discuss how to cut and install the remaining rows of boards. This process is essential as it ensures that your ceiling looks neat and professionally done.
Board alignment is critical when cutting and installing shiplap boards. To achieve a uniform look, you should ensure that each row overlaps the previous one by the same amount. This way, your ceiling will have straight lines running across it, giving it a polished look. The table below shows a step-by-step guide on how to align and install shiplap boards on your ceiling.
Staining options are available for those who want to add some color or give their ceiling a unique touch. You can choose from various stain colors depending on your preference; however, you should ensure that the stain complements your interior décor. Once you have decided on the staining option, apply it evenly on all boards before installation to avoid having uneven colors on your finished product.
As you finish cutting and installing the remaining rows of boards, you may notice gaps or imperfections in some areas of your ceiling. In our next section, we will discuss how to fill in these gaps and imperfections using caulking and putty. By following these instructions carefully, you can be sure that your shiplap ceiling will look professional and stunning once completed without any noticeable inconsistencies or flaws.
Filling In Gaps And Imperfections
After cutting and installing the remaining rows of boards, it is time to fill in any gaps and imperfections. This is an important step to ensure a smooth and polished look for your shiplap ceiling. Techniques for caulking and painting will be covered in this section, as well as choosing the right filler for any larger gaps.
When filling in gaps, it is crucial to choose the right type of filler for the job. For smaller gaps, a simple paintable caulk can do the trick. Apply the caulk with a caulk gun, making sure to smooth it out with a putty knife or finger before it dries. For larger gaps or imperfections, spackle or wood filler may be necessary. These can be applied with a putty knife and sanded down once dry.
Once all gaps and imperfections have been filled in, it’s time to paint or stain your shiplap ceiling. It’s important to choose a high-quality paint or stain that will adhere well to wood surfaces. When painting, use a small brush or roller to get into all of the crevices between boards. Staining can be done with a rag or brush, depending on personal preference.
In summary, filling in gaps and imperfections is an essential part of installing shiplap on a ceiling. Techniques for caulking and painting should be used to ensure a seamless finish. Choosing the right filler for larger gaps is also crucial. Once complete, your shiplap ceiling will be ready for the final step – adding trim and moulding for a finished look.
Adding Trim And Moulding For A Finished Look
When it comes to finishing your shiplap ceiling installation, adding trim and moulding is a crucial step in achieving a polished look. The right trim can enhance the beauty of the shiplap while also providing protection against moisture and dirt build-up. Installing these pieces may seem daunting at first, but with some careful planning and execution, you’ll have an eye-catching ceiling in no time.
Before beginning the installation process, consider the color options available for your trim and moulding. Coordinating with your existing decor or creating a contrasting effect are both viable options that can add depth to your ceiling. Keep in mind that certain wood stains or paints may require multiple coats to achieve the desired hue, so plan accordingly. Additionally, if you’re unsure about tackling this project on your own, consulting with a professional installer can help alleviate any concerns.
Whether you choose to take on this task yourself or hire a professional carpenter, adding trim and moulding will elevate your shiplap ceiling’s aesthetic appeal. With careful measurements and precise cuts, these finishing touches will complete the look of your ceiling while also providing practical benefits such as added durability and cleanliness. Once completed, move on to sanding and finishing for a truly impressive result.
Sanding And Finishing The Completed Ceiling
Once the shiplap ceiling is installed, it’s time to sand and finish the surface. Sanding the ceiling will help remove any rough spots or inconsistencies in the wood grain. It’s important to start with a coarse grit sandpaper and work your way up to a finer grit for a smooth finish. A handheld sander can be used for larger areas, while a sanding block may be better suited for tighter spaces. Make sure to wear protective gear such as goggles and a mask during this process.
Once the ceiling is sanded, it’s time to choose a staining option or finishing technique. There are many options available depending on personal preference and desired look. Some popular choices include clear coat finishes, which allow the natural wood grain to shine through, or stain finishes that enhance or alter the color of the wood. It’s important to apply these finishes evenly and follow manufacturer instructions for drying times between coats.
Before moving on to cleaning up and disposing of waste, take a moment to admire your handiwork! The completed shiplap ceiling adds texture and dimension to any space, making it an attractive feature in any home. By taking care during the sanding and finishing steps, you can ensure that your new ceiling will last for years to come with minimal maintenance required.
Cleaning Up And Disposing Of Waste
After completing the installation of shiplap on your ceiling, it is important to properly dispose of any waste material. Disposing waste is an integral aspect of any home improvement project, and it is crucial that we do so in a manner that minimizes its environmental impact.
The first step in disposing of waste is to gather all the scrap pieces and leftover shiplap material. This can be done by placing them in a designated area, such as a garbage bag or bin. It is important to ensure that all nails are removed from the wood before disposal, as they can pose a hazard to anyone handling or coming into contact with the waste.
Once you have gathered all the scrap pieces and leftover materials, it is time to dispose of them properly. The best way to dispose of shiplap waste is by taking it to a local landfill or recycling center. Before doing so, make sure you check with your local authorities about their regulations regarding construction waste disposal.
- Separate recyclable materials from non-recyclable ones
- Check if there are any hazardous materials present
- Properly seal and label the garbage bags containing waste material
- Follow guidelines for safe transportation and disposal
Properly disposing of construction waste not only benefits our environment but also helps protect our health and safety. By following these simple steps, we can make sure that our home improvement projects have minimal impact on our surroundings while still achieving excellent results. In the next section, we will discuss some common installation issues that may arise during your shiplap ceiling project.
Troubleshooting Common Installation Issues
Once you have completed the installation of your shiplap ceiling, it is important to properly clean up and dispose of any waste materials. Neglecting this step can lead to safety hazards and potential damage to your property. Some common installation mistakes that may result in excess waste include failing to measure accurately, using improper tools or materials, and not following manufacturer instructions. In order to avoid these issues, it is crucial to carefully plan out your project and ensure that you have all necessary tools and materials on hand.
Despite careful planning, however, it is still possible to encounter problems during installation. Troubleshooting techniques can help you identify and resolve these issues quickly and efficiently. Some common installation issues include uneven boards, improperly spaced joints, or gaps between boards. These problems can often be corrected by making adjustments to the placement of the boards or using wood filler for small gaps. If larger issues arise, such as warped or damaged boards, it may be necessary to replace them entirely.
By taking the time to address common installation mistakes and troubleshoot any issues that arise during the process, you can achieve a beautiful finished product with minimal hassle. However, maintenance is also key in ensuring your shiplap ceiling remains in top condition over time. In the next section, we will discuss some tips for maintaining your shiplap ceiling so that you can enjoy its beauty for years to come.
Tips For Maintaining Your Shiplap Ceiling Over Time
Proper maintenance of your shiplap ceiling is essential to keep it looking great and functioning well for years to come. There are some simple tips that you can follow to help maintain your shiplap ceiling over time. One of the most important things you can do is to regularly clean your shiplap ceiling with a soft cloth or brush. This will help prevent dust and dirt from building up, which can cause damage to the wood over time.
Another important aspect of maintaining your shiplap ceiling is to use proper staining techniques. If you choose to stain your shiplap ceiling, be sure to use a high-quality stain and follow the manufacturer’s instructions carefully. This will ensure that the stain penetrates deeply into the wood, providing long-lasting protection against moisture and other environmental factors.
Finally, if you notice any minor damages on your shiplap ceiling, such as scratches or dents, it is important to repair them as soon as possible. Small damages can quickly escalate into bigger problems if left unchecked, so taking care of them promptly can save you time and money in the long run. With proper care and maintenance, your shiplap ceiling can continue to look beautiful and function well for many years to come.
Conclusion
Shiplap ceilings are a popular trend in home design, adding character and warmth to any room. With the right materials and tools, installation can be a straightforward process. Understanding the benefits of shiplap on a ceiling is crucial to creating a successful project.
When choosing materials, it’s important to consider the style and durability of the wood. Measuring the ceiling accurately and calculating needed materials will save time and money during installation. Preparing the surface for installation is also critical in ensuring a smooth finish. Cutting shiplap boards to size requires precision, while sanding and finishing complete the look. Clean up and waste disposal are essential components of any installation project.
Troubleshooting common issues may arise during installation, but with proper preparation and attention to detail, these can be resolved quickly. Finally, maintaining your shiplap ceiling over time involves regular cleaning and upkeep to ensure longevity. Professional carpenters or home improvement contractors know that following these steps will lead to a beautiful and long-lasting shiplap ceiling that will enhance any room’s aesthetic appeal for years to come.
Image Credits
- “SHIPLAP SIDING, GOLDEN, COLORADO” by foto_graffiti (featured)









![How To Repair Rotted Wood 20 Texture : Altario Buick Estate Wagon : Rotting Faux Wood Paneling [1 of 2]](https://green-life.blog/wp-content/uploads/2023/05/z1CersK-gCjq-150x150.jpg.webp)

