Are you tired of the same old generic headboards that lack personality and character? Do you want to make a statement with your bedroom decor? A DIY wood headboard might just be the solution you’re looking for. Not only will it add warmth and texture to your room, but it will also be a unique reflection of your personal style.
Making a wood headboard is an accessible project for beginner and experienced woodworking enthusiasts alike. With a few basic tools and materials, this project can be completed in a weekend and customized to fit any size bed or design preference. In this article, we’ll guide you through the steps to create your own DIY wood headboard, from choosing the right type of wood to finishing touches that will make it stand out. So let’s get started on creating a beautiful and functional piece for your bedroom!
Choosing The Right Type Of Wood
When it comes to making a DIY wood headboard, choosing the right type of wood is crucial. Different wood species have varying characteristics that impact the final appearance and durability of your headboard. Some popular options include pine, oak, cherry, and maple. Pine is affordable and easy to work with but may not be as strong as other woods. Oak is sturdy and durable but can be more expensive. Cherry has a beautiful reddish-brown hue and ages well over time. Maple is also durable but tends to have a lighter color.
In addition to selecting the right wood species, you should also consider the grain direction of the wood. The way the grain runs impacts how it will look when finished and how it will react to moisture over time. There are two main types of grain patterns: straight and irregular. Straight-grain boards have consistent lines running parallel to one another and tend to be more stable than irregular-grain boards, which have varying patterns that can distort over time.
Once you’ve chosen your wood species and grain direction, you can also consider staining techniques and color options for your headboard. Depending on your personal style preferences, you may opt for a natural finish that showcases the beauty of the wood or choose a stain or paint color that complements your bedroom decor. Keep in mind that different types of wood absorb stains differently, so it’s important to test out different options before committing to a final finish.
Measuring Your Bed And Workspace
Before embarking on your DIY wood headboard project, it is crucial to measure your bed frame’s size and compatibility. The objective is to ensure that the headboard fits the bed frame perfectly. Measuring the width of your bed frame will help determine how wide the headboard should be. Additionally, you must consider the height of your bed frame when deciding on the height of your headboard.
Workspace organization is another essential factor to consider before starting your project. Ensure that you have ample space in which to work comfortably without any obstructions or distractions. A tidy workspace helps prevent accidents and makes it easier for you to access your tools and materials. You can use a workbench or even a large table as a workspace for this project, but ensure that it is at a comfortable height for you.
By measuring your bed frame’s dimensions and organizing your workspace appropriately, you are setting yourself up for success in building a beautiful DIY wood headboard. With these two factors considered, you can move onto cutting and sanding your wood with confidence in the next step of the process.
Cutting And Sanding Your Wood
After gathering all the necessary materials, the next step is to cut and sand your wood. First, measure the height and width of your bedframe to determine the dimensions of your headboard. You can use a circular saw or a jigsaw to cut out the shape of your headboard from a large piece of plywood or solid wood.
Once you have cut out the general shape of your headboard, use sandpaper to smooth out any rough edges or splinters. Sanding your wood is an essential step that cannot be overlooked as it helps to create a polished and professional-looking finish. Be sure to use a fine-grit sandpaper for a smoother surface.
After sanding, it’s time to assemble your headboard. Using wood glue, attach any additional pieces such as trim or decorative accents onto the main board. Once you have completed assembly, you can begin staining your wood to add color and depth. There are many staining techniques available depending on the desired look you want to achieve. With these steps completed, you’re one step closer to creating a beautiful diy wood headboard that will complement any bedroom decor.
To continue with creating your design plan, consider what type of style and aesthetic you want for your headboard. Do you want it to match existing furniture? Should it be modern or rustic? Take into account factors such as color scheme and texture when designing your headboard. The next section will provide guidance on how to create a design plan that suits both your personal style and functional needs for this diy project.
Creating Your Design Plan
While the idea of designing your own headboard may seem daunting, it’s important to remember that there are no wrong answers when it comes to creating a design plan. One potential obstacle that people often face is feeling overwhelmed by the sheer number of possibilities. With so many materials, styles, and colors to choose from, it can be easy to feel lost in the process. However, by breaking down the process into manageable steps and taking advantage of online resources and inspiration boards, you can turn your vision into a reality.
The first step in creating your design plan is sketching out your ideas on paper. Start by gathering inspiration from social media platforms like Pinterest or Instagram, or even by browsing furniture stores in person or online. Once you have an idea of what you’re looking for, start sketching out different options for your headboard. Don’t worry about being an artist – simple pencil sketches will do just fine! Consider factors like size, shape, and style as you sketch.
Another important aspect of designing your headboard is selecting a color palette that complements both the rest of your bedroom decor and your personal style preferences. Consider colors that make you feel calm and relaxed – after all, a headboard should be a peaceful focal point in any bedroom! Neutral tones like beige or gray can create a soothing atmosphere, while brighter hues like blue or green can add a pop of energy to the space. Once you’ve settled on a color palette, use this as a starting point for selecting materials like wood stains or fabrics.
With your sketched designs and color palette selections in hand, you’re ready to move onto marking and measuring your wood. By taking the time to carefully measure each piece before cutting them down to size, you’ll ensure that everything lines up perfectly once it’s assembled. In the next section, we’ll go over some tips for marking and measuring accurately – so grab your tape measure and get ready to dive in!
Marking And Measuring Your Wood
Marking tools are essential when building a DIY wood headboard, as they help to ensure accuracy and precision with measurements. Popular marking tools include pencils, marking knives, and transfer scribes. Measuring tools are also important to ensure that the headboard is the correct size. Common measuring tools for woodworking projects include rulers, measuring tapes, and framing squares. Additionally, it is important to have a layout plan that takes into account the size of the headboard and the specific pieces of wood needed to build it. This should be drawn out on paper or a digital platform before beginning the project.
Marking Tools
When it comes to woodworking basics, marking and measuring your wood is crucial for the success of your DIY furniture projects. Without accurate measurements and markings, your final product may not fit together properly or look as polished as you desire. One important aspect of this process is selecting the appropriate marking tools.
There are a variety of marking tools available for woodworking, each with its unique advantages and disadvantages. Pencils are a popular choice due to their versatility and ease of use; they can be easily sharpened and erased if needed. However, pencils may not create visible enough markings on darker woods, making them less than ideal in those situations. Another option is the mechanical pencil, which allows for precise lines but may break more easily than traditional pencils.
For those looking for something more permanent, markers or even knives can be used to create visible lines that will not smudge or fade over time. However, these options require a steady hand and may take some practice to master. Ultimately, the best marking tool for your project depends on the wood you’re using and personal preference. By taking the time to choose the right tool for your needs, you’ll set yourself up for success in your DIY wood headboard project (or any other woodworking project).
Measuring Tools
Measuring your wood accurately is just as important as marking it correctly. Common mistakes in measuring can result in uneven pieces that do not fit together properly, ultimately leading to a faulty final product. Therefore, it is crucial to use the appropriate measuring tools and techniques for your DIY woodworking project.
One of the most commonly used measuring tools in woodworking is the tape measure. When selecting a tape measure, it is important to choose one with a locking mechanism and a clear, easy-to-read scale. Using a tape measure, you can easily take measurements of length and width, ensuring that all pieces of wood are cut to the correct size.
Another popular measuring tool is the combination square. This tool can be used to check if edges are straight or at right angles and can also be used for marking lines on your wood. Best practices when using a combination square include checking for accuracy before cutting any wood and keeping the tool clean and well-maintained.
Other measuring tools such as calipers or height gauges may also be useful depending on the specific project requirements. By selecting the appropriate measuring tools and using best practices for their use, you can ensure that every piece of wood is measured accurately, leading to a successful and polished final product.
Layout Plans
Accurately measuring and marking your wood is crucial to the success of any DIY woodworking project. However, it is not enough to simply measure and mark your wood without a plan. This is where layout plans come in. A well-designed layout plan can help you visualize the final product and ensure that all pieces fit together seamlessly.
When creating a layout plan for your DIY woodworking project, it is important to consider factors such as the overall design, bed frame compatibility (if creating a DIY Headboard Design), and any unique features or measurements required for the project. By taking these factors into account, you can create a detailed and precise layout plan that will guide you throughout the entire woodworking process.
A good layout plan should include not only measurements but also details such as the types of joints needed, the direction of wood grain, and any special cuts or angles required. This level of detail may seem overwhelming at first, but it will ultimately save time and ensure that every piece fits together perfectly. In summary, creating a detailed layout plan is an essential part of accurately marking and measuring your wood for any DIY woodworking project.
Drilling Holes For Assembly
Before assembling your DIY wood headboard, it is crucial to drill holes in the right locations. This step will ensure that the pieces fit together perfectly and securely. There are drilling techniques that you can use to make this process easier and more efficient.
To start, you will need a drill with a drill bit that is appropriate for the size of the screws you will be using. You will also need a clamp or vise to hold the pieces in place while drilling. It is important to mark the location of each hole beforehand using a pencil or marker to ensure accuracy.
Once you have all your tools ready, begin by drilling each hole slowly and steadily. Apply enough pressure to penetrate the wood but not so much that it splits or cracks. Ensure that each hole is drilled straight through and at the correct depth. When finished, double-check that all holes line up properly before proceeding with assembly.
Now that you have drilled holes in all necessary pieces, you are ready to move on to attaching them together. But first, gather your required materials and tools for this next step.
Attaching Your Wood Pieces Together
Imagine your wood pieces as a puzzle waiting to be put together. Before starting the assembly, ensure that you’ve prepped your materials properly. Be sure to double-check that all measurements are accurate and each piece is cut precisely.
When attaching your wood pieces together, it’s important to use assembly techniques that will provide a sturdy foundation for your headboard. One technique is using pocket holes, which involves drilling angled holes into one piece of wood and then screwing it into another piece of wood at a right angle. Another technique is using dowels, which involves gluing dowels into pre-drilled holes in both pieces of wood and then joining them together.
It’s crucial to take your time during this step, as any mistakes could result in an unstable headboard. Remember to follow the instructions carefully and make sure each piece is level before moving onto the next step. With careful attention to detail, you’ll be able to create a beautiful and functional headboard that will last for years to come.
Now that you’ve attached all of your wood pieces together, it’s time to move onto sanding and smoothing your headboard. This step is crucial for achieving a polished look and feel. By sanding down any rough edges or imperfections, you’ll create a smooth surface that’s ready for staining or painting. In the next section, we’ll discuss how to effectively sand and smooth your headboard for best results.
Sanding And Smoothing Your Headboard
Before staining your DIY wood headboard, it is important to ensure that it is perfectly smooth. Sanding the surface of your headboard will help remove any roughness or bumps, allowing the stain to be absorbed evenly. Start by using coarse sandpaper to remove any large imperfections or splinters on the surface.
Once you have gotten rid of the larger bumps, switch to a finer grit sandpaper to smooth out the surface further. This will ensure that your headboard has a uniform and consistent texture. Make sure to sand in the direction of the wood grain, as this will prevent any scratches or marks from appearing on the surface.
After you have finished sanding, use a tack cloth or a damp rag to remove any sawdust that has accumulated on your headboard. Once it is completely clean and dry, you can start applying your stain. Keep in mind that different woods react differently to stains, so it’s always a good idea to test your chosen stain on a small area first before applying it all over your headboard. With these staining tips and smoothing techniques, you can create a beautiful and professional-looking DIY wood headboard that will last for years to come.
Moving forward with creating the perfect DIY wood headboard requires applying a wood finish with precision and care. A wood finish not only protects your project but also adds depth and richness to its appearance. In this section, we will delve deeper into how you can apply a wood finish like an expert woodworker without compromising quality and elegance in your final product.
Applying A Wood Finish
After sanding and smoothing your headboard, it is time to apply a wood finish. The wood finish will not only protect the wood but also enhance its appearance. Before applying any wood finish, it is essential to use a wood conditioner. A wood conditioner helps to even out the absorption of the stain or finish on the wood surface.
There are different types of wood finishes you can choose from depending on your preference. Some popular options include oil-based finishes, water-based finishes, and lacquer finishes. Oil-based finishes provide a durable and long-lasting coating that enhances the natural beauty of the wood grain. Water-based finishes dry quickly and emit fewer fumes, making them ideal for indoor use. On the other hand, lacquer finishes are easy to apply and offer excellent protection against scratches or fading.
Using a brush or cloth, apply a thin coat of your preferred wood finish following the manufacturer’s instructions. Allow the first coat to dry before applying subsequent coats until you achieve your desired level of sheen or color depth. Once done, let your headboard dry completely before using it in your room or attaching it to your bed frame.
Transition: With your headboard now protected and looking its best with an appropriate finish applied, it’s time to consider giving it some color by staining it with a beautiful hue that suits your style preferences.
Staining Your Headboard
When staining your headboard, it is important to carefully select the type of stain and finish for the desired look. Preparation for application should include sanding and cleaning the wood surface to ensure an even finish. Applying the stain should be done with a brush, rag, or spray and should be allowed to dry before adding a clear coat of finish. Sealing the wood with a finish is an important step to preserve the stain and ensure a lasting result.
Choosing The Stain
When it comes to staining your DIY headboard, choosing the right stain is crucial. The first step in choosing a stain is to consider the type of wood you are using for your headboard. Different woods absorb stains differently, which can affect the final color and finish. Mixing stains is another option that can help achieve a custom color for your headboard. This process involves combining two different stains to create a unique shade that complements your bedroom décor.
Once you have chosen the right stain or combination of stains, it’s time to apply them to your headboard. Stenciling techniques can add an extra touch of personalization to your headboard. You can use stencils to create patterns or designs on the surface of the wood before staining. This technique creates an interesting contrast between stained and unstained areas, giving your headboard a more artistic look.
Incorporating these tips into your DIY headboard project will ensure that you achieve a beautiful and customized result. Whether you choose a single stain or mix multiple colors, adding stenciling techniques can elevate the overall appearance of your project. With careful planning and attention to detail, you can create a stunning wooden headboard that will be the centerpiece of your bedroom for years to come.
Applying The Stain
When it comes to staining your DIY headboard, the application process is just as important as choosing the perfect wood stain color. DIY wood stain techniques can vary depending on the type of wood you are using for your headboard. Some woods absorb stains differently than others, which can affect the final color and finish. To achieve a more even finish, it’s recommended to sand your headboard before applying any stain.
Before applying the stain, it’s important to test it on a small area of your headboard to ensure that you are happy with the color and finish. When applying the stain, use a brush or cloth to spread it evenly over the surface of the wood. Make sure to follow the direction of the grain and apply several thin layers instead of one thick layer to avoid drips and uneven spots. Once you have applied all layers of stain, let it dry completely before adding any sealant or topcoat.
Adding a sealant or topcoat is optional but highly recommended as it protects your headboard from scratches and daily wear and tear. There are different types of sealants available such as polyurethane or wax that provide different levels of protection and shine. When applying a sealant, make sure that your headboard is completely dry before starting and apply according to manufacturer instructions. With these DIY wood stain techniques, choosing the right shade for your headboard and expertly applying it will result in a beautiful piece that adds character to your bedroom décor.
Painting Your Headboard
Choosing paint colors for your DIY wood headboard is an exciting step in the process. Before deciding on a color, consider the overall look and feel of your bedroom. If you have a neutral-colored room, adding a pop of color to your headboard can create an eye-catching focal point. On the other hand, if your walls are already bold or patterned, a simple white or natural wood finish may be the best choice.
Once you’ve chosen your paint color, it’s time to think about distressing techniques to give your headboard a unique look. Sandpaper is a great tool for creating a distressed look by rubbing it over the edges and corners of your headboard after painting. Another method involves using two contrasting colors of paint and then sanding through the top layer to reveal the base coat underneath. Experiment with different methods until you find one that works best for you.
With your newly painted and distressed wood headboard complete, it’s now time to add some decorative touches to finish off the project. Consider hanging string lights or placing decorative pillows on your bed in coordinating colors with your new headboard. A statement piece of artwork or wall hangings can also help tie everything together and create a cohesive look in your bedroom space. Get creative and make this DIY wood headboard truly unique!
Adding Decorative Touches
Painting the headboard is a popular decorative touch and can add colorful or subtle accents to the overall aesthetic. Stenciling is another option for adding unique patterns and designs to the wood headboard. Upholstering with fabric and adding trim can create a softer and more comfortable look. Carving, gilding, and adding beading, studs, and other embellishments are all possible ways to create a more personalized and ornate wooden headboard.
Painting
Achieving the perfect finish for your DIY wood headboard is crucial in transforming it from a simple piece of furniture to a stunning centerpiece in your bedroom. Painting is one way to add an extra decorative touch that can elevate the overall look of your headboard. To get started, consider these tips for blending colors to create a cohesive and harmonious design.
Firstly, it’s important to choose the right paint type that will adhere well to wood surfaces. Oil-based paints are known for their durability and glossy finish, while water-based paints offer easy clean-up and faster drying time. Additionally, some paint brands offer specific products that are formulated for use on wood surfaces, so make sure to read the label carefully before purchasing.
When it comes to blending colors, start with a base coat and allow it to dry completely before adding additional layers of color. Use a small amount of each color at a time and blend them together with a brush or sponge until you achieve the desired effect. Remember that less is often more when it comes to painting, so don’t overdo it with too many colors or patterns.
In conclusion, painting your DIY wood headboard can give it an extra pop of color and personality that will make it stand out in any room. With these tips for choosing the right paint type and blending colors effectively, you can achieve a professional-looking finish that will impress all who see it.
Stenciling
To further enhance the overall appearance of your DIY wood headboard, you may consider using stenciling techniques to add elegant designs and patterns. Stenciling is a cost-effective way to create unique and intricate designs on your headboard without the need for advanced painting skills. With the right DIY stenciling tools, you can easily achieve beautiful results that will elevate the look of your bedroom.
When selecting a stencil design for your headboard, consider the style and color scheme of your room. Choose a pattern that complements your existing decor and adds visual interest to your headboard. Once you have selected a stencil design, use painter’s tape to hold it in place on the surface of your headboard. Apply paint over the stencil with a small brush or sponge, taking care not to overload the brush with too much paint. Allow the paint to dry completely before removing the stencil.
To create more advanced stenciled designs, experiment with layering multiple stencils or using different colors of paint. You can also try using metallic paints or glitter accents for added texture and dimension. With some practice and patience, you can master stenciling techniques and transform your DIY wood headboard into a stunning work of art that reflects your personal style and creativity.
Mounting Your Headboard To The Wall
Like a sturdy anchor holding a ship in place, properly mounting your DIY wood headboard to the wall is crucial for stability and safety. Wall mounting techniques vary depending on the weight of your headboard and the type of wall it will be mounted on. It’s important to choose the appropriate hardware options to ensure that your headboard stays securely attached to the wall.
- Determine where you want to mount your headboard on the wall. Use a stud finder tool to locate the studs in the wall behind where you plan to hang your headboard.
- Measure and mark where you will attach your brackets or cleats onto your headboard. Make sure that the brackets are level and evenly spaced apart.
- Attach your brackets or cleats onto your headboard using screws and glue if necessary.
- Align and attach the other half of the bracket or cleat onto the wall using screws anchored into the studs.
For heavier headboards, consider using French cleats or Z-clips for added support. These types of hardware options allow for easy removal and adjustment if necessary, while still maintaining a strong hold on the wall.
Properly mounting your DIY wood headboard is not only important for aesthetic purposes but also for ensuring its durability and safety. By following these simple steps and choosing appropriate hardware options, you can rest assured that your beautiful creation will stay securely attached to its rightful place on your bedroom wall.
Moving forward with maintaining your DIY wood headboard, there are several steps you can take to keep it looking as good as new.
Maintaining Your Diy Wood Headboard
Cleaning a DIY wood headboard is essential for maintaining its appearance and structural integrity. Regularly dusting and wiping the headboard with a damp cloth can help prevent the buildup of dirt, grime, and other contaminants. Sanding a wood headboard helps to smooth the surface, remove imperfections, and create a uniform look. Sanding should be done in a controlled and methodical manner, using the appropriate grit sandpaper and tools.
Cleaning
To ensure the longevity of your DIY wood headboard, proper maintenance is essential. One of the most important aspects of maintenance is cleaning. Regular cleaning helps to keep your headboard looking great and prevents dirt and grime from building up over time.
When it comes to DIY wood headboard maintenance, cleaning tips are crucial. Begin by dusting your headboard with a soft cloth or brush to remove any loose debris. Next, use a damp cloth to wipe down the surface of the headboard, being careful not to saturate the wood with water as this can cause damage.
For tough stains or marks on your DIY wood headboard, consider using a mild soap solution or specialized wood cleaner. Apply the cleaner to a soft cloth and gently rub the affected area until the stain is removed. Always follow up with a clean, damp cloth to remove any excess cleaner and prevent damage to the wood.
Remember that regular cleaning is key when it comes to maintaining your DIY wood headboard. By following these simple tips and incorporating them into your cleaning routine, you can help ensure that your headboard remains in excellent condition for years to come.
Sanding
To maintain the pristine condition of your DIY wood headboard, proper maintenance is essential. Cleaning is an important aspect, but sanding also plays a crucial role in keeping your headboard looking great. Sanding helps to remove any scratches or dents and smooth out rough surfaces.
Using a sanding block is the best way to sand your DIY wood headboard. Make sure to choose the appropriate grit of sandpaper based on the level of damage or roughness on the surface. Begin by lightly sanding the surface with a coarse grit sandpaper, then progress to finer grits until the surface becomes smooth.
After sanding, it’s crucial to apply finishing techniques to protect your DIY wood headboard from damage and enhance its appearance. Applying a clear coat or stain can help protect against scratches and moisture damage while bringing out the natural beauty of the wood grain. By incorporating these simple steps into your maintenance routine, you can keep your DIY wood headboard looking great for years to come.
Troubleshooting Common Issues
Common mistakes can happen during any DIY project, including building a wood headboard. One common mistake is not measuring the wood properly before making cuts. This can result in uneven pieces that do not fit together correctly. To avoid this mistake, double-check your measurements and use a straight edge to ensure accurate cuts.
Another common issue is using the wrong type of wood for the project. Some woods are too soft and may dent or scratch easily, while others are too hard to work with using basic tools. It is important to research and choose the appropriate type of wood for your headboard based on its durability and ease of use.
If you find yourself facing an issue during the construction process, there are several troubleshooting tips you can try. For example, if your pieces are not fitting together snugly, check to see if any screws or nails need tightening. If your headboard is wobbly, make sure all joints are securely fastened and add additional support where needed. By taking time to troubleshoot issues as they arise, you can save yourself from having to start over or seek professional help.
| Problem | Solution |
|---|---|
| Uneven Cuts | Double-check measurements and use a straight edge |
| Wrong Wood Type | Research appropriate types for durability and ease of use |
| Pieces Not Fitting | Check screws/nails for tightness; adjust joints |
| Wobbly Headboard | Secure all joints and add additional support |
Remember that building a DIY wood headboard takes time and patience, but it can be a rewarding experience when done correctly. By being aware of common mistakes and following these troubleshooting tips, you can increase your chances of success. Don’t be afraid to ask for help if needed, whether it’s from online resources or experienced DIYers in your community. With some effort and determination, you can create a beautiful custom headboard that will last for years to come without breaking the bank.
Conclusion
Creating a DIY wood headboard can be a rewarding project that adds a personalized touch to your bedroom decor. By choosing the right type of wood, measuring carefully, and following a design plan, you can create a beautiful and functional headboard that enhances the look and feel of your sleeping space.
However, it is important to note that woodworking requires careful attention to detail and patience. It is possible to encounter common issues such as uneven cuts or misaligned measurements. Troubleshooting these issues requires persistence and an understanding of the principles of woodworking.
In conclusion, creating a DIY wood headboard is a challenging yet rewarding project for those with an interest in woodworking. By understanding the principles involved in choosing the right type of wood, measuring accurately, and following a design plan, you can create a beautiful addition to your bedroom decor. With patience and persistence, you can overcome any issues that arise during the process and enjoy the satisfaction of completing your own custom-made piece of furniture.
Image Credits
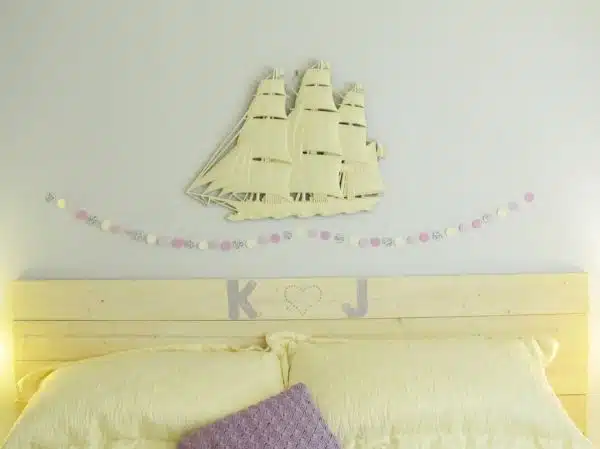
- “DIY Wood Headboard, Paper Garland and Vintage Wall Hanging” by AquaOwl (featured)









![How To Repair Rotted Wood 14 Texture : Altario Buick Estate Wagon : Rotting Faux Wood Paneling [1 of 2]](https://green-life.blog/wp-content/uploads/2023/05/z1CersK-gCjq-150x150.jpg.webp)


