As a professional deck refinisher, I have seen my fair share of poorly maintained decks. One of the most common mistakes that homeowners make is skipping the crucial step of sanding before refinishing their wooden deck. Sanding is an essential part of deck maintenance as it helps to remove any dirt, grime, or old finish from the surface and creates a smooth canvas for the new coating. In this article, I will guide you through the process of sanding your wooden deck correctly to ensure you achieve a professional-looking finish.
Before diving into the sanding process, it’s important to understand why it’s necessary. Over time, wooden decks can become rough and uneven due to weather exposure and foot traffic. This unevenness can cause problems when applying new finishes as they won’t adhere correctly or look uniform across the entire surface area. Sanding helps to even out these rough spots and create a surface that’s ready for refinishing. Additionally, sanding also removes any existing coatings or stains that may prevent new coatings from penetrating into the wood fibers. By following this guide on how to properly sand your wooden deck before refinishing, you’ll be able to achieve a beautiful and long-lasting finish that will protect your investment for years to come.
Understanding The Importance Of Sanding
Sanding is an essential step in the process of refinishing your wood deck. It is a crucial part of surface preparation, which ensures that your deck remains smooth and even after refinishing. Failing to sand your deck before refinishing can result in an unappealing finish, as well as other problems like rough patches, uneven staining, or peeling paint.
One common mistake that people make when sanding their decks is using the wrong grit of sandpaper. While it may be tempting to use a coarse grit to remove stubborn stains or finishes quickly, this can cause significant damage to the wood. Conversely, using a fine-grit sandpaper may not remove enough of the existing finish, resulting in poor adhesion for the new stain or paint.
The benefits of professional sanding services cannot be overstated. Professional deck refinishers have access to commercial-grade sanding equipment and years of experience working with all types of wood surfaces. They know how to choose the right grit level for each stage of sanding and can work efficiently without damaging your deck’s integrity. Hiring a professional saves you time and effort while ensuring that your deck receives proper care and maintenance.
To prepare your deck for sanding, you will need to clear it from any furniture or debris and inspect it for any signs of damage or rotting wood. Proper preparation ensures that you achieve optimal results when refinishing your deck by preventing mistakes such as missed spots or uneven surfaces during sanding.
Preparing Your Deck For Sanding
Understanding the Importance of Sanding your deck is crucial to achieving a smooth, even surface that allows for proper adhesion of the new stain or paint. Before you begin sanding, ensure that all furniture and objects are removed from the deck, and any plants or shrubs are covered to protect them from dust and debris. Deck cleaning should be done before sanding to remove any dirt, grime, or mold that has accumulated on the wood.
Power washing is an effective way to clean your deck before sanding. A pressure washer can quickly remove built-up dirt and debris from the wood’s surface, making it easier to sand away imperfections. Be careful not to use too much pressure as it can damage the wood fibers and leave marks on your deck. Once you have cleaned your deck thoroughly, allow it to dry completely before beginning the sanding process.
Preparing Your Deck for Sanding requires choosing the right sandpaper for your specific job. The type of sandpaper you use will depend on the condition of your deck’s wood and the level of roughness you want to achieve. Generally, you will want to start with a coarse grit (between 36-60) and work up gradually to finer grits (100-120) until you achieve a smooth finish. It is important to always sand in the direction of the grain and avoid applying too much pressure in one area as this can lead to uneven results.
- Wear protective gear such as gloves and goggles while power washing.
- Use a commercial deck cleaner or make your own solution using water, bleach, and dish soap.
- Allow ample time for drying before beginning any sanding.
- Dispose of used sandpaper properly after completing each section of your deck.
Choosing the right sandpaper for your deck is just one component of ensuring a successful refinishing project. In our next section, we will go over tips for selecting appropriate stains or paints based on factors such as climate and usage, as well as how to properly apply them for a long-lasting finish.
Choosing The Right Sandpaper For Your Deck
Different sandpaper types can make or break the success of your deck refinishing project. Choosing the right one can ensure that you get a smooth and even finish, while using the wrong grit or type of sandpaper can leave unsightly marks on your deck. There are generally three types of sandpaper: coarse, medium, and fine.
Coarse sandpaper is typically used to remove stubborn stains and rough spots on your deck. It has a grit range of 40-60 and is effective in stripping away old paint or finishes. Medium-grit sandpaper, with a range of 80-120, is perfect for smoothing out rough patches and preparing your deck for staining or painting. Meanwhile, fine-grit sandpaper has a range of 150-180 and is ideal for giving your deck that final polish before applying finish.
When it comes to sanding technique tips, always start with the coarsest grit first before moving on to finer ones. This will help you level out any rough patches before smoothing them out further with finer grits. Sand along the grain of the wood to avoid scratching it and use long strokes while applying even pressure to achieve an even finish. Finally, don’t forget to wipe down your deck with a clean cloth after each round of sanding to remove any dust or debris that may have accumulated.
Now that you know which type of sandpaper to use and how to use it properly, it’s time to gather the necessary tools for this project. Having all these tools on hand will help you save time and effort in completing this task efficiently.
Gathering The Necessary Tools
Before refinishing a wood deck, it is important to gather the necessary tools. Specifically, sandpaper, an orbital sander, safety glasses, a dust mask, an extension cord, a bucket, rags, gloves, a putty knife, a screwdriver, a wire brush, a broom, a putty knife, and a garden hose should be assembled. Sandpaper with varying grits are needed to sand the wood deck properly. An orbital sander is also necessary to ensure an even and smooth surface.
Sandpaper
When it comes to refinishing a wood deck, sanding is one of the most crucial steps to ensure a smooth and even surface. However, using the wrong type of sandpaper or incorrect technique can lead to unsatisfactory results. As a professional deck refinisher, I recommend familiarizing yourself with the different types of sandpaper available in order to choose the right one for your project.
The two main types of sandpaper are aluminum oxide and silicon carbide. Aluminum oxide is ideal for removing rough areas and smoothing out surfaces while silicon carbide is better suited for finer finishing work. It’s important to start with a coarse grit (60-80) and work your way up to finer grits (120-220) for best results. Proper sanding technique involves working in small sections at a time, using consistent pressure and motion in the direction of the wood grain.
It’s worth noting that power sanders can make the job easier but should be used with caution as they can cause damage if not handled properly. For those who prefer manual labor, hand-held sanding blocks are an effective alternative. Regardless of which method you choose, taking your time and being thorough will yield the best results. By choosing the appropriate type of sandpaper and adhering to proper sanding techniques, you’ll be well on your way to achieving a beautifully refinished deck.
Orbital Sander
When it comes to refinishing a wood deck, having the necessary tools is crucial for achieving satisfactory results. One of the most versatile and efficient tools for sanding large areas is an orbital sander. When used correctly, an orbital sander can save time and effort while providing a smooth and even finish.
When using an orbital sander, it’s important to select the appropriate type of sandpaper for the job. The two main types of sandpaper available for use with an orbital sander are aluminum oxide and silicon carbide, with each having its own unique properties. It’s also important to use consistent pressure and motion when operating the tool, as well as avoiding excess pressure that can cause damage to the surface being sanded.
In addition to using proper technique, there are several tips to keep in mind when using an orbital sander on other surfaces beyond decks. For instance, always start with a lower grit sandpaper before moving up to finer grits for optimal results. It’s also recommended to avoid using excessive force or speed when sanding delicate surfaces such as furniture or cabinetry. By keeping these tips in mind and utilizing an orbital sander properly, you’ll be well-equipped to tackle any sanding project that comes your way.
Clearing Any Debris And Obstacles
Did you know that one of the most common reasons why decks lose their luster is due to debris and obstacles? When left unattended, debris such as leaves, twigs, and dirt can accumulate on the surface of your deck. This can cause a variety of problems including water damage, mold growth, and discoloration. As such, it is essential to clear any debris and obstacles before sanding your wood deck.
Clearing obstacles involves removing any furniture or other items on your deck. These items may include potted plants, chairs, tables, and grills. You may also need to trim any nearby bushes or trees that may be obstructing your work area. Once this has been done, you can proceed with sweeping away any loose debris using a broom or leaf blower.
After clearing all obstacles from your deck, it’s now time to remove any remaining debris. This involves getting down on your hands and knees and using a scraper to remove any stubborn dirt or stains. After scraping off as much dirt as possible, you can then move on to washing the deck with a power washer or hose. By taking these steps before sanding your deck, you’ll be able to ensure that the refinishing process will go smoothly and result in a beautifully restored deck.
Now that you’ve cleared all obstacles and removed all debris from your wood deck surface, it’s time to start with rough grit sandpaper. The key here is to start with coarser grit sandpaper first before moving up gradually to finer grits. Doing this will help remove any remaining stains or blemishes while ensuring that your wooden surface remains smooth throughout the entire process. Remember not to rush through the sanding process since doing so may lead to uneven sanding marks or even damage to the wood itself.
Starting With Rough Grit Sandpaper
After clearing any debris and obstacles from your wood deck, it’s time to start sanding. Starting with rough grit sandpaper has its benefits. Rough grit sandpaper can remove old stain and paint, as well as smooth out any rough spots or splinters on the deck surface. It’s important to note that using too fine of a grit sandpaper in the beginning can actually clog up the paper and make it less effective.
When using rough grit sandpaper, it’s important to keep a few things in mind. First, wear protective gear such as gloves and eye protection to prevent injury. Second, use a power sander if possible to speed up the process and ensure even results. Third, move in the direction of the wood grain to prevent damage or scratches on the surface. Finally, make sure to clean up any dust or debris before moving on to the next step.
While rough grit sandpaper is effective for removing old finishes and smoothing out rough spots on your deck, there are alternatives you may consider depending on your specific needs. If you’re looking for a gentler approach, you could start with medium grit sandpaper instead. Additionally, there are chemical strippers available that can dissolve old finishes without any sanding necessary. It’s important to research different methods before starting your project so that you can choose what will work best for you.
Moving on to medium grit sandpaper will help refine the surface even further before applying new stain or paint. But first, make sure all debris is cleared away and all safety precautions are taken care of before proceeding with this step.
Moving On To Medium Grit Sandpaper
Medium grit sandpaper is a crucial step in the deck refinishing process. After completing the initial sanding with coarse grit, it’s time to switch to medium grit for a smoother finish. The benefits of using medium grit include removing any imperfections or rough spots left over from the coarse grit sanding and preparing the deck for the final step of finishing.
To achieve a smooth finish with medium grit sandpaper, it’s important to use proper techniques. Start by sanding with the grain of the wood, ensuring even pressure across the entire surface. Avoid applying too much pressure as this can cause uneven spots and damage to the wood. As you continue sanding, periodically check your progress by running your hand over the surface of the deck.
One effective technique for achieving a smooth finish is to use a random orbital sander. This type of sander uses a circular motion and is less likely to leave swirl marks or scratches on the deck surface. Remember to change out your sandpaper frequently to ensure maximum effectiveness. With these techniques and tools, you can achieve a smooth finish with medium grit sandpaper and be one step closer to completing your deck refinishing project.
As we move on from medium grit sandpaper, it’s important to note that using fine grit will be our next step towards achieving a polished look for your deck. Fine grit sandpaper will further refine and smoothen out any remaining rough spots or scratches left behind from previous stages of sanding.
Finishing With Fine Grit Sandpaper
Moving on to Medium Grit Sandpaper, you have completed the initial sanding and are now ready to refine the surface of your wood deck. Using a sanding block helps to ensure that the pressure is evenly distributed across the surface of your deck. This will help prevent uneven patches and dips in your wood’s surface. Avoid over-sanding as this can lead to damaging the wood fibers, causing it to weaken.
Now that you have created a smooth and even surface with medium grit sandpaper, it is time for Finishing with Fine Grit Sandpaper. The fine grit will remove any remaining roughness left from the previous sanding steps, leaving you with a polished finish. When using fine grit sandpaper, it is essential not to press down too hard; instead, let the paper do the work for you.
Sanding the edges and corners can be challenging but is crucial in achieving an overall clean look for your deck. Use a small hand-held sander or a piece of fine-grit sandpaper wrapped around a wooden block to reach these areas. Always make sure that you are wearing protective gear such as gloves and goggles when sanding. By taking your time and paying attention to detail, you can ensure that every part of your deck looks just as good as the center section where most people spend their time enjoying its beauty.
Sanding The Edges And Corners
As you move forward with the sanding process, pay attention to the edges and corners of your deck. These areas require special attention because they are often overlooked during routine maintenance. Sanding these areas will help create a smooth and uniform surface that is ready for staining or painting.
To begin sanding the edges and corners, use a small hand-held sander with low-grit sandpaper. This will help to remove any rough spots or splinters that may be present in these areas. Be sure to follow proper sanding techniques by moving the sander in a circular motion while applying even pressure. This will prevent over-sanding or uneven surfaces from forming.
Corner sanding tips include using an angled sanding sponge or block to get into tight spaces. You can also use a piece of sandpaper folded over your finger to reach difficult areas. Remember to be patient and take your time when working on these areas as they require extra care and attention. By following these tips, you can achieve a smooth finish throughout your entire deck that is both aesthetically pleasing and functional.
- Use low-grit sandpaper for rough spots
- Follow proper sanding techniques for even results
- Utilize angled tools for hard-to-reach corners
Now that you have successfully sanded the edges and corners of your deck, it’s time to move onto cleaning up the dust and residue left behind by the sanding process. This step is essential for ensuring a clean surface that is ready for refinishing.
Cleaning Up The Dust And Residue
After sanding your wood deck, you will have to clean up the dust and residue left behind. This is a crucial step as it ensures that no debris or particles remain on the surface, which could affect the quality of the refinishing job. One tip for minimizing dust during cleanup is to use a broom with fine bristles. This will help capture small particles that might have been missed by your sanding equipment.
Another effective way of cleaning up after sanding your wood deck is by using a shop vac. This tool makes it easy to pick up debris and residue from hard-to-reach areas such as corners and edges. When using a shop vac, ensure that you use an attachment with soft bristles to avoid scratching or damaging the wood surface.
Once you have removed all the dust and debris from your wood deck, inspect the surface for any imperfections such as scratches or dents. It is important to address these issues before proceeding with refinishing to ensure that you achieve a smooth and even finish. In the next section, we’ll discuss how to properly inspect your deck’s surface for imperfections and what steps you can take to correct them.
Inspecting The Surface For Imperfections
Before commencing any refinishing project, a professional deck refinisher must inspect the surface for common imperfections. Inspecting the wood deck is an essential step in ensuring that the refinishing process will produce a high-quality result that will last longer. The inspection process is crucial in identifying and repairing any damaged areas on the wood deck.
A professional inspection involves checking for cracks, splits, and discoloration on the wood deck’s surface. In addition to these common imperfections, inspectors also look out for mildew stains, algae growth, and water damage. These imperfections can affect the results of the refinishing project if they are not identified and repaired before starting.
Identifying imperfections during a professional inspection helps determine whether repairs are necessary before continuing with the refinishing project. Repairing any damaged areas on the wood deck’s surface ensures that it will be restored to its original state before refinishing begins. By doing so, you can guarantee that your refinishing project will produce a long-lasting result that you can enjoy for many years to come.
Repairing Any Damaged Areas
After inspecting the surface for imperfections, it is time to start repairing any damaged areas on the wood deck before sanding. Identifying damage is crucial because it can affect the end result of the refinishing process. Common types of damage include cracks, splinters, and rotting wood. It is important to address these issues promptly to prevent them from worsening and causing further damage.
Repair techniques vary depending on the type of damage present on the deck. For cracks and splinters, use a wood filler or epoxy to fill in any gaps or holes. Sand down any excess material once it dries. If there are areas where the wood has rotted, remove those sections entirely and replace them with new pieces of wood that match the existing deck. This ensures that the repaired areas blend in seamlessly with the rest of the deck.
Once repairs are complete, assess whether further sanding is needed. A good rule of thumb is to lightly sand any repaired areas to smooth out rough edges and create an even surface before proceeding with full-scale sanding. Additionally, if there are stains or discolorations on certain parts of the deck, focus on those areas during sanding to ensure that they are removed completely before refinishing. With these steps completed, you’re well on your way to a beautifully refinished wood deck that will last for years to come.
Assessing The Need For Further Sanding
When assessing the need for further sanding of a wood deck, it is important to first assess the overall damage of the deck. This involves looking for rot, splintering, and signs of wear. Once the damage has been assessed, it is important to check the areas that have already been sanded to ensure that the surfaces are smooth and even. It is also important to check for any leftover debris or residue from the sanding process. Finally, it is important to check for any remaining patches of rough or uneven surfaces that need further sanding.
Assessing Damage
Common damages on wood decks are inevitable, especially if the deck is exposed to harsh weather and constant foot traffic. Some of the common damages include scratches, cracks, and splits. These damages not only affect the aesthetic value of the deck but also weaken its structure. However, some damages can be prevented by taking necessary measures such as applying a sealer or stain that will protect the wood against moisture and UV rays.
Prevention measures can only do so much in protecting a wood deck from damages. Assessing the damage done to a deck is crucial before refinishing it. This assessment helps determine whether further sanding is necessary. Depending on the extent of damage, further sanding may be required to remove deep scratches and roughen up the surface for better adhesion of sealers or stains. Neglecting this step can lead to poor results during refinishing.
In conclusion, assessing damage done to a wood deck is an important step in determining whether further sanding is necessary before refinishing. Common damages such as scratches, cracks, and splits can be prevented with proper maintenance measures like applying sealers or stains that protect against moisture and UV rays. Neglecting this step could result in poor refinishing results, which will ultimately impact your overall satisfaction with your newly refinished deck.
Checking Sanded Areas
As a professional deck refinisher, monitoring progress during sanding is essential in ensuring the best results for your deck. Checking sanded areas is an important step in assessing the need for further sanding. After initial sanding, it is important to inspect the surface of the wood to identify missed spots that may require additional sanding.
Checking sanded areas requires a keen eye and attention to detail. It involves conducting a thorough inspection of the surface of the wood to ensure that all areas have been evenly sanded. A good approach is to use a bright light source and angle it across the surface, which will help highlight any imperfections or missed spots. By identifying these areas early on, you can prevent them from becoming bigger problems later on.
In summary, checking sanded areas during refinishing projects is crucial for achieving optimal results. This process involves inspecting the surface of the wood to identify any missed spots that may require further sanding. Neglecting this step could lead to poor adhesion of sealers or stains, resulting in unsatisfactory refinishing results.
Applying The New Finish
As we’ve sanded the deck down to a smooth surface, it’s time to apply the new finish. Think of this process like painting a masterpiece – you need to choose the right colors and layer them properly. The same goes for refinishing a deck. Choosing the right stain is crucial as it not only affects the overall look but also protects against weathering.
When selecting a stain, consider the wood species and its natural color. You can opt for transparent or semi-transparent stains that highlight the natural beauty of wood or go for solid stains that provide complete coverage. Additionally, ensure that the stain is suitable for exterior use and has UV inhibitors to prevent fading. Once you have your stain, it’s time to start applying multiple coats.
To achieve a professional-looking finish, we recommend applying at least two coats of stain with a roller or brush. Ensure that each coat dries completely before applying another one. Be mindful of any drips and wipe them off immediately with a clean cloth. If necessary, sand lightly between coats to remove any roughness or bubbles.
Now that you’ve applied multiple coats of stain and let it dry completely, your deck should look as good as new! But remember, maintaining your refinished deck is just as important as refinishing it. In the next section, we’ll discuss some tips on how to keep your deck in top condition for years to come.
Maintaining Your Refinished Deck
After putting in the effort to refinish your deck, it’s important to take steps to maintain its shine and prevent wood rot. One of the easiest ways to keep your deck looking great is by regularly cleaning it. Sweep away debris and use a pressure washer or garden hose with a sprayer attachment to wash away dirt and grime.
In addition to regular cleaning, you can also maintain your deck shine by applying a protective coating every few years. Choose a quality sealer or stain that is designed for outdoor use and follow the manufacturer’s instructions carefully. This will help protect your deck from sun damage, moisture, and other environmental factors that can cause it to deteriorate over time.
Preventing wood rot is another key aspect of maintaining your refinished deck. Make sure any water sources near the deck are properly directed away from it, such as through the use of gutters and downspouts. Also, inspect the decking boards regularly for signs of decay or damage, such as soft spots or cracks. If you notice any issues, replace them promptly to prevent further damage.
By following these simple tips for maintaining your refinished deck, you can enjoy a beautiful outdoor space that lasts for years to come without worrying about wood rot or other problems. Remember to clean your deck regularly, apply a protective coating every few years, and inspect the decking boards for signs of decay or damage so you can address issues quickly before they become bigger problems.
Conclusion
Sanding a wood deck before refinishing is a crucial step in maintaining its longevity and aesthetic appeal. As a professional deck refinisher, I understand the importance of properly sanding a deck to ensure that it is adequately prepared for the new finish. It not only removes dirt, grime, and old finishes but also helps to smooth out any rough areas and raise the grain of the wood for better absorption of the new finish.
To sand your deck, you need to gather the necessary tools and prepare the surface by clearing any debris or obstacles. Also, repair any damaged areas before assessing whether further sanding is required. Choosing the right sandpaper grit is vital as it determines how much material will be removed from your deck.
After sanding your deck, you can apply the new finish using a paintbrush or roller. However, proper maintenance is necessary to keep your refinished deck looking good for years to come. Regular cleaning and inspection can help identify any issues early on and prevent costly repairs down the line.
In conclusion, sanding a wood deck before refinishing should not be overlooked. It can greatly improve its appearance while also extending its lifespan. With proper preparation, choosing the right tools and sandpaper grits, and applying a quality finish, you can transform your old worn-out deck into an inviting outdoor space that’s perfect for relaxation and entertainment.
Image Credits
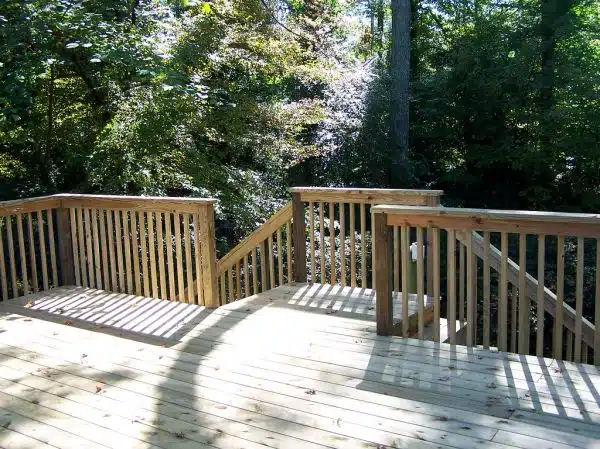
- “Wood Deck” by ntm1909 (featured)




![How To Build A Detached Deck 6 Force Reconnaissance Detachment Deck Shoot [Image 4 of 4]](https://green-life.blog/wp-content/uploads/2023/05/RJo3tlizSGjq-150x150.jpg.webp)


![How To Repair Rotted Wood 13 Texture : Altario Buick Estate Wagon : Rotting Faux Wood Paneling [1 of 2]](https://green-life.blog/wp-content/uploads/2023/05/z1CersK-gCjq-150x150.jpg.webp)

