Water damage is a frustrating and stressful experience for homeowners, especially if it affects their wood floors. Water can seep into the wood fibers, causing warping, cupping, and discoloration. If left untreated, it can lead to irreparable damage and costly repairs. As a wood floor restoration professional, I have seen many cases of water-damaged floors that could have been salvaged with timely intervention. In this article, I will share my knowledge and expertise on how to save a water-damaged wood floor and prevent further damage.
Firstly, it is crucial to understand the nature of wood and how it reacts to water. Wood is a natural material that contains moisture in its fibers. When exposed to excessive humidity or water, wood absorbs moisture and expands. This can cause the planks to swell or buckle, creating gaps or ridges between them. Moreover, prolonged exposure to water can weaken the wood structure and invite mold growth, which poses health hazards for residents. Therefore, prompt action is required when dealing with water-damaged wood floors. By following our guidelines and methods for restoring your wood floor after water damage occurs, you can save your beautiful flooring investment while keeping your family safe from potential hazards.
Understanding Wood And Water Interaction
Wood and water are like oil and water – they don’t mix. When exposed to moisture, wood tends to expand, which can lead to warping, cupping, or buckling. This is why water damage is a serious concern for homeowners who have wooden floors. However, understanding how wood interacts with water can help restoration professionals determine the best course of action.
One of the critical factors in wood-water interaction is the type of wood species used in the flooring. Every species has unique properties that affect how it reacts to moisture. For example, some woods are more resistant to water than others because they have a higher density or tighter grain structure. Restoration professionals need to be knowledgeable about different types of woods and their characteristics so that they can devise appropriate restoration techniques.
Another factor affecting the extent of the damage is the amount of time the floor was exposed to water. The longer the exposure time, the greater the damage will be. Early intervention by restoration professionals is crucial in preventing further degradation of the flooring material. Restoration techniques such as drying out and dehumidifying can be effective in mitigating damage caused by moisture intrusion. It’s also vital to assess structural integrity before attempting any repairs or restoration work on wet floors.
With an understanding of how wood and water interact and knowledge about different types of woods and their characteristics, restoration professionals can prepare for restoring a damaged floor effectively.
Preparing For Restoration
- To begin the restoration process, it is important to remove any standing water and excess moisture from the wood floor.
- An assessment of the damage should then be made to determine the extent of water absorption and the subsequent damage to the wood floor.
- A moisture meter can be used to accurately measure the moisture content of the wood floor to determine the level of water absorption.
- Once the moisture content is known, the next step is to identify the most appropriate restoration techniques to ensure the wood floor is brought back to its original condition.
Removing Water
Water damage on a wood floor is a common problem that can lead to extensive and costly repairs. The first step in preparing for restoration is to remove the water as quickly as possible. If left untreated, excess water can cause rot, warping, and swelling of the wood. To minimize damage, it is important to use effective drying techniques and restoration products.
One effective technique for removing water from a wood floor is through air circulation. Fans or dehumidifiers can be used to promote evaporation and reduce moisture content in the room. Restoration products such as absorbent towels, squeegees, or wet vacuums can also be used to remove standing water or excess moisture in hard-to-reach areas.
It is important to note that different types of wood floors may require specific drying techniques or restoration products. For example, engineered wood floors may respond differently than solid hardwood floors when exposed to water damage. Consulting with a professional wood floor restoration company can provide valuable insight into the best methods for restoring your specific type of wood flooring. By taking prompt action and utilizing proper drying techniques and restoration products, you can save your water-damaged wood floor from further harm.
Assessing Damage
When dealing with water damage on a wood floor, it is essential to assess the extent of the damage before proceeding with restoration. One way to assess the severity of the damage is through moisture meters. These devices measure the moisture content of the affected area and can determine whether or not further drying is necessary. Moisture meters can also help identify areas that may require more attention during restoration.
In addition to using moisture meters, visible signs of water damage should also be considered when assessing the extent of the damage. Visible signs may include discoloration, warping, or swelling of the wood. These signs can indicate that there is underlying damage that cannot be detected by a moisture meter alone. By identifying both visible and unseen damage, proper restoration techniques can be applied to effectively restore the wood floor.
Overall, assessing the extent of water damage on a wood floor is crucial in preparing for restoration. By using moisture meters and identifying visible signs of damage, professionals can determine which drying techniques and restoration products are needed for effective restoration. Taking these steps early on in the process can prevent further harm to the wood flooring and save homeowners from costly repairs down the line.
Safety Precautions
When it comes to restoring a water-damaged wood floor, safety should be your top priority. Before getting started, it is crucial to take the necessary precautions to protect yourself from any potential hazards that may arise during the restoration process. Wearing appropriate gloves and masks can help prevent exposure to harmful chemicals and mold spores that could be present in the damaged flooring.
Using proper ventilation techniques is also essential when working with water-damaged wood floors. Proper ventilation will help reduce the risk of inhaling harmful fumes and dust particles that may be released during restoration. It is recommended to open windows and use fans to circulate air throughout the room while working on the flooring.
In addition, it is important to follow safety guidelines provided by the manufacturer of any products used during restoration. Always read all labels and instructions carefully before using any chemicals or equipment. Failure to do so can result in serious injury or damage to the flooring.
- Wear appropriate gloves and masks
- Use proper ventilation techniques
- Follow safety guidelines provided by manufacturers
- Read all labels and instructions carefully
Taking adequate safety precautions before beginning work on a water-damaged wood floor will help ensure a safe and successful restoration process. With these measures in place, you can protect your health while restoring your home’s beautiful flooring. In the next section, we will discuss how to remove standing water from your damaged floor without causing further damage or harm.
Removing Standing Water
- The first step in removing standing water from a wood floor is to mop up any excess water that is visible.
- Once the surface water has been removed, it is important to extract any remaining water that may have seeped into the flooring.
- The most effective way to extract water from a wood floor is to use a wet/dry vacuum.
- After the water has been extracted, the waste water should be disposed of in a responsible manner.
- It is also important to inspect the underlayment for any water damage and to take appropriate remedial action if necessary.
- Finally, a wood floor restoration professional should be consulted to assess any additional damage that may have been caused by the standing water.
Mop Up Water
Standing water can be a nightmare for homeowners with wood floors. The sight of your beautiful flooring submerged in water can evoke feelings of despair and frustration. As a professional in the wood floor restoration industry, I understand the importance of acting quickly to mitigate the damage caused by standing water. The first step in removing standing water is to mop it up using absorbent materials such as towels or rags.
Using dehumidifiers is crucial in preventing further damage caused by moisture trapped beneath the surface of the wood floor. Once you’ve mopped up as much water as possible, set up dehumidifiers strategically around the affected area to draw out any remaining moisture. This will help prevent mold growth and warping of planks. It’s important to monitor the humidity levels and adjust accordingly until they return to normal.
Repairing warped planks may be necessary if the damage caused by standing water is severe enough. In some cases, replacement may be required if repairs aren’t feasible. To minimize future instances of water damage, consider sealing your wood floors with a protective coating that repels liquid spills and makes cleaning up easier. Remember, acting quickly when dealing with standing water can make all the difference in saving your beloved wood floors from further damage.
Extract Water
To effectively remove standing water from wood floors, it’s necessary to use proper water extraction techniques. As a professional in the wood floor restoration industry, I recommend using specialized drying equipment options such as wet vacuums, carpet cleaners, or sump pumps. These tools are specifically designed for extracting water from flooring materials and can help prevent further damage caused by moisture.
When using water extraction techniques, it’s important to act quickly and thoroughly. Any remaining moisture left behind can lead to mold growth and warping of planks. In some cases, the damage may be severe enough to require replacement of affected areas. To avoid this costly scenario, I advise homeowners to invest in high-quality drying equipment options that are capable of removing all standing water.
In addition to utilizing proper water extraction techniques, it’s important to monitor the humidity levels in the affected area and adjust accordingly until they return to normal. This helps prevent future instances of standing water and ensures your wood floors remain in top condition. By taking these steps, you can effectively remove standing water from your wood floors and preserve their beauty for years to come.
Dispose Of Waste Water
Proper disposal of waste water is a crucial aspect of removing standing water from wood floors. As a professional in the wood floor restoration industry, I cannot stress enough the importance of disposing of waste water properly to prevent any environmental impact. This means avoiding dumping waste water into storm drains or other bodies of water that could be contaminated with harmful chemicals.
To ensure proper disposal, it’s important to use specialized equipment such as wet vacuums or carpet cleaners that have built-in tanks for collecting waste water. These tanks should be emptied and cleaned after each use to prevent any buildup of bacteria or mold. Additionally, it’s important to dispose of waste water in accordance with local regulations and guidelines.
When disposing of waste water, it’s important to consider the environmental impact it may have. Some cleaning solutions used during the removal process can be harmful to plants and animals if not disposed of properly. To minimize any negative impact on the environment, we recommend using eco-friendly cleaning solutions and properly disposing of all waste materials in designated areas.
In conclusion, proper disposal of waste water is an essential part of removing standing water from wood floors. As professionals in the industry, we take great care in ensuring that all waste materials are collected and disposed of safely and responsibly. By following these guidelines, we can effectively remove standing water while minimizing any negative impact on the environment.
Drying The Wood
After removing the standing water, it is essential to dry out the wood floor as quickly as possible. Moisture measurement is a crucial step in determining if the wood has dried completely. Moisture meters can be used to check the moisture content of the wood before and after drying.
Air circulation is also an important factor in drying the wood floor. Fans and dehumidifiers can be used to increase air circulation and remove excess moisture from the air. The temperature of the room should also be kept warm to aid in drying.
It is important to note that even after drying, there may still be damage to the wood floor. Inspecting for damage such as warping or buckling should be done once the floor has been completely dried. Any necessary repairs should be made promptly to prevent further damage and ensure the longevity of the wood floor.
Inspecting For Damage
Inspecting for Damage:
To properly assess the damage of a water-damaged wood floor, one must understand the inspecting techniques. Early detection is crucial in preventing further damage and avoiding costly repairs. Inspecting for water damage involves a thorough examination of the flooring, starting from the surface level to the subfloor.
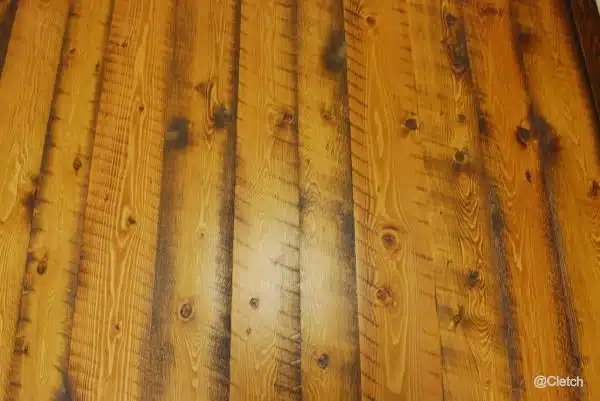
When inspecting for water damage, it is important to look out for signs such as discoloration, warping or cupping, cracks, and mold growth. Discoloration can occur when moisture penetrates deep into the wood fibers, causing stains that are hard to remove. Warping or cupping happens when there is an uneven distribution of moisture on the surface of the wood plank. Cracks are another sign of severe water damage where the wood loses its structural integrity due to prolonged exposure to moisture. Lastly, mold growth is an indication that there has been moisture accumulation which can lead to health hazards.
In conclusion with inspecting for damage, early detection is critical in identifying any potential issues before they escalate into major problems. Preventive measures such as regular inspections and proper maintenance can help you avoid costly repairs in the future. If you detect any signs of water damage on your wood floor during inspection, it’s best to contact a professional restoration service immediately to assess the extent of the problem and recommend appropriate solutions such as sanding and refinishing.
Sanding And Refinishing
Inspecting for damage is a crucial step in the process of saving a water-damaged wood floor. However, once you have identified the extent of the damage, it’s time to move on to refinishing techniques. After all, you want your wood floor to look as good as new again.
One effective refinishing technique for damaged wood floors is sanding. Sanding will help remove any stains or discolorations caused by the water damage. It also smooths out any rough patches that may have formed due to swelling or warping caused by the moisture. After sanding, you can apply a new coat of finish to give your floor a polished look.
Another important aspect of refinishing water-damaged wood floors is choosing the right wood stain. A quality stain will not only restore color to your floor but also protect it from future damage. There are many different types of stains available, each with its unique properties and benefits. As an expert in this field, I recommend using oil-based stains as they penetrate deep into the wood and provide long-lasting protection against moisture and other environmental factors.
When it comes to replacing damaged planks in your wood floor, it’s essential to do so with care and precision. Even a slight difference in height or width can make your floor look uneven and unprofessional. Therefore, it’s best to hire a professional who has experience in replacing damaged planks while maintaining consistency in color and texture throughout the entire flooring surface. With proper refinishing techniques, careful selection of wood stains, and professional assistance when replacing damaged planks, you’ll be able to save your water-damaged wood floor and enjoy its beauty for years to come.
Replacing Damaged Planks
When it comes to wood floor restoration, replacing damaged planks is a common solution. This is particularly true for water-damaged floors, as water can penetrate the wood and cause it to warp or rot. Unfortunately, replacing planks can be a time-consuming and expensive process. The cost of replacement will depend on the type of wood used in your flooring and the extent of the damage.
If you’re considering replacing damaged planks on your own, there are some DIY repair options available. However, it’s important to note that this is a delicate process that requires a certain level of skill and expertise. You’ll need to carefully remove the damaged plank without causing any further damage to surrounding boards. You’ll also need to ensure that the new plank fits seamlessly into place and matches the color and texture of the existing flooring.
Overall, replacing damaged planks is often the most effective way to restore a water-damaged wood floor. While it may be costly, it’s an investment in the long-term health and durability of your flooring. If you’re not comfortable attempting this repair on your own, consider hiring a professional to ensure that the job is done correctly.
Moving forward, if you’ve had water damage in your home, it’s important to address any potential mold growth as soon as possible. Mold can easily develop in damp environments like those created by water damage, and can pose serious health risks if left unchecked. In our next section, we’ll discuss how to deal with mold growth on your wood floors.
Dealing With Mold
- Mold can be identified by its characteristic musty odor and discoloration on the surface of the wood floor.
- To remove mold, all affected wood should be removed and replaced.
- The area should then be thoroughly cleaned with a detergent solution and dried completely.
- To clean mold, non-porous materials such as tile or linoleum should be scrubbed with a bleach solution.
- For porous materials such as wood, a borate solution should be applied and left to dry.
- The wood floor should be sanded, vacuumed, and sealed to prevent future mold growth.
Identifying Mold
Identifying mold is a crucial step in dealing with water damage on wood floors. Mold thrives in moist environments, and if left untreated, it can spread quickly and cause health hazards. One way to identify mold is through visual inspection. Look for any discoloration or dark spots on the surface of the wood floor, particularly in areas where there is moisture or standing water. It’s also important to pay attention to any musty odors as they could indicate mold growth.
Preventing the growth of mold is essential when dealing with water damage on wood floors. The first step towards prevention is to eliminate the source of moisture. This could mean fixing a leaky pipe or addressing poor ventilation in the room. It’s also important to dry out the affected area as soon as possible using fans or dehumidifiers. Regular cleaning and maintenance should also be performed to ensure that there are no areas where moisture can accumulate.
In conclusion, identifying mold and preventing its growth are critical steps when dealing with water damage on wood floors. As professionals in wood floor restoration, we understand that these tasks require expertise and proper equipment to ensure effective results. By taking these measures seriously, we can not only restore your wood floor but also create a safer environment for you and your loved ones.
Removing Mold
Dealing with mold on wood floors requires a comprehensive approach that includes identifying, preventing, and removing it. While mold prevention is crucial, sometimes it may have already grown on the floor, requiring remediation techniques. Mold remediation involves several steps to ensure that the mold is removed safely and effectively.
The first step in removing mold is to contain the affected area to prevent its spread. This involves sealing off doors and windows and covering any vents or air ducts. The next step is to remove any porous materials that are contaminated with mold, such as carpeting or padding. Once these materials are removed, the remaining surfaces should be cleaned using specialized equipment and cleaning solutions designed for mold removal.
After cleaning, the area should be thoroughly dried using fans or dehumidifiers to prevent further growth of mold. It’s essential to also address any underlying issues that could lead to moisture accumulation in the future, such as fixing leaks or improving ventilation. By following these steps and utilizing proper equipment and techniques, we can safely remove mold from your wood floor while ensuring a healthy environment for you and your family.
Cleaning Mold
Dealing with mold is a crucial aspect of maintaining the health and safety of your home. When it comes to wood floors, mold can be particularly problematic as it can lead to structural damage and pose a risk to your family’s health. As a professional in wood floor restoration, we know that cleaning mold from wood floors requires a comprehensive approach that involves removing spores and preventing regrowth.
One of the most critical steps in dealing with mold on wood floors is cleaning it thoroughly. This involves using specialized equipment and cleaning solutions designed for mold removal to ensure that all spores are eliminated. It’s essential to remove any porous materials that are contaminated with mold, such as carpeting or padding, to prevent further growth. Once cleaned, the area should be dried thoroughly using fans or dehumidifiers to prevent moisture accumulation that could lead to regrowth.
Preventing regrowth is just as important as removing existing mold from wood floors. Addressing underlying issues such as leaks or poor ventilation can help reduce moisture levels and prevent future outbreaks. Regularly inspecting the floor for signs of water damage or other issues can also help catch potential problems early on before they escalate into more serious problems. By taking these preventative measures, you can ensure that your home remains safe and healthy for you and your family.
Applying A Protective Coating
To safeguard your floor from future water damage, you must apply a protective coating. Applying a protective coating to your newly restored floor provides an extra layer of defense against moisture and spills. A protective coating is available in various types, such as wax, oil, and polyurethane.
Wax-based coatings are the most common option for protecting wood floors. They provide an excellent level of protection by creating a barrier between the surface and any potential damage. Oil-based coatings are also popular due to their natural look and feel. Polyurethane coatings are highly durable and resistant to scratches and scuffs.
To apply the protective coating effectively, follow these steps:
- First, clean your floor thoroughly.
- Next, sand the surface lightly with fine-grit sandpaper.
- Finally, use a brush or roller to apply the coating evenly on the surface.
After applying a protective coating to your floor, it is essential to maintain it regularly. Cleaning your floor by sweeping or vacuuming removes dirt and debris that can scratch or dull its finish. Additionally, polishing your floor periodically helps restore its shine and maintains its protective layer.
Maintaining Your Restored Floor
Now that your water-damaged wood floor has been restored, it is important to implement a regular maintenance schedule to keep it in excellent condition. One of the most effective ways to do this is by employing appropriate cleaning techniques. Vacuuming and sweeping are essential for removing dirt and debris from the surface of the floor. For more thorough cleaning, use a damp mop or cloth with a mild cleaning solution specifically formulated for wood floors. Avoid using abrasive materials or harsh chemicals as they can damage the protective finish.
In addition to regular cleaning, it is recommended that you establish a maintenance schedule for your restored wood floor. This includes having furniture pads installed on all legs of chairs, tables, and other heavy items to prevent scratches or dents on the surface of your flooring. Also, consider placing rugs or mats at entryways and high-traffic areas to minimize wear and tear.
By adhering to these maintenance measures, you can ensure that your restored wood floor maintains its luster and durability for years to come. In our next section, we will discuss tips on preventing future water damage so that you can avoid costly repairs in the future.
Preventing Future Water Damage
Prevention is key when it comes to water damage on wood flooring. One of the most effective ways to prevent water damage is by choosing a water-resistant flooring option. While hardwood floors are beautiful and timeless, they can be easily damaged by excess moisture. Consider choosing a type of flooring that is less prone to water damage, such as ceramic tile or luxury vinyl planks. These materials offer the look of hardwood with added durability and resistance to moisture.
In addition to selecting the right flooring material, it’s important to maintain proper humidity levels in your home. High humidity can cause wood floors to warp and buckle, so it’s important to keep the humidity level between 30% and 50%. You can use a dehumidifier or air conditioner to regulate the humidity in your home. Additionally, avoid using excessive amounts of water when cleaning your floors, as this can lead to water damage over time.
Investing in water-resistant flooring options and maintaining proper humidity levels can go a long way in preventing future water damage on your wood floors. However, accidents do happen, and it’s important to know what common mistakes to avoid when dealing with water-damaged floors.
Common Mistakes To Avoid
- The importance of drying out a wood floor after water damage cannot be overstated, as failure to do so quickly and thoroughly can lead to irreparable damage.
- Before attempting any repairs, it is essential to inspect the subfloor for any signs of water damage or decay.
- In cases where individual boards have been significantly damaged, replacement may be the only option to ensure the floor remains structurally sound.
- When reinstalling new boards, care should be taken to ensure the new boards match the existing floor as closely as possible in terms of color and grain.
- Once any new boards have been installed, all exposed surfaces should be sealed with a water-resistant coating.
- Finally, pay attention to the expansion gaps between boards and make sure they have been filled with a flexible sealant to prevent future water damage.
Not Drying Out The Floor Quickly Enough
As a wood floor restoration professional, I have seen many homeowners make the mistake of not drying out their water-damaged floors quickly enough. This can lead to irreversible damage and even mold growth, which can be harmful to one’s health. In order to prevent this from happening, it is important to act fast and use appropriate tools such as dehumidifiers to remove excess moisture from the area.
Dehumidifier usage is crucial in saving a water-damaged wood floor. These machines help to draw out the moisture in the air and prevent further absorption into the flooring. It is important to note that not all dehumidifiers are created equal, so it is recommended to consult with a professional on which type of machine would best suit your specific situation.
In addition to using a dehumidifier, it is also imperative to conduct moisture testing throughout the restoration process. This helps to ensure that all areas of excess moisture have been properly addressed and no further damage will occur. Failure to do so can result in additional problems down the line, which could have easily been prevented by taking proper precautions at the outset.
Not Inspecting The Subfloor
As a wood floor restoration professional, it is essential to identify all possible causes of damage and address them accordingly. One common mistake homeowners make is neglecting to inspect the subfloor for potential water damage. This can result in hidden damage that may go unnoticed until it’s too late. As such, conducting a thorough inspection of the subfloor should be done before any restoration work begins.
Identifying hidden damage in the subfloor is critical because it can lead to further issues down the line. Even if the surface area appears to be dry, there could still be moisture trapped underneath that will cause problems later on. Moisture can lead to mold growth, warping or cupping of the wood planks, and even structural damage if left unaddressed. By inspecting the subfloor before beginning any restoration work, you can ensure that all areas of potential damage are properly addressed.
In conclusion, not inspecting the subfloor for water damage is a common mistake that can have significant consequences on your wood floor’s overall health and longevity. As a professional in this field, it is my recommendation that homeowners take this step seriously and conduct a thorough inspection before beginning any restoration work. Doing so will not only save time and money but also prevent future headaches caused by hidden damage.
Not Replacing Damaged Boards
Another common mistake that homeowners make when it comes to wood floor repair is not replacing damaged boards. While DIY restoration techniques are popular, there are times when professional help is necessary. One such instance is when there are damaged boards that need to be replaced. Neglecting this aspect of the repair process can lead to further damage and may result in a shortened lifespan for your wood floors.
Not replacing damaged boards can also impact the overall appearance of your wood floors. Even if you manage to restore the rest of the floor successfully, a single damaged board can stand out like a sore thumb. This can be particularly problematic if you plan on putting your home up for sale in the future, as potential buyers may be put off by the sight of a damaged board.
As a wood floor restoration professional, my recommendation would be to replace any damaged boards as soon as possible. Doing so will not only ensure that your floors look their best but also prevent any further damage from occurring. Whether you choose to tackle this task yourself or hire a professional, it’s an essential step in ensuring that your wood floors remain healthy and beautiful for years to come.
When To Call A Professional
As the old adage goes, “prevention is better than cure.” This rings true for those who want to save their water-damaged wood floor. However, accidents happen, and sometimes, DIY solutions are not enough. Knowing when to call a professional can be crucial in saving your flooring.
When to DIY depends on the extent of the damage. If the affected area is small and can be easily remedied with a few steps such as drying and sanding, then doing it yourself may be possible. But signs of irreparable damage such as warping or buckling should prompt you to seek professional help immediately. Attempting to fix these issues without proper training could lead to more significant problems.
A professional wood floor restoration team has the necessary knowledge, tools, and experience needed to handle even the most severe water damage cases. They can assess the situation accurately and provide appropriate solutions that will ensure your flooring’s longevity. Don’t hesitate to call for help if you think your floor needs more than just a simple DIY solution.
In conclusion, saving your water-damaged wood floor requires proper assessment and attention from professionals who specialize in restoration services. While some cases can be fixed by DIY methods, it’s important to recognize when the damage is beyond repair and needs expert intervention. Remember that investing in quality service today will save you from costly repairs in the future.
Conclusion: Saving Your Water-Damaged Wood Floor
Saving Your Water-Damaged Wood Floor
If you have a water-damaged wood floor, it is possible to restore it without replacing the entire flooring. The first step in saving your wood floor is to remove any standing water or moisture. This can be done by using towels or a wet/dry vacuum. It is important to act quickly as the longer the water sits on the wood, the more damage it can cause.
Once you have removed all of the water, you can start repairing your wood floor. If the damage is minor, you may be able to use DIY techniques such as sanding and refinishing to restore your flooring. However, if the damage is severe, it may be best to hire a professional restoration company. Restoration cost will vary depending on the extent of the damage and whether or not you choose to hire a professional.
In conclusion, saving your water-damaged wood floor requires quick action and attention to detail. With proper cleaning and repair techniques, it is possible to restore your flooring without having to replace it entirely. Whether you choose to do-it-yourself or hire a professional restoration company, it is important to weigh the restoration cost against the value of your flooring before making a decision. Remember that restoring your wood floor not only saves money but also helps preserve its natural beauty for years to come.
Conclusion
Understanding the interaction between wood and water is crucial in restoring a water-damaged wood floor. Proper preparation, safety precautions, and removal of standing water are essential steps in the restoration process. Drying the wood thoroughly and preventing future water damage are also important considerations.
It is vital to avoid common mistakes such as using a heat source or not allowing enough time for drying. When in doubt, it is best to call a professional to ensure proper restoration of the wood floor.
According to the National Flood Insurance Program, floods are the most common natural disaster in the United States, causing an average of $3 billion in damage per year. This statistic evokes an emotional response and emphasizes the importance of taking preventative measures against future water damage.
As a wood floor restoration professional, it is my duty to provide quality services that restore damaged floors to their original state. By following these steps and being cautious throughout the process, your water-damaged wood floor can be saved.
Image Credits
- “Wood Floors” by cletch (featured)

