Hardwood flooring is a popular choice among homeowners due to its durability, natural beauty and timeless appeal. However, gaps between hardwood planks can be a common problem for those who have hardwood floors installed in their homes. These gaps can occur due to seasonal fluctuations in humidity and temperature or poor installation techniques. Not only do they detract from the appearance of your flooring but they can also impact the structural integrity of your floors over time.
As a hardwood flooring technician or installer, it’s important to know how to fix gaps in hardwood floors. There are several methods available depending on the size and location of the gap, as well as the type of hardwood used. In this article, we will explore some effective techniques for fixing gaps in hardwood floors that will help you provide exceptional service to your clients while enhancing the beauty and longevity of their flooring investment.
Understanding The Causes Of Gaps In Hardwood Floors
It’s always an unpleasant sight to see gaps in hardwood floors. It can negatively impact the floor’s stability, and it’s aesthetics. Hardwood flooring is a popular choice for its natural beauty, durability, and long lifespan. However, as with any flooring, it may develop gaps over time.
Causes and prevention of gaps in hardwood floors are essential to understand to avoid them from happening again. One of the most common causes of gapping is seasonal change; during colder months, indoor humidity decreases, causing wood to contract and create spaces between planks. Another factor that contributes to gapping is improper installation or insufficient acclimation time before installation.
Gaps can have significant impacts on hardwood floor stability and aesthetics. Gaps larger than 1/8 inch can cause tripping hazards and even lead to further damage if left unaddressed. Additionally, wide gaps can collect debris that may be challenging to clean. Therefore it’s crucial to address these gaps promptly by evaluating their severity and taking appropriate measures accordingly.
Evaluating The Severity Of The Gap
- Accurately measuring the gap between the boards is an essential first step in evaluating the severity of the gap for hardwood floor repair.
- The area must then be thoroughly prepared to ensure a successful application of the repair solution.
- Assessing the needed materials for the repair is a crucial step in determining the amount of time and effort required to complete the task.
- The size, depth and width of the gap must be taken into account to determine the best method of repair.
- The type of hardwood material and the desired finish must be considered when selecting the appropriate materials to fill the gap.
- The surrounding area must be evaluated to ensure that the repair will be done in a manner that is both safe and aesthetically pleasing.
Measuring The Gap
When it comes to fixing gaps in hardwood floors, one of the first steps is evaluating the severity of the gap. This involves measuring the size of the gap accurately to determine what type of repair is needed. Measuring accuracy is crucial as even small errors can lead to incorrect repairs.
To measure a gap accurately, there are several common measurement tools that hardwood flooring technicians or installers use. These include a tape measure, calipers, and feeler gauges. Tape measures are useful for measuring longer gaps while calipers and feeler gauges are ideal for smaller gaps. It’s important to note that using the correct tool for each situation is necessary for accurate measurements.
When measuring a gap, it’s essential to take multiple measurements at different points along the gap as gaps can vary in width and depth. By taking multiple measurements, you’ll be able to determine an average gap size and make a more accurate repair plan. Accurately measuring gaps is just one step in fixing them; however, it’s an essential step that should not be overlooked.
Preparing The Area
In addition to accurately measuring the size of the gap, preparing the area is also an essential step in fixing gaps in hardwood floors. Protective measures must be taken to avoid any damage to the surrounding flooring during the repair process. It’s important to cover nearby furniture, walls, and other surfaces with protective materials such as plastic sheets or drop cloths.
Necessary tools for preparing the area may include a vacuum cleaner, broom, and dustpan. The immediate surrounding area must be cleaned thoroughly before starting any repairs. The debris and dust particles must be removed from the gap using a vacuum cleaner or a broom and dustpan. This ensures that the repair material can be applied correctly without any obstructions.
Once the immediate surroundings are clean and protected, it’s time to prepare the gap itself for repair. Depending on the severity of the gap, different types of repair methods may be necessary. This includes filling small gaps with wood filler or applying new planks for larger gaps. Preparing the area is critical as it ensures that repairs are made accurately without damaging other parts of the floor.
Assessing Needed Materials
Assessing the severity of the gap is an essential step in repairing hardwood floors. Once the size of the gap has been measured, it’s time to evaluate the materials that will be needed for repair. The type and amount of materials required will depend on the severity of the gap.
To accurately assess what materials are needed for hardwood floor repairs, a thorough evaluation of the damage is necessary. For small gaps, wood filler may be all that’s required to fill in the space. However, larger gaps may require new planks or even replacement of entire sections of flooring. Additionally, assessing the severity of the damage can help determine how much material will be needed and provide an estimate for cost.
Once an assessment has been made regarding what materials are needed to repair a hardwood floor, it’s important to gather those materials and ensure they are readily available during the repair process. This includes purchasing enough wood filler or extra planks as well as any necessary tools such as saws or nails. By gathering all necessary materials beforehand, technicians can work efficiently and complete repairs without any unnecessary delays.
Identifying The Type Of Hardwood
After evaluating the severity of the gap, it is important to identify the type of hardwood before proceeding with fixing the gaps. Identifying techniques may involve comparing the color and grain pattern of the existing floorboards with samples from a flooring store or manufacturer. It is important to note that different types of hardwood have varying levels of hardness, which may affect the choice of filler material and installation method.
One common misconception is that all hardwood floors are the same and can be fixed using a one-size-fits-all approach. This is not true as each type of hardwood has unique characteristics, such as color, texture, and hardness. Another misconception is that gaps in hardwood floors are always caused by moisture or humidity issues. While this can be a factor, there are other reasons for gaps such as natural expansion and contraction due to temperature changes or improper installation.
Identifying the type of hardwood involves careful observation and knowledge about different species of wood. By doing so, you can determine which filler material is best suited for your specific type of hardwood, ensuring a seamless repair. In the next section, we will discuss choosing the right filler material and how it contributes to achieving a professional-looking finish on your newly repaired floor.
Choosing The Right Filler Material
When it comes to fixing gaps in hardwood floors, choosing the right filler material is crucial. Not all fillers are created equal, and selecting the wrong one can lead to unsightly results. There are several factors to consider when choosing a filler material, including color matching and drying time.
Matching color is an important consideration when selecting a filler material. The goal is to choose a filler that closely matches the color of the surrounding wood. This will help ensure that the repair blends seamlessly with the rest of the floor. Some fillers come in pre-mixed colors, while others require mixing with stain or paint to achieve a match.
Drying time is another crucial factor in selecting a filler material. Some fillers dry quickly, while others take longer to set up. The drying time will depend on several factors, including temperature and humidity levels in the room. It’s important to choose a filler that has an appropriate drying time for your project so that you can move on to sanding and finishing as soon as possible.
- Consider using wood putty for small gaps.
- Use epoxy or resin-based fillers for larger gaps.
- For wider gaps (1/4 inch or more), consider using rope-like fillers made of compressed wood fibers.
- If you’re unsure which type of filler to use, consult with a professional hardwood flooring installer.
With these considerations in mind, you’ll be better equipped to choose the right filler material for your hardwood floor repair project. Next up, we’ll discuss how to prepare the gap for filling.
Preparing The Gap For Filling
Before filling the gaps in your hardwood floors, proper preparation is necessary to ensure that the repair is done correctly. The first step in preparing the gap for filling is to clean it thoroughly. Any debris or dirt should be removed to prevent it from interfering with the adhesion of the filler material. A vacuum cleaner and a damp mop can be used to remove any dust or dirt that has accumulated in the gap.
Gap filling techniques vary depending on the size and width of the gap. For small gaps, wood putty can be used, while larger gaps require a more substantial filler material such as epoxy or latex filler. Necessary tools for gap repair include sandpaper, a putty knife, measuring tape, and a chisel. These tools are essential for removing any excess filler after application and ensuring that the surface is smooth and even.
Proper preparation of the gap before filling is crucial for achieving a long-lasting repair. Once you have cleaned out any debris or dirt from the gap and gathered all necessary tools, you can move on to applying wood filler. This process involves carefully selecting an appropriate filler material based on factors such as size and width of the gap, desired finish color, and drying time. By following these steps, you can effectively repair gaps in your hardwood floors without compromising their appearance or integrity.
Applying Wood Filler
After preparing the gap for filling, the next step is to apply wood filler. One way to do this is by using a putty knife to spread the filler over the gap until it is completely filled. It is important to choose a color matching filler to ensure that the gap blends in with the rest of the floor seamlessly.
When applying wood filler, it is essential to consider drying time. The length of time required for drying will vary depending on the type of filler used and how deep the gap is. It is best practice to follow manufacturer instructions regarding drying time before proceeding with sanding.
Once the filler has dried completely, it’s time to sand down the filled gap. Sanding should be done carefully and slowly, ensuring that any excess filler around the gap is removed without damaging surrounding areas of flooring. This process helps achieve an even surface level and a smooth finish that matches with the rest of your hardwood floor.
Sanding The Filled Gap
- Prior to sanding the filled gap, it is essential to prepare the floor by removing any existing varnish or sealant and cleaning the area.
- The filled gap should then be sanded using sandpaper of different grits and a powered sander to ensure a smooth finish.
- It is important to start with a coarse grit and gradually move to a finer grit to ensure an even, uniform surface.
- Care should be taken to avoid sanding too aggressively as this may cause further damage to the floor.
- Once the sanding is complete, the area should be wiped down and vacuumed to remove any excess dust.
- A fresh coat of sealant can then be applied to the area to protect the floor and complete the finishing process.
Preparing The Floor
To achieve a perfect hardwood floor, it is essential to prepare the surface before sanding any filled gaps. Sanding techniques can only be effective when applied to a clean and dry surface. Therefore, the first step in preparing the floor is to remove all dirt, debris, and residues that might have accumulated on the surface. This can be achieved by sweeping or vacuuming the floor thoroughly.
After cleaning, it is critical to conduct moisture testing on the floor. Moisture can severely damage hardwood floors and cause gaps even after filling them. High humidity levels or water damage may result in warping, cupping, or buckling of planks, which would require extensive repairs. Therefore, before sanding any filled gap, ensure that moisture levels are within acceptable limits.
Once you have confirmed that the floor is clean and dry with acceptable moisture levels, proceed with sanding the filled gap using appropriate techniques. Depending on the size of the gaps and type of wood used for flooring, different sanding tools may be required to achieve optimal results. However, it is important not to over-sand or under-sand since this could lead to uneven surfaces or over-exposure of subflooring material. In conclusion, proper preparation of hardwood floors before sanding filled gaps ensures successful repair and enhances their longevity.
Sanding The Filled Gap
After preparing the hardwood floor, the next step is to sand the filled gap. Sanding is a crucial aspect of repairing hardwood flooring since it levels out any bumps or uneven surfaces, creating a smooth and aesthetically pleasing finish. Additionally, sanding helps to remove any excess filler and prepares the surface for staining or finishing. However, it is important to note that there are alternatives to sanding, such as using a hand scraper or chemical stripping. Nevertheless, sanding remains the most effective method for achieving optimal results.
One of the benefits of sanding filled gaps in hardwood floors is that it ensures durability and longevity. Filling gaps without proper sanding can lead to an uneven surface that is prone to wear and tear. Over time, this could cause further damage and necessitate additional repairs or replacement of entire planks. Moreover, sanding ensures that the filler adheres well to the surrounding wood, preventing future gaps from forming.
To achieve optimal results when sanding filled gaps in hardwood floors, it is crucial to use appropriate techniques and equipment. The type of sander used will depend on various factors such as the size of the gap and type of wood flooring being repaired. It is also critical not to over-sand or under-sand since this could create an uneven surface that affects both aesthetics and functionality. Overall, proper preparation and execution of sanding techniques are essential for repairing hardwood floors effectively.
Finishing The Floor
After sanding the filled gaps in hardwood floors, the next crucial step is to apply the finish. Choosing the right finish is essential since it protects the wood and enhances its natural beauty. There are various types of finishes available, such as oil-based, water-based, or wax finishes. Each type has its advantages and disadvantages, depending on factors such as durability, color retention, and ease of application.
Once you have selected the appropriate finish for your hardwood floor, it is essential to apply it evenly across the entire surface. Applying the finish unevenly can result in unsightly blotches that affect both aesthetics and functionality. To achieve an even finish, start by applying a thin coat with a brush or roller and allow it to dry completely before adding subsequent coats. It’s also critical to follow manufacturer instructions regarding drying times and number of coats required.
In conclusion, finishing a hardwood floor after filling gaps ensures not only aesthetic appeal but also protection from wear and tear. Choosing the right finish and applying it evenly are crucial steps in achieving optimal results when repairing a hardwood floor. Whether for personal use or commercial purposes, following these steps will ensure that your hardwood floor remains durable and visually appealing for years to come.
Staining The Filled Gap To Match The Rest Of The Floor
Matching stain is crucial in making sure that the filled gap blends well with the rest of the floor. Before staining, ensure that the filler is completely dry and sanded flush to the floor surface. This will prevent any unevenness during staining and finishing. It is also advisable to test the stain on a small area first to make sure it matches perfectly.
There are different finishing techniques that can be applied after staining to achieve a seamless look. One option is applying a clear coat over the entire floor, including the filled gaps. This creates a uniform finish and helps protect against future wear and tear. Another technique involves blending in some sawdust from sanding with wood glue, then using this mixture to fill smaller gaps before staining and finishing.
When applying stain, use a small brush or cloth to carefully apply it onto the filled gap, ensuring that it blends well with surrounding areas. Apply additional coats as needed until you achieve your desired color match. After staining, apply your chosen finish using even strokes in long continuous lines for optimum results. Keep in mind that proper care and maintenance of your hardwood floor will help preserve its beauty for years to come.
To further address larger gaps in hardwood floors, another technique involves using wood strips to fill them up. This technique requires more advanced skills and tools for cutting precise measurements of wood strips since they must fit perfectly into the gaps without causing any further damage to your flooring.
Using Wood Strips To Fill Larger Gaps
Accurately measuring the size of the gap is critical to ensure the correct selection of wood strips. Wood strips should be chosen based on the type and color of the existing hardwood floor, as well as its thickness. Installation of the wood strips can be done with a hammer, nails, and adhesive. To secure the wood strips, the nails should be hammered into the subfloor. Adhesive should be applied along the edges of the wood strips, and the strips should be pressed into the gaps firmly. A damp cloth should be used to wipe away any excess adhesive which may have seeped onto the hardwood floor.
Measuring Gaps
Achieving a seamless and polished look for hardwood floors requires meticulous attention to detail. Measuring gaps in hardwood floors is an important task that should not be overlooked. The accuracy of gap measurement is crucial in determining the appropriate size of wood strips needed to fill larger gaps.
To measure gaps accurately, it is important to use the right tools and techniques. A measuring tape or ruler can be used to calculate gap width. However, it is also essential to keep in mind that the gap width may vary at different points along the floorboard. To ensure that all measurements are precise, it is recommended to measure each gap multiple times at different spots along the board and take an average of these measurements.
Once the gap width has been calculated, selecting the right size of wood strip becomes easier. It is imperative to choose a strip that will fit snugly into the gap without any additional trimming or sanding required. Accurate measurement of gaps helps prevent any errors or wasted materials during installation, resulting in a more efficient and cost-effective repair process.
Choosing Wood Strips
To achieve a flawless hardwood floor finish, it is necessary to ensure that any gaps are filled correctly. Using wood strips is an effective way of filling larger gaps in hardwood floors. When choosing wood strips for the job, there are several factors to consider.
One important factor is the thickness of the wood strip. The thickness should be chosen according to the width and depth of the gap being filled. If the gap is deep, then a thicker wood strip should be used to ensure a snug fit. On the other hand, if the gap is shallow, then a thinner wood strip may be sufficient.
Another crucial factor to keep in mind is the length of the wood strip. The length should be at least equal to or slightly longer than the length of the gap being filled. Choosing a shorter woodstrip may result in unsightly gaps along with the edges where it does not cover entirely.
Selecting appropriate wood strips and ensuring accurate measurements are essential steps for achieving excellent results when filling larger gaps in hardwood floors. By taking these factors into consideration, you can minimize waste and complete your flooring project more efficiently while creating stunning results that will last for years to come.
Installing Wood Strips
After choosing the appropriate wood strips for filling larger gaps in hardwood floors, the next step is to install them correctly. Installing wood strips requires some tools and techniques that ensure a snug fit and a seamless finish.
One of the essential tools needed when installing wood strips is a hammer. The hammer should be used carefully to avoid damaging the surrounding hardwood floor. A chisel or putty knife can also help remove any debris from the gap before inserting the wood strip.
Accurate measurements are crucial when installing wood strips. It is important to measure both the length and width of the gap so that the right size of wood strip can be used. It is advisable to cut the wood strip slightly longer than necessary so that it can be sanded down evenly with the rest of the floor after installation. Additionally, it is recommended to test-fit each piece before nailing it down to ensure a perfect fit.
By following these tips for measuring and using proper tools, installing wood strips becomes easier, resulting in an excellent finish for your hardwood floor. Remember always to take your time and work carefully for optimal results in your flooring project.
Replacing Damaged Boards
Using wood strips to fill larger gaps in hardwood floors can be an effective solution, but it is not always a permanent fix. In some cases, replacing damaged boards may be necessary. Before beginning any repair work, it is important to source the proper materials and tools needed for the job.
Sourcing materials can be done through local hardware stores or online vendors. It is important to ensure that the replacement boards match the species and grade of the existing flooring. This will prevent any noticeable differences in color or texture. Additionally, having access to specialized tools such as a circular saw or flooring nailer may be necessary for a successful installation.
When considering whether to attempt DIY repairs or hire a professional installer, it is important to weigh the pros and cons of each option. While DIY repairs may save money in labor costs, they require a significant amount of time and skill. Professional installers have experience with repairing hardwood floors and may offer warranties on their work. Ultimately, it is up to the homeowner to decide which option best fits their needs and budget.
To prevent gaps in hardwood floors from occurring in the future, there are several steps homeowners can take. Maintaining consistent humidity levels in the home can help prevent wood from expanding and contracting too much. Regularly cleaning and inspecting floors for damage can also help catch issues before they become larger problems. Finally, investing in high-quality flooring materials and professional installation can provide long-lasting results for years to come.
Preventing Gaps In The Future
Like a gardener tending to their plants, preventing gaps in hardwood floors requires consistent care and attention. With a few simple steps, you can ensure your hardwood floors remain gap-free for years to come.
Firstly, it is crucial to prevent shrinkage in your hardwood floors. This can be achieved by ensuring that there is adequate humidity control within your home or office. The ideal humidity level for hardwood floors is between 35-55%. Anything below this range can cause the wood to dry out and shrink, leading to gaps between the planks.
To further prevent gaps from forming in the future, consider implementing these preventative measures:
- Use a humidifier during drier months
- Avoid excessive exposure to sunlight
- Clean up spills and excess moisture immediately
- Use area rugs or mats in high traffic areas
- Schedule regular maintenance with a professional flooring technician
By taking these steps, you can rest assured that your hardwood floors remain beautiful and gap-free for years to come. In the next section, we will explore common mistakes to avoid when fixing gaps in hardwood flooring.
Common Mistakes To Avoid When Fixing Gaps
Using the wrong tools for hardwood floor gap repair can lead to poor results or further damage to the floor. It is important to measure the gap accurately to ensure the correct size of filler is used for the repair. Poor preparation of the gap prior to filling can also lead to a poor finish, so it is important to clean and prepare the gap correctly. Finally, it is important to finish the repair off properly with a sealant or wax to ensure the best possible result.
Using The Wrong Tools
If you’re planning to fix the gaps in your hardwood floor, it’s important to use the right tools. Using the wrong tools can lead to further damage and costly repairs. As a hardwood flooring technician, I’ve seen many cases where homeowners have attempted to repair their floors with improper tools and ended up causing more harm than good.
Before starting any repair work, it’s crucial to take safety precautions. Using the wrong tools can pose a risk to both yourself and your flooring. For example, using a hammer and nails instead of a specialized flooring nailer can lead to splintering and cracking of the wood. Always wear protective gear such as gloves and goggles when working with power tools.
If you don’t have access to specialized flooring tools, there are alternative options that can help you avoid using the wrong tools. For instance, instead of using a saw or an electric sander that may cause uneven surfaces, you could opt for a manual hand scraper or sandpaper. These alternatives might require more time and effort but they’ll ensure that your hardwood floors remain intact and undamaged.
By avoiding common mistakes like using the wrong tools, you can successfully fix gaps in your hardwood floors without causing further damage or requiring expensive repairs down the line. Remember: always prioritize safety precautions and consider alternative tool options when necessary.
Incorrect Measurement
Accurately measuring the gaps in your hardwood floors is crucial when planning to fix them. Incorrect measurement can lead to wasted time, effort, and resources. As a hardwood flooring technician, I’ve seen many cases where homeowners have attempted to repair their floors by estimating the size of the gap and ended up causing more harm than good.
Avoiding mistakes when measuring your hardwood floor gaps begins with using the right tools. A specialized flooring ruler or tape measure is essential for accurate measurement. Using a regular tape measure or ruler might lead to incorrect readings, which could cause you to cut the wrong size of wood or use the wrong type of filler material.
It’s also important to double-check your measurements before cutting any wood pieces or applying filler materials. Taking extra time to ensure that you have measured accurately can save you from costly mistakes down the line. Remember: investing in quality tools and taking extra care in measuring accurately are key steps in avoiding mistakes when fixing gaps in your hardwood floors.
When To Call In A Professional
While fixing gaps in hardwood floors is a common DIY project, it’s important to be aware of the potential pitfalls that can arise. In the previous section, we discussed some common mistakes to avoid when fixing gaps, such as using the wrong type of filler or failing to properly prepare the floor. However, even with proper preparation and technique, some gaps may require professional intervention.
When deciding whether to hire a professional or attempt a DIY fix, cost is often a primary consideration. While DIY fixes may seem more cost-effective at first glance, they can actually end up costing more in the long run if not done correctly. In addition to potentially causing further damage to the floor, a poor DIY job can decrease the value of your home if you ever decide to sell.
Professional services for gap repair vary in cost depending on factors such as the severity of the gaps and the type of wood flooring being used. However, it’s generally recommended to get an estimate from a few different contractors before making a decision. While it may be tempting to choose the cheapest option available, keep in mind that quality workmanship and materials will ultimately save you money and headaches down the line.
When considering cost considerations for gap repair, it’s important not to skimp on quality in favor of lower prices. Hiring a professional can ultimately save you time and money by ensuring that your hardwood floors are repaired correctly and effectively. In the next section, we’ll explore some other factors that should be taken into account when deciding whether or not to call in professionals for gap repair.
Cost Considerations For Gap Repair
As a hardwood flooring technician, I have seen numerous DIY attempts at gap repair that end up causing more damage than good. While DIY gap repair may seem budget-friendly, it can actually end up costing more in the long run due to mistakes and lack of experience. Professional gap repair ensures that the job is done correctly the first time, saving you money and preventing further damage to your floors.
If you do choose to go the DIY route, there are some budget-friendly options available. One option is using wood filler, which can fill in small gaps and cracks. However, be aware that wood filler may not hold up as well over time and may need to be reapplied periodically. Another option is using rope or twine to fill larger gaps before sanding and refinishing your floors.
When considering cost for gap repair, it’s important to weigh the benefits of professional installation versus attempting a DIY fix. While professional installation may initially cost more, it can save you money in the long run by ensuring that the job is done correctly and preventing further damage. On the other hand, if budget constraints are a concern, there are still affordable DIY options available.
Maintaining your hardwood floors for longevity starts with proper gap repair. Whether choosing a professional or DIY approach, consider both budget and experience when making your decision. In the next section, we will discuss tips for maintaining your hardwood floors beyond gap repair to keep them looking beautiful for years to come.
Maintaining Your Hardwood Floors For Longevity
Preventive measures are the key to maintaining your hardwood floors for longevity. Begin by placing mats and runners in high-traffic areas such as entryways, hallways, and kitchens. This will prevent dirt, sand, and grit from being tracked onto your hardwood floors. It’s also important to place felt pads under furniture legs to avoid scratches and dents.
Cleaning techniques are also crucial for maintaining the quality of your hardwood floors. Avoid using wet mops or steam cleaners as they can damage the wood surface. Instead, use a dry mop or vacuum with a soft-bristled attachment to remove dust and debris. If you need to use a cleaning solution, make sure it’s specifically designed for hardwood floors and follow the manufacturer’s instructions carefully.
Regular maintenance is necessary for preserving the beauty of hardwood floors. This includes sweeping or vacuuming at least once a week and cleaning up spills immediately to prevent staining. Also, periodically check for any gaps or cracks in your flooring and have them repaired by a professional before they get worse. By implementing preventive measures and proper cleaning techniques, you can enjoy beautiful hardwood floors that last for decades.
Conclusion
The gaps in your hardwood floors can be a frustrating and unsightly problem, but with the right tools and knowledge, they can be easily fixed. Understanding the causes of gaps, evaluating their severity, and identifying the type of hardwood are all important steps in the repair process. Choosing the right filler material and properly preparing the gap for filling will ensure a successful repair.
It is important to avoid common mistakes such as overfilling or using improper materials, which can lead to further damage. If you are unsure about your ability to fix gaps in your hardwood floors, it may be best to call in a professional. Consider the cost of repairs and maintenance when making decisions about your hardwood flooring.
Remember that maintaining your hardwood floors is key to their longevity. Regular cleaning and upkeep will prevent future damage and keep your floors looking beautiful for years to come. As an installer or technician, it is important to convey this deeper meaning: just as hardwood floors require proper care and attention, our own lives also require regular maintenance to ensure longevity and beauty.
Image Credits
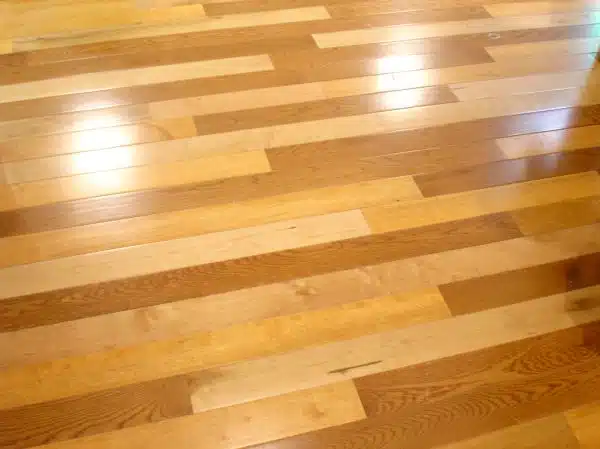
- “Multi-Color Hardwood Flooring” by merfam (featured)





![How To Repair Rotted Wood 16 Texture : Altario Buick Estate Wagon : Rotting Faux Wood Paneling [1 of 2]](https://green-life.blog/wp-content/uploads/2023/05/z1CersK-gCjq-150x150.jpg.webp)

