Squeaky floors are a common problem that many homeowners face. Not only can they be annoying, but they can also indicate an underlying issue with your flooring or subflooring. Fixing squeaky floors is important not only for the sake of peace and quiet, but also for the overall safety and stability of your home.
Fortunately, there are several methods for fixing squeaky floors that you can do yourself without the need for professional help. In this article, we will explore some of these methods in detail and provide step-by-step instructions on how to tackle this common home improvement issue. Whether you have hardwood, laminate, or carpeted floors, our expert tips will help you eliminate those pesky squeaks and enjoy a quieter, more stable home environment.
Identifying The Source Of The Squeak
Squeaky floors are a common issue in many homes. The sound of a squeaky floor can be frustrating and distracting, especially when you’re trying to relax or get some sleep. Fortunately, there are ways to fix the problem. The first step is identifying the source of the squeak.
Common causes of squeaky floors include loose floorboards, gaps between the subflooring and joists, and worn-out nails or screws. Prevention tips include using adhesive to secure loose floorboards, filling gaps with caulking or foam insulation, and using longer nails or screws to replace worn-out ones. However, if your floors are already squeaking, these tips may not be enough.
To identify the source of the squeak, start by walking around your home and listening for areas that make noise. Once you’ve located a noisy area, try jumping up and down on the spot to see if you can replicate the sound. If you can’t find where the squeak is coming from by walking on it yourself, ask someone else to help you out. Sometimes it takes two people to locate a particularly stubborn squeak.
Inspecting the subflooring is the next step in fixing your squeaky floors. By examining what’s underneath your flooring surface, you’ll be able to determine whether any repairs need to be made there before moving forward with other methods like adding lubrication or shimming up boards as needed.
Inspecting The Subflooring
- Subflooring material types can vary, with the most common being plywood, particle board, and chipboard.
- It is important to inspect subflooring for signs of damage, such as buckling, warping, or discoloration, as these can indicate a structural issue.
- To determine the severity of the damage, an experienced home improvement professional should inspect the subfloor surface for any gaps or loose boards.
- Solutions for repairing subfloor damage can range from replacing sections of damaged boards to installing additional supports.
- If the damage is more extensive, such as if the subfloor is rotting, it may be necessary to replace the entire subfloor.
- In some cases, it may be possible to reduce or eliminate any squeaks in the floor by adding screws or nails to secure the subflooring to the joists.
Identifying Subfloor Material
As a homeowner, hearing squeaky floors can be frustrating and even embarrassing when having guests over. Inspecting the subflooring is the first step in fixing this issue. Identifying subfloor material is crucial as it affects the type of repair required and its longevity.
There are different types of subfloor materials, such as plywood, oriented strand board (OSB), and concrete. Plywood is a popular choice due to its durability and resistance to moisture. OSB, on the other hand, is more affordable but may not hold up well under heavy traffic or moisture. Concrete subfloors are known for their strength but may require additional steps before installing new flooring.
Each subfloor material has its pros and cons. While plywood is a reliable option, it can be expensive compared to OSB. On the other hand, OSB may not have the same level of durability as plywood but is more budget-friendly. Concrete subfloors can provide excellent stability, but they require proper preparation before installation.
Identifying subfloor material can help homeowners make informed decisions about repairing their squeaky floors. Understanding the differences between various types of materials will determine which approach will give lasting results for your home improvement project. Remember that thorough inspection and assessment are essential before starting any repair work on your floorboards to ensure success in fixing those pesky squeaks!
Assessing Subfloor Damage
After identifying the subfloor material, the next step in fixing squeaky floors is to assess any damage to the subfloor. Water damage and rot are common issues that can affect the stability of your subfloor, leading to squeaks and other problems. Assessing subfloor moisture levels and checking for signs of rot is crucial before proceeding with any repair work.
Assessing subfloor moisture levels requires a moisture meter, which can detect moisture content in wood or concrete. High levels of moisture can indicate leaks or other sources of water damage that need to be addressed before repairing the floorboards. Additionally, checking for signs of rot such as soft spots or discoloration can help determine if sections of the subfloor need to be replaced entirely.
Repairing subfloor rot involves removing affected areas and replacing them with new wood or other material. In some cases, additional support may be necessary to ensure stability in these areas. It’s essential to address any underlying issues causing the rot, such as leaks or inadequate ventilation, before repairing the subfloor. Properly assessing and addressing subfloor damage will ensure a long-lasting solution for your squeaky floor problems.
Determining Solutions
Inspecting the subfloor is a crucial step in fixing squeaky floors. After identifying the subfloor material and assessing for any damage, it’s time to determine solutions that will address the issues found. One consideration when determining solutions is whether to opt for a DIY approach or hire a professional. DIY may be more cost-effective, but it requires time, skills, and tools. On the other hand, hiring a professional can save time and ensure quality work, but it comes at a higher cost.
For minor squeaks caused by loose floorboards, DIY solutions such as using shims or screws can be effective. However, for more extensive damage such as subfloor rot or structural issues, hiring a professional is recommended. Professionals have the expertise and equipment needed to properly repair significant subfloor damage and ensure long-term stability of your flooring.
When considering cost and time in determining solutions for inspecting subflooring issues, it’s important to weigh the pros and cons of each option carefully. While DIY may seem cheaper initially, mistakes can lead to additional costs in materials and repairs down the line. Hiring a professional may come with higher upfront costs but can save time and provide peace of mind knowing that the repair work was done correctly. Ultimately, choosing between DIY vs professional depends on individual circumstances and should be carefully evaluated before proceeding with any repairs.
Tightening Loose Floorboards
Loose floorboards are a common cause of squeaky floors. If you hear creaking noises when walking on your floor, it’s time to inspect the floorboards. First, locate the loose boards by walking around and identifying which areas produce the most noise. Then, inspect each board for any cracks or damage that may have caused it to loosen.
Once you have identified the loose boards, it’s time to tighten them up. One effective technique is to use screws or nails to secure them in place. Before doing so, make sure to drill pilot holes through the boards and into the subfloor to prevent splitting and ensure a secure hold. Another technique involves using wooden shims or wedges that fit between the subfloor and the loose board. This will help create a tight fit and eliminate any gaps that may be causing noise.
By following these tightening techniques, you can effectively fix those pesky squeaks caused by loose floorboards. However, if your floorboards are severely damaged or warped beyond repair, it may be best to replace them entirely. In this case, consult with a professional or experienced home improvement expert for guidance on how best to proceed with replacing your floorboards.
With your newly tightened floorboards in place, you can now move on to securing any remaining loose boards with adhesive for added reinforcement.
Using Adhesive To Secure Loose Boards
After tightening the loose floorboards, the next step is to use adhesive to secure them in place. Adhesive is an excellent solution for squeaky floors caused by loose or shifting boards. It bonds the boards together, preventing any movement that may cause squeaks.
However, before applying adhesive, it is crucial to choose the right product. There are various types of adhesives available in the market, each with its unique properties and applications. Some adhesives work better on certain materials or conditions than others. Therefore, it is essential to consider factors such as humidity levels, temperature changes, and traffic intensity when selecting an adhesive product.
Here are some helpful adhesive application tips:
- Clean the surface thoroughly before applying adhesive.
- Apply a uniform amount of adhesive along the edges of the board.
- Use a notched trowel to spread the adhesive evenly.
- Clamp or weight down the boards for at least 24 hours after applying adhesive.
Installing shims for added support can provide an extra layer of stability to your floorboards and prevent future squeaks. Shims are thin pieces of wood that can be inserted between the joists and subfloor to raise low spots and level out uneven areas. In combination with adhesive, shims can help create a solid base for your flooring system, resulting in a quiet and sturdy floor.
Installing Shims For Added Support
Shims are a simple and effective solution for fixing squeaky floors in your home. The key to success is selecting the proper shim size and material. Shims come in different sizes, ranging from ¼ inch to 2 inches thick. You should choose a shim that is thick enough to provide adequate support but not so thick that it creates an uneven surface.
Proper installation technique is also crucial when using shims. First, locate the joist where the squeak is originating from by walking across the floor until you hear the noise. Then, use a pry bar or screwdriver to lift the subfloor until there is enough space to insert the shim. Once you have inserted the shim, tap it into place with a hammer until it is snug against the subfloor and joist.
When using shims, it’s important to remember that they are only a temporary fix. If there are underlying issues with your floor, such as water damage or structural problems, shimming may not be enough to solve the problem permanently. In these cases, it’s best to consult with a professional before proceeding with any repairs.
To ensure long-lasting results from your shim installation efforts, consider adding powdered graphite lubrication between adjoining surfaces of hardwood floorboards. This will reduce friction and eliminate creaks that can occur due to rubbing wood surfaces. Powdered graphite can be easily applied using a squeeze bottle or by sprinkling it directly onto affected areas of your floorboards.
Using Powdered Graphite For Lubrication
Graphite powder is an excellent lubricant that can help you fix squeaky floors in your home. It has been used for many years and is known for its effectiveness in reducing friction between moving parts. One of the benefits of using graphite is that it does not attract dust or dirt, which means it won’t clog up over time. Additionally, it dries quickly, so you won’t have to wait long before walking on the floor again.
If you’re looking for alternatives to graphite lubrication, there are a few options available. One option is silicone spray, which works similarly to graphite but can be messier to apply. Another option is talcum powder, which can be effective but may not last as long as graphite. Ultimately, the best choice will depend on your specific situation and personal preferences.
In the next section, we’ll discuss how to apply wood putty to fill gaps in your flooring. This step can help prevent future squeaks by stabilizing loose boards and creating a smooth surface for walking. But before we move on, keep in mind that using powdered graphite for lubrication is a great solution for fixing squeaky floors with minimal mess and hassle.
Applying Wood Putty To Fill Gaps
Although powdered graphite can be effective for lubricating squeaky floors, it may not always be the best solution for repairing them. If you find that your squeaky floors are caused by gaps or cracks in the wood, applying wood putty can be a more durable and long-lasting solution. Not only can it fill in gaps and cracks, but it can also be stained to blend seamlessly with your floor.
When selecting a wood putty for floor repair, it’s important to choose one that is specifically designed for use on floors. Some of the best options include epoxy putty, latex putty, and vinyl patching compound. These products are formulated to withstand foot traffic and other wear and tear associated with flooring.
Once you’ve selected the best putty for your needs, you can begin the process of applying it to fill in any gaps or cracks in your flooring. Make sure to follow the manufacturer’s instructions carefully to ensure proper application and drying time. Once the putty has dried completely, you can sand it down to create a smooth surface that is ready for staining.
If wood putty isn’t enough to fix your squeaky floors, it may be necessary to consider replacing damaged floorboards altogether. In this case, a professional contractor may be necessary to ensure that the replacement boards are installed correctly and securely. With proper care and maintenance, however, you can keep your floors looking beautiful and free of squeaks for years to come.
Replacing Damaged Floorboards
If the squeaky floorboards in your home are beyond repair, it may be time to replace them. Choosing replacement boards can be a daunting task, but it is important to select a board that matches the wood species and thickness of the existing floor. It is also important to choose a board that has been properly dried and acclimated to your home’s humidity level.
Once you have selected replacement boards, it is important to use proper installation techniques for a long-lasting fix. First, remove the damaged boards by cutting through the center of the board with a circular saw and prying it up with a pry bar. Next, measure and cut your replacement board to fit snugly into the opening. Be sure to leave a small gap between the new board and existing boards for expansion during changes in temperature and humidity.
When installing the new board, apply construction adhesive along the edges of the surrounding boards and slide the new board into place. Use finish nails to secure the board every six inches along each joist. Finally, countersink all nails below the surface of the wood and fill any nail holes with wood filler before sanding smooth. With proper installation techniques, your newly replaced floorboards will not only look great but also provide a squeak-free foundation for years to come.
Transition: While replacing damaged floorboards can solve some squeaky floor issues, addressing squeaks in carpeted areas requires a different approach.
Addressing Squeaks In Carpeted Areas
After replacing damaged floorboards, it’s time to address squeaks in carpeted areas. Squeaky floors can be caused by a variety of factors such as loose or damaged subflooring, gaps between the subfloor and joists, and loose nails or screws. One effective way to address these issues is by using construction adhesive.
Before applying the adhesive, it’s important to locate the source of the squeak. This can be done by walking over the area slowly and listening for any creaking or popping sounds. Once you’ve identified the problem spot, lift up the carpet and padding to expose the subfloor. Use a flashlight to inspect the area for any damage or gaps.
Once you’ve located the issue, apply construction adhesive to any loose areas between the subfloor and joists. After applying the adhesive, use a clamp or heavy object to hold down the subfloor until it dries completely. Once dry, replace any worn or damaged padding and reattach your carpet. Regular carpet cleaning can also help prevent future squeaks by removing dirt and debris that can cause friction between your carpet and subfloor.
- Inspect your subfloor regularly for damage or gaps
- Use construction adhesive to secure any loose areas
- Clamp down on glued areas until they dry completely
- Replace any worn or damaged padding
- Consider regular carpet cleaning to prevent future squeaks
With these steps, you can effectively address squeaky floors in your home while also maintaining your carpets’ longevity through proper maintenance like carpet cleaning and padding replacement. For those who prefer a more hands-off approach, consider hiring a professional contractor with experience in flooring installation and repair services for best results. In our next section, we’ll discuss using construction adhesive specifically for repairing squeaky floors in carpeted areas.
Using Construction Adhesive For Carpeted Floors
- Prior to applying the construction adhesive, it is important to prepare the area of the floor that will be worked on by ensuring the surface is clean and free from debris.
- The adhesive should then be distributed evenly across the affected area and allowed to dry for no longer than the manufacturer’s specified time period.
- After the adhesive has dried, a weight should be placed over the affected area to ensure the adhesive sets properly and the squeaky area is effectively fixed.
- If the area is not completely sealed, additional adhesive can be applied to the area until a secure bond has been created.
- Upon completion of the adhesive application, the surface should be wiped down and any remaining adhesive should be removed.
- To ensure the best possible results, additional insulation should be installed beneath the carpeted area to minimize any future squeaking.
Preparing The Floor
A common issue homeowners face is a squeaky floor. Not only is it annoying, but it can also be a sign of a more serious problem. Fortunately, fixing it is not as complicated as you might think. One solution involves using construction adhesive for carpeted floors, but preparation of the floor beforehand is crucial to ensure a successful outcome.
Before applying construction adhesive, it’s essential to prepare the floor properly. First and foremost, make sure that the subfloor is clean and free of any debris. This will help ensure that the adhesive adheres correctly and maintains its strength over time. Additionally, check for any moisture issues in the subfloor that could cause problems down the line. If there are any signs of moisture, address them before proceeding with the repair.
Moisture prevention is critical when preparing the floor for construction adhesive. It’s vital to check both the subfloor and the carpet itself for any signs of moisture or water damage. If you find any issues, address them immediately before proceeding with repairs. Once you’ve addressed any potential moisture problems and ensured that the subfloor is clean and dry, you’re ready to move on to applying construction adhesive to fix your squeaky floors for good!
Applying The Adhesive
Now that you’ve prepared your floor for repair, it’s time to apply the construction adhesive. The first step is to choose the right type of adhesive for your carpeted floors. There are different types available in the market, but it’s crucial to select one that is specifically designed for carpets. Make sure to read and follow the manufacturer’s instructions carefully.
When applying the adhesive, remember to work in small sections at a time. This will help ensure that the adhesive is evenly applied and doesn’t dry out before you can lay down the carpet. It’s also essential to use a notched trowel when spreading the adhesive over the subfloor. This tool helps create ridges in the adhesive, which helps prevent air pockets from forming under the carpet.
Once you have applied enough adhesive over a small section of subfloor, lay down your carpet and press firmly into place. Repeat this process until you have covered all areas with squeaks on your floor. Remember to clean up any excess adhesive immediately using a damp cloth or rag. Properly applying construction adhesive can save you money on costly repairs and eliminate annoying squeaks from your floors for good!
Finishing Touches
Now that you have successfully applied construction adhesive to your carpeted floors, it’s time to focus on the finishing touches. The first consideration is choosing the right materials for your floor. While carpeting is a common choice, there are other options available as well. Rugs and floor coverings can be used to add color and texture to your room while also protecting your floor from wear and tear.
When deciding on DIY vs professional installation, consider the complexity of the project and your level of expertise. While DIY projects can save money, they can also lead to mistakes that may require costly repairs down the line. Professional installation ensures a high-quality result but comes at a higher cost. Ultimately, it’s up to you to decide which option fits best with your budget and skillset.
Finally, don’t forget about decorating options once your carpeted floors are complete! Adding rugs or floor coverings can help tie together different elements in a room while also providing additional comfort underfoot. With careful consideration of materials and installation options, you can create a beautiful flooring solution that will last for years to come.
Securing The Subflooring With Screws
The most effective way to fix squeaky floors is by securing the subflooring with screws. This method involves attaching the subfloor to the joists underneath using screws instead of nails. The use of screws provides a more secure connection, which prevents movement and reduces friction between the subfloor and joists that cause squeaks.
Using screws for subflooring has its pros and cons. On one hand, it provides a more secure connection between the subfloor and joists, which reduces movement and eliminates squeaks. On the other hand, it takes longer to install than using nails, and there is a potential risk of damaging pipes or electrical wires if you do not identify their location before drilling into them.
When using screws for subflooring, it is crucial to choose the right type of screw for your project. There are different types of screws available in hardware stores such as wood screws, deck screws, drywall screws, and concrete screws. Wood screws are suitable for attaching plywood or OSB (oriented strand board) to wooden joists. Deck screws are best suited for outdoor projects where corrosion resistance is essential. Drywall screws are useful in attaching drywall sheets to framing studs while concrete screws work best when attaching subfloors to concrete surfaces.
| Type of Screw | Length | Diameter | Head Type |
|---|---|---|---|
| Wood Screws | 2-1/2″ | #8 | Flat |
| Deck Screws | 3″ | #10 | Bugle |
| Drywall Screws | 1-1/4″ | #6 | Phillips |
| Concrete Screws | 2-3/4″ | #7 | Hexagonal |
Using a screwdriver or drill equipped with a screwdriver bit, drive the chosen screw through the subfloor into the underlying joist at an angle that will pull it down tight. Keep in mind that overdriving the screws can cause the subfloor to deform, leading to more squeaks. Once you have installed all the screws, walk over the floor to test for any remaining squeaks. If there are still some sounds, move on to using a squeak-relief kit.
Using A Squeak-Relief Kit
- A Squeak-Relief Kit is a great way to fix squeaky floors in the home.
- When purchasing a kit, it is important to choose one with the appropriate size and type of screws for the particular flooring surface.
- Applying the kit is a straightforward process; the screws should be inserted directly into the subflooring and then driven into the floor joists.
- Once the screws are in place, it is important to ensure that the flooring surface is properly sealed to prevent any further squeaking.
- To test the results, walk around on the floor to see if the squeak has been eliminated.
- If the squeak persists, additional screws may need to be inserted in order to properly secure the floor.
Buying A Kit
When it comes to fixing squeaky floors in your home, one option is to use a Squeak-Relief Kit. These kits offer an easy solution for homeowners who want to fix their squeaky floors without having to hire a professional. There are several kit options available depending on the type of flooring and the severity of the problem.
Cost comparison is an important factor when considering which kit to purchase. Some kits may be more expensive but offer additional features or benefits such as ease of installation or long-lasting results. It’s important to weigh the cost against the potential benefits and choose the kit that best fits your needs and budget.
Overall, using a Squeak-Relief Kit can be a cost-effective and efficient way to fix squeaky floors in your home. With various kit options available and a careful consideration of cost comparison, you can successfully repair your floors and enjoy a quieter home without breaking the bank.
Applying The Kit
Now that you have decided to use a Squeak-Relief Kit to fix your squeaky floors, it’s important to know how to apply the kit properly. The process can vary depending on the type of kit you purchased and the flooring material, but generally involves locating the source of the squeak, drilling a pilot hole, and inserting the kit’s screw into the subfloor. It’s important to follow the instructions carefully and take your time during installation to ensure a successful outcome.
One of the benefits of using a Squeak-Relief Kit is that it can be applied quickly and easily without requiring extensive knowledge or experience in home repair. However, there are also some limitations to consider. For example, if your floor has other underlying issues such as water damage or structural problems, simply using a kit may not fully resolve the issue. Additionally, if you have carpeted floors, removing and re-installing carpeting may be necessary for proper installation.
Overall, applying a Squeak-Relief Kit can be a cost-effective solution for fixing squeaky floors in your home. By following the instructions carefully and considering any potential limitations or additional steps required for your specific flooring type, you can successfully eliminate those annoying squeaks and enjoy a quieter home environment.
Testing Results
After applying a Squeak-Relief Kit, it is important to test the results to ensure that the squeaky floors have been effectively repaired. Testing results can provide homeowners with peace of mind and help them identify any potential issues that need further attention.
When testing results, it is important to consider the type of flooring material used in your home. Different flooring materials may require different methods of testing to determine if the squeaks have been eliminated. For example, hardwood floors may require walking around the room while listening for any remaining squeaks, while carpeted floors may require pressing down firmly on the surface to see if any noise is present.
In addition to testing results, homeowners should also consider DIY versus professional repair cost analysis. While using a Squeak-Relief Kit can be a cost-effective solution for fixing squeaky floors, some homeowners may prefer the convenience and expertise of hiring a professional. Ultimately, the decision will depend on factors such as budget, time constraints, and level of experience with home repairs. By weighing these factors carefully and considering all available options, homeowners can make an informed decision about how best to repair their squeaky floors.
Hiring A Professional For Complex Repairs
Cost considerations should be taken into account when deciding whether to hire a professional for complex squeaky floor repairs. DIY options may seem more affordable, but they could end up being more expensive if mistakes are made. Hiring a professional can ensure that the job is done correctly the first time, saving homeowners from having to pay for additional repairs.
When it comes to finding reliable contractors, there are a few key factors to consider. Look for contractors who are licensed and insured, as this will protect both the homeowner and the contractor in case of any accidents or damages during the repair process. Additionally, read reviews from previous customers and ask for references before hiring anyone. This will help ensure that the contractor has a track record of providing quality work.
Overall, while DIY options may be tempting, hiring a professional for complex squeaky floor repairs is often worth the investment. Not only can it save homeowners money in the long run by avoiding costly mistakes, but it can also provide peace of mind knowing that the job was done correctly. By taking cost considerations into account and finding reliable contractors through research and references, homeowners can feel confident in their decision to hire a professional for their squeaky floor repairs. In order to prevent future squeaks, there are several steps homeowners can take to maintain their floors properly.
Maintaining Your Floors To Prevent Future Squeaks
- Proper cleaning of your floors is essential for preventing future squeaks. This includes regular sweeping and mopping with a gentle cleaning solution.
- Lubricating the joists beneath the floorboards is another way to help prevent future squeaks. This can be done with a lubricant such as graphite or talcum powder.
- When lubricating the joists, it is important to use a vacuum to remove any dust or debris from the area first.
- It is also important to inspect the joists regularly for any signs of wear or damage, and repair or replace them if necessary.
Cleaning Floors
To maintain your floors and prevent future squeaks, it is important to keep them clean. One effective method is steam cleaning, which has numerous benefits. Steam cleaning not only removes dirt and grime from your floors but also eliminates bacteria and allergens that can cause health problems. Additionally, it requires minimal water usage, making it an eco-friendly option for cleaning.
When choosing a cleaning solution for your floors, it is important to consider the type of flooring you have. Hardwood floors require special care as they are more delicate than other types of flooring. Using harsh chemicals or abrasive cleaners on hardwood can cause damage and lead to squeaking. Opting for a gentle cleaner specifically designed for hardwood will ensure that your floors are cleaned effectively without causing any harm.
Regularly maintaining clean floors not only prevents future squeaks but also improves the overall look and feel of your home. Clean floors create a welcoming environment and add to the aesthetic appeal of your space. By investing in proper cleaning methods and solutions, you can ensure that your floors stay in top condition and continue to provide comfort and functionality for years to come.
Lubricating Joists
One effective way to prevent future squeaks in your floors is by lubricating the joists. This process involves applying a lubricant to the areas where the joists meet the subfloor, reducing friction and preventing creaking noises. The benefits of lubrication include increased durability of the flooring system, improved sound insulation, and extended lifespan of the floor.
There are several types of lubricants that can be used for joists, including silicone sprays, graphite powders, and wax-based products. Silicone sprays are ideal for hardwood floors as they do not leave any residue behind and are easy to apply. Graphite powders are more suitable for carpeted areas as they can stain hardwood or tile flooring. Wax-based products provide long-lasting protection but require more effort when applying.
When lubricating joists, it is important to follow manufacturer instructions carefully and wear appropriate protective gear such as gloves and a mask. It is also recommended to inspect your floors regularly for any signs of damage or wear that may require additional maintenance. By taking these steps, you can ensure that your floors remain quiet and functional for years to come.
Enjoying Your Quieter, More Stable Home!
All good things take time, and preventing squeaks in your home is no exception. But trust me, the effort is well worth it. Not only will it make your floors more stable, but it will also give you peace of mind knowing that there won’t be any unnecessary noise in your home. Here are three soundproofing solutions to help you enjoy a quieter, more stable home:
Install a Floating Floor: A floating floor is an excellent way to prevent squeaks from occurring in the first place. It involves laying down a layer of foam insulation on top of your existing floor and then installing hardwood or laminate flooring on top of that. The foam layer helps absorb sound and provides a buffer between the subfloor and the top layer.
Use Soundproof Underlayment: If installing a floating floor isn’t an option for you, consider using soundproof underlayment instead. This type of underlayment is specifically designed to reduce noise transmission through floors. It works by absorbing impact noise and reducing airborne sounds.
Add Screws or Nails: If you already have squeaky floors, adding screws or nails might be all you need to fix them. The key is to locate the source of the squeak, which can be done by walking around until you hear it, and then drilling a screw or nail into that spot.
In conclusion, preventing squeaks in your home requires some effort but can provide significant benefits in terms of stability and noise reduction. Consider using one or more of these soundproofing solutions to enjoy a quieter home environment today!
Conclusion
Squeaky floors are a common problem in many homes, causing annoyance and frustration for homeowners. However, fixing this issue is not as difficult as it may seem. By identifying the source of the squeak, inspecting the subflooring, tightening loose floorboards, using adhesive to secure loose boards, installing shims for added support or using a squeak-relief kit, you can easily solve this problem.
It is important to note that if your squeaky floor is caused by more complex issues such as water damage or structural problems, it is best to hire a professional to ensure proper repairs. Additionally, maintaining your floors regularly by keeping them clean and dry can help prevent future squeaks and prolong their lifespan.
According to a survey conducted by the National Association of Home Builders (NAHB), 70% of homebuyers prefer hardwood flooring in their homes. It’s no secret that hardwood floors add value and beauty to any home. So why let squeaky floors take away from their appeal? By following these simple steps and taking proper care of your floors, you can enjoy a quieter and more stable home for years to come.
Image Credits
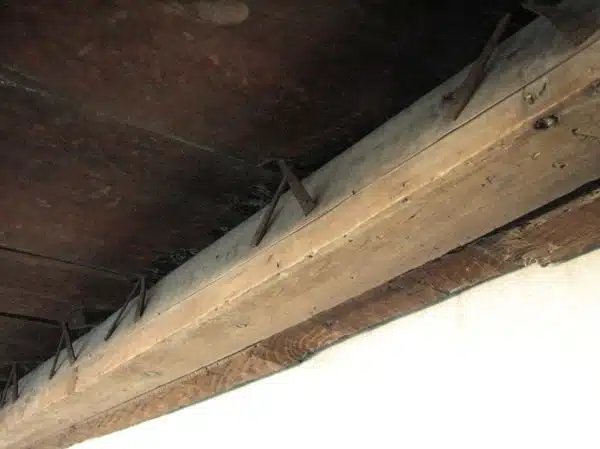
- “Nightingale Floors” by MShades (featured)

