Slate floor tiles are a popular choice for many homeowners due to their durability, natural beauty, and timeless appeal. However, over time, wear and tear can cause individual tiles to crack or become damaged. Replacing a slate floor tile may seem like a daunting task, but with the right tools and techniques, it can be done efficiently and effectively.
As an experienced slate floor tile installation and replacement expert, I understand the importance of maintaining the integrity of your flooring. In this article, I will provide step-by-step instructions on how to replace a slate floor tile. Whether you are a DIY enthusiast or a professional contractor, these tips will help you to achieve a seamless repair that blends seamlessly with your existing flooring. With my guidance, you can confidently tackle your next home improvement project and serve others by creating a safe and beautiful living space for your family or clients.
Assessing The Damage
Are you facing a situation where you need to replace a slate floor tile? It can be difficult to determine if the tile is damaged beyond repair or if it can be salvaged. Assessing the damage is an essential step in determining whether replacement is necessary.
Before replacing the tile, it’s important to check for any underlying damage. This could include issues such as water damage or rotting subflooring. If there is underlying damage, it will need to be addressed before replacing the tile to ensure that your new tile won’t also become damaged.
Once you have determined that replacement of the tile is necessary and there are no underlying issues, you can move on to preparing your workspace. This involves gathering all necessary tools and materials and ensuring that your workspace is clean and free from any debris or obstacles that could impede your progress during installation.
Preparing Your Workspace
Workspace organization and safety precautions are critical before replacing a slate floor tile. The workspace should be cleared of all debris, dust, and any other materials that may hinder the repair process. Ensure that you have ample space to move around and work comfortably without causing any damage to adjacent tiles.
Moreover, you need to take safety precautions seriously as well. Even though slate tiles are durable, they can be brittle when exposed to forceful impacts or dropped from a height. Wear protective gear like goggles, gloves, and dust masks before proceeding with the replacement process. It is also crucial to ensure that the workspace is well lit and ventilated, as this will reduce the risk of accidents while working.
Lastly, make sure that your workspace is free from any obstructions or potential hazards such as power cords or sharp objects that can cause accidents. Keep all necessary tools within reach so that you do not need to leave your workspace frequently. This will help save time and minimize disruptions during the tile replacement process. By following these workspace organization and safety tips, you’ll be able to complete your tile replacement project efficiently without worrying about accidents or injuries.
With proper workspace organization and safety precautions in place, it’s now time to gather the necessary tools for replacing the slate floor tile.
Gathering The Necessary Tools
Before starting the process of replacing a slate floor tile, you need to gather the necessary tools. Proper tool organization is essential for a successful project; it can save you time and prevent accidents. You will need several tools for this repair, including a hammer, chisel, flathead screwdriver, safety goggles or glasses, gloves, and a replacement tile.
When gathering your tools, it’s crucial to keep safety precautions in mind. Safety goggles or glasses should always be worn when working with tiles. Gloves will also protect your hands from sharp edges while handling broken pieces of slate. Additionally, make sure the work area is free of any hazards that could cause accidents.
Once you’ve gathered all the necessary tools and taken appropriate safety measures, you’re ready to begin replacing your slate floor tile. The first step is removing the broken tile without damaging surrounding tiles. This can be done with a chisel or flathead screwdriver by carefully prying up the edges of the tile until it loosens from the adhesive beneath it.
Removing The Broken Tile
- Before beginning the process of replacing a slate floor tile, it is important to prepare the area by protecting the surrounding tiles and flooring.
- The tile to be replaced should be scored and chiseled out to remove it from the floor.
- Care must be taken to ensure that the tile is removed in one piece to minimize damage to the surrounding tiles and adhesive.
- Additionally, the new tile should be set in a bed of mortar and pressed firmly into place.
Preparing The Area
To ensure a successful replacement of a broken slate floor tile, it is crucial to properly prepare the area beforehand. This involves repairing any cracks or unevenness in the surface that may have caused the previous tile to break. The first step is to assess the floor’s condition and determine if any subfloor repairs are necessary. Once any underlying issues have been addressed, it is important to level the surface where the new tile will be placed.
Choosing the right replacement tile for your slate floor requires careful consideration. It is essential to find a tile that matches the existing color and texture of your flooring as closely as possible. Furthermore, selecting a tile with similar thickness and durability will help ensure that it blends seamlessly with surrounding tiles and withstands wear and tear over time. When removing a broken tile, it may be helpful to keep a piece of it on hand for reference when selecting a replacement.
After completing these preparatory steps, you can move on to removing the broken tile and installing its replacement. By taking care in preparing the area beforehand, you can ensure a smooth and successful installation process that restores your slate floor’s beauty and functionality for years to come.
Removing The Tile
After assessing the condition of the slate floor and preparing the surface properly, the next step in replacing a broken tile is to remove it. Removing a broken tile can be a challenging task, but it is essential to do so carefully and methodically to avoid damaging surrounding tiles or the subfloor.
The first step in removing a broken tile is to use a hammer and chisel to break up the tile into smaller pieces. Once the tile has been sufficiently broken up, use a pry bar or scraper tool to carefully lift and remove each piece from the floor. It is important to take care not to damage surrounding tiles during this process. Any remaining adhesive or grout can be removed using a scraper or rotary tool.
Once the old tile has been removed, it is time to install its replacement. Selecting a replacement tile that matches the existing color and texture as closely as possible will help ensure that it blends seamlessly with surrounding tiles. Additionally, choosing a replacement tile with similar thickness and durability will help ensure that it withstands wear and tear over time. With careful attention to detail throughout each step of the process, you can replace your broken slate floor tile successfully and enjoy beautiful floors for years to come.
Cleaning The Area
After removing the broken tile, it’s important to assess the surrounding tiles for any damage. If there are any loose or cracked tiles nearby, they should be fixed before proceeding with the replacement. Preventing further damage is crucial in maintaining the structural integrity of your slate floor.
Once the area is deemed safe for replacement, it’s time to clean up any debris or dust left from removing the broken tile. This will ensure that the new tile sits properly and securely in place. Use a damp cloth to wipe down the surface and make sure there is no remaining residue.
To prevent future incidents of broken tiles, regular maintenance is key. Avoid using harsh chemicals on your slate floor as this can weaken its structure over time. Instead, opt for gentle cleaning solutions and use soft-bristled brushes to avoid scratching the surface. Furthermore, consider investing in slip-resistant rugs or mats to reduce foot traffic on high-risk areas of your slate floor.
Moving forward, measuring the replacement tile is an important step in ensuring a successful installation.
Measuring The Replacement Tile
Accurate measurements of the existing tile should be taken to ensure the proper fit of the replacement tile. The replacement tile should be cut to the correct size and shape, based on the measurements taken. Proper preparation of the replacement tile is necessary to ensure a successful installation. To begin cutting the replacement tile, a wet saw should be used to make the necessary cuts. The cutting blade should be set to the correct depth in order to make the precise cuts needed. The replacement tile should then be tested to make sure it fits correctly and any necessary adjustments should be made. Once the replacement tile is cut to the correct size and shape, it is ready for installation.
Measuring The Tile
Accurate measurements are essential when it comes to replacing a slate floor tile. As an expert in slate floor tile installation and replacement, I understand the importance of measuring the replacement tile precisely. Before selecting a new tile, you need to measure the length, width, and thickness of the damaged tile. This information will help you find the right-sized replacement tile that matches your existing slate flooring.
When measuring the replacement tile’s length and width, use a tape measure to get accurate dimensions. Measure from one edge of the damaged slate to the opposite edge, taking into account any curves or angles in your existing flooring design. Make sure to record these measurements in inches or centimeters for future reference. Additionally, measure the thickness of your current slate tiles with a caliper or ruler to ensure that your new replacement tile is of equal thickness.
Tile selection is also essential when replacing a slate floor tile. Look for a replacement tile that closely matches the color and texture of your existing flooring. Similarly, check if there are any visible patterns or designs on your current tiles that should be replicated on your new tiles during installation techniques. By selecting matching tiles that blend well with your existing flooring, you can create a seamless finish that looks like it has always been there.
In conclusion, precise measurements and appropriate tile selection are crucial when replacing a slate floor tile. As an expert in this field, I recommend taking accurate measurements of length, width, and thickness before selecting matching tiles for installation techniques. By following these steps carefully, you can ensure that your replaced slate floor tiles blend seamlessly with your existing flooring and maintain its visual appeal for years to come.
Preparing The Replacement Tile
Accurate measurement is critical in replacing a slate floor tile, but it is equally important to prepare the replacement tile before installation. There are different types of slate tiles available in the market, and each type has unique properties that require specific precautions when handling. Some types of slate may be brittle and easily breakable, while others are denser and more durable.
To ensure that the replacement tile fits perfectly into your existing flooring, it is essential to prepare the tile appropriately. Precautions to take include cleaning the tile surface thoroughly with a damp cloth to remove any dirt or debris. This will help ensure that the adhesive bonds well with the surface during installation techniques. Additionally, check for any cracks or chips on the replacement tile’s edges as they may cause an uneven finish after installation.
After preparing the replacement tile by cleaning and checking for cracks or chips, you can proceed with installation techniques. However, if you notice any significant damage or irregularities on the replacement slate tile, consider getting a new one that matches your existing flooring better. By taking these precautions and ensuring that your replacement slate tiles are well prepared for installation techniques, you can maintain your flooring’s beauty for years to come.
Cutting The Replacement Tile
Measuring the replacement tile is an essential part of replacing a slate floor tile. However, accurate measurement alone is not enough to ensure that the replacement tile fits perfectly into your existing flooring. Cutting the replacement tile to fit into the designated space is equally important. Tile cutting techniques vary depending on the type of slate used, and choosing replacement tiles that match your existing flooring can be challenging.
When it comes to cutting the replacement tile, it is crucial to use appropriate tools and techniques to avoid damaging or breaking the slate. A wet saw with a diamond blade is commonly used for cutting slate tiles as it helps achieve precision cuts with minimal breakage. It’s also important to set up a stable work surface and secure the tile in place before cutting. Double-checking measurements before making any cuts is also advised as mistakes can be costly.
Choosing replacement tiles that match your existing flooring can be difficult due to variations in color, texture, and thickness in natural stone products like slate. To ensure proper matching, it’s best to purchase all replacement tiles from the same batch if possible. If you’re unable to find an exact match, consider selecting tiles with similar characteristics such as color tone or veining patterns. It’s essential to remember that slight differences are inevitable when working with natural stone products but proper preparation during installation techniques can help minimize noticeable discrepancies.
In summary, measuring and cutting are two critical steps in replacing a slate floor tile accurately. Selecting appropriate tools and techniques when cutting replacement tiles while ensuring they match your existing flooring will result in a flawless finish after installation techniques are complete. Taking these precautions ensures that your new installation blends seamlessly with your existing flooring while maintaining its beauty for years to come.
Cutting The Replacement Tile
Did you know that slate is one of the most durable and long-lasting flooring materials available? It is no wonder why it has remained a popular choice for centuries. However, even the toughest of materials can succumb to wear and tear, which may require replacement tiles. When replacing a slate floor tile, it is important to ensure that it matches the original tile in terms of size and texture. Cutting techniques and safety measures must be properly followed to achieve this.
Before cutting the replacement tile, make sure to measure the dimensions of the damaged tile accurately. Mark these measurements on the new tile using a chalk or wax pencil. Next, using either a wet saw or angle grinder equipped with a diamond blade, carefully cut along your markings. Be sure to keep your fingers away from the blade at all times and wear protective gear such as gloves and goggles to prevent injury.
Safety should always be prioritized when working with power tools. Never force your tool through the material being cut as this could cause kickback or damage to both yourself and your equipment. Remember, precision is key when cutting replacement tiles for your slate floor. By following proper techniques and safety measures, you can ensure a seamless match between old and new tiles for a flawless finish.
With your newly cut replacement tile in hand, it’s time for dry-fitting before installation. This step allows you to check if any further adjustments are needed before permanently fixing it in place. Simply lay the tile over its designated spot on the floor and make any necessary cuts or adjustments until it fits snugly into place. Once satisfied with its fit, you’re ready for installation!
Dry-Fitting The Replacement Tile
Dry-fitting the replacement tile is the process of placing it in the designated spot without any adhesive. It allows you to see how well the tile fits and make any necessary adjustments before permanently installing it. Dry fitting ensures that your replacement tile will be flush with its surrounding tiles, and it eliminates the risk of making mistakes that can lead to costly replacements.
Benefits of dry fitting include saving time, money, and resources. You can easily make any adjustments or changes before applying adhesive, avoiding any potential complications that may arise during installation. Additionally, dry fitting allows you to ensure that your replacement tile matches the surrounding tiles in terms of size, texture, and color.
Common mistakes to avoid while dry fitting include not taking accurate measurements and not testing the fit properly. It’s important to measure accurately to ensure that your replacement tile will fit snugly into its designated spot. Testing the fit properly includes placing the replacement tile in various positions to ensure that it aligns with surrounding tiles and doesn’t stick out awkwardly.
Now that you have dry-fitted your replacement tile successfully, it’s time to move on to applying adhesive. But before we do that, let’s take a moment to appreciate how dry fitting has helped us avoid costly mistakes and ensured a seamless installation process. By following these steps carefully, you’ll save yourself time and hassle while achieving a professional-looking result.
Applying Adhesive
How to Apply Adhesive for a Slate Floor Tile Replacement
Are you planning to replace a broken slate floor tile? If so, you need to know the proper way of applying adhesive to ensure that the replacement tile stays in place. Applying adhesive is an essential step in replacing a slate floor tile. Without using the right type of adhesive and applying it correctly, the new tile may not stick properly and can cause further damage.
There are different types of adhesives available on the market, but not all are suitable for slate floor tiles. The most common types of adhesive used for this purpose are ceramic tile mastic and thin-set mortar. Ceramic tile mastic is easy to use and ideal for small jobs like replacing one or two tiles. Meanwhile, thin-set mortar is more durable and best suited for larger projects. It is essential to choose the right type of adhesive that suits your project’s size and requirements.
Once you have chosen the appropriate adhesive, it’s time to apply it onto the surface. Before spreading the adhesive onto the surface, make sure that you clean and prepare it first by removing any debris or dust particles. Then, follow these best practices when applying adhesive:
| Best Practices for Applying Adhesive | | — | — | — | | Use a notched trowel | Apply even pressure on each pass | Work in small sections | | Spread only enough area that can be covered with tiles in 15 minutes | Avoid over-spreading |
Now that you know how to apply adhesive properly let’s move on to placing the replacement tile without any issues.
Placing The Replacement Tile
After removing the damaged slate tile, it is time to replace it with a new one. Before placing the replacement tile, ensure that the area is clean and free of any dust or debris. This will help guarantee that the adhesive used for the tile to stick firmly.
Tile placement techniques are crucial in ensuring that the new slate tile fits perfectly into place. Begin by applying adhesive on the back of the replacement tile, then press it gently onto its designated spot on the floor. Use spacers to create equal gaps between tiles, and make sure that the level of the new tile matches with those surrounding it.
Finding matching replacement tiles can be challenging. However, it is essential for aesthetic purposes that you find a suitable match for your existing slate flooring. Check with your local home improvement store or supplier to see if they have any matching tiles available. If not, try to find a similar styled tile, as even though it may not match exactly, it will still blend in nicely with your existing flooring.
In summary, replacing a slate floor tile involves proper cleaning before placing a new one and utilizing appropriate tile placement techniques such as using spacers and ensuring levelness. Finding matching replacement tiles can be challenging but necessary for aesthetic purposes and maintaining uniformity throughout your flooring. In the following section, we will discuss how to ensure proper alignment when laying down your replacement slate floor tile.
Ensuring Proper Alignment
After placing the replacement tile, it is important to ensure that it is properly aligned with the surrounding tiles. One common method for ensuring proper alignment is to use spacers between the tiles. These spacers can be purchased at most hardware stores and are available in a variety of sizes. Once the spacers have been inserted, check that the tile is level using a spirit level.
Tips for leveling include using a flat trowel to spread adhesive evenly across the back of the tile. This will help prevent any bumps or lumps from forming under the tile, which could cause it to sit unevenly. Additionally, be sure to press down firmly on all areas of the tile to ensure good adhesion.
Maintaining evenness is also important when replacing slate floor tiles. If one area of the floor is higher than another, this can cause problems with foot traffic and may even make the floor unsafe. To avoid this issue, take care when replacing each tile and use a spirit level frequently throughout the process.
Next, we will discuss cleaning up excess adhesive from around the edges of the replacement tile. This can be done using a damp cloth or sponge. Be sure to clean up any excess adhesive before it dries completely, as it can be difficult to remove once it has hardened. With these steps complete, your newly replaced slate floor tile should look seamless and fit in perfectly with its surroundings.
Cleaning Up Excess Adhesive
Once you have successfully replaced a slate floor tile, it is important to clean up any excess adhesive that may remain. Failure to do so can result in a residue buildup that can be difficult to remove later on. The best way to remove adhesive residue is by using a scraper or putty knife. Gently scrape away any remaining adhesive until the surface is smooth.
It is also important to take preventative measures to avoid future damage to your slate floor tiles. One way to do this is by applying a sealant over the tiles. A sealant will protect the tiles from moisture and spills, which can cause damage over time. Be sure to follow the manufacturer’s instructions when applying sealant and allow proper drying time before walking on the tiles.
By removing residue and preventing future damage, you can ensure that your slate floor tiles remain in excellent condition for years to come. In the next section, we will discuss how allowing time for the adhesive to set is crucial for ensuring a successful replacement of your slate floor tile.
Allowing Time For The Adhesive To Set
The success of replacing a slate floor tile is not only dependent on the quality of the adhesive but also on the amount of time allowed for it to set. The adhesive needs sufficient drying time to create a strong bond that will hold the tile in place for years to come. Rushing this process can result in bubbles, unevenness, and ultimately, tile failure.
To ensure a strong adhesive bond when replacing a slate floor tile, there are several tips to follow. Firstly, make sure that the surface area is completely clean and dry before applying the adhesive. This will remove any contaminants that could interfere with the bonding process. Secondly, use a high-quality adhesive designed specifically for natural stone tiles like slate. Finally, apply enough pressure when placing the replacement tile into position to ensure it is firmly secured.
It cannot be stressed enough how important allowing sufficient drying time is when replacing a slate floor tile. Generally speaking, most adhesives need at least 24 hours to dry completely before any weight or pressure can be applied to them. In colder or more humid conditions, additional drying time may be required. Resist the temptation to speed up this process by using fans or heaters as it may cause more harm than good. Patience is key in achieving a successful slate floor tile replacement project.
As we move forward in this guide on replacing a slate floor tile, we must now turn our attention to grouting the replacement tile into place. Once again, patience and attention to detail are essential in ensuring that you achieve professional-looking results that will last for years to come.
Grouting The Replacement Tile
When it comes to replacing a slate floor tile, the next step after setting the new tile in place is grouting. Grouting is an important part of the process as it fills in the gaps between tiles and provides a finished look. To ensure that the replacement tile blends seamlessly with the surrounding tiles, it’s crucial to use proper grouting techniques.
Color matching is one key factor to consider when selecting grout for your replacement tile. It’s important to choose a color that matches the existing grout as closely as possible. This can be achieved by either using a premixed grout or by mixing your own using cement, sand and water. Once you have selected your grout, spread it evenly over the surface of the tile with a rubber float, taking care not to leave any gaps or air pockets.
After applying the grout, use a damp sponge to wipe away any excess material before it dries. This will help create clean lines and prevent unsightly stains from forming on your new slate floor tile. Allow the grout to dry completely before walking on or cleaning the area. Using these simple techniques will ensure that your replacement tile looks great and lasts for years to come.
- Choose a premixed grout or mix your own using cement, sand and water
- Spread grout evenly over surface of tile with rubber float
- Wipe away excess material with damp sponge before drying – Allow the grout to dry completely according to manufacturer’s instructions
Finishing Touches And Maintenance Tips
After replacing a slate floor tile, it is important to finish the job by sealing the tile properly. Sealing techniques vary depending on the type of slate used and the desired finish. A high-gloss sealant may require several layers, while a matte finish may only need one coat. It is also important to choose a sealant that will not yellow or discolor over time.
Regular maintenance of your slate floor tiles will ensure they remain in good condition for years to come. Cleaning products should be chosen carefully as some chemicals can damage the slate’s surface. Avoid using acidic cleaners or abrasive materials such as steel wool. Instead, use a pH-neutral cleaner specifically designed for natural stone.
In addition to regular cleaning, it is recommended that you reseal your slate floor tiles every few years to maintain their appearance and protect them from wear and tear. When applying sealant, be sure to follow manufacturer instructions carefully and allow adequate drying time between coats. With proper care and maintenance, your slate floor tiles will continue to provide beauty and durability for many years.
| Sealing Techniques | Types of Slate | Recommended Sealants |
|---|---|---|
| High Gloss | Polished | Acrylic |
| Polyurethane | ||
| Matte Finish | Honed | Penetrating Sealers |
| Natural Wax | ||
| Rough Texture | Gauged | Silicone |
| Epoxy |
The table above provides guidance on which types of sealants are recommended based on the texture of your slate tile and the desired finish. Remember that proper maintenance is crucial in preserving the beauty of your slate floor tiles. Choose cleaning products carefully, avoid harsh chemicals, and reseal periodically for optimal results. By following these simple steps, you can enjoy your stunning slate floor tiles for years to come.
Conclusion
Replacing a slate floor tile can be a daunting task, but with the right tools and preparation, it is manageable. It is important to assess the damage carefully and prepare your workspace accordingly. Gather all necessary tools before removing the broken tile and cleaning the area thoroughly. Allow ample time for adhesive to set before grouting the replacement tile.
While replacing a slate floor tile may seem like a challenging project, it can also be an opportunity to showcase your DIY skills and enhance the beauty of your space. Remember to take your time and pay attention to detail throughout the process. With proper care and maintenance, your new slate floor tile will continue to add value and charm to your home for years to come.
Image Credits
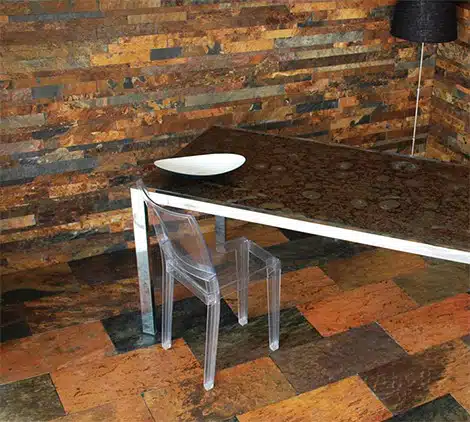
- “decorative-slate-tiles-wall-floor-3” by colorhome (featured)

