As a tile backsplash removal expert, I have encountered countless individuals who are looking to update their kitchen or bathroom but are hindered by the presence of outdated or damaged tile backsplashes. Removing these tiles may seem like a daunting task, but with the right tools and techniques, it can be accomplished efficiently and effectively.
In this article, I will provide step-by-step instructions on how to remove tile backsplash in a way that minimizes damage to surrounding areas and ensures a smooth transition for future updates. Whether you are a homeowner looking to update your space or a contractor seeking tips on how to efficiently remove tile backsplashes for clients, this guide will equip you with the knowledge and skills necessary to accomplish your goals.
Preparing Your Work Area
As you prepare to remove the tile backsplash, it’s essential to prioritize safety. Protective gear is a must-have for this project. Wear a dust mask to protect your lungs from the debris that will be released during the removal process. Gloves will protect your hands from cuts and scrapes, and eye protection is vital in case any tiles or debris fly off.
Another crucial step is setting up a dust barrier. The last thing you want is for dust and debris to spread throughout your home, causing unnecessary cleaning and potential health hazards. Use plastic sheeting to create a barrier around the work area, sealing it tightly with tape. This will ensure that all of the dust remains contained within the workspace.
By prioritizing safety and taking these precautions before starting, you’ll be able to work more efficiently without worrying about potential hazards. Once you have your protective gear on and your dust barrier set up, you can move on to gathering the necessary tools for removing the tile backsplash.
Gathering The Necessary Tools
Before starting the process of removing tile backsplash, it is important to gather all the necessary tools. This not only saves time but also ensures that the job is done correctly. The required tools include a hammer, chisel, scraper, utility knife, gloves, goggles and a dust mask. Wearing gloves and goggles protects your hands and eyes from any debris while the dust mask prevents inhalation of harmful particles.
Choosing the right adhesive is crucial when it comes to removing tile backsplash. Most tiles are installed using thin-set mortar which sets quickly and forms a strong bond with surfaces like countertops. To remove this type of adhesive, you will need a hammer and chisel or a scraper. However, if your tiles are installed with mastic adhesive which is less durable than thin-set mortar, you can use a heat gun to soften the adhesive before scraping it away.
Protecting your countertops is essential during tile backsplash removal. To avoid damaging them, cover them with cardboard or plywood sheets held in place with masking tape. This provides an extra layer of protection against scratches or gouges as you work on removing the tiles.
Now that you have gathered all necessary tools and know how to choose the right adhesive as well as protect your countertops during tile backsplash removal, you can proceed to the next step – turning off power and water supply before beginning work.
Turning Off Power And Water
- To begin removing a tile backsplash, it is important to start by turning off the power to the area.
- Shutting off the water supply to the tile backsplash is essential to ensure the safety of the installer.
- Careful disconnection of the electrical wiring is necessary to avoid potential damage to the tile backsplash.
- After the power and water are disconnected, the tile and grout can be removed with the appropriate tools.
- If the tile backsplash is attached to drywall, the drywall should be cut away as well.
- Once the tile and grout have been removed, the underlying surface can be cleaned to prepare for new tile installation.
Turn Off Power
Before you start removing your tile backsplash, it is important to turn off the power. Safety precautions should always be taken when working with electricity, and turning off the power will help prevent any potential accidents or injuries. To turn off the power, locate the circuit breaker box and switch off the corresponding breaker that controls the area where you will be working.
Once you have turned off the power, it is also important to check for wiring behind your tile backsplash. Wires may be hidden behind the tiles or in junction boxes, so it is crucial to inspect these areas before starting your removal project. If you do find any wiring, make sure it is properly disconnected and capped before proceeding with your tile removal.
By taking these steps to turn off the power and check for wiring, you can ensure a safe and successful tile backsplash removal project. Always prioritize safety when working on home improvement projects, as it can save you from potential harm or costly damages down the road.
Shut Off Water Supply
As a tile backsplash removal expert, it is crucial to prioritize safety when working on any home improvement project. One important step to take before starting the removal process is to shut off the water supply. This will help prevent any potential water damage and protect surrounding surfaces from being impacted by the removal process.
To shut off the water supply, locate the main shut-off valve in your home. This valve is typically found near your water meter or where the main water line enters your home. Once you have located the valve, turn it clockwise until it is completely closed. It’s also important to release any remaining pressure in the pipes by turning on a faucet or two after shutting off the main valve.
Before beginning the tile backsplash removal process, make sure to check for any signs of water damage around and behind the tiles. If you do notice any damage, make necessary repairs before proceeding with removal to avoid further harm. By taking these precautions and shutting off your water supply, you can ensure a successful and safe tile backsplash removal project while protecting your home from potential damage.
Disconnect Electrical Wiring
When taking on a tile backsplash removal project, it’s important to prioritize safety and take all necessary precautions before beginning. In addition to shutting off the water supply, disconnecting electrical wiring is another crucial step that should not be overlooked. As a tile backsplash removal expert, it’s my professional recommendation to follow these steps carefully to ensure a successful and safe removal process.
To disconnect electrical wiring, locate your home’s main breaker panel and turn off power to the area where you will be working. This will prevent any potential electrocution or damage to surrounding electrical components. It’s important to wear protective gear such as gloves and goggles while handling electrical wiring and use proper tools such as wire strippers when necessary.
When removing tiles, be sure to take extra care around electrical outlets and switches. Before completely removing any tiles around these areas, make note of which wires are connected where so that they can easily be reconnected later. It’s also important to label each wire with tape or a marker for easy identification during reconnection. By taking these safety precautions and disconnecting electrical wiring before beginning your tile backsplash removal project, you can ensure a successful and safe outcome without any unexpected complications.
Removing Outlet Covers And Switch Plates
After turning off the power and water, the next step in removing a tile backsplash is to remove outlet covers and switch plates. This ensures that they will not be damaged during the removal process. After this, protective measures should be taken before starting to remove the tiles.
Protective measures are important when removing a tile backsplash. Gloves and safety glasses should be worn to protect hands and eyes from sharp edges or flying debris. Covering the countertops with a drop cloth or cardboard will protect them from scratches or damage caused by falling tiles. It is also recommended to cover cabinets with plastic sheeting to prevent dust or debris from getting inside them.
Repairing damage may be necessary once the tile backsplash has been removed. If any drywall or other surfaces were damaged during the removal process, they must be repaired before installing a new backsplash. Small holes can be patched with spackle or joint compound, while larger holes may require replacement of drywall. The surface must then be sanded smooth and cleaned thoroughly before installing new tiles.
Starting at the edges is an important technique when removing a tile backsplash. Using a putty knife or similar tool, gently insert it between the edge of the first tile and the wall surface. Slowly pry upward until it releases from the wall surface. Continue working along the edge of each tile until all are removed. This technique helps prevent damage to both tiles and walls, making for an easier repair process later on.
Starting At The Edges
Like the intricate pattern of a tile backsplash, removing it requires patience and precision. Edging techniques are vital in starting the removal process. Using a putty knife or chisel, carefully pry away the first tile at the edge of the backsplash. Once removed, slide the tool underneath adjacent tiles to loosen them from the adhesive.
Grout removal is also an essential step before tackling the tiles themselves. Using a grout saw or rotary tool, gently remove as much grout as possible without damaging surrounding tiles. This will make it easier to remove individual tiles without causing collateral damage.
By using edging techniques and removing excess grout, you can now move on to applying heat to loosen adhesive. This method will help ensure that your tile backsplash comes off easily and without causing damage to your walls.
Applying Heat To Loosen Adhesive
Starting at the edges is a crucial step in removing tile backsplash. However, in some cases, the adhesive may be too strong or stubborn to come off easily. In such situations, applying heat can help loosen the adhesive and make it easier to remove the tiles.
Using a heat gun is an effective way of applying heat to the tile backsplash. Hold the heat gun approximately 2-3 inches away from the surface of the tiles and move it around slowly and evenly. Do not hold it in one spot for too long as this could cause damage to both the tiles and surrounding surfaces. Work in small sections at a time until you have heated up all of the tiles.
While using a heat gun, it’s important to protect surrounding surfaces from any potential damage or discoloration caused by excess heat. Use masking tape or painter’s tape to cover nearby walls, cabinets, countertops or any other surface that might be affected by heat exposure. This will ensure that only the adhesive on the tile backsplash is being loosened and not any other part of your kitchen or bathroom.
Transition: With the adhesive now loosened up due to consistent application of heat, we can proceed towards using a putty knife to pry tiles off from their place without causing damage to them.
Using A Putty Knife To Pry Tiles
For this section, let’s consider a hypothetical case. Sarah is a DIY enthusiast who wants to remove her old tile backsplash to make room for a new one. She has gathered all the necessary tools and protective gear but isn’t sure how to proceed with removing the tiles. In this situation, using a putty knife to pry tiles is an effective method that Sarah can try.
Using a putty knife is one of the most common methods of prying off tiles from a backsplash. To start with, you need to wear your protective gloves and goggles before you begin. Then, insert the putty knife between the tile and the adhesive while applying gentle pressure on it. Make sure that you don’t apply too much force as it can damage both the tile and the wall.
Here are some alternative methods for prying off tiles from a backsplash:
- Using a hairdryer or heat gun to soften the adhesive
- Applying vinegar or baking soda solution to loosen up the glue
- Tapping lightly on each tile with a hammer and chisel until it comes off
Now that we have discussed using a putty knife to pry tiles, let’s move on to common mistakes people make when removing backsplashes in general.
Transition: While using a putty knife can be effective in prying off tiles, it’s crucial not to rush into removing them without proper preparation.
Removing The Tiles
- To begin the process of removing a tile backsplash, it is necessary to first gather the appropriate tools, such as a hammer, putty knife, grout saw, and screwdriver.
- Once the tools have been gathered, the next step is to prepare the area by clearing away any furniture and other items that may be in the path of the removal process.
- Removing the tiles from the wall is the next step, and can be done by tapping the tile gently with a hammer to loosen the adhesive.
- If necessary, a putty knife can be used to scrape away any adhesive that is still attached to the wall.
- The grout saw should then be used to remove any grout that remains between the tiles.
- Finally, any screws or nails that may be present should be removed using a screwdriver.
Gather Tools
Tile backsplashes can be a stylish addition to your kitchen, but when it’s time for a change, removing them can be a challenging task. Before starting the removal process, gather all the necessary tools to ensure that you have everything you need at hand. Tool organization is crucial as it will save you time and effort during the tile removal process.
To start with, you’ll need safety gear such as gloves and goggles to protect your hands and eyes from flying debris. You’ll also need a chisel or putty knife for prying off tiles, a hammer to break tiles into smaller pieces, pliers for removing any adhesive left behind on the wall, and a scraper for scraping away grout. It’s important to have all these tools nearby before commencing work in order to avoid any accidents.
Safety precautions should always be taken seriously when removing tiles. Ensure that the area where you are working is well-ventilated by opening windows or using fans. Cover countertops and floors adjacent to the backsplash with drop cloths or plastic sheeting to protect them from dust and debris. With proper tool organization and safety precautions in place, you can safely remove your tile backsplash without any hitches.
In conclusion, gathering tools is an essential step in removing tile backsplashes. Tool organization ensures that you have everything at hand while safety precautions protect you from harm during the process. Keep these tips in mind as you prepare to remove your tile backsplash and enjoy a successful renovation project!
Preparing The Area
Before starting the tile removal process, it is important to prepare the area where you will be working. This involves cleaning the surrounding surfaces and ensuring that they are protected from any debris or dust that may be generated during the removal process. Cleaning supplies such as a broom, vacuum cleaner, and damp cloth should be readily available for this purpose.
Safety precautions should also be taken into consideration when preparing the area for tile removal. As mentioned earlier, proper ventilation is crucial as it helps to prevent inhalation of dust or fumes that may be generated during the removal process. Additionally, protective gear such as gloves, goggles, and face masks should also be worn to protect yourself from any potential hazards.
Finally, make sure that you have ample space to work in and that any nearby furniture or fixtures are moved away from the backsplash area. This will give you enough room to maneuver and work comfortably while minimizing any potential accidents caused by tripping or bumping into objects. By taking these necessary steps to prepare the area before removing your tile backsplash, you can ensure a safe and successful renovation project!
Removing Tiles
Once the area is properly prepared, it is time to start removing the tile backsplash. Before beginning this process, it is important to understand that there are different methods of removing tiles depending on the materials used and the design of the backsplash. As a tile backsplash removal expert, I recommend assessing your backsplash thoroughly to determine the best approach for removing it.
For example, if your tile backsplash was installed using thinset mortar, you may need to use a hammer and chisel to break up the tiles and scrape away any remaining adhesive. On the other hand, if your backsplash was installed using adhesive mats, you can simply peel off the tiles one by one. Additionally, if your tile backsplash has intricate designs or patterns, you may need to be more careful and precise when removing each tile.
It is important to note that regardless of which method you choose, safety precautions should still be taken into consideration. This includes wearing protective gear such as gloves and goggles to protect yourself from any potential hazards. By following these steps and taking the necessary precautions during the tile removal process, you can successfully remove your old tile backsplash without causing damage to surrounding surfaces or harming yourself in the process.
Removing Adhesive Residue
Removing Adhesive Residue:
Once you have successfully removed the tile backsplash, you may find that there is still some adhesive residue left on your wall. This can be a tricky situation to deal with, but it’s important to remove all the adhesive before proceeding with any further work. Here are some tips and tricks for removing tile adhesive residue.
Firstly, avoid using harsh chemicals or tools such as scrapers that may damage your wall surface. Instead, use a soft cloth or sponge soaked in warm soapy water to gently scrub off the residue. If this does not work, try using vinegar mixed with warm water or a commercial adhesive remover solution.
Secondly, common mistakes to avoid include rushing the process and not allowing enough time for the solution to penetrate the adhesive. It’s important to be patient and allow sufficient time for the solution to work its magic on the adhesive. Also, avoid applying too much pressure while scrubbing as this may damage your wall surface.
Lastly, once you have successfully removed all the adhesive residue from your wall surface, make sure to rinse it thoroughly with clean water and then dry it completely before moving on to the next step of sanding the surface. By following these tips and tricks and avoiding common mistakes, you can ensure a smooth and hassle-free removal of tile backsplash adhesive residue.
Sanding The Surface
Did you know that sanding the surface after removing a tile backsplash can increase the longevity of your new backsplash by up to 30%? This is because sanding creates a smooth and even surface for painting or tiling, which helps prevent future cracks and damage.
To start sanding, gather a fine-grit sandpaper and lightly sand the entire area where the tile backsplash was removed. Be sure to wear eye protection and a dust mask to avoid inhaling any debris. After sanding, wipe down the surface with a damp cloth to remove any excess dust.
Once you have sanded and wiped down the surface, you are ready to paint or install your new backsplash. If you choose to paint, be sure to use a primer before applying your desired color. If tiling, follow the manufacturer’s instructions for installation. With a smooth and even surface after sanding, your new backsplash will look flawless for years to come.
As you move forward with filling in any holes or cracks from removing the tile backsplash, remember that attention to detail is key in achieving a polished look for your kitchen or bathroom.
Filling In Any Holes Or Cracks
Once you have successfully removed your tile backsplash, it is essential to fill in any holes or cracks left behind. This step is crucial to ensure that your wall is smooth and ready for a new backsplash design. Repairing drywall is the most common method for fixing any damage caused by removing tiles.
For small holes or cracks, use spackle or joint compound to fill them in. Apply the compound using a putty knife and wait for it to dry completely before sanding it down with fine-grit sandpaper. For larger holes, cut a piece of drywall slightly larger than the hole and place it over the damaged area. Secure it in place with drywall screws and apply joint compound over the seams. Sand it down once it has dried completely.
Now that your wall is repaired, it’s time to choose a new backsplash design! Consider selecting a material that complements your kitchen’s overall aesthetic and color scheme. From classic subway tiles to trendy mosaic patterns, there are countless options available to suit every taste and budget. Take your time browsing through samples and consulting with experts before making a final decision.
As you prepare for future updates, keep in mind that proper maintenance is key to preserving the longevity of your new backsplash. Regular cleaning with non-abrasive cleaners will help prevent stains and damage from occurring over time. Additionally, consider investing in high-quality grout sealer to protect against moisture damage and discoloration. With these tips in mind, you can enjoy your beautiful new backsplash for years to come!
Preparing For Future Updates
After filling in all the holes and cracks, you can now proceed with removing the tile backsplash. This is an important step to take if you want to update your kitchen or bathroom without breaking the bank. Instead of hiring a professional, you can do this yourself and save money in the process.
One budget-friendly alternative is using a grout saw to remove the grout between the tiles. This will make it easier for you to pry off each tile with a putty knife or chisel. If you don’t have these tools on hand, they are relatively inexpensive and can be found at most hardware stores. Another way to save money is by selling any salvageable tiles or donating them to a local charity.
When it comes to disposing of your old tile backsplash, there are eco-friendly options available. One option is repurposing the tiles for another DIY project like creating a mosaic table or garden stepping stones. Another option is recycling the tiles by contacting your city’s waste management department to see if they have a recycling program for construction materials. By choosing eco-friendly disposal options, you are reducing your carbon footprint and helping the environment.
Once you have successfully removed your tile backsplash and disposed of it properly, it’s time to clean up the work area. This step is crucial as leftover debris can cause injuries and damage surfaces if not cleaned up properly. In order to clean up effectively, use a vacuum cleaner with a HEPA filter to capture any dust particles and debris that may be left behind. Additionally, wipe down all surfaces with an all-purpose cleaner and dispose of any remaining debris in accordance with local regulations.
Cleaning Up The Work Area
After removing the tile backsplash, you may find that your work area is a mess. You will want to clean up the area to ensure that it is safe and ready for your next project. Organizing tools and minimizing mess are two key steps in cleaning up after tile removal.
First, you should organize your tools so that they are easy to find when you need them again. This can be done by placing them in a toolbox or on a shelf where they are easily accessible. You should also label each tool so that you know what it is and where it belongs. This will help you stay organized and save time when working on future projects.
Secondly, you should minimize mess by sweeping or vacuuming the area thoroughly. Any leftover debris or dust can cause problems down the road if left unchecked. After sweeping or vacuuming, consider using a damp cloth to wipe down surfaces and remove any remaining residue.
- Use a plastic drop cloth to protect the floor from debris during removal.
- Place all removed tiles in a designated container for easy disposal.
- Consider wearing protective gear such as gloves and goggles while removing tiles.
- Use a shop vac or dust mask to prevent inhaling dust particles.
Cleaning up after tile backsplash removal is an important step in ensuring that your work area is safe and organized for future projects. By organizing your tools and minimizing mess, you can save time and effort when starting your next task.
As important as cleaning up may be, disposing of old tiles is equally crucial. In the next section, we will discuss how to dispose of old tiles safely and responsibly without causing harm to yourself or others around you.
Disposing Of Old Tiles
Once you have finished cleaning up the work area, you can now move on to removing the tile backsplash. Many homeowners are hesitant to remove their tile backsplash due to concerns about damaging their walls or creating a mess. However, with the right tools and techniques, removing your old tile backsplash can be a relatively simple task.
Before getting started, it is important to consider your options for disposing of your old tiles. While some homeowners may choose to simply throw them in the trash, there are more eco-friendly options available. Recycling companies often accept ceramic tiles for recycling purposes, and some communities offer special recycling programs specifically for construction waste. By taking advantage of these recycling options, you can ensure that your old tiles are disposed of in an environmentally responsible manner.
Once you have removed your old tile backsplash and disposed of the tiles properly, it’s time to enjoy your updated space. Whether you plan on installing a new backsplash or leaving the wall bare, take pride in knowing that you have successfully completed this project and improved the look of your kitchen or bathroom. With careful planning and attention to detail, removing your tile backsplash can be a rewarding experience that leaves you with a cleaner and more modern living space.
Enjoying Your Updated Space
Now that you have successfully removed the tile backsplash, it’s time to enjoy your updated space. Maximizing space is key when decorating a room, so take advantage of the extra wall space that removing the backsplash has provided. Consider adding shelves or hanging artwork to make your kitchen feel more personalized and spacious.
Choosing the right colors can also make a significant impact on how your kitchen looks and feels. Instead of sticking with the same color scheme as before, try incorporating new hues that complement your new backsplash-free walls. Bright colors can add energy to the room, while muted tones will create a calming atmosphere.
Remember to take some time to appreciate all the hard work you put into removing the tile backsplash. Your updated kitchen is now a reflection of your dedication and determination to create a beautiful space for yourself and others to enjoy.
- Take a moment to bask in your accomplishment and be proud of yourself.
- Host a dinner party with close family and friends to show off your newly updated kitchen.
- Share your experience with others who may be considering removing their own tile backsplash.
- Experiment with different decor styles to see what works best in your new space.
- Enjoy every moment spent in your refreshed kitchen.
Conclusion
Removing a tile backsplash can be a daunting task, but with the right tools and preparation, it can be done efficiently and effectively. It is essential to prepare your work area by covering nearby surfaces with plastic or drop cloths, as removing tiles can create quite a mess. Gathering the necessary tools, including safety goggles, gloves, a hammer, chisel, and putty knife will ensure that you have everything needed to complete the job.
Before beginning the removal process, it is crucial to turn off power and water to avoid any accidents. Removing outlet covers and switch plates will also make it easier to remove tiles from around electrical outlets. Starting at the edges of the tile backsplash and working your way towards the middle will help prevent damage to surrounding areas.
According to a recent survey conducted by Houzz, 58% of homeowners who renovated their kitchens chose to replace or update their backsplashes. By following these steps for removing old tiles properly, homeowners can ensure they are adequately preparing for future updates and enjoying their newly updated space without any regrets. Remembering to clean up the work area and dispose of old tiles responsibly will also contribute to a successful renovation project.
Image Credits
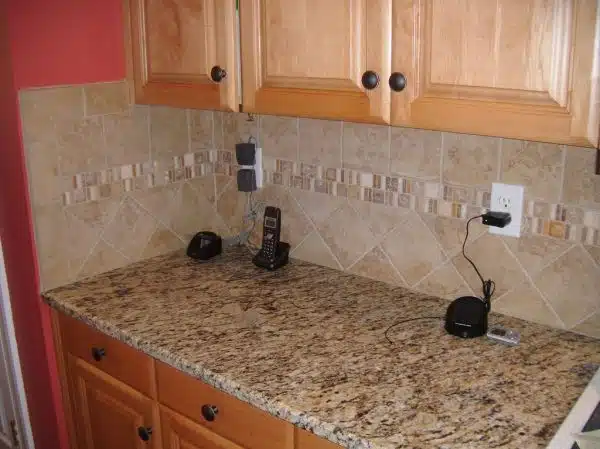
- “Santa Cecilia Granite with Tile Backsplash – Charlotte, NC” by granite-charlotte (featured)

