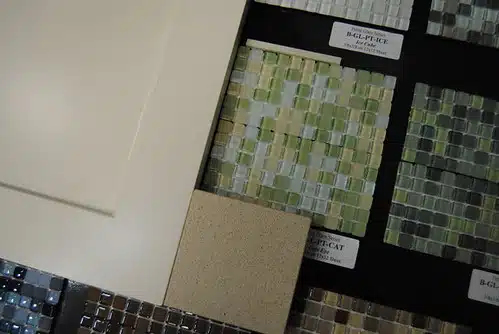
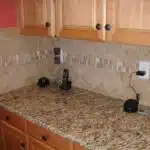
Installing a glass tile backsplash can be a great way to add color and style to your kitchen, bathroom or any other room in your home. Glass tiles are not only beautiful but also durable and easy to clean, making them a popular choice for many homeowners looking to update their space. While the process of installing glass tile may seem daunting at first, with proper planning and execution, it can be a DIY project that anyone can accomplish.
As an expert in tile installation, I have seen firsthand how glass tiles can transform a room. However, before you begin the installation process, it is important to understand the necessary steps involved. From preparing the surface to selecting the right adhesive and grout, every detail must be taken into consideration for a successful installation. In this article, I will guide you through the process of installing a glass tile backsplash step-by-step so that you can achieve professional-looking results without breaking the bank.
Measuring And Planning Your Backsplash
The process of installing a glass tile backsplash requires careful planning to ensure that the end result is both functional and aesthetically pleasing. Backsplash design is an essential aspect of any kitchen or bathroom renovation project, and choosing the right color coordination can significantly impact the overall appeal of your space.
Before you begin the installation process, measure the area where you plan to install the backsplash carefully. Accurate measurements will help you determine how much tile you need and avoid costly mistakes. It’s also vital to consider any obstacles like electrical outlets, light switches, or windows that may require special cuts or custom tile sizes. Planning for these factors in advance can save time and money during installation.
Once you have measured the area and identified any obstacles, it’s time to start thinking about color coordination. Choose a color scheme that complements your existing decor while adding visual interest to your space. Consider using different shades of glass tiles to create depth and texture, or mix and match colors for a unique look. Remember that your backsplash will be a focal point in your room, so take time to choose colors that will enhance its appeal. In the next section, we’ll explore choosing the right type of glass tile for your backsplash project.
Choosing The Right Type Of Glass Tile
- When considering the size of glass tile, it is important to select the right proportions for the desired effect.
- Glass tiles come in a variety of shapes and can be used to create interesting patterns and designs.
- Color is an important factor when selecting the right glass tile as it can set the overall tone and mood of a space.
- Glass tile can be used to add texture, depth and contrast to a design.
- The size and shape of glass tile can also play an important role in the overall design aesthetic.
- Choosing the right color and type of glass tile can help create a unique and stylish backsplash.
Considering Size
When it comes to choosing the right type of glass tile for your backsplash, size considerations are crucial. Measuring accuracy is paramount in ensuring that you purchase the right amount of tiles for your project. Before making any purchases, measure the dimensions of your backsplash area with a tape measure to determine how many tiles you need.
Size alternatives also play a significant role when choosing glass tiles for your backsplash. Large tiles may require fewer grout lines, resulting in a cleaner and more streamlined appearance. On the other hand, smaller tiles allow for more intricate designs and patterns, providing an opportunity to showcase your creativity. It’s important to consider the size of your kitchen or bathroom as well; larger spaces may benefit from larger tiles, while smaller areas might look better with smaller ones.
In conclusion, accurately measuring and considering size alternatives are essential when selecting glass tile for your backsplash installation. Take into account both the dimensions of your space and design preferences to choose the perfect size tile for your project. Remember that a properly installed glass tile backsplash can add style and value to any kitchen or bathroom renovation.
Shape
Choosing the right shape for your glass tile backsplash is crucial in creating a stylish and functional kitchen or bathroom. Incorporating different shapes in your backsplash design adds depth and dimension to your space, making it more visually appealing. When selecting shapes for your glass tiles, it’s important to consider both form and function.
One way to incorporate different shapes in your backsplash design is by using mosaic tiles. These small, square-shaped tiles can be arranged in various patterns, such as herringbone or chevron, creating a unique and eye-catching focal point in your kitchen or bathroom. Another option is subway tiles, which are rectangular in shape and offer a classic and timeless look that never goes out of style.
When choosing the right shape for your glass tile backsplash, it’s essential to consider the overall design aesthetic of your space. For example, if you have a modern kitchen with clean lines and minimalistic features, geometric-shaped tiles may be the perfect choice. On the other hand, if you have a traditional kitchen with ornate cabinetry and intricate details, curved or scalloped-shaped tiles may complement the space better.
Incorporating different shapes into your glass tile backsplash allows you to showcase your creativity while adding value to your home renovation project. By carefully considering form and function, you can choose the perfect tile shape that complements both the size of your space and overall design aesthetic.
Color
When it comes to choosing the right type of glass tile for your backsplash, color is a crucial element to consider. The color you choose can have a significant impact on the overall look and feel of your space. Adding contrast or matching tones with other design elements in the room can create a harmonious and cohesive aesthetic.
To add contrast, consider selecting a tile color that contrasts with your cabinetry or countertop. For example, if you have white cabinets and countertops, adding a bold-colored tile will make an eye-catching statement. On the other hand, if you want to match tones, choose a tile color that complements the existing colors in your kitchen or bathroom.
When selecting a color for your glass tile backsplash, it’s important to consider the overall design scheme of your space. If you have a neutral-colored kitchen or bathroom, adding pops of bright colors through your backsplash can create visual interest and break up monotony. However, if you already have vibrant colors in other parts of the room, choosing a more subdued tone for your backsplash may be more appropriate.
In conclusion, choosing the right color for your glass tile backsplash is just as important as selecting the right shape. By considering factors such as contrast and tone matching and keeping your overall design aesthetic in mind, you can create an impactful and visually appealing feature in your space.
Selecting The Right Adhesive
Having chosen the right type of glass tile for your backsplash, it’s time to move on to selecting the right adhesive. There are various types of adhesives available in the market, including thinset mortar, mastic, and epoxy. Each has its own unique set of pros and cons.
Thinset mortar is a popular choice for installing glass tiles because it provides excellent adhesion and is resistant to moisture. This adhesive is made up of cement, sand, and a bonding agent that helps it stick to surfaces. However, thinset mortar can be difficult to work with and requires some experience to apply correctly.
Mastic, on the other hand, is easier to work with than thinset mortar but doesn’t provide the same level of durability. It’s a premixed adhesive that comes in a bucket and can be applied using a notched trowel. While it dries faster than thinset mortar, mastic isn’t suitable for use in areas with high humidity or exposure to water. Epoxy is another option that provides excellent adhesion but can be expensive and tricky to work with.
Understanding the pros and cons of different adhesives will help you make an informed decision when installing your glass tile backsplash. Keep in mind that each type of adhesive has its own specific instructions for application and curing times which must be followed carefully for best results. In the next section, we’ll discuss how to prepare the surface for installation before applying your chosen adhesive.
Preparing The Surface For Installation
Firstly, existing material should be removed from the wall surface to ensure that the new tile installation adheres properly. Secondly, it is important to check the wall surface for any damage or defects that may need to be addressed prior to installation. Thirdly, it is necessary to ensure that the wall surface is clean, dry and free of dust or debris. Finally, it is beneficial to apply a bonding agent to the wall surface to provide an optimal surface for the tile to adhere to.
Remove Existing Material
Before beginning the installation of a glass tile backsplash, it is essential to remove any existing material on the surface. This process involves taking necessary safety precautions and using specific tools to ensure an optimal result.
To start, it is crucial to shut off all electrical power sources in the working area. Next, put on protective gear such as gloves and goggles to prevent any injury during the removal process. Use a hammer and chisel to break apart any tiles or other materials currently on the surface gradually. It is important to work slowly and carefully so as not to damage the wall behind the existing materials.
After removing all existing materials, use a scraper or putty knife to flatten out any remaining adhesive or mortar that may be present. A smooth surface will facilitate adhesion for new tiles. Be sure to sweep up any debris from this step before moving on to preparing the wall for installation.
In conclusion, proper preparation of the surface is critical for achieving a successful glass tile backsplash installation. Safety precautions must be taken before starting work, and specific tools are required for removing existing materials. By following these steps carefully, you can ensure that your new backsplash will adhere correctly and provide lasting beauty for your kitchen or bathroom space.
Check Wall Surface
After removing any existing materials from the surface, it is important to inspect the wall thoroughly. The inspection will help identify any structural or cosmetic issues that may affect the installation of the glass tile backsplash. Look for cracks, holes, unevenness, or any other damage that may require repair before moving forward with surface preparation.
Once you have identified any necessary repairs, it is time to prepare the wall surface. First, fill in any cracks or holes with a wall patching compound and allow it to dry completely. Then use sandpaper to smooth out any rough spots on the surface. Next, clean the entire area with a degreaser and rinse it thoroughly with water.
After cleaning, ensure that there is no dust or debris left on the surface before starting to install your glass tiles. A clean and smooth surface will ensure proper adhesion for your new backsplash tiles. By performing a thorough wall inspection and preparing the surface correctly, you can guarantee a successful glass tile backsplash installation that will add beauty and functionality to your kitchen or bathroom space for years to come.
Cutting Glass Tiles To Size
Cutting glass tiles may seem intimidating, but with the right tools and techniques, it can be easily accomplished. When it comes to cutting glass tiles to size for your backsplash, a glass tile cutter is essential. This tool is specifically designed to score and break glass tiles cleanly and accurately.
To use a glass tile cutter, start by marking the tile where you want to make the cut. Then, place the tile face up on the cutter’s base and align the scoring wheel with your mark. Apply pressure to the scorer and run it along the marked line until you reach the end of the tile. Once scored, place the tile over the edge of a table or workbench and gently press down on either side of the scoreline to break it cleanly.
There are also other cutting techniques that can be used for more complex cuts or shapes. For example, using a wet saw with a diamond blade can make curved or angled cuts in glass tiles. However, this method should only be attempted by experienced tile installers as it requires some skill and precision. By mastering these cutting techniques, you’ll be able to create a custom backsplash that fits seamlessly into your kitchen design.
With your glass tiles now cut to size, it’s time for dry fitting them in place before beginning installation.
Dry Fitting Tiles In Place
After cutting the glass tiles to size, the next step in installing a glass tile backsplash is dry fitting the tiles in place. This involves laying out the tiles on the wall without adhesive or grout to ensure proper placement and spacing. Once you are satisfied with how the tiles look, it’s time to move on to actually installing them.
Before starting the installation, there are a few tips for achieving a clean and successful installation. First, make sure you have all necessary tools and materials on hand before beginning. This includes adhesive, grout, spacers, a trowel, a notched trowel, tile cutters or wet saws (if needed), and safety gear such as gloves and goggles. Additionally, it’s important to properly prepare the surface by cleaning it thoroughly and ensuring it is smooth and free of any debris or loose material.
While there are many ways to approach installing a glass tile backsplash, there are also some common mistakes that should be avoided. One common mistake is failing to use spacers between tiles during installation. Without spacers, your tiles may end up uneven or crooked over time. Another mistake is applying too much adhesive at once or failing to spread it evenly across the wall. This can result in uneven coverage and difficulty placing tiles correctly. By following these tips for clean installation and avoiding common mistakes, you can achieve a beautiful and functional glass tile backsplash in your kitchen or bathroom.
Starting The Installation
Before starting the installation of a glass tile backsplash, it is important to gather all the necessary tools needed for the job. These tools include a measuring tape, level, trowel, notched trowel, tile cutter, tile spacers, and adhesive. It is recommended to use white thin-set mortar or epoxy adhesive for glass tiles as it provides better adhesion and prevents discoloration.
One common mistake that people make when installing glass tiles is not properly measuring the area to be tiled. This can result in an uneven and unprofessional-looking backsplash. It is essential to measure accurately and plan out the layout before beginning the installation process.
Another mistake is not using enough adhesive or spreading it too thinly. This can cause the tiles to loosen or fall off over time. Always follow manufacturer instructions for the amount of adhesive needed per square foot and use a notched trowel to spread it evenly over the surface.
Now that you have gathered all necessary tools and are aware of common mistakes to avoid, it’s time to move on by applying the adhesive.
Applying The Adhesive
To ensure a secure and long-lasting glass tile backsplash, applying the adhesive correctly is critical. The adhesive serves as the foundation that holds the tiles in place, so it’s essential to use proper adhesive application techniques. Before starting, make sure the surface is clean and dry. Any dirt or debris can affect the adhesion of the tiles.
- Use a notched trowel to apply the adhesive evenly on the surface.
- Apply enough adhesive that it covers an area that you can work on within 15-20 minutes.
- Use a consistent motion and angle when spreading the adhesive. This will ensure uniform coverage and prevent air pockets from forming under the tiles.
Common adhesive mistakes to avoid include using too much or too little adhesive, not mixing the components correctly, and not following manufacturer instructions. These mistakes can result in uneven surfaces, loose tiles, and even complete failure of the backsplash.
Remember to take your time when applying the adhesive and follow proper techniques for a professional-looking finish. In the next section, we’ll discuss how to set your glass tiles in place with precision and accuracy without disturbing the adhesive’s integrity.
Setting The Glass Tiles In Place
After applying the adhesive, it’s time to set the glass tiles in place. Start by laying out your desired pattern on a flat surface so you can visualize how the tiles will look when they’re installed. This is also a good time to make any necessary adjustments to your pattern before you start installing.
When setting the tiles, be sure to use spacers between each one to ensure consistent spacing and alignment. Once you’ve placed all of the full tiles, you’ll need to make cuts for any electrical outlets or switches. Use a tile cutter or wet saw to make precise cuts, and be sure to wear safety goggles and gloves during this process.
Before grouting, consider your options for grout color. A contrasting grout color can make your glass tile patterns pop, while a matching color can create a seamless look. Ultimately, it’s up to personal preference and the overall aesthetic you’re going for in your space.
As you continue with your glass tile backsplash installation, remember that attention to detail is key. Take your time and ensure that each tile is level and properly spaced before moving on. Making careful cuts around electrical outlets and switches will also ensure a professional-looking finished product. Next up: making cuts for electrical outlets and switches.
Making Cuts For Electrical Outlets And Switches
As you proceed with your glass tile backsplash installation, it is important to consider the placement of electrical outlets and switches. Cutting tiles to fit around these fixtures can be a challenging process, but with the right tools and safety precautions, it can be done smoothly and efficiently.
Before making any cuts, gather the necessary tools. A tile saw or wet saw will be needed to make precise cuts in the glass tiles. Additionally, a tile file or sandpaper may also be necessary for smoothing out rough edges. It is important to wear eye protection and gloves while cutting glass tiles to avoid injury.
When making cuts for electrical outlets and switches, measure carefully and mark the tile where it needs to be cut. Use a tile saw or wet saw to make the cut, being cautious not to damage nearby tiles. After making the initial cut, use a tile file or sandpaper to smooth out any rough edges before placing the tile in its proper position.
With these tools and safety precautions in mind, you can successfully cut glass tiles for your electrical fixtures without causing damage or injury. Once all cuts have been made, you can move on to applying grout between each individual tile for a seamless finish.
Applying Grout
After making cuts for electrical outlets and switches, it’s time to move on to the next step in installing your glass tile backsplash. Applying grout is an important part of the process that can greatly affect the final look of your project. When choosing a grout color, consider whether you want it to blend in or contrast with the tiles. You can also choose a shade that matches your countertops or cabinets for a cohesive look.
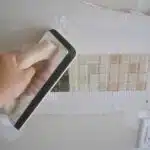
Once you have chosen your grout color, it’s time to apply it to your tiled surface. Be sure to follow the manufacturer’s instructions carefully, as different types of grout may require different application techniques. Use a rubber float to spread the grout evenly and press it into the gaps between tiles. Clean off any excess grout with a damp sponge before it dries.
Grouting may be finished, but there are still some important steps you should take to ensure that your glass tile backsplash looks great for years to come. Regular cleaning and maintenance will help prevent staining and discoloration over time. To clean your tiles, use a gentle cleaner and avoid harsh abrasives that could scratch or damage the surface. Consider sealing your grout every six months to protect against moisture and mildew buildup.
Next up, let’s discuss some tips for cleaning your newly installed glass tile backsplash without damaging its delicate surface.
Cleaning The Tiles
Now that you’ve finally installed your glass tile backsplash, it’s time to clean up the mess. While some may think that all it takes is a quick wipe with a damp cloth, cleaning glass tiles requires special techniques and materials. But don’t worry, as a tile installation expert, I’m here to guide you through the process.
Firstly, before you start cleaning, make sure that the adhesive has fully cured for at least 24 hours. Otherwise, any moisture or chemicals used in cleaning may seep into the adhesive and affect its strength. Once you’re ready to clean, use a non-abrasive cleaner specifically designed for glass tiles. Avoid using acidic or vinegar-based cleaners as they can etch the surface of the tiles over time.
Next, gather all the materials needed for cleaning: a soft-bristled brush, microfiber cloths or sponges, and a bucket of warm water. Dip the brush into the soapy water and gently scrub away any dirt or grime on the surface of the tiles. Then rinse with clean water and dry with a microfiber cloth or sponge. Repeat this process until all the tiles are clean.
Now that your glass tile backsplash is sparkling clean, it’s time to move on to sealing the grout. But before we get into that step, let’s first discuss how to prepare for it.
Sealing The Grout
After the grout has thoroughly dried, it is crucial to take the necessary steps to seal it. Sealing will help protect your tile backsplash from staining, discoloration, and moisture penetration. It is a good idea to wait at least 24 hours after grouting before sealing. This allows ample time for the grout to dry completely.
Before applying the sealant, make sure that there is no excess grout on the surface of the tile or in between the gaps. If there are any leftover residues, use a damp sponge or cloth to gently remove them. Once you have ensured that your backsplash is clean and free of debris, you can begin applying the sealant.
Grout cleaning and maintenance tips are essential to keep your glass tile backsplash looking its best. Regular cleaning with warm water and mild detergent will help avoid buildup of dirt and grease. Avoid using abrasive cleaners or materials such as steel wool that may scratch or damage the tile’s surface. In case of stubborn stains, use a specialized cleaner recommended by your tile manufacturer.
Now that you have sealed your backsplash, it’s time for some finishing touches! The last step in installing a glass tile backsplash involves adding decorative elements such as trim pieces or borders if desired. These elements can be added using adhesive caulk or glue for a seamless look. With proper care and maintenance, your new glass tile backsplash should provide years of beauty and functionality in your kitchen or bathroom space.
Finishing Touches
Choosing colors and styling options for your glass tile backsplash is an exciting task. With a wide range of colors and styles available, selecting the perfect one can be overwhelming. However, it is essential to choose a design that complements your kitchen or bathroom’s existing decor.
To start, consider the overall color scheme of your space. If you have neutral walls, you can opt for a bold-colored backsplash to add some character to your room. Alternatively, if you have brightly colored walls, choose a softer shade for the backsplash to create balance. Additionally, you can mix and match different shapes and sizes of tiles to create a unique pattern that makes your backsplash stand out.
Once you’ve chosen the perfect color and style for your glass tile backsplash, it’s time to think about the finishing touches. You can add edging pieces around the perimeter of your backsplash or use contrasting grout to highlight the individual tiles’ shape and style. These small details will make all the difference in creating a cohesive look in your kitchen or bathroom. With these tips in mind, you’ll be able to create a stunning glass tile backsplash that adds beauty and value to any space.
As an expert in tile installation, I highly recommend taking care of your new glass tile backsplash by following proper maintenance procedures. In the next section, we will discuss how to clean and maintain your glass tile backsplash so that it stays looking as good as new for years to come.
Maintenance And Care For Your Glass Tile Backsplash
Maintaining and caring for your glass tile backsplash is crucial to ensure its longevity and appearance. Preventing stains is the first step in maintaining a clean and beautiful backsplash. It is important to clean up any spills or splatters immediately to prevent them from penetrating the surface of the tiles. Using a dry cloth or paper towel to wipe away any excess liquid is recommended, followed by a gentle cleaner specifically designed for glass tile.
Removing stubborn grime can be a challenging task, but with the right tools and techniques, it can be accomplished effectively. Avoid using abrasive cleaners or scrub brushes that may scratch the surface of the tiles. Instead, opt for a soft sponge or cloth and a non-abrasive cleaning solution. A mixture of warm water and mild dish soap is an effective solution for removing dirt and grime buildup on glass tile.
Regular cleaning of your glass tile backsplash is essential in maintaining its beauty and durability. It is recommended to clean your backsplash at least once a week with a non-abrasive cleaner to prevent dirt buildup. By following these maintenance tips, you can keep your glass tile backsplash looking brand new for years to come.
Conclusion
Installing a glass tile backsplash requires careful planning, attention to detail, and the right tools and materials. Before beginning your project, it is important to measure your space and select the appropriate type of glass tile for your design. You must also choose an adhesive that will provide a strong bond and prepare the surface properly for installation.
Once you have all of your materials ready, you can start cutting your tiles to size and cleaning them thoroughly. Sealing the grout will help prevent staining or discoloration over time. Finally, adding finishing touches like edging or trim can greatly enhance the look of your new backsplash.
As an expert in tile installation, I recommend taking the time to properly maintain and care for your glass tile backsplash so that it lasts for many years to come. With its unique beauty and durability, a glass tile backsplash can add value and style to any kitchen or bathroom renovation project. Just remember to follow all of the necessary steps outlined in this guide carefully, and you’ll be on your way to enjoying a stunning new addition to your home décor.
In conclusion, installing a glass tile backsplash is not an easy task but with proper planning and execution, it can be done successfully. As they say, “a picture is worth a thousand words” – just like how each glass tile adds color and depth to create a beautiful mosaic masterpiece that will last for years. Take pride in creating something unique and personal while following expert advice from seasoned professionals who know how to get the job done right!
Image Credits
- “glass mosaic tile backsplash” by trec_lit (featured)

