Installing ceramic wall tile is a task that requires precision and patience. As a seasoned installer, I have seen numerous homeowners attempt to install tiles on their own, only to find themselves overwhelmed by the intricacies of the process. However, with the right tools, preparation and technique, installing ceramic wall tile can be a satisfying and rewarding experience.
In this article, I will guide you through a step-by-step process for installing ceramic wall tile in your home. From selecting the right materials to preparing your surface and laying your tiles, I will provide you with tips and tricks that will make your installation successful. Whether you are looking to enhance the aesthetic appeal of your bathroom or kitchen or simply need to repair damaged walls, this article will equip you with the knowledge and skills necessary for achieving professional-grade results.
Assessing Your Project Needs
Just as a painter must first prepare their canvas, a ceramic wall tile installer must first assess the needs of their project. The crucial first step is to determine your budgeting options. Ceramic wall tiles can range in price from inexpensive to extremely costly, depending on the quality and design. As such, it is essential to set a budget before beginning your project.
Next, you must decide if you will opt for a DIY installation or hire a professional. A DIY installation may seem like an economical option, but it requires time, skill and patience. If you lack any of these qualities, it may be wise to invest in a professional installation instead. A professional installer has the expertise and tools needed to ensure that your tiles are properly measured, cut and installed with ease.
Ultimately, your decision should depend on your specific needs and abilities. By carefully considering your budgeting options and assessing whether a DIY or professional installation is right for you, you can set yourself up for success as you move onto measuring your space with confidence.
Measuring Your Space
- Prior to installing ceramic wall tile, it is necessary to gather the necessary materials and supplies.
- Accurate measurements of the walls need to be taken in order to ensure the tile will fit properly.
- The measurements should be taken from the floor to the ceiling and from one corner of the wall to the other.
- After taking the measurements, the installer needs to determine the layout of the tiles in order to estimate the number of tiles needed.
- The installer should consider the size of the tile, the size of the room, and any patterns that are desired when determining the layout.
- It is important to map out the layout prior to beginning the installation process to ensure the correct measurements and desired design will be achieved.
Gathering Supplies
When it comes to installing ceramic wall tile, the first step is gathering all the necessary supplies. Choosing the right colors and budgeting costs are important factors to consider when purchasing materials. It’s essential to have all the supplies on hand before beginning any work to ensure a smooth installation process.
The first item on your list should be ceramic tiles themselves. Depending on your project’s size, you may need to purchase more or less than you initially anticipated. It’s always better to have extra tiles than not enough, so make sure you purchase an adequate amount. Next, you’ll need adhesive and grout to secure the tiles in place permanently. Be sure to choose high-quality products that will last for years to come.
Other essential items include tile spacers, a trowel, a notched trowel, a level, and a tile cutter. These tools are necessary for properly measuring and cutting tiles to fit your space accurately. It’s crucial to have all these supplies organized and easily accessible before starting any work. By gathering all necessary materials beforehand, you can ensure a successful installation process that meets both aesthetic and functional requirements without breaking the bank.
Measuring Walls
Measuring your space is a crucial step when it comes to installing ceramic wall tiles. This subtopic will focus on measuring techniques that you can use to ensure the perfect fit of your ceramic tiles. As an experienced ceramic wall tile installer, I know how important it is to measure your space accurately before purchasing any materials or starting any work. Measuring walls correctly ensures that you have enough tiles and minimizes the risk of errors during the installation process.
Wall preparation is vital before taking measurements for installing ceramic wall tiles. You should clean the walls thoroughly and remove any debris or old adhesive residue using a scraper or sandpaper. The surface should be dry and even, with no bumps or dents that could affect tile placement. After preparing the walls, you can start measuring them accurately.
Measuring techniques vary depending on your wall’s shape and size. You can use a tape measure to calculate the length and width of each wall section and add them up to determine the total area. Alternatively, you can use laser level tools that project lines onto surfaces to create a grid system for more accurate measurements. A pro tip is to add 10% extra tile material than what you initially measured in case of cutting errors during installation. By following these guidelines for measuring techniques and wall preparation, you’ll be ready to install your ceramic wall tiles with confidence!
Determining Tile Layout
After measuring your space accurately, the next crucial step is to determine your tile layout. Tile design and spacing techniques can make a significant difference in the overall look of your ceramic wall tiles. As an experienced ceramic wall tile installer, I have seen how proper tile layout can enhance the aesthetic value of any space.
Before determining your tile layout, it is essential to consider the size and shape of your tiles. Larger tiles may require wider grout lines or staggered placement for better visual appeal. You should also take into account any fixtures or obstructions on the walls that could affect tile placement. Determining your tile layout helps you create a cohesive and visually pleasing design that complements your space.
Spacing techniques are also critical when determining your tile layout. Proper spacing ensures that each tile is aligned correctly and creates even grout lines throughout the installation process. You can use spacers or wedges to maintain consistent spacing between tiles and prevent them from shifting during installation. By following these guidelines for determining tile layout and spacing techniques, you’ll be able to achieve a flawless finish for your ceramic wall tiles.
Selecting Your Tile
After measuring your space, the next step in installing ceramic wall tile is selecting the tile itself. When choosing a tile pattern and color scheme, it’s important to consider the overall aesthetic of the room. A bold pattern or bright color can create a focal point, while a more neutral choice can provide a calming backdrop. Additionally, it’s essential to think about the size of the tiles and how they will fit together on your walls.
One popular tile pattern is subway tiles, which are rectangular tiles that resemble those found in traditional subway stations. These tiles can be arranged in a variety of patterns, such as running bond or herringbone, depending on the desired look. Other options include mosaic tiles or larger format tiles for a more modern feel.
Once you have selected your tile pattern and color scheme, it’s time to gather your tools. While specific tools may vary depending on the project and personal preference, some essentials include a trowel for applying adhesive, a level for ensuring even placement of tiles, and spacers for maintaining consistent spacing between each tile. With these tools at hand and your chosen tile ready to go, you are ready to begin the installation process.
Gathering Your Tools
A tile cutter is essential for cutting ceramic wall tile to fit into corners or around fixtures. A grout float and trowel are necessary for applying grout between the tiles. A sponge and bucket are needed to clean the tiles and a pair of gloves is recommended to protect hands. A safety mask and drill with drill bits, pencil, level, notched trowel, spacers, adhesive, and measuring tape are also necessary to successfully install ceramic wall tile.
Tile Cutter
When it comes to installing ceramic wall tiles, having the right tools is crucial. Among these tools is a tile cutter, which plays a significant role in making precise cuts and shaping tiles according to the desired shape and size. Choosing the right tile cutter is essential in ensuring that you achieve quality work that meets your expectations.
When selecting a tile cutter, consider its cutting capacity, blade type, and cutting length. A manual tile cutter is ideal for small or medium-sized projects, while an electric one is better for larger jobs. It’s important to note that proper maintenance of the tile cutter ensures its longevity and optimal performance. Keep the blade clean, lubricated, and sharpened after every use.
In conclusion, choosing the right tile cutter and maintaining it properly can make all the difference when it comes to installing ceramic wall tiles. Ensure that you have the appropriate tools at hand before starting any project to avoid frustration along the way. By investing in quality equipment and taking care of them regularly, you can guarantee successful results for your clients or personal projects alike.
Grout Float
As a ceramic wall tile installer, one of the critical tools that you should have in your toolbox is the grout float. This tool plays a vital role in filling the gaps between tiles with grout material to create a uniform and seamless surface. Grout float techniques vary depending on the type of grout used and the desired finish. Therefore, it’s essential to understand how to use this tool properly to achieve optimal results.
Different grout types require different float techniques. For instance, sanded grout requires more pressure when pushing it into the gaps between tiles than unsanded grout. Additionally, epoxy grouts require a different approach because they set quickly compared to other types of grouts. As such, using a rubber float instead of a traditional sponge one can help you achieve smooth surfaces without leaving any residue or stains.
In conclusion, incorporating proper grout float techniques is crucial in achieving successful ceramic wall tile installation projects. Having different types of floats for various scenarios can help you achieve quality finishes that meet your clients’ needs and expectations. Remember that understanding which technique works best for each type of grout is key in ensuring that you deliver quality workmanship every time.
Preparing The Surface
It’s always amusing to see homeowners attempt to install ceramic wall tile without properly preparing the surface. Without proper surface preparation, the tiles won’t adhere correctly, and you’ll have a mess on your hands. Here are some helpful tips for preparing your wall surfaces before laying down those beautiful tiles.
First and foremost, ensure that your walls are clean and free of any dust or debris. A dirty surface can hinder adhesive from sticking to the surface, which can lead to cracked or loose tiles later on. Next, check for any cracks or holes in the walls that need repair. These should be fixed before adding tile as they can cause problems with the placement of tiles.
Once you’ve cleaned and repaired any imperfections in your walls, it’s time to rough up the surface using sandpaper or a similar abrasive material. This step is essential because it allows the adhesive to grip onto the wall better. After you’ve roughened up the surface, use a damp cloth to remove any dust or debris left behind. Now that you’ve prepared your wall surfaces correctly, you’re ready to move onto applying your adhesive.
- Make sure all wallpaper is removed before starting work.
- Use a level to ensure surfaces are even.
- Check for moisture problems in your walls before beginning work.
- Wear protective gear when working with sandpaper or other abrasive materials.
- Allow sufficient time for repairs and preparation before beginning installation work.
With these tips in mind, you’ll be able to prepare your surfaces adequately and avoid any issues with poorly adhered tiles later on. Remember, taking the extra time now will save you headaches down the line!
Applying Your Adhesive
Now that the surface is properly prepared, it’s time to move on to applying your adhesive. To ensure a successful installation, be sure to mix your adhesive according to the manufacturer’s instructions and check its consistency before applying. The ideal consistency should be similar to peanut butter – not too thick or thin.
When it comes to adhesive application techniques, there are a few things to keep in mind. First, you’ll want to work in small areas at a time so that the adhesive doesn’t dry out before you have a chance to lay your tiles. Second, it’s important to spread the adhesive evenly using a notched trowel. This will help prevent any air pockets from forming under your tiles.
To help you keep track of your progress and ensure an even application of adhesive, consider using a tile spacing system. These systems come in different sizes and can be adjusted for different grout lines. By inserting these spacers between tiles, you’ll create uniformity and avoid any unsightly gaps once everything has dried.
As you finish up applying your adhesive, keep in mind that the next step will involve cutting your tiles to fit around corners or edges. With this in mind, make sure you’ve left yourself enough space for these cuts as you continue working across the wall. With proper preparation and technique, installing ceramic wall tile can be a satisfying project with beautiful results.
Cutting Your Tiles
Tile cutting techniques are crucial in ensuring a successful ceramic wall tile installation. One of the most important decisions to make when cutting tiles is choosing the right tile cutter. There are two main types of tile cutters: manual and electric. Manual tile cutters are generally cheaper and suitable for smaller projects, while electric tile cutters are more expensive but can handle larger tiles and thicker materials.
When using a manual tile cutter, it’s important to score the glazed surface of the tile with a carbide-tipped scoring wheel before snapping it along the scored line. This creates a clean break without damaging the surrounding tiles. Electric tile cutters, on the other hand, use diamond blades to make precise cuts through ceramic tiles. They also have adjustable guides for angled cuts and can be used to make holes or notches in tiles.
Choosing the right technique ultimately depends on your budget and project needs. For smaller projects or occasional use, a manual cutter may suffice. However, for larger projects or thicker tiles that require more precision cuts, an electric cutter may be necessary. Regardless of which method you choose, always take safety precautions when using any type of tool or machinery during your ceramic wall tile installation process.
With your tiles now properly cut, it’s time to start your first row.
Starting Your First Row
Like a painter surveying a blank canvas, starting your first row of ceramic wall tile can be both exciting and intimidating. But with the right layout techniques, you can ensure that your tiles are perfectly aligned and create a beautiful finished product. One common mistake is failing to measure accurately. Take the time to measure your wall and mark out your tile placement before you begin.
Another mistake is not properly preparing the wall surface. Make sure that the wall is clean, dry, and free of any debris or bumps. Use a level to ensure that your first row is straight, as this will set the tone for the rest of the installation. You may also want to consider using spacers between each tile to maintain an even grout line.
As you start laying your first row of ceramic wall tile, remember that attention to detail is key. Take it one tile at a time and make sure that each one is level and aligned properly before moving on to the next. With patience and perseverance, you can create a stunning tiled surface that will enhance any room in your home. Next up: spreading grout seamlessly into every crevice for a flawless finish.
Spreading Grout
Once the ceramic wall tiles are firmly in place, it is time to spread the grout. The grout is a cement-based mixture that fills in the gaps between the tiles and creates a seamless look. It also helps to protect against moisture and mold growth. Before starting to spread the grout, make sure that all of the tiles are clean and dry.
To achieve a professional-looking finish, it is important to choose the right grout color for your tiles. A contrasting color can add depth and character to your design, while a matching color will blend seamlessly into the background. Take some time to experiment with different colors before making your final decision.
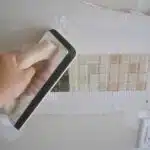
There are two main techniques for applying grout: spreading it diagonally across the tiles or working it back and forth in small sections. Whichever technique you choose, be sure to work quickly and carefully as the grout dries fast. Once you have filled all of the gaps between your ceramic wall tiles, use a damp sponge to wipe away any excess grout from the surface of the tiles.
Next up is applying sealant to protect your newly installed ceramic wall tile.
Applying Sealant
Applying sealant is an important step in the installation of ceramic wall tiles. It protects the tiles from moisture, stains, and other forms of damage. Using the right sealant is essential to ensure maximum protection and durability of your tiles.
When choosing a sealant for your ceramic wall tiles, it’s important to consider factors such as the type of tile, location, and expected wear and tear. There are two main types of sealants: penetrating sealers and surface sealers. Penetrating sealers seep into the pores of the tile and provide long-lasting protection without altering its appearance. Surface sealers create a protective layer on top of the tile and can enhance its color or shine.
Tips for sealing tiles include cleaning them thoroughly before application to ensure that there are no dirt or dust particles that could interfere with adhesion. Apply the sealant using a brush or roller in thin layers, following manufacturer instructions regarding drying times between coats. Once you’ve applied the final coat, allow ample time for it to dry completely before touching or walking on the surface.
After applying sealant comes cleaning your tiles which is equally important in maintaining their durability and aesthetic appeal. By using proper techniques like wiping up spills immediately with a soft cloth or sponge, avoiding harsh chemicals that might damage your tiles’ finish, you can prolong their lifespan while preserving their beauty for years to come.
Cleaning Your Tiles
After installing your ceramic wall tiles, it is important to keep them clean and well-maintained. There are several cleaning methods that you can use to ensure the longevity of your tiles. One popular method is to use warm water and a mild detergent solution. Simply mix the solution in a bucket, dip a soft cloth or sponge into it, and wipe down the tiles. Be sure to rinse thoroughly with clean water afterwards.
Another effective cleaning method is to use vinegar and water. This natural solution is great for removing stubborn stains and grime from your tiles. Mix equal parts vinegar and water in a spray bottle, then spray the solution onto the tiles. Allow it to sit for a few minutes before wiping away with a soft cloth or sponge. Rinse thoroughly with clean water.
To maintain the appearance of your ceramic wall tiles, there are some maintenance tips that you should follow. Avoid using abrasive cleaners or scrub brushes, as these can scratch or damage the surface of the tile. Instead, opt for gentle cleaning solutions and tools such as soft cloths or sponges. Additionally, be sure to wipe up spills and stains as soon as possible to prevent them from setting into the tile.
As you move on to curing time, it is important to remember that proper cleaning is essential for maintaining the beauty and durability of your ceramic wall tiles. By following these simple cleaning methods and maintenance tips, you can ensure that your tiles remain in top condition for years to come.
Curing Time
One interesting statistic to consider is that ceramic wall tiles require a minimum of 24 hours of curing time before grouting, according to industry standards. This means that it’s important to plan your tiling project accordingly, taking into account the time required for curing before moving on to the next step.
The importance of allowing sufficient curing time cannot be overstated. Rushing the process can result in tiles shifting or becoming uneven, resulting in an unprofessional finish. In addition to causing frustration and wasted effort, this can also result in costly repairs down the line.
To ensure proper curing, it’s important to follow a few simple tips. First, avoid walking on newly installed tiles until they’ve had adequate time to set. Second, keep the room well-ventilated during the curing period by opening windows or using fans. Finally, resist the temptation to rush ahead with grouting until you’re certain that every tile is fully cured and securely in place. By taking these steps and being patient with the process, you’ll achieve a beautiful and long-lasting tile installation that will be a source of pride for years to come.
With your ceramic wall tiles now successfully installed and properly cured, it’s time to move on to those finishing touches that will truly make your project shine.
Finishing Touches
Once the ceramic wall tile installation is complete, it’s time to move on to the finishing touches. One of the most important aspects of these final steps involves choosing the right color options for your tiles. You’ll want to consider both your personal style and the overall aesthetic of your space when selecting a color palette. Some popular choices include neutral tones like beige, gray, or white, while others may opt for more vibrant hues such as red or blue.
In addition to color options, decorative patterns are another great way to add personality and visual interest to your ceramic wall tile installation. From geometric designs to intricate mosaics, there are countless patterns available to suit any taste or décor style. If you’re unsure which pattern is right for you, consider consulting with a professional tile installer who can provide expert guidance and advice.
Overall, taking the time to carefully select the perfect color options and decorative patterns can really elevate your ceramic wall tile installation from ordinary to extraordinary. By considering all of your options and working with a skilled installer, you can create a space that’s not only functional but also beautiful and unique.
As you move forward with completing your ceramic wall tile installation project, it’s important to keep in mind that even with careful planning and preparation, issues can still arise. In the next section, we’ll explore some common troubleshooting tips that can help you address these challenges quickly and effectively so that you can enjoy your newly tiled space without unnecessary stress or frustration.
Troubleshooting Common Issues
When installing ceramic wall tiles, it’s possible to encounter issues that can cause frustration and even ruin the project. Troubleshooting common issues is part of the installation process and requires patience, attention to detail, and the right tools. One of the most common problems that installers face is grouting problems.
Grouting problems can occur when there are gaps between tiles or when excess grout is not removed from the surface. These issues can lead to an unattractive finish and affect the durability of the installation. To troubleshoot grouting problems, it’s important to inspect each tile carefully and fill any gaps with additional grout. The excess grout should be removed gently using a damp sponge before it dries completely.
Another issue that can arise during ceramic wall tile installation is uneven tile placement. This can happen due to an uneven surface or incorrect measurements. Fortunately, fixing uneven tile placement is relatively easy if you catch it early on in the installation process. Simply remove the affected tile(s) and adjust accordingly before applying new adhesive.
| Problem | Solution |
|---|---|
| Gaps between tiles | Fill with additional grout |
| Excess grout on surface | Remove gently with damp sponge |
| Uneven tile placement | Remove affected tile(s) and adjust accordingly |
In conclusion, troubleshooting common issues during ceramic wall tile installation is crucial for achieving a successful outcome. Grouting problems and uneven tile placement are two of the most common issues that require attention during installation. By addressing these issues promptly, installers can ensure a flawless finish that lasts for years to come. Moving forward, maintaining your ceramic wall tile will also play a vital role in its longevity and appearance.
Maintaining Your Ceramic Wall Tile
Tile cleaning is an essential aspect of maintaining the beauty and durability of your ceramic wall tile. Dirt, grime, and stains can accumulate on the surface of your tile over time, which can cause discoloration and damage if left untreated. To clean your ceramic wall tile properly, start by sweeping or vacuuming the surface to remove loose dirt and debris. Then, use a damp mop or cloth with a mild cleaning solution to wipe down the tiles.
Grout maintenance is another critical factor in keeping your ceramic wall tile looking its best. Grout lines are prone to collecting dirt and stains, which can make them look unsightly over time. To prevent this from happening, it’s important to regularly clean and seal your grout lines. Use a grout cleaner specifically designed for ceramic tile, and follow the manufacturer’s instructions carefully.
By following these tips for tile cleaning and grout maintenance, you can keep your ceramic wall tile looking like new for years to come. Regular upkeep will not only enhance the appearance of your space but also extend the life of your investment. Remember to always use proper cleaning techniques and products to avoid damaging your tiles or grout lines. With a little effort and attention, you can enjoy beautiful ceramic wall tiles that add value to your home or business for many years.
Conclusion
The installation of ceramic wall tile requires careful planning, precise measurements, and attention to detail. As a ceramic wall tile installer, it is essential to assess the project needs, measure the space accurately, select the appropriate tiles, gather necessary tools and materials, prepare the surface, and allow for curing time before finishing touches can be applied. Troubleshooting common issues such as uneven surfaces or adhesive problems may also arise during the installation process.
Maintaining your ceramic wall tile after installation is crucial to ensure its longevity and beauty. Regular cleaning with non-abrasive cleaners and avoiding harsh chemicals will help preserve the finish of your tiles. The use of sealants or grout treatments will also help protect against stains or discoloration over time.
In conclusion, installing ceramic wall tile requires patience and expertise to achieve a flawless finish. As a ceramic wall tile installer, taking pride in your workmanship and attention to detail will provide lasting satisfaction for both you and your clients. So why not take on this rewarding challenge?
Image Credits
- “2015.04 – Amsterdam photo of wall-art – An unknown wall-decoration in ceramic tiles on a house-front, made c. 1980’s; a geotagged free urban picture, in public domain / Commons CCO; city photography by Fons Heijnsbroek, The Netherlands” by Amsterdam free photos & pictures of the Dutch city (featured)


