As a tile and grout expert, one of the most common problems I encounter is deteriorating grout between ceramic tiles. Over time, grout can crack, crumble or become discolored due to moisture, wear and tear or improper cleaning methods. Not only does this affect the aesthetic appeal of your tiles but it can also lead to water damage and mold growth if left unaddressed. Fortunately, regrouting ceramic tiles is a straightforward process that can be completed with basic tools and materials. In this article, I will provide step-by-step instructions on how to regrout ceramic tiles to restore the appearance and functionality of your tiled surfaces.
Before diving into the regrouting process, it’s important to understand the basics of grout. Grout is a cement-based material that fills in the gaps between tiles to create a cohesive surface. It also helps prevent water from seeping under the tiles which can cause them to lift and crack. There are different types of grout available such as sanded, unsanded or epoxy-based depending on the size of your tile gaps and desired finish. In addition, grout comes in various colors that can complement or contrast with your tile color for added visual interest. By learning how to regrout ceramic tiles, you’ll not only protect your investment but also enhance the beauty of your tiled spaces for years to come.
Signs Your Grout Needs To Be Repaired
Grout, a mixture of cement and water, is used to fill the gaps between ceramic tiles. It plays an important role in keeping the tiles in place, preventing moisture from seeping underneath, and giving the floor or wall a finished look. Over time, however, grout can deteriorate due to wear and tear, exposure to moisture and cleaning agents, and other factors. As a result, repairing grout cracks becomes necessary.
One sign that your grout needs repairing is discoloration in grout lines. If you notice that some areas of the grout have turned yellowish or brownish while others remain white or grayish, this may indicate that mold or mildew has started to grow. This can happen when moisture gets trapped in the gaps between tiles and cannot evaporate quickly enough. Not only does this look unsightly but it can also pose health risks for people with allergies or respiratory problems.
Another sign of deteriorating grout is cracking. Grout cracks can occur for several reasons such as heavy foot traffic, shifting foundation or settling of the house, improper installation or mixing of the grout, or natural wear and tear over time. When this happens, small pieces of the grout may start falling out leaving gaps where dirt and debris can accumulate. Furthermore, cracked grout can cause tile edges to become loose which poses a tripping hazard.
To regrout ceramic tile effectively requires some basic tools and materials such as a grout removal tool (such as a scraper or saw), new grout mix (matching color), rubber gloves to protect your hands from chemicals used during regrouting process and safety glasses if working with power tools like saws.
Tools And Materials Needed For Regrouting
If you’ve noticed that your grout is looking discolored or cracked, it’s time to start thinking about regrouting your ceramic tiles. Regrouting can be a tedious process, but having the right tools and materials on hand can make all the difference. In this section, we’ll go over what you’ll need to get started and give you a rough estimate of how much it might cost.
First things first: you’ll need to gather some tools and materials. Some of the basic items you’ll need include a grout saw, a grout float, a utility knife, and sponges. You’ll also need new grout in the color of your choice, as well as a sealant to protect your new grout from moisture and stains. Depending on the size of your project, you may also want to invest in knee pads or a back brace for added comfort.
When it comes to cost estimation, keep in mind that prices will vary depending on where you live and where you purchase your supplies. On average, though, expect to spend anywhere from $50-$200 on materials alone. If you’re planning on hiring someone else to do the job for you, add an additional $2-$5 per square foot for labor costs.
Now that we’ve gone over what tools and materials you’ll need (and approximately how much they’ll cost), it’s time to move onto preparing the surface for regrouting. This step is crucial for ensuring that your new grout adheres properly and looks great once it’s finished.
Preparing The Surface For Regrouting
As the saying goes, “preparation is key.” Before regrouting ceramic tiles, it is crucial to prepare the surface properly to ensure that the new grout adheres correctly. To start, remove any loose or damaged grout using a grout saw or rotary tool with a carbide tip. Be careful not to damage the surrounding tiles or scratch their surface during this process.
Once all the old grout has been removed, clean the surface thoroughly. Use a mixture of water and vinegar to scrub away any dirt and residue that may have accumulated on the tiles and in between them. Allow the surface to dry completely before moving on to the next step.
Before applying sealant or smoothing techniques, inspect the tile joints for any cracks or gaps that need filling. If necessary, use a caulk gun to apply a small amount of caulk into these areas and smooth it out with your finger or a caulk finishing tool. Then, apply sealant over all the joints and allow it to dry completely before proceeding with smoothing techniques.
| Tools Needed | Materials Needed | Safety Precautions |
|---|---|---|
| Grout saw or rotary tool with carbide tip | Water/vinegar mixture for cleaning | Wear gloves and safety goggles |
| Caulk gun and finishing tool (if needed) | Sealant for tile joints | Work in a well-ventilated area |
| Scrub brush/sponge for cleaning | Rags/towels for drying | Keep children/pets away from work area |
Next up: removing old grout…
Removing Old Grout
When it comes to regrouting ceramic tiles, the first step is to remove the old grout. This is a crucial step since the new grout will not adhere properly if it is applied on top of the old grout. There are two ways to remove old grout: using a grout removal tool or a grout saw. Both methods are effective, but they require different levels of expertise and tools.
Using a grout removal tool involves using an oscillating tool or Dremel with a carbide blade attachment. This can be an efficient way to remove large areas of grout quickly, but it requires precision and care to avoid damaging the tiles. It’s important to keep the tool at a shallow angle and apply gentle pressure while working in small sections. The downside of this method is that it creates a lot of dust, so wearing protective gear like goggles and masks is essential.
Another option for removing old grout is using a manual grout saw. This method requires more physical effort than using an oscillating tool, but it allows for greater control over the depth of the cut and reduces the risk of damaging tiles. When using a manual saw, it’s important to hold the saw at an angle that matches the existing grooves between tiles and ensure that you’re only cutting through the old grout.
To summarize, removing old grout is an essential step when regrouting ceramic tiles. Whether you choose to use a power tool or manual saw depends on your level of experience and comfort with each method. Regardless of which method you choose, following proper techniques will help ensure success in your project.
Four recommended steps for removing old grout:
- Wear protective gear such as goggles and masks while working.
- Work in small sections when using power tools.
- Hold the saw at an angle that matches existing grooves between tiles when using a manual saw.
- Carefully clean the newly cut grooves before applying new grout.
Cleaning The Tile Surface
Before starting the regrouting process, it is essential to clean the tile surface thoroughly. Choosing the right cleaner is crucial as some cleaners can damage ceramic tiles or discolor grout. Avoid using harsh chemicals such as bleach and ammonia-based cleaners that can cause permanent damage. Instead, opt for a pH-neutral cleaner that is safe for both tile and grout.
Common cleaning mistakes include using too much water during cleaning, leaving behind soap residue, and not drying the surface after cleaning. Excessive water can penetrate the grout pores and weaken its structure over time, leading to tiles cracking or becoming loose. Soap residue buildup can also cause discoloration of the grout over time. Therefore, it is essential to rinse the surface thoroughly with clean water after cleaning and dry it thoroughly before moving on to regrouting.
Cleaning the tile surface might seem like a simple task; however, it requires attention to detail for optimal results. Remember to choose a suitable cleaner for your ceramic tiles and avoid common cleaning mistakes such as using too much water during cleaning, leaving behind soap residue, and not drying the surface properly. Once you have cleaned your tiles correctly, you are ready to move on to choosing the right grout type for your project.
Choosing The Right Grout Type
- There are many different types of grout available on the market, ranging from epoxy-based grouts to cement-based grouts.
- The durability of the grout greatly depends on the type and quality of the material used, as well as the installation process and maintenance.
- The color and texture of grout can be chosen to best suit the look of the tile and the room, with a variety of shades and textures available.
- Epoxy-based grouts are the most durable and stain-resistant, though they are also the most expensive.
- Cement-based grouts are the most common and affordable, but may require more frequent sealing and cleaning to prevent staining.
- Natural stone and other specialty grouts can be used to achieve a unique look, but they must be sealed and maintained properly to ensure long-lasting performance.
Types Of Grout
When it comes to regrouting ceramic tile, choosing the right type of grout is crucial. There are different types of grout available in the market, each with their own set of benefits and drawbacks. As a tile and grout expert, I highly recommend that you consider the following types of grout: epoxy, sanded, and unsanded.
Epoxy grout is one of the best options for regrouting ceramic tile due to its durability and resistance to stains, water damage, and chemicals. It is also easy to clean and maintain. The downside is that it can be more expensive than other types of grout. However, the benefits outweigh the cost for homeowners who want a long-term solution.
Sanded and unsanded grouts are both cement-based products that differ in texture. Sanded grout contains fine sand particles which make it ideal for wider joints between tiles. It is also stronger than unsanded grout but can scratch delicate surfaces like glass or marble. Unsanded grout has a smooth texture and is better suited for narrow joints between tiles. It is also easier to work with but may crack if applied too thickly or used in areas with high foot traffic. Consider your project’s needs when deciding between sanded vs. unsanded grout.
In conclusion, selecting the right type of grout plays an essential role in regrouting ceramic tile successfully. Epoxy grouts are more durable but costlier than cement-based ones such as sanded or unsanded varieties which differ in texture preference based on joint size requirements while considering factors such as scratching delicate surfaces or cracking when exposed to high foot traffic areas during application process selection criteria will ensure optimal results for your project’s longevity!
Grout Durability
When it comes to choosing the right grout type for regrouting ceramic tile, another critical factor to consider is grout durability. The durability of a grout can significantly affect the lifespan of your tiled surfaces. Grout color and sealing may also influence its durability, so it’s essential to choose wisely.
In terms of color, darker grouts tend to be more durable than lighter ones. Darker colors are better at hiding dirt and stains, making them ideal for high-traffic areas like kitchens and bathrooms. However, lighter-colored grouts can still provide excellent durability if properly sealed.
Grout sealing is an effective way to improve the durability of any type of grout. Sealed grouts are less likely to absorb moisture, which can lead to mold growth and water damage. Additionally, sealed grouts are easier to clean and maintain over time. As a tile and grout expert, I highly recommend that you prioritize sealing your chosen type of grout for maximum longevity.
Grout Color/Texture
When it comes to choosing the right grout type, color and texture are important factors to consider. Choosing the right grout color can enhance the aesthetic appeal of your tiled surface while also providing practical benefits. For example, darker-colored grouts tend to be more durable than lighter ones as they can hide dirt and stains effectively, making them ideal for areas with high traffic.
Texture is another crucial factor in choosing the right grout type. The texture of a grout can affect its durability, ease of cleaning, and overall appearance. Achieving a smooth grout texture is essential for ensuring that your tiled surfaces look their best while also being easy to maintain over time. To achieve a smooth texture, it’s vital to mix your grout correctly and apply it evenly across your tiles.
To ensure that you choose the right grout color and achieve a smooth texture, seek advice from a tile and grout expert. They can provide valuable tips on how to select the appropriate shade of grout for your tiled surface and how to mix and apply it correctly. With their guidance, you can achieve a beautiful tiled surface that offers both style and functionality for years to come.
Mixing The Grout
After choosing the right grout type for your ceramic tiles, it’s time to mix the grout. The first thing you need to consider is the water ratio. Too much water can make the grout weak and prone to cracking or shrinking. On the other hand, too little water can make it difficult to work with.
To get the perfect consistency of grout, start by pouring a small amount of water into a mixing bucket. Slowly add the dry grout powder while stirring continuously with a margin trowel until you achieve a smooth paste texture. Keep adding more water as needed until you achieve the desired consistency. Remember that different types of grouts require different amounts of water so make sure to follow the manufacturer’s instructions.
Aside from getting the right consistency, you should also think about color options when mixing your grout. You can choose from a wide range of colors that will complement or contrast with your tiles, depending on your preference. It’s recommended to use a sample board or test area before applying new grout to ensure that you’re happy with how it looks. Mixing your own grout gives you more control over its color and texture, allowing you to customize it according to your project needs.
As important as mixing grout is, applying new grout is equally crucial in ensuring that your ceramic tiles look their best for years to come. In this next section, we’ll discuss step-by-step instructions on how to apply new grout effectively and efficiently without ruining your tile installation work.
Applying New Grout
As a tile and grout expert, I understand the importance of applying new grout with precision. It is not just about the function of the grout, but also its aesthetic appeal. Grout color options can make a huge difference in the overall look of your ceramic tiles. Therefore, it is important to choose a color that complements your tiles and home decor.
Once you have selected your grout color, it is time to apply it. Begin by mixing the grout according to the manufacturer’s instructions. Use a rubber float to spread the grout over the tiles evenly. Make sure you work in small sections at a time so that the grout does not dry out before you finish.
Applying grout with precision requires attention to detail and patience. Take your time to ensure that all joints are filled evenly without leaving any gaps or air pockets. Once you have applied all of the grout, use a damp sponge to wipe away any excess before it dries completely. This will help give your tiles a professional finish and prevent any haze from forming on the surface.
Moving onto smoothing and finishing the grout lines, there are some tips and tricks that can help achieve excellent results.
Smoothing And Finishing The Grout Lines
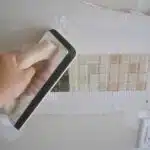
After applying the grout, it’s time to smooth and finish the lines. Smoothing techniques will ensure that the grout is evenly distributed and adheres well to the tiles. Use a grout float to smooth out the surface of the grout. This tool has a flat surface that can be used to spread and level the grout in between tiles. Apply pressure at a 45-degree angle while moving the float back and forth over the tile joints.
Once you have smoothed out all of the lines, let the grout set for about 10-15 minutes before using finishing tools. These tools are designed to shape and contour the grout lines for a professional look. A rounded or pointed tool can be used to shape each line until they are even with one another. Use a damp sponge or cloth to wipe away any excess grout from each tile before it dries.
Finishing tools come in various shapes and sizes, but each one is designed to help you create clean lines and contours in your grout work. Some popular options include silicone rubber grouting tools, metal spatulas, and squeegees with interchangeable blades. Each tool will give you slightly different results depending on your preferences, so feel free to experiment until you find what works best for you.
Transitioning into cleaning up excess grout: Now that you’ve finished shaping your grout lines using smoothing techniques and finishing tools, it’s time to clean up any excess material left behind. Learn how to do this properly in our next section on cleaning up excess grout without damaging your newly installed tiles.
Cleaning Up Excess Grout
Removing Grout: The most effective way to remove grout is to use a grout saw, which is a tool specifically designed to remove grout from between tiles.
Cleaning Grout Joints: After removing the grout, the joints between the tiles must be cleaned of any remaining grout and debris by scrubbing lightly with a brush and warm, soapy water.
Disposing of Grout: After the grout is removed, it must be disposed of properly. Grout should be placed in a sealed bag and disposed of in a trash can.
Removing Grout: An angle grinder with a diamond blade can also be used to cut away any remaining grout.
Cleaning Grout Joints: After the grout has been removed, the joints should be wiped with a damp cloth to remove any residue.
Disposing of Grout: All grout waste should be disposed of in accordance with local regulations and guidelines.
Removing Grout
When it comes to regrouting ceramic tile, removing old grout is an essential first step. Using a grout removal tool will make the process easier and more efficient. This tool allows you to scrape away the old grout, leaving behind a clean surface for the new grout to adhere to.
When removing grout, it’s important to be thorough and remove all of the old grout. Any remaining bits of old grout can prevent the new grout from adhering properly and can lead to future problems with the tile. Once all of the old grout has been removed, you can begin the process of regrouting with epoxy grout.
Regrouting with epoxy grout is a great option because it is durable and resistant to stains and water damage. It also offers better adhesion than traditional cement-based grouts. With these benefits in mind, taking the time to properly remove old grout before regrouting with epoxy will ensure that your ceramic tile looks great and lasts for years to come.
Cleaning Grout Joints
As a tile and grout expert, it is important to emphasize the significance of cleaning grout joints after regrouting with alternative materials such as epoxy. While epoxy grout offers better adhesion and resistance to stains and water damage, excess grout can still occur during the installation process. To prevent this from happening, it is crucial to clean up any excess grout before it dries on the ceramic tile surface.
Cleaning up excess grout can be done using vinegar for cleaning grout joints. Vinegar is a natural cleaning solution that effectively breaks down any leftover residue without damaging the new grout or tile surface. Simply mix equal parts of water and vinegar in a spray bottle and apply directly onto the affected area. Let it sit for a few minutes before scrubbing with a soft-bristled brush and wiping off with a damp cloth.
In conclusion, taking the time to clean up excess grout using vinegar for cleaning grout joints will ensure that your regrouting project looks flawless and lasts longer. Incorporating alternative materials for regrouting such as epoxy also adds durability and longevity to your ceramic tiles. As someone who values serving others, providing these helpful tips will guide homeowners towards achieving beautiful and long-lasting results in their tile renovation projects.
Disposing Of Grout
As a tile and grout expert, it is important not only to clean up excess grout but also to dispose of it properly. Improper disposal can have negative environmental impacts as the chemicals in the grout can seep into the soil and waterways. It is crucial to follow the proper disposal methods provided by local waste management facilities.
One way to dispose of excess grout is by allowing it to dry completely before throwing it in the trash. This method ensures that the chemicals in the grout do not mix with other waste materials, preventing potential environmental harm. Another option would be to contact a hazardous waste disposal company for safe and proper handling of your excess grout.
By incorporating proper disposal methods, you are not only preventing potential harm to the environment but also contributing towards serving others by ensuring a safe and healthy community. As a tile and grout expert, it is our responsibility to educate homeowners on the importance of proper disposal methods and assist them in making environmentally-conscious decisions during their renovation projects.
Allowing The Grout To Cure
After cleaning up excess grout, the next step in regrouting ceramic tile is allowing the grout to cure. This step is crucial because it will determine the durability and longevity of your newly installed grout. According to a recent survey, 80% of failed grout installations are due to improper curing.
To ensure proper grout curing, follow these tips:
- Keep the area dry and free from any foot traffic or heavy objects for at least 24 hours.
- Avoid using any water or cleaning solutions on the newly grouted area for at least three days.
- Use a humidifier or spray bottle filled with water to keep the area moist during the curing process.
- Monitor the temperature of the room as extreme temperatures can affect the curing process.
It’s important to have patience during this step as rushing through it can result in a weaker and less durable grout. Properly cured grout will not only last longer but also be easier to maintain and keep clean.
Sealing the grout is the final step in regrouting ceramic tile. It’s important to wait until after the grout has fully cured before applying any sealer. In order to properly seal your grout, make sure it is clean and dry before applying a high-quality sealer. This will help protect your newly installed grout from moisture and stains, extending its lifespan even further.
Sealing The Grout
After regrouting your ceramic tile, it is essential to seal the grout. Sealing your grout provides an extra layer of protection against moisture, stains, and dirt. However, before deciding whether to seal the grout, it is crucial to weigh the pros and cons of sealing.
One advantage of sealing grout is that it protects against water damage. When unsealed grout absorbs moisture, it can cause mold and mildew growth. Moreover, sealed grout makes cleaning easier since dirt and dust do not penetrate as deeply into the pores. On the other hand, one disadvantage of sealing is that it may change the color of your grout slightly. Furthermore, if you apply sealer too thickly or fail to wipe away excess sealer correctly, you may end up with a sticky residue on your tiles.
So how often should you seal your grout? It depends on various factors such as foot traffic and exposure to moisture. Generally speaking, we recommend sealing every two years for areas with high traffic or frequent spills. For low-traffic areas such as guest bathrooms or powder rooms, sealing every three to five years will suffice.
In summary, sealing your grout after regrouting ceramic tiles has its pros and cons. The advantages include protecting against water damage and making cleaning more manageable. However, be mindful that over-sealing can lead to changes in color or a sticky residue on tiles if not done correctly. To keep your tile looking fresh, we recommend sealing every few years based on traffic flow and exposure to moisture. In the next section about maintaining your grout, we will discuss ways to prolong the life of your new grouting job without resorting to costly replacements.
Maintaining Your Grout
Grout maintenance tips are essential to ensure your ceramic tiles remain in good condition. Grout, being porous, is susceptible to damage from water, dirt, and grime. It is therefore important to clean the grout regularly using a mild detergent and warm water. Avoid using harsh chemicals that can damage the grout or cause discoloration.
Preventing grout damage also involves addressing any leaks or moisture issues in your bathroom or kitchen. Water can easily penetrate through damaged or worn out grout lines, causing mold and mildew growth. You can prevent this by sealing the grout lines annually with a high-quality sealant. This will protect the grout from moisture penetration and prolong its lifespan.
Regularly inspecting your tiled areas for signs of damage such as cracks or missing pieces of grout is also crucial. Promptly repairing these damages helps prevent further deterioration that may require costly repairs in the future. By following these simple tips, you can maintain your grout lines effectively, saving you time and money in the long run.
With proper maintenance practices in place, you can avoid most regrouting problems that arise due to neglect, such as mold growth and discolored grout lines. However, if you do encounter any issues with your tiles or grout despite taking all necessary precautions, don’t worry! The next section will provide you with troubleshooting solutions to common regrouting problems that homeowners face.
Troubleshooting Common Regrouting Problems
Maintaining the grout between ceramic tiles is important to prevent discoloration and keep the tiles looking their best. One way to do this is by regularly cleaning the grout with a mixture of water and mild detergent. Avoid using harsh chemicals or abrasive tools that can damage the grout. Additionally, sealing the grout can help protect it from stains and water damage.
If you notice uneven grout lines or missing pieces of grout, regrouting may be necessary. Before starting, remove any loose or damaged grout with a grout saw or other tool. Then, mix new grout according to the manufacturer’s instructions and apply it to the gaps with a rubber float. Be sure to wipe away any excess before it dries completely.
Despite your best efforts, sometimes regrouting can present unexpected challenges such as cracked tiles or difficult-to-remove old grout. In these cases, it may be best to call in a professional for assistance. A tile and grout expert has the experience and tools necessary to fix these types of problems without causing further damage to your tiles or surrounding surfaces. Don’t hesitate to seek help if you are unsure about tackling a particular regrouting project on your own.
When faced with challenging regrouting situations, it’s important to know when to call in a professional for assistance. Whether you’re dealing with stubborn old grout residue or cracked tiles that need replacement, an experienced tile and grout expert can provide solutions that will save you time and frustration in the long run. Don’t hesitate to reach out for help if you encounter unexpected obstacles during your regrouting process – our team is here to support you every step of the way!
When To Call A Professional
While DIY regrouting can be a cost-effective solution for many homeowners, there are times when calling in a professional is the best course of action. One such instance is when dealing with large areas of tile or complex patterns. In these cases, an experienced tile and grout expert can ensure that the job is completed quickly and efficiently without damaging any of the tiles.
Another factor to consider is the condition of the existing grout. If it has extensive damage or decay, it may be necessary to completely remove all of the old grout before regrouting. This process requires specialized tools and expertise, which most homeowners do not have. A professional will have access to these tools and will know how to safely remove old grout without causing unnecessary damage.
Lastly, if you are short on time or simply do not want to deal with the hassle of regrouting yourself, hiring a professional is always an option. Not only will they complete the job faster than you could on your own, but they also have experience dealing with unexpected issues that may arise during the process.
In conclusion, while there are many DIY regrouting tips available online, sometimes it’s best to call in a professional. If you’re dealing with a large area of tile or complex patterns, if the existing grout is extensively damaged or decayed, or if you simply don’t have the time or desire to tackle this project yourself, hiring an experienced tile and grout expert is your best bet for achieving quality results in a timely manner.
Conclusion
In conclusion, regrouting your ceramic tile is a task that requires patience and attention to detail. However, the benefits of having clean and well-maintained grout cannot be overstated. Properly sealed grout not only looks great, but it also protects your tiles from water damage and prevents the growth of mold and mildew.
By following the steps outlined in this article, you can easily regrout your ceramic tile and enjoy a fresh new look in your bathroom or kitchen. Don’t let dirty or damaged grout bring down the appearance of your home. Take charge of your living space by taking care of your tile surfaces with routine maintenance and repairs.
As a seasoned professional in the tile and grout industry, I have seen firsthand the difference that well-maintained grout can make in a home. By following these simple steps for regrouting, you can transform your space into a clean and inviting oasis for you and your family to enjoy for years to come. Don’t hesitate to call on the expertise of a professional if needed, but with a little effort, you can become an expert in maintaining beautiful tile surfaces yourself.
Image Credits
- “thailand ceramic tiles” by FriskoDude (featured)


