As a ceramic tile installation expert, I have encountered numerous cases where homeowners had successfully installed their ceramic wall tiles but failed to properly grout them. Grouting ceramic wall tile is the process of filling the spaces between the tiles with a mixture of cement and sand, which not only enhances the aesthetic appeal of the tiles but also provides protection against water damage and mould growth.
Grouting ceramic wall tile can seem like a daunting task for those inexperienced in tile installation. However, with proper preparation and execution, anyone can achieve professional-looking results. In this article, we will discuss step-by-step instructions on how to grout ceramic wall tile effectively while avoiding common mistakes that could lead to costly repairs down the road. Whether you’re looking to update your bathroom or kitchen backsplash, follow along as we provide you with useful tips for mastering the art of grouting ceramic wall tile.
Gathering Your Materials And Tools
Imagine embarking on a journey through a vast and complex maze. You have the map, but without the right tools, you’ll never reach the end. Similarly, before even starting to grout ceramic wall tiles, you must gather all necessary materials and tools to ensure a successful outcome. Choosing tile patterns will require measuring tape, a straight edge ruler, and chalk lines to mark out your design. Safety considerations are also crucial, including gloves, safety glasses, and dust masks to protect against hazardous materials.
In addition to measuring tools and safety gear, you’ll need an assortment of supplies such as grout mix, water bucket, sponge or grout float for application purposes. Depending on your preference or project specifications, there are various types of grout available such as latex-based or epoxy-based grouts. Knowing which type of grout is best for your project requires some research and consultation with experts in this field.
Once you have gathered all the materials and tools needed for your project according to your plan or design preference, it’s time to prepare the surface for grouting. This stage involves cleaning up any debris or dirt on the surface using soap and water before inspecting it thoroughly for any cracks or imperfections that may affect the final look of your ceramic wall tile installation.
Preparing The Surface For Grouting
Surface preparation is key to achieving a successful and long-lasting ceramic wall tile grout job. Before starting the grout application process, it is essential to ensure that the surface of the tiles is clean, dry, and free from any dirt, dust, or debris. Any contaminants on the wall surface can interfere with the bond between the grout and tiles.
Surface preparation tips include wiping down the tiles with a damp sponge or cloth to remove any loose materials. For more stubborn stains or residues, use a specialized tile cleaner recommended for ceramic surfaces. Avoid using acid-based cleaners as they may etch or damage the tiles’ finish.
Proper cleaning of your ceramic wall tile’s surface prior to grouting cannot be overstated. It ensures that you have a clean slate and provides an even surface for applying grout. By taking these necessary steps before beginning your ceramic wall tile installation project, you can guarantee that your finished product will look polished and professional.
To achieve a smooth and beautiful result in your ceramic wall tile installation project, you’ll need to choose the right type of grout. Different types of grout exist for different applications; therefore, it’s important to consider factors like color choice, durability requirements, and ease of maintenance when making your decision. In our subsequent section topic, we will explore these factors in greater detail and provide guidance on selecting the right type of grout for your specific needs.
Choosing The Right Type Of Grout
After preparing the surface for grouting, it is crucial to choose the right type of grout. There are various types of grout available in the market, such as sanded, unsanded, epoxy, and furan. The choice of grout depends on factors such as tile spacing, desired look, and location. For ceramic wall tiles with a narrow joint space of less than 1/8 inch, unsanded grout is recommended. Sanded grout is suitable for wider joints between tiles.
Color selection is another essential aspect to consider when choosing a grout. Grouts come in different colors that can complement or contrast with the tile color. It is advisable to choose a color that blends well with the tile color and design. A contrasting color can also be used for a dramatic effect, but it should be done tastefully.
Grout consistency is critical when working with ceramic wall tiles. The right consistency will make it easier to apply and ensure proper adhesion between the tiles. A thick and sticky consistency is desirable for vertical surfaces like walls because it prevents sagging or dripping during application. On the other hand, a runny consistency may cause the grout to slump.
- Use a mixing paddle attachment on an electric drill for consistent mixing.
- Gradually add water to avoid over-saturating the mixture.
- Test your mix by forming peaks that stand up without collapsing.
- Mix only enough for one section at a time to avoid drying out before use.
To achieve great results when grouting ceramic wall tiles, careful consideration must be given to choosing both the type and color of grout while ensuring appropriate consistency during mixing. With these factors in mind, you can create an impressive tiled surface that adds value and beauty to your space. Now onto mixing the grout…
Mixing The Grout
To ensure a successful ceramic tile installation, it is essential to pay close attention to mixing the grout. Grout consistency is key to achieving a smooth and even finish on your tiled surface. The consistency of your grout mixture will be determined by the amount of water you use when mixing.
When preparing your grout, refer to the manufacturer’s instructions for recommended water-to-grout ratios. However, keep in mind that these ratios are only a starting point. Depending on the humidity and temperature of your workspace, you may need to adjust these ratios slightly. Add water slowly until you achieve a creamy consistency that is easy to work with but not too runny.
Mixing additives into your grout can improve its performance and make it easier to work with. Additives like latex or acrylic polymer can increase the strength and flexibility of your grout and help prevent cracking over time. Other additives like powdered colorants can be used to change the color of your grout if desired. When adding any type of additive, follow the manufacturer’s instructions carefully and do not exceed recommended amounts.
With proper grout mixing techniques, you can achieve a beautiful finished product that will last for years to come. Next up, we will discuss how to apply the grout mixture onto your ceramic wall tiles effectively for optimal results.
Applying The Grout To The Tile
After mixing the grout properly, it’s time to start applying it to the ceramic wall tiles. Keep in mind that using different grout colors can make a big difference in the final look of your tile project. Choose a color that complements or contrasts with your tiles to create a unique and personalized design.
Before you start grouting, take some time to inspect the surface of your tiles. Make sure there are no loose or chipped pieces that could interfere with the grouting process. If you find any damaged areas, fix them first before proceeding with grouting.
Techniques for grouting around corners can be tricky but with practice, you’ll be able to achieve a neat and even finish. Start by filling the horizontal gap between the tiles and then work on the vertical gaps. Use a small putty knife or a grout float for better control over the application of the grout. Remember to wipe off any excess immediately so as not to leave unsightly marks on your tiles.
- Use a small amount of water when cleaning up excess grout from tiles.
- Apply sealant after curing for added protection against moisture and stains.
- Avoid stepping on freshly installed tile until the adhesive has fully cured.
- Always wear protective gear such as gloves and goggles when working with cement-based products.
- Plan ahead and purchase enough materials including extra in case of unexpected breakages or damages.
Now that you’ve mastered applying the grout, it’s time to move on to spreading it evenly across your tiled surface using a float.
Spreading The Grout With A Float
- The first step in spreading the grout is to mix the grout with water in a bucket according to the manufacturer’s instructions.
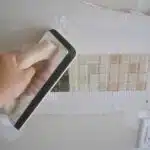
- After mixing the grout, it should be applied to the wall tile with a grout float, ensuring that it is spread evenly and packed into the joints.
- It is important to hold the float at a shallow angle to the tile to avoid gouging and scratching the grout lines.
- Once the grout has been applied, any excess should be removed with a damp sponge.
- The sponge should be rinsed and wrung out frequently to ensure a consistent finish.
- The tile surface should then be wiped with a clean cloth to remove any remaining residue.
Mixing The Grout
Mixing the grout is a crucial step in achieving a successful ceramic wall tile installation. Before mixing, make sure to have all the necessary tools and materials on hand. These include a mixing bucket, a margin trowel, water, and the grout itself. It is also important to wear protective gloves and goggles during the process.
To achieve the right grout consistency, always follow the manufacturer’s instructions and mix additives such as latex or acrylic in accordance with their specifications. The addition of these substances can improve the grout’s durability, flexibility, color retention, and resistance to stains and cracking. Mix small batches at a time to prevent the grout from drying out before it can be applied to the surface.
Once you have achieved your desired consistency, allow the mixture to slake for approximately 10 minutes before remixing it again briefly. This will ensure that any dry areas have been fully incorporated into the mix. Remember that proper mixing is essential for achieving an even color and texture throughout your ceramic wall tile installation project.
Applying The Grout
After achieving the right grout consistency through proper mixing, the next step is to apply the grout onto the ceramic wall tile surface. This process involves using a float, which is a flat, rectangular tool that allows for even and precise spreading of the grout. Using a float helps to ensure that every gap between the tiles is filled with grout, providing a uniform look to the finished project.
One important consideration when applying grout is color options. Grout comes in a variety of colors, so be sure to choose one that complements your ceramic wall tile design. It’s also important to note that grout can appear darker or lighter depending on factors such as humidity and lighting conditions. To avoid any unpleasant surprises after application, it’s advisable to test the chosen grout color on a small area before proceeding with the entire installation.
To achieve a smooth finish when applying grout with a float, there are some tips to keep in mind. First, hold the float at an angle of approximately 45 degrees and apply pressure while moving it diagonally across the tiles. This will help to push the grout into all gaps between tiles evenly and efficiently. Second, avoid overworking each section of grout as this can cause air pockets and unevenness in color and texture. Finally, use clean water and a sponge to wipe away excess grout from the surface while ensuring not to remove too much from within the gaps between tiles.
Scraping Excess Grout
After spreading the grout onto the ceramic wall tile surface with a float, it is essential to scrape off any excess grout efficiently. Using a grout scraper is an effective way of removing excess grout from the surface of the tiles and ensuring that all gaps between tiles are filled with grout evenly. It’s important to note that this step should be done as soon as possible after applying the grout, before it dries and becomes more challenging to remove.
When scraping off excess grout, it’s crucial to do so carefully without damaging the tiles. Start by holding the scraper at a 45-degree angle and gently scraping diagonally across each tile’s surface. Be sure to wipe away any excess grout from the scraper frequently to prevent it from building up and creating scratches on the tiles. Proper disposal of excess grout is also crucial, as it can harden in drains and cause blockages over time.
Once all excess grout has been removed from the surface, use clean water and a sponge to wipe away any remaining residue. Be sure not to apply too much pressure or remove too much of the newly applied grout while cleaning up. This final step will help ensure that your ceramic wall tile installation looks professional and polished, with no visible signs of excess or unevenly applied grout.
Cleaning The Excess Grout With A Sponge
To clean the excess grout from your ceramic wall tile, you’ll need a damp sponge. However, it’s crucial to use the right amount of pressure when cleaning with a sponge. Applying too much pressure can remove too much grout and leave gaps between tiles, while applying too little pressure will not remove enough grout.
To prevent grout haze during the cleaning process, it’s important to keep your sponge clean. Rinse it frequently in clean water and wring it out well before using it again. You may also want to have a few sponges on hand so that you can switch them out as they become dirty.
Using small circular motions, gently wipe the surface of each tile with your damp sponge until all excess grout has been removed. Be sure to rinse your sponge frequently and change out the water in your bucket often to prevent reintroducing grime onto your tiles. Once you’ve finished cleaning all of your tiles, allow them to dry completely before moving on to the next step of wiping them clean with a damp cloth.
Transition: Now that you’ve cleaned up any excess grout from your ceramic wall tiles, you’re ready to move on to wiping them down with a damp cloth.
Wiping The Tile Clean With A Damp Cloth
Did you know that 80% of grout problems stem from improper cleaning? That’s right, a lack of proper cleaning can affect the longevity and appearance of your ceramic wall tiles. It’s important to wipe off any excess grout from the tile surface before it dries, but equally crucial is wiping the tile clean with a damp cloth once the grout has set.
To ensure your ceramic wall tile looks its best, here are some best practices for cleaning after grouting:
- Use a soft, non-abrasive cloth or sponge to avoid scratching the surface of the tile.
- Work in small sections to prevent the grout from drying before you get a chance to clean it.
- Rinse your cloth or sponge frequently in clean water to avoid smearing dirty water over cleaned areas.
- Avoid using harsh chemicals that can damage the finish of your tiles.
Common mistakes during this step include not rinsing your cloth frequently enough, using abrasive materials that can scratch or dull the finish of the tile, and not being thorough enough with cleaning. Taking these simple steps will ensure your ceramic wall tile looks beautiful and lasts for years to come.
Properly cleaning your ceramic wall tile after grouting is crucial to maintaining its appearance and durability. Once you’ve wiped down each section with a damp cloth, it’s time to move on to letting the grout dry.
Letting The Grout Dry
- Waiting time for grout to dry between coats is an important step to consider when installing ceramic wall tile.
- Excess grout should be delicately removed while the grout is still wet to ensure a clean, even surface when dry.
- A curing process is also necessary after the grout has dried to achieve maximum strength and adhesion.
- During the curing process, the grout should remain undisturbed for a period of time to allow it to harden completely.
- Proper ventilation is important to ensure that the grout properly cures, as moisture can slow down the process.
- After the grout has dried and cured, a sealer can be applied to protect the grout from water and staining.
Waiting Time
As a ceramic tile installation expert, one of the most important aspects of grouting ceramic wall tiles is allowing enough time for the grout to dry. After applying the grout, it’s essential to wait for an appropriate amount of time before cleaning or walking on the tiles. The waiting time depends on various factors such as humidity, temperature, and type of grout used.
Using a sealer after installation can help protect the grout from moisture and stains. However, it’s crucial to ensure that the grout has dried completely before sealing it. If the grout is not dry when sealed, it can lead to discoloration and weaken its durability. Therefore, it’s best to wait at least 24 hours after applying the grout before using a sealer.
Drying time also plays a critical role in achieving perfect results when grouting ceramic wall tiles. It’s recommended to wait for at least 48 hours after applying the grout before allowing any water contact with the tiles. While some types of grouts may require less drying time, rushing this process can compromise both aesthetic appearance and functionality. Hence, being patient while allowing enough drying time is essential for flawless ceramic wall tile installation.
Cleaning Excess Grout
Another crucial aspect of grouting ceramic wall tiles is cleaning excess grout before it dries. Cleaning excess grout can be done using grout removal tools, such as a damp sponge or a soft scrub brush. The key is to remove the excess grout while it’s still wet and pliable, as dried grout can be difficult to remove and may leave behind unwanted residue. It’s essential to work in small sections and rinse the sponge or brush frequently to prevent grout haze.
Preventing grout haze is another critical consideration when cleaning excess grout. Grout haze occurs when a thin layer of grout residue remains on the tile surface after installation and cleaning. To prevent this, rinse the sponge or brush frequently during the cleaning process and use clean water for each section. It’s also essential to avoid using too much water when cleaning the tiles, as excess water can weaken the bond between the tiles and the substrate.
In conclusion, cleaning excess grout is an essential part of achieving perfect results when installing ceramic wall tiles. By using appropriate tools and techniques, such as working in small sections, rinsing frequently, and preventing grout haze, you can ensure that your ceramic wall tile installation looks flawless. Taking these steps will not only enhance the aesthetic appeal of your project but also improve its durability and functionality.
Curing Process
Another crucial aspect of grouting ceramic wall tiles is the curing process. After applying the grout, it must be left to dry for a specific period depending on the manufacturer’s instructions. The drying time can vary based on factors such as temperature and humidity levels. It’s essential to follow the recommended drying time to ensure that the grout color sets correctly and doesn’t crack or shrink.
During the curing process, it’s important to keep foot traffic off the newly grouted area and avoid introducing excess moisture. This can be achieved by covering the area with plastic sheeting or using a fan to circulate air around the space. It’s also important not to clean or touch the newly grouted area during this time, as doing so may disturb its integrity and cause damage.
After completing the curing process, any remaining haze or residue should be removed using a soft cloth or sponge and clean water. It’s essential to avoid using harsh chemicals or abrasive tools that may damage the grout surface. By following these steps, you can maximize your ceramic wall tile installation’s durability and appearance while prolonging its lifespan.
Checking For Any Missed Spots
After allowing the grout to dry for the recommended time, it is important to check for any missed spots or areas where the grout may have shrunk. Checking for uniformity in color and texture is crucial to ensure a professional and polished finish. Use natural light or a bright lamp to inspect the surface of the tile carefully.
One way to check for uniformity is to compare adjacent tiles’ grout lines. If there are any discrepancies in color matching or texture, it will be easier to spot them this way. Another method is to run your hand over the surface of the tile gently. If you feel any rough patches or inconsistencies, these could indicate missed spots that need extra attention.
Once you have checked for uniformity and addressed any missed spots, use a clean cloth to buff the tile surface gently. This will help remove any excess grout residue that may remain on the surface of the tile while also polishing it. Buffing should be done after cleaning with a damp sponge and before applying sealant if necessary. With careful attention to these steps, you can achieve an even and professional-looking finish on your ceramic wall tile installation project.
Transition: Moving onto buffing, it’s important not only to remove excess residue but also polish the tile surface for optimal results.
Buffing The Tile Surface
- Preparing the tile for buffing is essential to ensure a successful grouting job; it should be clean, dry and free from any dirt or debris.
- Buffing the tile surface is best done with a polishing wheel equipped with a medium grit sandpaper; this will remove any scratches and create a smooth surface for the grout to adhere to.
- After buffing, it is important to vacuum the tile to ensure all dust and debris is removed before applying the grout.
- The grout should then be applied with a rubber float, and allowed to set for a minimum of 24 hours before buffing the surface with a soft cloth.
- After buffing, it is important to seal the grout to prevent staining and water damage; a penetrating sealer is recommended for best results.
- Proper care and maintenance of the grouted tile surface is essential to ensure a long lasting installation; regular cleaning with mild detergent and warm water will help maintain the grout’s integrity.
Preparing The Tile
Before you start grouting your ceramic wall tile, it is important to prepare the surface properly. This involves measuring the tiles and cleaning the surface thoroughly. Measuring the tile ensures that you have enough grout for the job and helps you plan how much time it will take to complete.
To begin, measure the area of your wall where you will be installing the ceramic tiles. You can use a tape measure to get an accurate measurement of both height and width. Once you have these measurements, calculate the total square footage of your wall by multiplying height by width. This will give you an idea of how many tiles you need and how much grout to use.
Next, clean the surface of your wall thoroughly before applying any grout. Use a soft cloth or sponge with mild soap and warm water to remove any dirt or dust from the surface of each tile. Make sure no residue is left behind as this could prevent proper adhesion between the grout and tile.
By following these steps, you can ensure that your ceramic wall tile installation will go smoothly without any issues due to poor preparation. Remember to measure your tiles accurately and clean the surface thoroughly before starting to apply any grout. With these tips in mind, your ceramic tile installation project will be a success!
Buffing The Tile
After preparing the surface of your ceramic wall tile, the next step is to buff the tile surface. Polishing techniques are important to achieve a smooth and shiny finish on the tiles. Buffing supplies such as diamond polishing pads or sandpaper can help you achieve this.
Before buffing, make sure that the grout has completely dried. It is recommended to wait at least 24 hours after applying grout before starting to buff. Once you have allowed enough time for drying, use a handheld rotary tool with a diamond polishing pad attached. Start with a lower grit pad and work your way up to a higher grit for a smoother finish.
When using sandpaper, start with a coarser grit and gradually move to a finer grit until you achieve the desired smoothness. Make sure to clean the surface of each tile thoroughly after buffing to remove any residue left behind by the polishing process. With proper buffing techniques and supplies, your ceramic wall tile installation will look polished and professional!
Sealing The Grout
After buffing the ceramic wall tile surface, it is important to consider sealing the grout. Grout sealer options are available in different types, such as penetrating and topical sealers. Penetrating sealers go deep into the grout and protect it from water damage and stains, while topical sealers create a barrier on top of the grout surface. Sealing the grout can help prolong its life and maintain its appearance.
The importance of sealing grout cannot be emphasized enough. Grout is porous and can easily absorb liquids that can cause discoloration or damage over time. Sealing the grout prevents moisture, dirt, and stains from penetrating the surface, making it easier to clean and maintain. In addition to protecting your investment, sealing the grout also enhances the overall look of your tile installation.
To apply the sealer, use a foam brush or roller to spread it evenly over the entire surface of each tile’s grouted area. Allow it to dry completely before applying another coat if necessary. It is recommended to apply two coats of sealer for optimal protection. With proper sealing techniques, you can ensure that your ceramic wall tile installation will not only look great but also last longer.
Sealing The Grout
After grouting your ceramic wall tile, it is important to apply sealant to prevent discoloration and maintain the integrity of the installation. The sealant acts as a barrier between the grout and any dirt, moisture or other substances that may cause discoloration over time. Applying sealant will also make cleaning easier and extend the life of the grout.
When selecting a sealant, be sure to choose one that is compatible with your grout type. There are two types of sealants: penetrating and topical. Penetrating sealants soak into the grout, creating a protective layer from within, while topical sealants sit on top of the surface. Both types have their advantages, but for best results, follow the manufacturer’s instructions on application.
To apply sealant, start by ensuring that your grout has fully cured. This typically takes 24-72 hours depending on the type of grout used. Then, using a small brush or roller, apply an even coat of sealant over the entire surface area of your grouted ceramic wall tile. Be sure to work in small sections and avoid overlapping. Once applied, allow ample drying time before exposing it to water or foot traffic.
Now that you have applied sealant to your grouted ceramic wall tile, you can rest assured that it will remain protected against discoloration and damage caused by moisture or dirt accumulation. However, maintaining your installation is important in ensuring long-term durability and aesthetic appeal. In the next section, we will discuss techniques for keeping your ceramic wall tile clean and looking brand new for years to come.
Maintaining Your Grouted Ceramic Wall Tile
Cleaning grouted ceramic wall tile requires regular maintenance and the use of mild detergent, warm water, and a soft cloth. Sealing grouted ceramic wall tile is important to maintain a water-resistant surface and should be done with a quality sealant once the grout is completely dried. Repairing grouted ceramic wall tile may require replacing cracked or broken tiles, re-grouting or filling in any missing grout, or replacing the entire wall tile installation. Adequate preparation and the use of the correct materials are essential to a successful repair.
Cleaning
When it comes to cleaning your grouted ceramic wall tile, it is important to follow best practices in order to maintain its pristine look. One of the most common mistakes people make when cleaning their tiles is using harsh chemicals that can damage the grout or even the tile itself. Instead, opt for a pH-neutral cleaner specifically designed for ceramic tile and grout. This will effectively remove dirt and stains without harming the surface.
Another best practice when cleaning grouted ceramic wall tile is to avoid using abrasive tools like steel wool or scrub brushes with stiff bristles. These can scratch the surface of both the tile and grout, making them more prone to staining and discoloration over time. Instead, use a soft sponge or cloth and gentle circular motions to clean the area.
Finally, after cleaning your grouted ceramic wall tile, be sure to rinse thoroughly with clean water and dry completely with a soft towel. Leaving any residual cleaner on the surface can lead to residue buildup which can dull and damage your tile over time. By following these best practices and avoiding common mistakes, you can keep your ceramic wall tile looking fresh and new for years to come.
Sealing
To further maintain the pristine look of your grouted ceramic wall tile, sealing is a crucial step that should not be overlooked. Sealing your tile can provide a layer of protection against dirt, stains, and moisture that can seep into the grout and cause discoloration or damage over time. Additionally, sealing can make cleaning your tile easier and more efficient.
There are several common sealant options available for grouted ceramic wall tiles, including penetrating sealers and surface sealers. Penetrating sealers work by seeping into the pores of both the tile and grout to create a barrier against moisture and stains, while surface sealers sit on top of the surface of the tile to protect it from damage. Both types offer benefits in terms of protecting your tile, so it ultimately comes down to personal preference and the specific needs of your space.
While sealing may seem like an extra step in maintaining your grouted ceramic wall tile, its benefits are clear. Not only does it provide protection against damage and staining, but it can also extend the life of your tile and make cleaning easier. Be sure to consult with a professional or do thorough research before choosing a sealant option to ensure you are selecting the best one for your specific needs.
Repairing
Maintaining your grouted ceramic wall tile is essential in keeping its pristine look. However, even with proper care, damages and wear and tear can happen over time. One of the most common mistakes homeowners make is neglecting minor repairs, which can lead to bigger problems in the long run. It is crucial to address any damages as soon as possible before they get worse.
Cost-effective solutions for repairing your grouted ceramic wall tile will depend on the extent of the damage. For small cracks or chips, using a touch-up kit or filling it with epoxy putty can be enough to fix the issue. However, for larger damages or missing tiles, replacing them entirely may be necessary. It is important to note that matching new tiles to existing ones can be challenging, so seeking the help of a professional may be necessary.
Preventing damages from happening in the first place is still the best approach in maintaining your grouted ceramic wall tile. Regular cleaning and sealing can help protect against stains and moisture that can lead to damages. Additionally, avoiding harsh chemicals or abrasive tools when cleaning and being cautious when placing heavy objects on tiled surfaces can also prevent unnecessary damages from occurring. By taking these preventive measures and addressing repairs promptly, you can prolong the life of your grouted ceramic wall tile and keep it looking its best for years to come.
Troubleshooting Common Grouting Problems
Grouting ceramic wall tile is a meticulous task that requires patience and attention to detail. When done properly, it can transform the look of your bathroom or kitchen. However, even the most experienced DIYers can make grouting mistakes that can be frustrating to fix. Just like laying tiles, grouting requires precision and a steady hand.
One common problem with grouting is discoloration. This can happen for several reasons, including using too much water when mixing the grout or not cleaning the tiles properly before applying the grout. If you notice discoloration in your newly-grouted tiles, don’t panic. There are ways to fix it. One solution is to use a colorant that matches the original grout color and apply it over the discolored areas. Another option is to remove the affected areas with a grout saw and reapply fresh grout.
Prevention is key when it comes to avoiding common grouting problems. Make sure you follow all instructions when mixing your grout and keep an eye on its consistency as you work. Also, be sure to clean your tiles thoroughly before applying any grout and avoid using too much water during installation. While some issues may require professional help, many can be fixed with a little bit of patience and elbow grease. With these tips in mind, you can enjoy beautiful, evenly-grouted ceramic wall tiles for years to come.
When facing issues with your ceramic wall tile installation project that seem beyond your skill level or experience, seeking professional help may be necessary. A trained expert will have the knowledge and tools needed to fix any problems you encounter along the way, ensuring that your finished product looks polished and professional. Don’t hesitate to reach out for assistance if needed; sometimes asking for help is the best step towards achieving success in your DIY project!
Seeking Professional Help When Needed
Hiring professionals for grouting ceramic wall tiles can be a wise decision to make, as it not only saves time but also provides a professional finish. Before hiring professionals, it is important to do a cost-benefit analysis to determine whether the benefits of hiring outweigh the costs or not. This will help in making an informed decision and prevent any regrets later on.
DIY grouting may seem like a feasible option for some individuals, but it comes with its own set of pros and cons. One of the major advantages of DIY grouting is that you have complete control over the process and can customize it according to your preferences. However, if you are inexperienced or lack the necessary skills, it can lead to mistakes that may end up costing more than hiring professionals in the first place.
Professional grouting comes with its own set of benefits such as experience, expertise, and quality workmanship. They have access to specialized tools and equipment required for the job which ensures a flawless finish every time. In addition, they provide warranties on their work which gives peace of mind to homeowners. Overall, one must carefully weigh their options before making a decision between DIY and professional grouting.
As previously discussed, there are both pros and cons of DIY vs professional grouting when it comes to ceramic wall tiles. Ultimately, it depends on individual circumstances such as experience level, budget constraints, timeline requirements etc. Therefore, before embarking on this project make sure you evaluate everything thoroughly so that you can make an informed decision that is best for you and your home renovation project.
Conclusion
Grouting ceramic wall tile is an important step in the installation process that can enhance the overall look and durability of your tiled surface. By following the steps outlined in this guide, you can achieve a professional-looking finish that will last for years to come. Remember to gather all necessary materials and tools, prepare your surface properly, choose the right type of grout, mix it thoroughly, apply it carefully, seal it correctly, and maintain it regularly.
One interesting statistic worth noting is that according to a recent survey by Houzz, 41% of homeowners who renovated their bathrooms in 2020 chose to install ceramic or porcelain tile on their walls. This highlights the enduring popularity of these materials for both aesthetic and practical reasons. By learning how to grout ceramic wall tile effectively, you can join countless others who have successfully transformed their bathrooms (and other spaces) with durable, attractive tiling solutions. If you encounter any problems along the way or feel unsure about your abilities, don’t hesitate to reach out to a professional for assistance. With patience and attention to detail, however, many DIY enthusiasts are able to achieve excellent results on their own.
Image Credits
- “2015.04 – Amsterdam photo of wall-art – An unknown wall-decoration in ceramic tiles on a house-front, made c. 1980’s; a geotagged free urban picture, in public domain / Commons CCO; city photography by Fons Heijnsbroek, The Netherlands” by Amsterdam free photos & pictures of the Dutch city (featured)


