Tile reglazing is an effective way to renew the appearance of a bathroom or kitchen without having to spend a fortune on replacement. If you have been considering reglazing your tiles, it is important to understand the process and the proper techniques for achieving a smooth and long-lasting finish.
Reglazing tile involves applying a special coating over the existing tiles to create a new surface. The process can be challenging and time-consuming, but with careful preparation and attention to detail, it is possible to achieve professional-looking results that will last for years. In this article, we will explore the steps involved in reglazing tile, including how to prepare the surface, choose the right materials, and apply the coating for a flawless finish. Whether you are looking to update your home or renovate a rental property, reglazing tile is a cost-effective and efficient way to give any space a fresh new look.
Understanding The Benefits Of Tile Reglazing
Tile reglazing is a process that involves re-coating your existing tiles with a new layer of finish. There are several benefits to reglazing tiles, including aesthetic and functional advantages. One of the most significant benefits is that it is a cost-effective alternative to replacing old or damaged tiles. Reglazing can save you up to 75% of the cost of tile replacement.
Another benefit of tile reglazing is that it can give your bathroom or kitchen a fresh new look without having to go through the hassle and expense of full-scale renovation. Reglazing can be done in any color, pattern, or texture, allowing you to completely customize your tiles’ appearance. It’s an excellent way to modernize outdated designs and make them look brand new again.
Lastly, tile reglazing can extend the life of your tiles by sealing them against moisture and other environmental factors that can cause wear and tear over time. A properly done reglaze job can add years of life to your tiled surfaces while keeping them looking great. Plus, it’s environmentally friendly since you’re not disposing of old tiles into landfills unnecessarily. So if you’re looking for a cost-effective way to update your bathroom or kitchen while also saving some money, then tile reglazing may be just what you need! Now let’s move on to assessing the condition of your tiles before getting started with the process itself.
Assessing The Condition Of Your Tiles
When it comes to reglazing tile, the first step is always to assess the condition of your tiles. This crucial step involves looking at every tile in your space and identifying any repair needs. Doing this will help you determine if reglazing is the right solution for your situation.
Assessing tile condition requires a keen eye and attention to detail. Start by examining each tile closely, checking for any cracks or chips on the surface. Next, look for any signs of wear and tear such as discoloration or fading. Finally, check the grout between each tile for any signs of damage or deterioration.
Once you’ve assessed the condition of your tiles, it’s time to identify any repair needs. Based on what you find during your assessment, make a list of all necessary repairs needed before proceeding with reglazing. This may include filling in cracks or replacing damaged tiles altogether. By addressing these issues beforehand, you’ll ensure that your new finish lasts as long as possible while making sure that the final product looks its best.
After assessing tile condition and identifying repair needs, it’s important to gather all necessary tools and materials for reglazing. With these items in hand, you’ll be ready to tackle this DIY project with confidence knowing that you’re fully prepared for whatever challenges come your way!
Gathering The Necessary Tools And Materials
Assessing the condition of your tiles is crucial before embarking on any tile reglazing project. Once you have assessed the state of your tiles and determined that they are good candidates for reglazing, it’s time to gather the necessary tools and materials. Choosing the right tools and buying the necessary materials will ensure a successful tile reglazing project.
Before gathering your tools and materials, you must first determine what type of tile you have. Different types of tile require different kinds of preparation, coatings, and processes. For example, ceramic tiles need a different coating than porcelain tiles. It’s important to research the specific needs of your particular type of tile before proceeding with purchasing any materials.
After determining what type of tile you have and researching its specific requirements, it’s time to choose the right tools and buy the necessary materials. Some basic tools needed for any tile reglazing project include sandpaper or an orbital sander, cleaning supplies such as TSP or degreaser, a putty knife or scraper for removing old caulk or grout, and painter’s tape. Materials needed include a bonding agent such as epoxy primer or polyurethane primer, paint thinner or acetone for cleaning up spills or mistakes during application, and high-quality paint specifically designed for use on tiles.
In summary, choosing the right tools and buying the necessary materials are crucial steps in ensuring a successful tile reglazing project. Proper research on your specific type of tile is essential in order to determine its unique needs when it comes to preparation, coatings, and processes. With these steps completed successfully, we can now move onto preparing the surface for reglazing in our next section.
Preparing The Surface For Reglazing
Surface preparation techniques are crucial when reglazing tiles. Any existing damage or contamination on the surface can compromise the final results of the project. Therefore, it is necessary to take extra care and effort in preparing the surface for reglazing.
Before starting any work, make sure that you have all the necessary materials and tools on hand. You will need a tile cleaner, scouring pads, sandpaper, masking tape, and plastic sheets to protect surrounding areas from overspray. Once you have these materials ready, begin by cleaning the tiles thoroughly with a tile cleaner. This will remove any dirt, grime or grease that may be present on the surface.
Tips for avoiding common mistakes include being careful not to damage or scratch the tiles during cleaning or sanding. It is also important to ensure that there is no remaining dust or debris on the surface before applying any primer or coating as this could affect adhesion. Additionally, it is recommended to use a fine-grit sandpaper for smoothing out rough spots and creating a suitable surface for primer application.
In preparation for cleaning and sanding the tiles in the next step, it is important to ensure that all surfaces are fully dry after cleaning. This will prevent water from interfering with subsequent steps of the process. Once dry, use masking tape and plastic sheets to protect surrounding tiles or fixtures from accidental spraying during sanding or priming processes.
Cleaning And Sanding The Tiles
Cleaning tiles prior to reglazing requires the use of a heavy-duty cleaner to remove any dirt, grime, or debris from the surface. Sanding tiles is necessary to remove any gloss from the surface and to rough up the tile so that the glaze can adhere better. For best results, a professional grade orbital sander should be used to sand the tiles. After sanding, the tiles should be vacuumed and wiped down with a damp cloth to remove any dust particles prior to applying the glaze.
Cleaning Tiles
When it comes to reglazing your tiles, the first step is to clean and sand them. Cleaning the tiles properly is crucial to achieving a long-lasting and flawless finish. As a tile reglazing expert, I know that using effective cleaning solutions and techniques can make all the difference.
Before starting the cleaning process, it’s important to remove any loose debris or dirt from the surface of the tiles. This can be done with a brush or vacuum cleaner. Once you’ve done this, you can move on to the actual cleaning process. There are various tile cleaning techniques that can be used, depending on the type of tile and its condition. Some solutions may be too abrasive for some types of tile, so it’s important to choose carefully.
One effective solution is a mixture of warm water and mild detergent. This gentle solution won’t damage your tiles and will effectively remove any dirt or grime build-up without leaving behind any residue. Alternatively, vinegar mixed with warm water also works well as an effective cleaning solution for tiles. With these techniques in mind, you’ll be able to thoroughly clean your tiles before moving on to sanding them down in preparation for reglazing.
Sanding Tiles
After thoroughly cleaning the tiles, the next step in reglazing is sanding. Sanding is a crucial part of the process as it helps to remove any remaining residue or old finishes and creates a smooth surface for the new coating to adhere to. As a tile reglazing expert, I know that choosing the right sandpaper grit and technique is essential to achieving a flawless finish.
There are different tile sanding techniques that can be used depending on the type of tile and its condition. For instance, if you’re dealing with ceramic tiles, using an orbital sander with a fine-grit sandpaper would do the job effectively. On the other hand, if you’re working with natural stone tiles, such as marble or granite, using a diamond-tipped grinder is recommended.
When it comes to choosing the right sandpaper grit for your tiles, it’s important to consider their texture and hardness. Generally, coarse-grit sandpaper should only be used on heavily damaged or uneven surfaces as it can create deep scratches that are difficult to remove. Fine-grit sandpapers are more suitable for smoothing out minor imperfections and preparing the surface for reglazing. By following these guidelines and using proper tile sanding techniques, you’ll be able to achieve a smooth surface that’s ready for reglazing.
Repairing Any Damage Or Cracks
After cleaning and sanding the tiles, the next step in reglazing is to repair any damage or cracks that may be present. It is important to note that the tiles must be completely dry before proceeding with this step. Choosing the right filler is crucial in achieving a smooth and even surface for reglazing.
Firstly, identify the type of tile before purchasing a filler to ensure compatibility. For ceramic or porcelain tiles, epoxy-based fillers are ideal as they offer strong adhesion and durability. On the other hand, if you have natural stone tiles, it is best to opt for a filler that matches its color and texture to achieve a seamless finish. Once you have chosen the appropriate filler, follow manufacturer instructions carefully for application and curing time.
Tips for avoiding future damage include using non-abrasive cleaners and avoiding dropping heavy objects on the tiles. In addition, placing protective pads under furniture legs can prevent scratches or dents from occurring. Regular maintenance such as re-sealing grout lines can also prolong the lifespan of your newly reglazed tiles.
Next up is applying primer to the tiles before proceeding with reglazing. This will ensure better adhesion between the surface and coating, resulting in a longer-lasting finish. Stay tuned for our next section on how to apply primer effectively for optimal results.
Applying Primer To The Tiles
When reglazing tile, applying primer is a crucial step that should not be overlooked. Choosing the right primer is key to ensuring that the final result looks great and lasts for years to come. There are various types of primers available on the market, so it’s important to do your research before making a purchase.
One tip for smooth application of primer is to ensure that the surface of the tiles is clean and free of any debris or dust. Use a mild detergent and warm water to clean the tiles thoroughly, and allow them to dry completely before beginning the priming process. Additionally, it’s important to use a high-quality brush or roller for application, as this will help to ensure an even coat.
By taking your time during this step and following these tips for smooth application, you can ensure that your tile reglazing project turns out beautifully. In the next section, we’ll discuss how to choose the right reglazing kit for your particular needs and preferences. With careful consideration and attention to detail at each step of the process, you’ll be able to enjoy beautiful new-looking tiles in no time!
Choosing The Right Reglazing Kit
After applying primer to the tiles, it is essential to choose the right reglazing kit for your project. The process of choosing can be overwhelming due to the numerous brands in the market. However, with proper research and understanding of the features you need, you can select a kit that meets your requirements.
Firstly, when choosing a reglazing kit, it is vital to compare different brands in terms of their quality. Some brands may offer inferior quality solutions that may not last long or provide the desired finish. Therefore, it is crucial to read reviews from other customers who have used a particular brand before settling on one.
Secondly, cost analysis is also a significant factor when selecting a reglazing kit. While expensive brands may offer high-quality solutions, they may not always be affordable for everyone. On the other hand, cheap options may not provide satisfactory results and could end up costing more in repairs or replacements.
Lastly, ensure that you pick a kit that includes everything required for your project. This means checking if it comes with all necessary tools and materials such as gloves and brushes. By comparing different brands based on these factors, you can make an informed decision and choose a reglazing kit that suits your needs.
As you move on to mixing and applying the reglazing solution, it’s essential to follow manufacturer instructions carefully for optimal results.
Mixing And Applying The Reglazing Solution
Mixing and applying the reglazing solution is a crucial step when it comes to reglazing tiles. Before starting the process, it’s essential to ensure that you have all the necessary tools and materials ready, including gloves, goggles, a respirator mask, paintbrushes, and the reglazing solution itself. Safety precautions should be taken seriously since some of these chemicals can cause skin irritation and respiratory problems.
When mixing the reglazing solution, follow the instructions provided by the manufacturer carefully. Typically, you’ll need to pour equal parts of the solution into a mixing container and stir well until they’re thoroughly combined. At this point, you may add any desired color pigments or additives in case you want to personalize your tile appearance. Ensure that you mix all ingredients correctly; otherwise, your final product won’t turn out as expected.
It’s worth noting that different manufacturers may have varying mixing techniques for their products. If you’re uncertain about how to mix your particular brand of reglazing solution, refer to their instructions manual or consult with professionals for guidance. Once mixed correctly, apply the reglazing solution onto your tiles using paintbrushes in even strokes making sure not to overdo it in one area or let it pool in certain spots. The objective is achieving a smooth and even finish without brush marks appearing after drying up.
Achieving A Smooth And Even Finish
After mixing and applying the reglazing solution, your next focus should be on achieving a smooth finish. This step is essential in giving your tiles a new look that will last for years to come. The secret to achieving a smooth finish is to apply the solution evenly, using long strokes. Also, ensure that you use the right brush or roller for the job.
One of the most common mistakes people make when reglazing tiles is rushing through it. They forget that this process requires patience and attention to detail. Rushing through it may result in uneven coats and bumps on the surface of your tiles. To avoid this mistake, take your time and work systematically from one corner of the room towards the other.
Achieving a smooth finish is crucial in making your tiles look new again. Be sure to follow the above tips to avoid any mistakes that may lead to unsatisfactory results. Once you have finished reglazing all the tiles, allow them enough time to cure and dry before using them again. In the next section, we will discuss how long it takes for your tiles to cure and dry properly so that you can enjoy their new look for many years to come.
Curing And Drying The Tiles
After reglazing your tiles, it is essential to allow them to cure and dry adequately before using them. Curing and drying are crucial steps that can determine the longevity of your newly reglazed tiles. Therefore, you must follow the best practices for ensuring proper tile drying.
To ensure that your tiles dry correctly, avoid making common curing mistakes such as touching or cleaning them too soon after reglazing. Doing so may cause damage to the newly applied glaze, and you may have to redo the entire process. Additionally, make sure that you provide adequate ventilation in the room where the tiles are drying. Proper ventilation will help speed up the drying process and prevent mold growth.
Best practices for ensuring proper tile drying include allowing sufficient time for the tiles to dry completely. Depending on how thick the glaze was applied, it may take up to 24 hours or more for the tiles to dry fully. Also, avoid walking on or moving any objects over newly glazed tiles until they are entirely dried and cured. Lastly, ensure that there is no moisture left on the surface of the tiles before you start using them again.
Now that you have allowed your freshly reglazed tiles to cure and dry properly, it’s time to check if there are any imperfections that need fixing. In this next section, we will discuss how to touch up any flaws in your newly reglazed tiles without damaging their finish.
Touching Up Any Imperfections
To achieve a perfectly reglazed tile surface, you need to touch up any imperfections on the tiles. This crucial step will ensure that your tiles look new and flawless for many years to come. One common issue you may encounter is chipped tiles. Fortunately, covering chips is an easy process that can be done in a few simple steps.
First, clean the area around the chip with a damp cloth to remove any dirt or debris. Then, apply a small amount of epoxy or porcelain filler to the chip using a putty knife. Make sure to apply it evenly and fill the entire chip. Once the filler has dried completely, sand it down with fine-grit sandpaper until it is smooth and level with the surrounding tile surface.
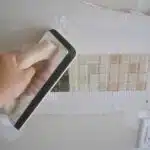
Another issue that may arise during tile reglazing is uneven grout lines. Filling grout lines is also a straightforward process that can be done using either grout or caulk. If you choose to use grout, mix it according to the manufacturer’s instructions and apply it using a rubber float. Fill in any gaps between the tiles and smooth out any excess grout with the float. Allow it to dry completely before wiping away any haze with a damp sponge.
In summary, touching up imperfections such as chipped tiles and uneven grout lines is an essential step in achieving flawless reglazed tiles. With proper preparation and application techniques, this step can be completed quickly and easily. In the next section, we will discuss how to seal and protect your newly reglazed tiles for long-lasting durability.
Sealing And Protecting The Tiles
Cleaning tile prior to reglazing is essential for optimal results. Priming the tile to ensure proper adhesion of the sealer is also important. Applying a sealer to the tile will protect it from water, staining, and dirt. After the sealer has been applied, grouting, caulking, and waxing may be necessary depending on the desired effect.
Cleaning
When it comes to reglazing tiles, cleaning is an essential step in sealing and protecting the surfaces. The best cleaning techniques depend on the type of tile and the existing finish. For example, if you’re working with ceramic tiles, start by sweeping or vacuuming away any loose dirt or debris. Then, use a mild detergent mixed with warm water to scrub the tiles gently. Avoid using harsh chemicals that can damage the finish of your tiles.
One of the most common cleaning mistakes people make when reglazing their tiles is using abrasive tools such as steel wool or heavy-duty scouring pads. These tools can scratch the surface of your tiles and ruin their appearance. Instead, use soft cloths or sponges to clean your tiles. Additionally, avoid using acidic cleaners that contain vinegar or lemon juice as they can damage natural stone tiles.
In conclusion, proper cleaning is crucial for successful reglazing of your tiles. By following the best cleaning techniques and avoiding common mistakes such as using abrasive tools or acidic cleaners, you can ensure that your tiles are well prepared for sealing and protection. Remember to always read and follow manufacturer instructions for specific tile types before beginning any reglazing project.
Priming
Now that we have discussed the importance of cleaning tiles before reglazing, let us move on to another crucial step in the process: Priming. Priming is a necessary preparation step that ensures that the surface of the tiles is ready for sealing and protection. Primers are specially formulated coatings that adhere to the surface of tiles and create a smooth, even base for topcoats.
There are different types of primers available, each designed for specific tile materials. For example, there are primers made specifically for ceramic tiles, natural stone tiles, porcelain tiles, and more. It is essential to choose the right type of primer for your tile material to ensure proper adhesion and maximum durability.
When it comes to best practices for priming, there are a few things to keep in mind. Firstly, make sure the surface is clean and dry before applying the primer. Any dirt or debris left on the surface can affect how well the primer adheres. Secondly, follow manufacturer instructions carefully when applying the primer. Use appropriate tools such as brushes or rollers and apply thin coats uniformly across all surfaces. Finally, allow sufficient drying time between coats as per manufacturer instructions before applying any topcoat.
By following these guidelines for priming your tiles before sealing and protecting them with topcoats like epoxy paint or urethane sealants you can achieve long-lasting results that will keep your tiled surfaces looking great for years to come!
Maintaining Your Reglazed Tiles
Now that you have invested in a new reglazed tile surface, it is important to preserve and maintain its beauty and functionality. Proper maintenance can extend the lifespan of your tiles and protect them from damage caused by harsh cleaning agents or exposure to moisture.
Cleaning your reglazed tiles is a simple process that can be done using non-abrasive cleaning products. Avoid using acidic or abrasive cleaners, as they can scratch the surface of your tiles and cause discoloration. Instead, opt for mild detergents or specialized tile cleaners that are designed specifically for use on glazed surfaces.
In addition to regular cleaning, it is recommended that you reseal your reglazed tiles periodically to maintain their protective coating. This will prevent stains and other types of damage from penetrating the surface of your tiles. Consult with a professional tile reglazing service provider to determine the best type of sealant for your specific type of tile material and usage pattern. By adhering to these simple tips, you can ensure that your newly reglazed tiles remain beautiful and durable for years to come.
As important as proper maintenance is, there may come a time when hiring a professional reglazing service becomes necessary. Whether due to extensive wear-and-tear or accidental damage, our team of experts has the expertise and tools needed to bring new life to your tiled surfaces. With our help, you can enjoy the benefits of a freshly updated tile surface without having to worry about complicated installation processes or expensive equipment rentals.
Hiring A Professional Reglazing Service
When it comes to reglazing tile, there are pros and cons to hiring a professional service. On the one hand, professionals have the experience and expertise to ensure that the job is done right. They also have access to specialized equipment and products that can produce superior results. Additionally, a professional service will typically offer a warranty or guarantee on their work, giving homeowners peace of mind.
On the other hand, hiring a professional reglazing service can be costly. The cost will depend on a number of factors, including the size and complexity of the job and the location of the home. Homeowners should expect to pay several hundred dollars for even a small reglazing project. For those on a tight budget, DIY reglazing may offer a more affordable option.
When comparing costs between hiring a professional service and doing it yourself, it’s important to consider all of the expenses involved in each option. While DIY reglazing may seem cheaper at first glance, homeowners must factor in the cost of materials, tools, and their own time. Additionally, if something goes wrong during the process, it could end up costing even more in repairs or replacement down the line. Ultimately, homeowners should carefully weigh their options before deciding whether to hire a professional or tackle the project themselves.
Conclusion
In conclusion, reglazing tile can be a cost-effective and efficient way to revitalize your space without the hassle of replacing tiles. By assessing the condition of your tiles, gathering the necessary tools and materials, preparing the surface for reglazing, cleaning and sanding the tiles, touching up any imperfections, sealing and protecting the tiles, and maintaining them over time, you can achieve a renewed look for your bathroom or kitchen.
To ensure optimal results, it is important to hire a professional reglazing service that has experience in this process. They will have access to high-quality products and equipment that may not be available to individuals attempting this task on their own. With proper care and maintenance, your reglazed tiles can last for years to come. Remember that regular cleaning and avoiding harsh chemicals will help preserve their appearance. By following these steps and seeking expert advice when needed, you can enjoy a fresh new look for your home that won’t break the bank.
Image Credits
- “Facial Tile Mosaic” by Scott 97006 (featured)


