Installing a soap dish on a tile wall may seem like a daunting task, but with the right tools and techniques, it can be a simple and straightforward process. Whether you are looking to add functionality to your bathroom or simply enhance its aesthetic appeal, proper installation of a soap dish is crucial for ensuring that it stays securely in place and serves its intended purpose.
When it comes to installing a soap dish on a tile wall, there are several key factors to consider. These include choosing the right location for your soap dish, preparing the surface of the tile wall, selecting the appropriate adhesive material, and properly sealing the edges of the soap dish to prevent water damage. By following these steps and taking the necessary precautions, you can ensure that your soap dish is installed correctly and provides reliable use for years to come.
Tools And Materials Needed For The Job
One might think that installing a soap dish on a tile wall is an easy task. However, it requires a certain level of skill and knowledge to get the job done correctly. Before starting, it is important to note that there are different types of adhesives available in the market, and not all of them are suitable for tile installations. It is crucial to choose the right adhesive to ensure that the soap dish stays in place for a long time.
Safety precautions must also be taken into consideration when installing a soap dish on a tile wall. Always wear protective gear such as gloves and goggles when handling tools or chemicals. Use caution when drilling into tiles to avoid cracking or damaging them. It is best to use low RPM settings on your drill to prevent excessive heat buildup.
To begin the installation process, gather all the necessary tools and materials such as a drill, screws, anchors, adhesive, and of course, your soap dish. With these items at hand and with safety measures in place, you can now proceed with measuring and marking the location of the soap dish on your tile wall.
Measuring And Marking The Location Of The Soap Dish
Measuring and marking the location of the soap dish is a crucial step to ensure that the installation process goes smoothly. Measuring accuracy is key in this process, as even the slightest error can cause issues during installation. Before starting, gather all necessary tools such as a tape measure, pencil, and level.
Common mistakes when measuring include taking measurements from incorrect points on the wall or measuring too close to an edge. To avoid these mistakes, start by identifying the center point of where you want to place the soap dish. From there, use a level to ensure that your markings are straight and accurate. Double-check your measurements before moving forward with drilling.
Alternative soap dish placement options may include placing it in a corner or on a nearby countertop instead of directly on the tile wall. Consider factors such as convenience and aesthetic appeal before making a final decision. Ultimately, choosing the right location for your soap dish will depend on personal preference and practicality.
Transitioning into the subsequent section about preparing the tile wall surface, it is important to note that proper preparation is crucial for successful installation. Before attaching any fixtures onto tile walls, it is essential to make sure that they are clean and smooth. Failure to do so may result in poor adherence and possible damage to both the fixture and tile surface.
Preparing The Tile Wall Surface
- To properly install a soap dish on a tile wall, the surface should be clean of dirt and debris.
- Measure the area where the soap dish is to be installed, to ensure the correct placement of the soap dish.
- Make sure to use a level to mark the wall in the area where the soap dish will be installed.
- Use a pencil or marker to make a reference point on the tile where the soap dish will be installed.
- Use a tile drill bit to drill a hole in the tile at the reference point.
- Install the soap dish using the manufacturer’s instructions, ensuring the soap dish is securely fastened to the wall.
Cleaning The Wall
Cleaning the wall is a crucial step when preparing the tile wall surface for installing a soap dish. It’s important to remove any dirt, grime, or soap scum buildup that may be present on the surface. Cleaning techniques will vary depending on the type of tile and the severity of the buildup. However, using the right cleaning products can help prevent future soap scum buildup.
To start cleaning, use a soft-bristled brush or sponge to scrub away any visible dirt or grime. If there is stubborn soap scum, mix equal parts water and vinegar and apply it to the affected area. Let it sit for 15 minutes before scrubbing with a brush or sponge. Rinse thoroughly with warm water and dry with a clean towel.
Preventing future soap scum buildup can save time and effort in the long run. One way to do this is by wiping down the tile walls after each shower to remove excess moisture and prevent soap residue from building up. Another option is to use a squeegee to remove excess water from tiles after showering. Additionally, using specialized cleaning products designed for preventing soap scum can be helpful in maintaining a clean tile wall surface over time. Overall, keeping up with regular cleaning maintenance will ensure that your tile wall surface stays clean and ready for installation of a soap dish.
Measuring The Wall
Once the tile wall surface is clean and free from any dirt or grime, it’s time to measure the wall. Measuring the wall is an essential step in preparing for the installation of a soap dish. Using a level, find the center of the wall where you want to place the soap dish. This will ensure that your soap dish is centered and aligned with other bathroom fixtures.
To measure accurately, use a tape measure and measure the height and width of the area where you plan to install your soap dish. Take note of these measurements, as they will be crucial when purchasing your soap dish. It’s important to ensure that your soap dish fits perfectly in the space provided.
After measuring, mark off where you want to install your soap dish using a pencil or marker. Double-check that your markings are level and accurately placed before proceeding with installation. Taking these steps will guarantee a successful installation process without any hiccups along the way.
With proper measuring techniques in place, you can create a layout plan for installing your soap dish on the tile wall surface. This step may seem tedious but taking precise measurements and finding center properly will save time during installation while ensuring accurate placement of your soap dish.
Marking The Wall
When preparing a tile wall surface for soap dish installation, it’s crucial to mark the wall accurately. Proper marking is essential to ensure accurate placement of the soap dish and guarantee a successful installation process. To properly mark a tile wall, use a pencil or marker to indicate where you want to install your soap dish. Double-check that your markings are level and accurately placed before proceeding with installation.
Tips for ensuring accurate measurements when marking tile walls include using a level to find the center of the wall where you want to place the soap dish. This will ensure that your soap dish is centered and aligned with other bathroom fixtures. Additionally, use a tape measure to measure the height and width of the area where you plan to install your soap dish. Take note of these measurements as they will be crucial when purchasing your soap dish.
Creating a layout plan for installing your soap dish on the tile wall surface may seem tedious, but taking precise measurements and finding center properly will save time during installation while ensuring accurate placement of your soap dish. With proper measuring techniques in place, you can mark off where you want to install your soap dish accurately. By following these tips and techniques, you can ensure that your soap dish is installed correctly on the tile wall surface.
Choosing The Right Adhesive Material
After preparing the tile wall surface, it’s time to choose the right adhesive material for your soap dish installation. The success of your project depends on the type of adhesive you use. There are various types of adhesives available on the market, and the choice you make will depend on several factors such as the weight of your soap dish, location, and bathroom humidity levels.
When selecting an adhesive for your soap dish installation project, it’s crucial to consider its strength. Adhesive strength comparison is essential because it determines how well the soap dish will withstand daily use. Epoxy adhesives are known for their superior bonding abilities but can be challenging to remove if you need to reposition or replace the soap dish in future. On the other hand, silicone adhesives provide a strong bond but offer more flexibility when removing or repositioning the soap dish.
Now that you have chosen your adhesive material based on its strength and compatibility with bathroom conditions let’s move on to applying it to your soap dish. Understanding how much adhesive to apply is critical in ensuring a successful installation project. Applying too little adhesive may cause the soap dish to come off easily while using too much could lead to a messy installation process. In our next section, we will guide you through step by step on how to apply your chosen adhesive effectively without any hitches.
Applying The Adhesive To The Soap Dish
Before applying the adhesive, it is important to remove any residue or debris from both the soap dish and tile wall. This can be done using a damp cloth or sponge. Make sure to dry both surfaces thoroughly before moving on to the next step.
When applying the adhesive, it is recommended to use a notched trowel to ensure even coverage. Start by applying a small amount of adhesive onto the back of the soap dish and then use the trowel to spread it evenly over the surface. Try not to apply too much pressure as this can cause the adhesive to seep out from under the soap dish.
Here are some tips for adhesive application: Firstly, work in small sections so that you can complete one area before moving on to another. Secondly, make sure that you apply enough adhesive so that there is full contact between the soap dish and tile wall. Finally, avoid touching or disturbing the adhesive once it has been applied as this can affect its ability to bond properly.
In preparation for positioning your soap dish onto your tile wall, there are some key steps that need to be followed.
Positioning The Soap Dish On The Tile Wall
When it comes to installing a soap dish on a tile wall, one of the most important aspects is the positioning. There are several benefits to having a soap dish installed correctly, including preventing soap from sliding off and creating clutter in your shower or bathtub area. Additionally, properly placed soap dishes can add an aesthetically pleasing element to your bathroom décor.
There are different types of soap dishes available on the market, including corner-mounted, suction cup-mounted, and adhesive-mounted. The type of soap dish you choose will depend on various factors such as the size of your tile wall, personal preference, and budget. Regardless of the type you choose, it is important to ensure that it is securely fastened onto the tile wall.
To position the soap dish on the tile wall, determine where you want it to be located and mark the spot with a pencil. Then use a leveler tool to ensure that it is perfectly straight before drilling any holes or attaching any mounting hardware. This will prevent water from pooling in the base of the dish and causing mold or mildew buildup over time. Once you have confirmed that it is level, proceed with attaching the mounting hardware according to manufacturer instructions for best results.
Leveling The Soap Dish
After positioning the soap dish on the tile wall, the next step is to ensure that it is level. A soap dish that is not level can lead to water pooling and soap slipping off, defeating its purpose altogether. Here are some tips for leveling your soap dish:
- Use a spirit level: This tool will help you determine if the soap dish is perfectly horizontal. Place the spirit level on top of the soap dish and adjust accordingly until it reads level.
- Check with your eyes: While using a spirit level is recommended, it’s always good to double-check with your eyes. Stand back and look at the soap dish from different angles to see if it looks straight.
- Use shims if necessary: Sometimes, despite your best efforts, there may be slight variations in the tile wall surface that prevent you from getting a perfectly level soap dish. In such cases, use small shims made of plastic or wood to fill in any gaps between the tile wall and the back of the soap dish.
Common mistakes to avoid when leveling a soap dish include assuming that all tiles are flat and even, not checking with both a spirit level and your eyes, and forgetting to use shims when needed.
Now that you’ve successfully leveled your soap dish on the tile wall, it’s time to secure it in place.
Securing The Soap Dish In Place
Now that the soap dish is in position, it’s time to secure it in place. There are several ways to do this, including using adhesive, screws, or a combination of both. Adhesive is a popular choice because it doesn’t require drilling into the tile and can be used on any type of tile surface. However, if you prefer a more permanent solution or have concerns about the strength of adhesive alone, screws may be a better option.
Before beginning installation, make sure to read and follow all manufacturer instructions for your chosen mounting method. For adhesive installation, clean the area thoroughly with rubbing alcohol and allow it to dry completely before applying the adhesive. Apply the adhesive according to package instructions and press the soap dish firmly into place. Allow it to cure for at least 24 hours before use. For screw installation, mark the location of each screw hole on the tile using a pencil or marker. Drill pilot holes using a masonry bit and then attach the soap dish using screws.
Alternative mounting methods may include using suction cups or magnets. While these options may work well in some cases, they may not provide as secure of a hold as adhesive or screws. Additionally, maintenance and cleaning tips will vary depending on your chosen mounting method.
In order to keep your soap dish looking great for years to come, be sure to regularly clean it with mild soap and water. Avoid harsh chemicals and abrasive scrubbers that could damage both the soap dish and tile surface. If excess adhesive has oozed out during installation, clean it up immediately using a clean cloth dampened with rubbing alcohol before it dries and hardens onto the tile surface.
Cleaning Up Excess Adhesive
Now that you have successfully installed your soap dish on the tile wall, it’s time to clean up any excess adhesive that may be present. This step is crucial because leaving residue on the tiles can damage their appearance and lead to a less durable installation over time.
To begin removing residue, use a plastic scraper or putty knife to gently scrape away any excess adhesive. Be careful not to apply too much pressure as this can cause damage to the tiles. If the adhesive has already begun to dry, you may need to use a solvent such as mineral spirits or acetone. However, be sure to test the solvent in an inconspicuous area first and avoid using it on porous tiles such as natural stone.
When cleaning up excess adhesive, it’s important to take your time and be patient. Rushing through this step can lead to mistakes and potentially damage your newly installed soap dish or surrounding tiles. With proper care and attention, you can successfully remove any residue without causing harm and ensure a long-lasting tile installation. Next, we will discuss allowing the adhesive to dry thoroughly before using your new soap dish.
Allowing The Adhesive To Dry
- Before beginning the installation of a soap dish to a tile wall, it is imperative that the wall be properly cleaned and prepped to ensure a lasting bond.
- An appropriate adhesive should then be chosen according to the type of tile being worked with, and sufficient adhesive should be applied to the back of the soap dish.
- The adhesive should be allowed to cure or dry according to the manufacturer’s instructions to ensure a secure bond.
- Finally, the soap dish should be firmly pressed into place and given sufficient time to set before use.
Clean Tile Wall
When installing a soap dish on a tile wall, it is important to have a clean surface for the adhesive to properly adhere. The best cleaners for tile walls are those that are specifically designed for removing soap scum buildup. This type of cleaner is typically formulated with acidic compounds that break down and dissolve the buildup, allowing it to be easily wiped away.
To prevent future soap scum buildup and maintain a clean tile wall, there are several tips to follow. First, squeegee the wall after each shower to remove excess water and prevent moisture from lingering. Second, avoid using bar soap as it can leave behind residue. Instead, opt for liquid or gel soaps which are less likely to cause buildup. Lastly, regularly deep clean the tile wall with a specialized cleaner to remove any remaining residue.
Once the tile wall has been properly cleaned and maintained, allow the adhesive for the soap dish to fully dry before use. This typically takes 24-48 hours depending on the specific adhesive used and environmental factors such as humidity levels. Rushing this step can result in a weak bond between the dish and the wall, causing it to potentially fall off or become loose over time. By taking these steps and allowing proper drying time, you can ensure a secure and long-lasting installation of your new soap dish on your tile wall.
Apply Adhesive
After properly cleaning and maintaining the tile wall where the soap dish will be installed, the next step is to apply adhesive. It is important to choose an adhesive that is specifically designed for use on tile surfaces. Some popular options include silicone adhesive, epoxy, and construction adhesives. Before applying the adhesive, make sure to read and follow the manufacturer’s instructions carefully.
Alternative adhesives can also be used if you encounter any issues with your primary choice. For example, if you are having trouble getting your chosen adhesive to adhere properly, consider using a double-sided mounting tape or a heavy-duty Velcro strip instead. Troubleshooting common adhesive issues is essential in ensuring a secure installation of your soap dish.
Once the adhesive has been applied, it is crucial to allow it to fully dry before using the soap dish. This typically takes anywhere from 24-48 hours depending on the specific adhesive used and environmental factors such as humidity levels. Rushing this step can result in a weak bond between the dish and the wall, causing it to potentially fall off or become loose over time. By allowing proper drying time and following these steps for applying adhesive, you can ensure a successful installation of your new soap dish on your tile wall.
Applying Caulk To The Edges Of The Soap Dish
Caulking is an essential step when installing a soap dish on a tile wall. It helps to prevent water from seeping behind the soap dish and into the wall, which could lead to mold growth and damage. Additionally, it provides a finished look to the installation by filling in any gaps or spaces between the soap dish and the tile.
However, there are common mistakes that you should avoid when applying caulk. One of these is not using enough caulk, which can result in gaps that allow water to penetrate through. On the other hand, using too much caulk can make the installation look messy and unprofessional. Another mistake is not smoothing out the caulk properly, which can leave an uneven surface and make it difficult to clean.
To ensure a successful caulking job, start by selecting a high-quality silicone or latex caulk that is designed for bathroom use. Then, apply a continuous bead of caulk around the edges of the soap dish, making sure to fill any gaps or spaces completely. Use a caulking gun for precision and control. Once you have applied the caulk, use your finger or a tool to smooth it out evenly and remove any excess before it dries.
Now that you have applied caulk to the edges of your soap dish installation successfully, it’s time to move on to smoothing out the caulk. This step is crucial for achieving an attractive finish as well as ensuring that no water seeps through any gaps between tiles.
Smoothing Out The Caulk
After applying caulk to the edges of the soap dish, it is now time to move onto the finishing touches. Before doing so, it is important to ensure that the caulk has fully dried. This can take anywhere from 24-48 hours depending on the temperature and humidity in the room.
Once you have confirmed that the caulk has fully dried, it’s time to smooth out any rough edges or bumps. This can be done with a plastic putty knife or your finger (using a glove). Simply run along the edge of the caulk, smoothing out any imperfections until you achieve a clean finish.
To complete your soap dish installation, consider these final steps:
- Clean up any excess caulk with a damp cloth.
- Allow 24 hours for the caulk to fully cure before using your shower or bathtub.
- Enjoy your newly installed soap dish!
By taking these steps, you’re ensuring that your installation will last for years to come without any issues. Remember to remove excess caulk carefully as this will help ensure a professional-looking finish without damaging surrounding surfaces.
Removing Excess Caulk
- Before beginning to install a soap dish, it is important to prepare the area around the tile wall by ensuring all dust, dirt, or other debris has been removed.
- Once the area is clean and dry, caulk should be applied to all edges of the soap dish.
- When the caulk has dried, any excess should be removed with a utility knife or similar tool.
- Care should be taken to ensure no damage is done to the tile wall or the soap dish when removing excess caulk.
Preparing The Area
Before installing a soap dish on a tile wall, there are several pre-installation considerations that you should take into account. First and foremost, it is important to ensure that your tile wall is well-maintained. This means checking for any cracks or chips in the tiles and repairing them as needed. Additionally, you should make sure that the area where you plan to install the soap dish is clean and free of debris.
Next, it is important to remove any excess caulk from the tile wall before installing the soap dish. Excess caulk can prevent the soap dish from adhering properly to the surface of the tile wall, which can lead to it falling off or becoming dislodged over time. To remove excess caulk, use a putty knife or scraper to gently scrape away any visible caulk. Be careful not to damage or scratch the surface of your tile wall while doing so.
Finally, once you have removed any excess caulk and prepared the area for installation, you are ready to begin installing your soap dish on the tile wall. This process typically involves applying adhesive to the back of the soap dish and pressing it firmly onto the surface of the tile wall. Be sure to follow any specific instructions included with your soap dish for best results. With proper preparation and installation techniques, your new soap dish should stay securely in place for years to come!
Removing Caulk
Before installing a soap dish on a tile wall, it is crucial to ensure that the surface is well-prepared for installation. One of the essential steps in preparing the surface for installation is removing caulk. Excess caulk can prevent the soap dish from adhering correctly to the surface of the tile wall, eventually leading to its dislodgement or falling off.
Removing caulk requires careful attention to avoid damaging or scratching the tile wall’s surface while doing so. A putty knife or scraper can be used to gently scrape away any visible caulk. It is important to note that removing all traces of excess caulk ensures that your soap dish will adhere correctly and remain securely in place for years to come.
To conclude, removing excess caulk from a tile wall before installing a soap dish is an essential step in ensuring proper adhesion and longevity. By carefully and thoroughly removing any excess caulk present, you can create a clean and debris-free surface that will provide adequate support for your soap dish. With these steps completed, you can now move forward with installing your new soap dish and enjoy its convenience and utility for many years to come!
Letting The Caulk Dry
Once the soap dish is attached to the tile wall, it’s important to let the caulk dry completely before using it. The drying process can take anywhere from 24-48 hours depending on factors such as temperature and humidity levels. It’s crucial to follow a few tips for speeding up the caulk drying process to ensure that the soap dish stays in place.
One tip for speeding up the caulk drying process is to use a hairdryer on low heat. Hold it about 6 inches away from the caulk and move it back and forth over the surface until it’s dry. Another tip is to keep ventilation in mind by opening windows or using fans in the room. This will help remove excess moisture from the air, which can slow down the drying process.
If you encounter issues with caulk not drying properly on tile walls, there are a few things you can troubleshoot. One common issue is applying too much caulk in one go, which can cause cracking and prevent proper adhesion. Another issue is using old or expired caulk, which won’t adhere well to surfaces and may not dry at all. Checking for these problems beforehand can save time and effort when attaching soap dishes or other items to tile walls.
Transition: Now that you’ve let your caulk dry completely, it’s time to test the stability of your newly installed soap dish.
Testing The Stability Of The Soap Dish
After installing a soap dish on a tile wall, it is crucial to test its stability. A poorly installed soap dish can result in damage to your tiles and potentially cause injury. There are various testing methods that one can use to ensure the soap dish stays in place.
Visual inspection: One of the most straightforward ways to check if the soap dish is stable is by inspecting it visually. Check to see if there are any gaps between the tile and the soap dish or if there are any cracks in the grout lines. If there are visible signs of instability, then take corrective action immediately.
Weight test: Another way to test the stability of a soap dish is by placing a weight on it. You can use something as simple as a bar of soap or a small bottle of shampoo. Place it on the soap dish and see if it stays in place or slides off easily.
Water test: Lastly, you can perform a water test by wetting your hands and rubbing them against the surface of the soap dish. If it moves or slides easily, then it needs further adjustment.
There are different types of soap dishes available on the market, such as suction cup-mounted, adhesive-mounted, and screw-mounted ones. Each type has its own unique installation method and requires different testing techniques for stability. It is essential to choose a soap dish that is suitable for your tile surface and follow proper installation instructions carefully.
By following these testing methods, one can ensure that their newly installed soap dish remains stable and secure over time. It’s always better to be safe than sorry when it comes to household installations like these as they can have long-term consequences if not done correctly.
Conclusion
Installing a soap dish on a tile wall can be a simple and straightforward process with the right tools and materials. It is essential to measure and mark the location of the soap dish beforehand, prepare the surface of the tile wall, choose appropriate adhesive material, apply it to the soap dish and smooth out excess caulking.
One anticipated objection to this installation process may be concerns about the stability of the soap dish over time. However, selecting an appropriate adhesive material and allowing sufficient drying time for the caulking will ensure that the soap dish remains securely attached to the tile wall. Testing its stability once dry is also recommended.
As a tile installation expert, I would advise taking necessary safety precautions while handling tools and materials during this process. Careful measurement and marking, along with proper preparation of the surface area, are crucial for successful installation. With these steps followed carefully, installing a soap dish on a tile wall can be accomplished efficiently and effectively.
Image Credits
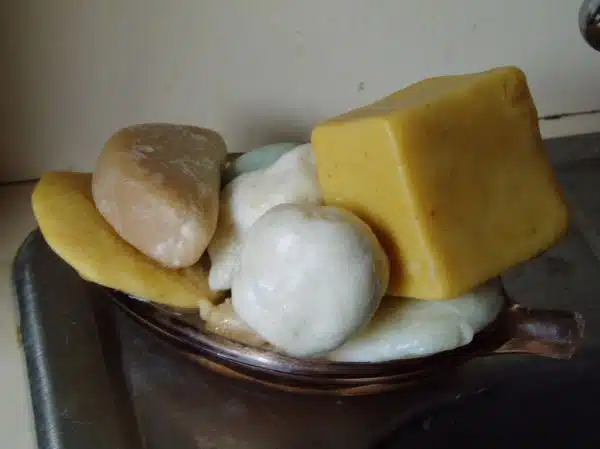
- “Momma’s Soap Dish” by Emily (featured)

