Wall paneling is a popular and cost-effective way to add texture, depth, and character to any room. Whether you’re looking to create an accent wall or cover up damaged drywall, installing wall paneling can transform your space in just a few simple steps. With the right tools and materials, this DIY project can be completed in a weekend with little to no experience required.
In this article, we will guide you through the process of installing wall paneling in your home. We will cover everything from selecting the right type of paneling for your needs, preparing your walls for installation, measuring and cutting panels to size, and securing them in place. By following these steps and tips from our experts, you’ll be able to achieve professional-looking results that will enhance the beauty and value of your home. So let’s get started!
Types Of Wall Paneling
Wall paneling can add a touch of elegance and warmth to any room in your home. However, choosing the right type of wall paneling is crucial to achieve the desired look and feel of your space. There are different finishes available for wall paneling, each with its unique characteristics and advantages.
One type of wall paneling finish is wood, which offers natural beauty and warmth that complements any decor style. Wood paneling comes in various species, such as pine, cedar, and oak, among others. The cost of wood paneling varies depending on the species used, size of the panels, and quality. On average, wood paneling costs between $2 to $7 per square foot.
Another option for wall paneling is vinyl or PVC panels. These types of panels come in a wide range of colors and styles and are easy to install. Vinyl or PVC panels are an ideal choice if you’re looking for an affordable yet durable option. Their cost typically ranges from $1 to $4 per square foot.
When choosing the right paneling for your space, it’s essential to consider factors such as durability, style preference, budget, among others. In the next section, we’ll discuss some tips on how to choose the perfect wall paneling for your home or office space based on these considerations.
Choosing The Right Paneling For Your Space
When it comes to installing wall paneling, one of the most important considerations is selecting the right type of paneling for your space. The first thing you should consider is the color of the paneling. Paneling colors can have a significant impact on the overall look and feel of a room. For example, if you want to create a warm and cozy atmosphere in your living room, consider choosing paneling in warm, earthy tones like brown or beige.
Another factor to consider when choosing wall paneling is design patterns. Paneling with intricate designs or textures can add visual interest to a space and make it more dynamic. However, be careful not to choose anything too busy or overwhelming that might detract from other design elements in the room.
When deciding on the right paneling for your space, keep these tips in mind:
- Consider the overall style of your home and choose paneling that complements it
- Think about how much natural light enters the room – lighter colored paneling can help brighten up dimly lit spaces
- Take into account any existing furniture or decor that will remain in the room
- Consider durability – if you have children or pets, choose paneling that can stand up to wear and tear
- Don’t be afraid to mix and match different types of paneling for added interest
With these factors in mind, you’ll be well on your way to selecting the perfect wall paneling for your space. Once you’ve made your selection, it’s time to move onto measuring your walls for installation.
Measuring Your Walls For Paneling
Now that you have chosen the right paneling for your space, it’s time to start measuring your walls. Before you do anything else, you need to determine the total area of your walls that need paneling. This will help you estimate how much material you’ll need and how much it will cost.
Wall paneling design is an important consideration during installation. Depending on the type of paneling you choose, there may be specific instructions for installing it correctly. Some types of paneling require nails or adhesive, while others simply snap together. Make sure to read the manufacturer’s instructions carefully and follow them closely.
When estimating the cost of wall paneling installation, keep in mind that there may be additional costs beyond just the panels themselves. You may need to purchase nails, adhesive, or other materials depending on the type of installation method required for your chosen paneling. Additionally, if you’re not comfortable installing the panels yourself, you may want to hire a professional which can add additional costs.
Transition: Now that we’ve covered how to choose the right paneling and estimate costs for installation let’s move onto preparing your walls for new wall paneling!
Preparing Your Walls For Installation
- Before installing wall paneling, it is important to remove any existing wall coverings, such as wallpaper, paneling, or paint to create a flat, even surface.
- After removing the existing wall coverings, it is necessary to take precise measurements of the wall dimensions in order to ensure the proper fit of the paneling.
- Once the wall coverings have been removed and the measurements taken, the wall should be cleaned with a damp rag, to remove any dust and debris.
- Finally, the wall should be inspected for any holes, gaps, or other irregularities that need to be filled in with spackling before installation can begin.
Remove Existing Wall Coverings
Removing existing wall coverings is an essential step when preparing your walls for paneling installation. Before you begin, it’s crucial to understand that this process can cause significant damage to your walls if not done correctly. Therefore, it’s essential to adopt strategies for minimizing wall damage during the removal process. One effective strategy is to use a scoring tool that creates small perforations in the wallpaper or paint, making it easier to remove without damaging the underlying drywall.
To remove existing wall coverings successfully, you will need specific tools. These include a scoring tool, scraper, spray bottle filled with warm water and fabric softener mixture, and a putty knife. Begin by using the scoring tool to perforate the wallpaper or paint before spraying it with the warm water and fabric softener mixture. Allow the mixture to sit for 10-15 minutes before using a scraper or putty knife to gently scrape off the covering. Repeat this process until all of the wall coverings have been removed.
In conclusion, removing existing wall coverings is an important step towards installing new paneling in your home. By adopting strategies for minimizing wall damage and using specific tools like a scoring tool, scraper, spray bottle filled with warm water and fabric softener mixture, and a putty knife, you can ensure that your walls are ready for installation without any damage. Remember to work carefully and patiently throughout the process to achieve optimal results.
Measure Wall Dimensions
When preparing your walls for installation of wall paneling design, one crucial step is to measure the dimensions of your walls accurately. Common mistakes in measuring for paneling include underestimating the size of the room or failing to account for irregularities in the wall surface. To avoid these mistakes and ensure that you have enough materials to complete the project, it’s essential to take accurate measurements before purchasing any materials.
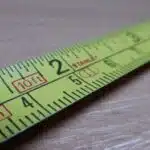
To measure your walls accurately, you will need a measuring tape, a pencil, and a piece of paper or notepad. Begin by measuring the length and height of each wall in feet and inches, recording these measurements on your notepad. Then, measure any areas that may require special attention, such as windows or doors. It’s important to account for any irregularities in the wall surface by taking additional measurements at various points along each wall.
After completing your measurements, calculate the total square footage of your walls by multiplying the length and height of each wall and adding those numbers together. This will give you an accurate estimate of how much material you will need for your project. By taking accurate measurements and accounting for any irregularities in the wall surface, you can ensure that your paneling installation goes smoothly without any hiccups along the way.
Removing Old Wallpaper Or Paint
As you prepare to install new wall paneling, it’s important to properly remove any old wallpaper or paint that may be lingering. The first step is to assess the condition of the existing material. If the wallpaper or paint is in good condition and firmly adhered to the walls, it may be possible to simply leave it in place and prime over it. However, if there are any signs of peeling, bubbling or other damage, it’s best to remove it before proceeding with the installation.
To remove old wallpaper, start by using a scoring tool to create small perforations in the surface. Then apply a wallpaper removal solution (readily available at most home improvement stores) and allow it to sit for 15-20 minutes. After the solution has had time to work its magic, use a scraper tool and gently peel away the old wallpaper. Be sure to use scraping techniques that won’t damage your walls.
If you’re removing old paint instead of wallpaper, begin by using a scraper tool to remove as much of the loose paint as possible. Next, apply a chemical paint stripper according to package instructions and allow it to sit for several minutes before using your scraper again. Once all of the old paint has been removed, you may notice some adhesive residue left behind on your walls. Use a solvent-based cleaner or sandpaper (depending on the type of adhesive) to carefully remove any remaining residue before moving on with your project.
With your walls free from any old wallpaper or paint, you’re ready for the next step: filling in holes and cracks. But before we dive into that process, let’s take a moment to review what we’ve covered so far…
Filling In Holes And Cracks
Once all your wall paneling has been installed, it’s time to start filling in any holes or cracks that may have been left behind. To do this, you’ll need to use a putty that can be easily molded and shaped to fit the gaps. When choosing a putty, look for one that dries hard and can be sanded down smoothly.
To fill in the holes and cracks, use a putty knife to scoop up some putty and then apply it to the affected area. Make sure you press the putty firmly into place so that it fills in all the gaps completely. Once you’ve applied the putty, allow it to dry for several hours or overnight.
After the putty has dried, use sandpaper to smooth down any rough edges or bumps. Start with a coarse grit sandpaper to get rid of any excess putty quickly, then switch to a finer grit sandpaper for a smoother finish. Remember to sand before and after filling in holes and cracks so that your wall paneling looks perfectly smooth when you’re finished.
- Use a high-quality putty that dries hard.
- Apply enough pressure when applying the putty so that it fills all gaps.
- Sand before and after filling in any holes or cracks.
Now that your wall paneling is fully filled in, it’s time to start sanding your walls. Sanding will help prepare your walls for painting or staining by creating an even surface free of any bumps or rough patches. Follow our next section on how to properly sand your walls for best results.
Sanding Your Walls
- Before beginning the sanding process, walls should be thoroughly cleaned and any old paint or wallpaper should be removed.
- Sanding should be done in small sections, beginning with a medium grit sandpaper and working up to a fine grit for a smooth finish.
- It is important to use a vacuuming system to keep dust from entering the air as sanding can produce a great deal of dust.
- After sanding is complete, walls should be wiped down with a damp cloth to ensure a clear surface for painting or wallpapering.
Preparing Walls For Sanding
As you begin your journey to install wall paneling, it is important to start with a clean slate. Preparing the walls for sanding is the first step in achieving a smooth and even surface. It may seem like an unnecessary task, but taking the time to prep your walls will save you from headaches down the road.
Before diving into sanding, ensure that you have all the necessary tools needed for this task. You will need a sanding block or orbital sander, sandpaper (ranging from coarse to fine grits), dust mask, safety goggles, and a vacuum cleaner or broom to clean up debris. Properly equipping yourself with these tools will make the process much smoother and efficient.
When it comes to techniques for sanding walls, it’s important to start with a coarse-grit sandpaper and work your way down gradually until you reach a fine-grit paper. This will ensure that any bumps or rough spots are smoothed out completely. However, be careful not to over-sand as this can cause damage to your walls. Additionally, make sure you wear protective gear such as safety glasses and a dust mask in order to keep yourself safe from any harmful debris.
By following these tips for preparing walls for sanding, you’ll be on your way towards achieving beautiful wall paneling in no time! Remember to take your time and do things right so that your end result is nothing short of spectacular.
Sanding Techniques
When it comes to sanding walls in preparation for wall paneling, there are various techniques that you can use. Two of the most common techniques are wet and dry sanding. Wet sanding involves using a lubricant such as water or oil to help reduce dust and prevent the sandpaper from clogging. Dry sanding, on the other hand, is done without any lubricants and is generally quicker but produces more dust. Whichever technique you choose, be sure to wear protective gear such as a dust mask and goggles.
In addition to selecting the right technique, it’s important to have the right tools and equipment for the job. A sanding block or orbital sander is necessary, along with sandpaper ranging from coarse to fine grits. You may also want to invest in a vacuum cleaner or broom to clean up debris as you go along. Having all of these tools at your disposal will make the task much easier and efficient.
When it comes to actually sanding your walls, start with a coarse-grit paper and work your way down gradually until you reach a fine-grit paper. Be careful not to over-sand as this can cause damage to your walls. Remember that taking your time and doing things correctly will ensure that you achieve a smooth surface that is ready for wall paneling installation.
Installing Furring Strips
As the saying goes, “preparation is key.” This couldn’t be more true when it comes to installing wall paneling. After sanding your walls to create a smooth surface, the next step is to install furring strips. These strips are used to level out uneven walls and provide a stable surface for your panels.
The benefits of furring strips are numerous. They allow for better insulation and soundproofing, as well as improving the overall appearance of your walls. Additionally, they provide added support for heavier panels and prevent warping over time. Alternatives to furring strips include using plywood or drywall instead, but these options may not provide the same advantages as furring strips.
To install furring strips, you’ll need to measure the length and width of each wall before cutting them to size. Make sure the strips are spaced evenly apart and attached securely with screws or nails. Once all the furring strips are in place, you can move on to cutting your panels to size.
In summary, installing furring strips is an essential step in preparing your walls for paneling. They provide numerous benefits that other alternatives may not offer while ensuring a stable base for your panels. By measuring carefully and attaching them securely, you can create a smooth and level surface that will improve both the aesthetics and functionality of your walls. Now that you have installed furring strips successfully let’s move on to cutting the panels down to size!
Cutting Your Panels To Size
Accurately measuring and marking your panels is a critical step in the wall paneling installation process. To ensure precision, use a measuring tape to measure the width and height of the area where the panel will be installed. Next, use a pencil to mark the desired location on the panels. Finally, use a sharp utility knife to cut the panels to the desired shape and size.
Measuring
Accurately measuring for wall paneling is crucial to ensure a seamless installation process. Before you start measuring, make sure that your walls are clean and free from any obstructions. This will allow you to get precise measurements without any discrepancies. You can use a measuring tape or laser measure to measure the height and width of your walls accurately.
When it comes to measuring tricky corners, there are a few tips that you can follow to ensure that you get accurate measurements. Firstly, make sure that you measure from one corner to the next along the floor and ceiling. This will give you an idea of how much paneling you need for each wall. Secondly, if your corners are not perfectly square, make sure to measure both diagonals of the wall as this will give you a more accurate measurement.
Once you have all the necessary measurements, it’s time to order your wall panels. Make sure that you order enough panels to cover your entire wall area with additional panels in case of errors during installation. By following these tips, you can ensure that your wall paneling installation project goes smoothly without any hiccups.
Marking
Measuring accurately is just one part of the wall paneling installation process. Once you have your measurements, the next step is to cut your panels to size. To ensure a perfect fit, you need to mark your panels carefully using the appropriate tools.
Before you start marking, make sure that you have all the necessary tools for cutting your panels. These tools include a saw, a measuring tape or laser measure, and a pencil or marker. When marking your panels, be sure to use a straight edge to ensure that your lines are straight and even. This will help you avoid any mistakes when cutting your panels.
Once you have marked your panels, it’s time to cut them to size. Always double-check your measurements before making any cuts to ensure that everything is accurate. Use a saw with the appropriate blade for cutting through the type of paneling you are using. With patience and precision, you can cut each panel perfectly to size for a seamless installation process.
Securing Your Panels In Place
To secure your wall paneling in place, there are several methods you can use. One of the most popular options is to use adhesives. This is a great alternative to nailing and creates a seamless finish. Before applying any adhesive, make sure the surface is clean and dry. Using a notched trowel, spread the adhesive evenly onto the back of each panel and press firmly into place. Allow ample time for the adhesive to dry completely before moving on to the next panel.
Another tip for securing your panels is to invest in a good set of clamps. Clamps can help hold panels in place while you work on other sections, creating a more efficient process. Additionally, if you plan on incorporating electrical outlets or other fixtures into your wall paneling design, it’s important to measure and mark out where they will go before installing any panels.
As with any home improvement project, it’s important to follow best practices and tips and tricks from experienced DIY specialists. Take your time during installation and always double-check measurements before making any cuts or attaching panels. With these techniques in mind, your wall paneling installation should be a success! In the following section, we will discuss nailing versus gluing panels for those who may still be undecided on which method to use.
Nailing Vs. Gluing Panels
Now that your panels are securely in place, it’s time to decide whether you want to nail or glue them. Both methods have their pros and cons, so it’s important to consider factors like cost and durability before making a decision.
Nailing your panels is a traditional method that many DIYers prefer because it’s relatively easy and quick. All you need is a hammer and nails to attach the panels directly onto the wall studs. This method is also more cost-effective than using adhesive, as nails are typically cheaper than glue. However, nailing can cause damage to the wall if you’re not careful, and the holes left by the nails will need to be filled in and painted over.
Gluing your panels is becoming increasingly popular due to its clean finish and ease of installation. Adhesive options such as Liquid Nails or Power Grab offer a strong hold without damaging the walls. Glue also allows for greater flexibility when installing panels on uneven surfaces or around corners. However, gluing can be more expensive than nailing because of the cost of adhesive materials. Additionally, removing glued panels can be difficult if you ever decide to change your wall decor.
As you weigh the pros and cons of nailing versus gluing your wall paneling, consider which method is best suited for your specific project needs and budget. Once you’ve made your choice, it’s time for finishing touches: caulking any gaps between the paneling and trim pieces before painting or staining to create a polished look that will last for years to come.
Finishing Touches: Caulking And Painting
Now that the wall paneling installation is complete, it’s time for the finishing touches. One of the most important steps in this process is caulking. Caulk fills any gaps between the panels and the wall, creating a seamless look. It also helps with insulation and prevents moisture from seeping in. When choosing caulk, make sure to select a type that is compatible with both your wall and paneling materials. Apply it in thin, even lines using a caulking gun, then smooth it out with a damp finger or caulk smoothing tool.
Once the caulk has dried, it’s time to paint or stain your paneling. This step will not only enhance its appearance but also protect it from wear and tear. When selecting colors, consider your overall decor scheme and choose something that complements it. Neutral tones like white, beige, or gray are classic choices that work well in any space. However, don’t be afraid to experiment with bolder shades like navy blue or forest green for a more dramatic effect.
If you’re looking for alternative materials to traditional wood paneling or want to add some texture or pattern to your walls, there are many options available on the market today. Some popular choices include vinyl plank panels, metal sheets, brick veneer panels, or 3D decorative wall tiles. These materials offer versatility and durability while still providing an attractive finish to your walls. With so many color choices and alternative materials available today, there’s no limit to what you can create with your wall paneling project.
As you complete the final touches of your project by painting or staining your newly installed wall paneling, remember that cleaning up after installation is just as important as the actual installation process itself! In the next section we will discuss how to properly clean up after installation so that you can enjoy your beautiful new walls for years to come without any hassle.
Cleaning Up After Installation
- When installing wall paneling, it is important to have the right cleaning tools to ensure a successful job.
- The necessary cleaning tools will depend on the material being used, but may include a vacuum cleaner, dust cloths and a damp cloth.
- Once the paneling is installed, dust should be removed from the surfaces and from between the panels.
- Additionally, wiping down the panels with a damp cloth can help to keep the paneling looking fresh and clean for a long time.
Cleaning Tools
When it comes to cleaning up after installing wall paneling, having the right cleaning tools is essential. You’ll want to make sure you have everything you need to get the job done efficiently and effectively. Some of the essential cleaning tools you’ll need include a broom or vacuum cleaner, a mop or sponge, and a bucket filled with warm water and mild detergent.
Avoid making common cleaning mistakes when dealing with wall paneling installation cleanup. For example, don’t use abrasive cleaners or harsh chemicals on your walls as this can damage the surface of your panels. Additionally, be careful not to oversaturate your walls with water, which can cause warping or other damage.
Cleaning tools such as sponges and buckets can also be used in creative ways beyond wall paneling installation cleanup. For instance, a sponge can be used to clean hard-to-reach areas in your kitchen or bathroom while a bucket can be repurposed as a stylish planter for your garden. Get creative and think outside the box when using your cleaning tools!
Dust Removal
When installing wall paneling, it’s essential to clean up properly to ensure that your newly installed walls look their best. One crucial aspect of cleaning up is removing any dust that may have accumulated during the installation process. Using a vacuum, damp cloth, or brush for dust removal is an effective way to get rid of any debris remaining on your walls.
Tips for minimizing dust during wall paneling installation include covering furniture and floors with plastic sheets and sealing off the work area. Doing this will help prevent dust from spreading throughout your home, making it easier to keep your space clean after the installation process is complete.
To remove dust effectively, start by using a vacuum cleaner fitted with a soft brush attachment to gently suction away any loose debris. Next, use a damp cloth or sponge to wipe down your walls thoroughly. Be sure not to oversaturate the cloth or sponge with water as this can cause damage to your panels. Finally, use a dry cloth or towel to wipe away any remaining moisture left behind by the damp cloth or sponge. With these simple tips in mind, you’ll be able to remove dust easily and efficiently after installing wall paneling.
Maintenance And Care Of Wall Paneling
Proper maintenance and care of your wall paneling is crucial to ensure its longevity and preserve its aesthetic appeal. There are many ways to protect your wall paneling, including avoiding exposure to direct sunlight or extreme temperatures, as well as preventing moisture buildup by using a dehumidifier in humid climates. Additionally, it is essential to avoid placing heavy objects against the panels, which could cause scratches or dents.
When it comes to cleaning wall paneling, it’s important to select the right products to avoid damaging the surface. The best cleaning products for wall paneling typically include mild detergents, such as dish soap or vinegar solutions. Avoid using abrasive cleaners that can scratch or damage the surface of your panels. For stubborn stains, try using a magic eraser or gentle scrub brush with your cleaning solution.
By following these simple tips for maintenance and cleaning, you can help ensure that your wall paneling looks great for years to come. Regularly wiping down the surface with a damp cloth can also help prevent dust buildup and other unsightly marks from forming on the panels. If you do encounter any issues with your wall paneling despite proper maintenance, don’t worry – there are plenty of troubleshooting techniques available to help you address common installation problems.
Troubleshooting Common Installation Issues
Common mistakes in installing wall paneling can lead to a lot of headaches and wasted time. It’s important to do the job right the first time, but if you encounter any issues along the way, don’t worry – there are DIY solutions for most common installation problems.
One common mistake is not properly preparing the wall surface before installing the panels. This can result in uneven or unstable panels that may not adhere correctly. Before starting your project, make sure to thoroughly clean and prime the wall surface so that it is smooth and free of any bumps or debris.
Another mistake is failing to measure accurately before cutting your panels. This can waste materials and leave you with improperly sized pieces that won’t fit together properly. To avoid this issue, always measure twice and cut once, using a straight edge or template to ensure accurate cuts every time.
If you do run into issues during installation, don’t panic – there are DIY solutions available for most common problems. For example, if your panels aren’t adhering correctly, try using a stronger adhesive or adding additional support behind the panels. By being proactive and troubleshooting potential issues as they arise, you’ll be able to complete your wall paneling installation with ease and confidence.
Conclusion
Wall paneling can transform a plain room into a stylish and cozy space. There are many types of wall paneling to choose from, including wood, PVC, metal, and fabric. The right type of paneling for your space will depend on the overall style and function of the room. Before installation, you should measure your walls carefully and prepare them by removing old wallpaper or paint.
Once you have installed your wall paneling, it is important to maintain and care for it properly. Regular cleaning with a soft cloth and mild detergent will help keep your paneling looking its best. If you encounter any issues during installation, such as gaps or uneven panels, there are troubleshooting steps you can take to fix the problem.
According to a recent survey by HomeAdvisor, the average cost to install wall paneling is $1,781. This statistic emphasizes the importance of choosing the right type of paneling for your space and taking care during installation to avoid costly mistakes. By following these tips for measuring, preparing, installing, and maintaining your wall paneling, you can create a beautiful and durable feature in any room of your home.
Image Credits
- “Metal Wall Panel Texture” by pareeerica (featured)











![Calculating How Much Stone Dust You Need 23 [Blog Post]Stone Dust © Oxfam Australia](https://green-life.blog/wp-content/uploads/2023/05/GdZVzgTqPhjq-150x150.jpg.webp)
