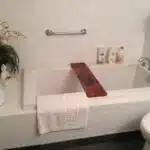
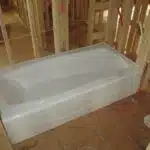
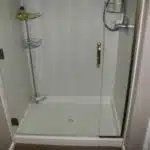
Bathroom remodeling can be a daunting task, especially when it comes to installing tub or shower surrounds. However, with the right tools and techniques, this process can become much easier and straightforward. In this article, we will guide you through the steps of installing a direct-to-stud tub or shower surround like an expert.
Before starting the installation process, it is essential to understand what a direct-to-stud tub or shower surround is. Typically made of fiberglass or acrylic, these surrounds are designed to fit over the existing wall studs in your bathroom. This makes them an ideal choice for those who want to update their bathroom without tearing down walls or adding extra support. By following our step-by-step instructions and tips, you can install a direct-to-stud tub or shower surround efficiently and effectively while achieving professional results.
Understanding Direct-To-Stud Tub Or Shower Surrounds
Direct-to-stud tub or shower surrounds have become increasingly popular among homeowners who wish to renovate their bathroom space affordably and efficiently. These surrounds are designed to fit directly onto the wall studs without requiring a separate backer board, making them easy to install for both professionals and DIY enthusiasts. However, before purchasing a direct-to-stud surround, it is essential to weigh the pros and cons of this type of bathroom fixture.
One of the significant advantages of direct-to-stud tub or shower surrounds is that they offer a seamless look that enhances the overall aesthetic appeal of your bathroom. They come in various design options, including tile patterns, solid colors, and textures that mimic natural stone or wood. Moreover, these surrounds are relatively low maintenance since there are no grout lines or joints where dirt and mildew can accumulate, making cleaning more manageable.
On the other hand, one potential drawback of direct-to-stud tub or shower surrounds is that they may not be as durable as other materials such as acrylic or fiberglass. While they can withstand everyday wear and tear, they may crack or chip if subjected to excessive force. Additionally, since these surrounds are custom-made to fit specific wall measurements, you cannot change their size once installed. Therefore it is crucial to measure and prepare your bathroom space accurately before choosing a direct-to-stud surround that fits perfectly on your walls.
To ensure a successful installation process, measuring and preparing your bathroom space is crucial when it comes to installing a direct-to-stud tub or shower surround.
Measuring And Preparing Your Bathroom Space
Before starting on the installation process, it is important to measure your bathroom space accurately. This step is crucial to determine the right size of the tub or shower surround that you need. Take note of the height, width, and depth of your bathroom walls to ensure that the direct-to-stud tub or shower surround fits perfectly.
Optimizing your bathroom space is also essential in ensuring a successful installation process. Remove any clutter and unnecessary items from your bathroom to create more space for movement during the installation process. It is also important to ensure that there are no obstructions such as pipes or protruding objects on the walls where you plan to install your direct-to-stud tub or shower surround.
Measuring accuracy and space optimization are critical when installing a direct-to-stud tub or shower surround. By taking precise measurements of your bathroom walls and optimizing space, you can avoid wasting time, effort, and resources on an incorrectly sized tub or cluttered workspace. Once you have completed this step, it’s time to gather all necessary tools and materials for a smooth installation process.
Gathering The Necessary Tools And Materials
Gathering the necessary tools and materials for installing a direct-to-stud tub or shower surround is an essential step in the remodeling process. It is important to have the right tools on hand, such as a tape measure, level, drill, and saw. When selecting materials, consider the type of tub or shower surround that fits the style of the bathroom and the necessary components such as the base, wall panels, and trim pieces. Additionally, make sure to have the necessary sealant, silicone, and caulk for a professional-looking installation.
Gather Tools
In order to install a direct-to-stud tub or shower surround, it is crucial to have the appropriate tools and materials. Choosing the right tools can make all the difference in completing a successful installation. Before beginning any project, it is essential to gather all necessary tools and materials to ensure a smooth process.
When gathering tools, it is important to choose ones that are appropriate for the task at hand. Some of the necessary tools include a drill, level, hammer, measuring tape, hacksaw, utility knife, and caulk gun. It is also vital to have safety equipment such as safety glasses and gloves on hand. Organizing your workspace before starting can help prevent accidents and increase efficiency.
Having the proper tools on hand can make or break your installation project. With careful planning and preparation, you can ensure that you have everything needed to complete your direct-to-stud tub or shower surround installation successfully. Take time to select high-quality tools that will last for years to come and keep them organized for future projects.
Choose Materials
As a bathroom remodeling expert, I understand the importance of selecting the right materials for any project. When it comes to installing a direct-to-stud tub or shower surround, choosing the appropriate materials is just as crucial as selecting the proper tools. There are many factors to consider when evaluating durability and comparing costs.
One of the first considerations when choosing materials for a direct-to-stud tub or shower surround installation is water resistance. You want to select materials that will hold up against moisture and prevent mold or mildew growth. Additionally, you should consider the aesthetic appeal of your chosen materials, ensuring they complement the overall look and feel of your bathroom.
Another key factor in selecting materials is cost-effectiveness. While it may be tempting to choose lesser-quality materials to save money upfront, this can end up costing more in the long run if they need frequent repairs or replacements. It’s essential to evaluate each material’s cost versus its expected lifespan and durability to make an informed decision that balances both quality and affordability.
By carefully considering both durability and cost-effectiveness when choosing your materials, you can ensure that your direct-to-stud tub or shower surround installation is both functional and visually appealing for years to come. Don’t rush through this crucial step—take time to research and compare options before making a final decision on which materials will work best for your specific project needs.
Removing Existing Fixtures And Wall Coverings
As you begin preparing for the installation of a direct-to-stud tub or shower surround, it is important to remove any existing fixtures or wall coverings. This process can be messy, so it’s important to take the necessary precautions to protect your floors and nearby surfaces. Start by shutting off the water supply and removing any hardware such as showerheads, handles, and faucets.
Next, use a utility knife to cut around the edges of any wall coverings such as tiles or panels. Carefully remove these coverings with a pry bar or scraper tool, being mindful not to damage the underlying drywall or studs. If you encounter stubborn adhesive residue, use a chemical solvent specifically designed for bathroom surfaces.
Once all fixtures and wall coverings have been removed, take time to inspect the exposed surfaces for any damage or rotting wood. Make necessary repairs before proceeding with the installation of your new surround to ensure a solid foundation for your new fixture. With proper preparation, you can create a clean slate for installing your direct-to-stud tub or shower surround.
With all fixtures and wall coverings removed and surfaces inspected and repaired, you are now ready to move on to installing the bottom track and nailing flange. This step will help ensure that your new surround is securely anchored in place and ready for years of use. Follow manufacturer instructions carefully and take time during this process to ensure everything is level and plumb. By taking care during each step of this installation process, you can achieve professional-looking results that will provide a beautiful and functional upgrade to your bathroom space.
Installing The Bottom Track And Nailing Flange
After installing the backer board, it’s time to install the bottom track and nailing flange. This will provide a secure foundation for your tub or shower surround. First, take the bottom track and place it along the edge of the tub or shower base. Make sure it’s level before screwing it in place. Then, install the nailing flange by inserting screws through the pre-drilled holes into the studs.
When installing these components, be mindful of sealing techniques and waterproofing methods. You want to ensure that water doesn’t seep behind your surround and cause damage to your walls or floors. To prevent this, use a silicone caulk around the perimeter of the bottom track and nailing flange to create a watertight seal.
Now that you’ve installed the bottom track and nailing flange, you’re ready to move on to cutting and fitting the surround panels. This step is crucial in creating a seamless look for your bathroom remodel. In order to achieve this, it’s important to carefully measure each panel before cutting it to size. Stay tuned for our next section on how to properly cut and fit your tub or shower surround panels without causing any damage!
Cutting And Fitting The Surround Panels
How do you ensure proper panel alignment when installing a direct-to-stud tub or shower surround? One of the most important steps is cutting and fitting the surround panels. This involves precise measurement and cutting techniques to ensure that the panels fit snugly against each other and against the wall studs.
Before cutting any panels, it’s important to double-check your measurements and make sure they are accurate. Measure twice, cut once! Use a straight edge or level to mark where you need to make cuts on each panel. Cutting tools such as a circular saw or jigsaw with a fine-tooth blade can help you achieve clean, accurate cuts.
Once you have all of your panels cut and fitted together, it’s time to secure them to the wall studs. This is where having a helping hand can come in handy. Start by attaching the bottom track to the tub or shower base using screws or adhesive. Then, one by one, attach each panel to the wall studs using nails or screws. Be sure to double-check that each panel is level before securing it in place.
Next up is securing the panels to the wall studs without damaging them.
Securing The Panels To The Wall Studs
Before securing the panels to the wall studs, it’s crucial to ensure that the studs are properly positioned. The standard distance between two adjacent studs is 16 inches on center. However, this may vary depending on your specific bathroom layout and building codes. Use a stud finder tool to locate the studs behind the drywall surface and mark their position with a pencil or tape measure.
After identifying the stud positions, you can now proceed to install the tub or shower surround panels. Apply a generous amount of construction adhesive onto the back of each panel before placing them against the wall studs. Align each panel squarely and levelly with its adjacent panels, using shims if necessary. Once all panels are in place, attach them firmly to the studs using corrosion-resistant screws or nails.
Waterproofing techniques are essential when securing tub or shower surround panels to prevent water damage and mold growth. Apply a bead of silicone caulk along all panel edges that meet another surface such as walls, floors, or ceilings. This will create a watertight seal that prevents moisture from seeping into gaps around the edges. Additionally, use waterproofing membrane strips over seams where two panels meet for added protection against leaks.
Moving forward, trimming and finishing the edges of your new tub or shower surround is crucial for completing your bathroom renovation project. In this next section, we’ll go over some tips for cutting and shaping your surround panels accurately and adding finishing touches such as corner trims and sealing strips.
Trimming And Finishing The Edges
- Proper caulking of the tub or shower surround is essential to achieving a long-lasting, water-tight seal.
- Grouting should be done carefully, making sure to fill all the cracks and crevices between the tiles completely.
- After grouting, it is important to seal the surface to ensure the grout does not become stained or discolored.
- Once all the grout and sealant is dry, a polishing agent can be used to give the surface a glossy finish.
Caulking
When it comes to trimming and finishing the edges of a direct-to-stud tub or shower surround, caulking is an essential step that should not be overlooked. There are different types of caulking available in the market, but not all of them are suitable for this type of project. Some common types of caulking include silicone, acrylic, and hybrid caulks. Silicone is the most durable option, while acrylic is easy to apply and paintable.
Before applying caulk, it’s crucial to prepare the surfaces properly. The area should be clean and dry before starting the application process. It’s also important to choose a caulk gun that fits comfortably in your hand to make the application easier. When applying caulk, start from one end and work your way to the other end in a continuous line without stopping. Once done, use a caulk smoothing tool or your finger to smooth out any bumps or ridges.
In conclusion, proper caulking is essential when trimming and finishing the edges of a direct-to-stud tub or shower surround. Choosing the right type of caulk and preparing the surface beforehand will ensure a seamless finish that lasts for years to come. Remember these tips for caulking: start from one end and work your way across without stopping, use a smoothing tool or your finger to smooth out any imperfections, and allow ample time for drying before using your newly installed tub or shower surround.
Grouting
When it comes to trimming and finishing the edges of a direct-to-stud tub or shower surround, caulking is an essential step that shouldn’t be overlooked. However, another crucial aspect of achieving a seamless finish is grouting. Grouting techniques are vital in ensuring that the tiles on your bathroom walls and floors have a professional-looking finish. Choosing grout color is also an important consideration as it can significantly impact the overall aesthetic of your bathroom.
Grouting involves filling the spaces between tiles with a cement-based mixture to create a smooth and even surface. There are different types of grout available in the market, including sanded, unsanded, and epoxy grouts. Sanded grout is ideal for larger gaps between tiles, while unsanded grout is better suited for smaller gaps. Epoxy grout is more expensive but provides superior durability and stain resistance compared to other types.
When choosing grout color, consider factors such as the color scheme of your bathroom, tile size and style, and personal preferences. Neutral shades such as white or beige are popular choices as they complement most tile colors and designs. However, bolder hues like black or dark gray can provide a striking contrast against lighter tiles or create a monochromatic look with darker tiles. Ultimately, selecting the right grout color will enhance the overall appearance of your bathroom while providing long-lasting protection against moisture damage.
In summary, trimming and finishing the edges of a direct-to-stud tub or shower surround requires proper caulking techniques and expert grouting skills. Choosing the right type of grout based on gap size and durability needs is critical to achieving a professional-looking finish. Moreover, considering different options when selecting grout color can help create an attractive design that suits your personal preferences while serving your functional needs in the bathroom renovation process.
Installing The Corner And Edge Pieces
As we move towards the final stage of installing a direct-to-stud tub or shower surround, it’s time to add some aesthetic and functional touches to the corners and edges. This is where the magic happens! Imagine a beautifully designed bathroom with perfectly fitting corner pieces that make your shower stand out like never before. It’s time to bring that imagination into reality.
Corner caulking is an essential step in this process. It prevents water from seeping through the gaps and causing damage to your walls. Apply silicone caulk around all four sides of the corner piece and use a wet finger or caulking tool to smoothen it out. Ensure that you don’t miss any spots as even a small gap can allow water penetration, leading to long-term damage.
Edge sealing comes next, which involves sealing all gaps between the edge pieces and walls using silicone caulk. Ensure that you apply enough pressure while caulking so that every crevice gets filled up properly. You can also use painter’s tape to cover areas where you don’t want the caulk to spread, allowing for a neat finish.
As we approach the end of this installation guide, it’s time to perfect everything by sealing all joints and gaps effectively. We’ll be discussing this further in our next section, but remember – taking care of these details will not only give your shower surround a polished look but also protect your walls from water damage over time. Keep reading for more tips on achieving seamless seals for a perfect finish!
Sealing The Joints And Gaps
After successfully installing the corner and edge pieces of your direct-to-stud tub or shower surround, it is time to focus on sealing the joints and gaps. This step is crucial in ensuring that water does not leak through the seams between panels, which can cause damage to the surrounding walls and floors. Unfortunately, this is also a common area where mistakes are made by many DIY enthusiasts.
One of the most important things to keep in mind when sealing your direct-to-stud tub or shower surround is to use only the best sealing techniques available. Begin by thoroughly cleaning all surfaces with a mild detergent and water solution, followed by a rinse with clean water. Once dry, apply a high-quality silicone caulk around all joints, including corners and edges. Be sure to work slowly and carefully, using only enough caulk to fill the gap completely without overfilling.
To ensure that your direct-to-stud tub or shower surround remains waterproof for years to come, consider following these three bullet point tips:
- Use high-quality silicone caulk specifically designed for use in wet areas.
- Apply silicone caulk generously around all joints.
- Smooth out any excess caulk with a flexible plastic tool or your finger for a professional-looking finish.
With these tips in mind, you can confidently seal your direct-to-stud tub or shower surround without fear of leaks or other problems down the road. Next up: installing the shower or tub faucet and fixtures seamlessly into your new bathroom renovation project.
Installing The Shower Or Tub Faucet And Fixtures
Installing a faucet onto a shower or tub includes measuring the location of the faucet and the holes for the handles, securing the faucet to the surface, attaching the supply lines and ensuring a tight connection. When installing fixtures, it is important to make sure the surface is level and the fixtures are properly aligned. Additionally, it is necessary to pay attention to the manufacturer’s instructions for proper installation and use of the fixtures. Lastly, when installing a direct-to-stud tub or shower surround, the mounting of the panels should be secured to the studs with screws and the seams should be sealed with caulk.
Install Faucet
When installing a direct-to-stud tub or shower surround, it is important to properly install the faucet and fixtures. Faucet positioning is crucial when considering the layout of the bathroom. It’s essential to ensure that you have enough clearance for the spout and handles. When it comes to faucet type comparison, there are two main types: single-handle and double-handle. Single-handle faucets are easier to use and require less space, while double-handle faucets offer more temperature control options.
Once you have chosen your faucet type, it’s time to install it. Start by turning off the water supply and removing any old fixtures or hardware. Then, follow the manufacturer’s instructions for installing the new faucet. Make sure that all connections are tight and secure before turning the water back on. Test the faucet thoroughly before moving on to other elements of your bathroom remodel.
Overall, proper installation of your shower or tub faucet and fixtures is essential for a successful bathroom remodel. Take time to carefully consider faucet positioning and choose a high-quality fixture that will meet your needs for years to come. With these tips in mind, you can confidently install your new direct-to-stud tub or shower surround with ease!
Install Fixtures
When installing a shower or tub surround, the process does not end with just the faucet installation. Fixtures such as showerheads, handles, and spouts also play a significant role in providing comfort and convenience to users. Therefore, it is crucial to install these fixtures correctly. There are various types of fixtures available in the market, such as wall-mounted, handheld, rain showers, and body sprays. Choosing the right type of fixture depends on your preferences and needs.
When installing fixtures, it is essential to consider their placement carefully. For example, if you have a rain showerhead that requires a ceiling mount installation, make sure that there is enough space between the ceiling and the showerhead to avoid any discomfort for taller individuals. Similarly, when installing handles or knobs for hot and cold water control, make sure they are within easy reach but not too close to prevent accidental scalding.
Once you have selected the appropriate fixtures and determined their placement, it’s time to install them. Follow the manufacturer’s instructions carefully while keeping in mind any particular requirements or precautions for your chosen fixture type. Secure all connections tightly before testing them thoroughly before use; this helps detect any leaks or issues early on in the installation process. With proper installation of faucets and fixtures alike, you can enjoy an efficient and comfortable bathroom remodel that will last for years!
Attaching The Showerhead Or Tub Spout
As we approach the final stages of our installation process, it is essential to consider the height and placement of your showerhead and tub spout. These two components play a crucial role in ensuring a comfortable and efficient bathing experience. When determining the showerhead height, consider the height of your household members. If you have tall individuals in your home, a higher showerhead may be more practical to avoid uncomfortable crouching during use.
Next, let us talk about tub spout placement. The placement of your tub spout can significantly impact the functionality and aesthetics of your bathroom space. It is recommended to install the tub spout at a distance that allows easy access for filling the tub but also prevents splashing outside of the tub area. Additionally, make sure that it is placed at a comfortable height for turning on and off.
With proper showerhead height and tub spout placement, we can now move on to testing and adjusting water flow to ensure optimal performance. This step involves checking for leaks, adjusting water pressure, and fine-tuning temperature settings to suit individual preferences. Remember to take time with this step as it can affect both comfort levels and energy efficiency in the long run. With these steps completed, you can now enjoy your newly installed direct-to-stud tub or shower surround with confidence!
Testing And Adjusting Water Flow
- Accurately measuring water flow is essential for determining if a direct-to-stud tub or shower surround installation is possible.
- Adjusting the water pressure from the incoming main water line is necessary to ensure the installation is successful.
- Testing the water pressure at different points in the system should be done to ensure the pressure is consistent.
- Pressure gauges are used to measure the water flow and pressure throughout the system.
- Adjustment of the main water line valve is necessary to adjust the flow and pressure of the system.
- Regularly checking the water pressure is important to ensure the system is operating as designed.
Measuring Water Flow
As a bathroom remodeling expert, it is important to know how to measure water flow when testing and adjusting the water pressure. Water pressure measurement is crucial in determining whether there are any issues with the plumbing system that need to be addressed. To do this, you will need a water pressure gauge that can be attached to an outdoor faucet or spigot.
Once you have attached the gauge to the faucet or spigot, turn on the water and let it run for a few minutes. This will allow the gauge to take an accurate reading of the water pressure. The reading should be taken at a time when no other appliances or fixtures are running, such as washing machines or dishwashers.
After taking the water pressure measurement, it is important to also calculate the flow rate of the water. Flow rate calculation can be done by measuring how much water flows out of a fixture over a certain amount of time. This can be done by filling up a bucket with known volume and timing how long it takes for the bucket to fill up completely. By dividing the volume of water by the time it took to fill up the bucket, you can determine the flow rate in gallons per minute (GPM).
By accurately measuring both water pressure and flow rate, you can identify any issues with your plumbing system and make necessary adjustments accordingly. It is crucial for providing excellent service in bathroom remodeling projects that require proper installation of tubs or showers with direct-to-stud surrounds that require adequate amounts of hot/cold running water for comfortable use during bathing sessions without being affected by fluctuating pressures or low-flow rates.
Adjusting Water Pressure
As a bathroom remodeling expert, it is crucial to have a thorough understanding of how to test and adjust water flow. Water pressure measurement is an essential aspect of plumbing systems that needs to be addressed properly. However, this process may reveal some common issues such as low or fluctuating water pressure. In such cases, adjusting water pressure becomes necessary to ensure optimal performance and comfort.
Adjusting water pressure in a plumbing system requires specific knowledge and expertise. The most common way of doing this is by installing a pressure regulator that controls the amount of water pressure flowing through the pipes. This device reduces high-pressure levels, preventing damage or leaks in the system while ensuring a constant flow rate for all fixtures.
It is important to note that adjusting water pressure should be done with great care and precision since too much or too little pressure can cause serious problems in the plumbing system. If you are uncertain about how to adjust your home’s water pressure, it is best to consult with an experienced plumber who can provide guidance on how to make any necessary adjustments safely and effectively.
Testing Water Pressure
As a bathroom remodeling expert, understanding how to test and adjust water flow in plumbing systems is crucial. Water pressure measurement is an essential aspect of this process that needs to be addressed properly. However, testing water pressure may reveal common issues such as low or fluctuating water pressure. These issues can cause discomfort and inconvenience for homeowners, making it imperative to address them through DIY solutions.
Testing water pressure is vital as it ensures that the plumbing system is functioning optimally. Common issues such as low or fluctuating water pressure can arise due to various factors such as clogged pipes, leaks, and faulty fixtures. Homeowners can use a simple tool called a pressure gauge to test their home’s water pressure accurately. By doing so, they can identify any potential problems and take appropriate measures to fix them.
The importance of water pressure cannot be overstated when it comes to plumbing systems. Proper water pressure ensures that all fixtures in the house receive a constant flow rate without any fluctuations. It also prevents damage or leaks in the system by ensuring that the pressure levels are within acceptable limits. Testing water pressure regularly helps homeowners identify any potential problems early on before they escalate into major issues that require costly repairs or replacements.
Cleaning And Maintaining Your Surround
Once your direct-to-stud tub or shower surround is installed, it’s essential to keep it clean to prevent mold and mildew growth. Regular cleaning will also help maintain the appearance of your surround. Here are some tips to help you keep your surround clean and well-maintained.
Preventing Mold: The best way to prevent mold growth in your surround is to keep it dry. Wipe down the walls after each use with a squeegee or towel. Also, make sure there’s good ventilation in your bathroom by using an exhaust fan or opening a window when showering.
Stain Removal: If you notice stains on your surround, don’t panic. Most stains can be removed with a simple cleaning solution of vinegar and water. Mix one part white vinegar with three parts water in a spray bottle and apply it to the stain. Let it sit for a few minutes, then scrub with a soft-bristled brush and rinse thoroughly.
General Cleaning: To keep your surround looking its best, clean it regularly with a non-abrasive cleaner such as dish soap or mild detergent mixed with water. Avoid using harsh chemicals or abrasive scrubbers that could scratch the surface of the surround.
Maintaining a clean and well-maintained shower or tub surround is easy if you follow these simple tips. However, if you encounter any problems during installation, don’t hesitate to seek professional help from a bathroom remodeling expert. In the next section, we’ll discuss some common installation problems and how to troubleshoot them effectively.
Troubleshooting Common Installation Problems
Just like a painter who must first prepare the canvas before applying paint, installing a direct-to-stud tub or shower surround requires proper preparation. From measuring the area to ensuring that the studs are level and plumb, each step must be done with precision to ensure that the final product is seamless and long-lasting. However, even with meticulous preparation, common mistakes can occur during installation.
One of the most common installation problems is improper sealing. When water seeps through gaps in between panels or around fixtures, it can cause serious damage to your walls and floors. To avoid this issue, make sure you use waterproof caulk and sealant in all areas where water could potentially penetrate. Additionally, it’s important to check for leaks regularly by running water through your shower or tub and inspecting your surround for signs of moisture.
Another common mistake is using incorrect tools or techniques during installation. For example, using screws that are too long can damage your plumbing or studs while not using enough adhesive can cause panels to shift over time. To avoid these issues, carefully follow the manufacturer’s instructions and use appropriate tools for each step of the process. If you’re unsure about anything, don’t hesitate to seek guidance from a professional.
Troubleshooting tips can be helpful when dealing with unexpected issues during installation such as warped panels or uneven walls. One solution is to use shims to level out any imperfections in your wall before installing your surround. Another option is to sand down any high spots on the wall surface so that each panel fits snugly against it. By taking preventative measures and being prepared for potential challenges, you can ensure that your direct-to-stud tub or shower surround is installed smoothly and without issue.
Conclusion
Installing a direct-to-stud tub or shower surround can be a daunting task for any homeowner, but with the proper preparation and tools, it can be a manageable DIY project. Understanding the basics of this type of installation is crucial before beginning any work. Accurate measurements and careful preparation are key to ensuring your project goes smoothly.
Once you have all the necessary materials and tools at hand, removing existing fixtures and wall coverings is the first step in the installation process. Following this, installing the bottom track and nailing flange should be done correctly to ensure the stability of your surround. Finally, testing water flow post-installation is essential to ensure that there are no leaks or other issues that could lead to future problems.
In conclusion, while installing a direct-to-stud tub or shower surround may seem like an intimidating project, with careful planning, it is achievable for most homeowners. Remember to take accurate measurements and prepare your space properly before beginning work. Once you have completed all steps correctly, enjoy your newly installed surround with peace of mind knowing that you have taken all necessary precautions to ensure its longevity. As bathroom remodeling experts often say – “A well-installed direct-to-stud tub or shower surround is not just functional but also adds an element of sophistication to any bathroom.”
Image Credits
- “GMS counseling staff surround pregnant Shelley at her baby shower” by bmitd67 (featured)


