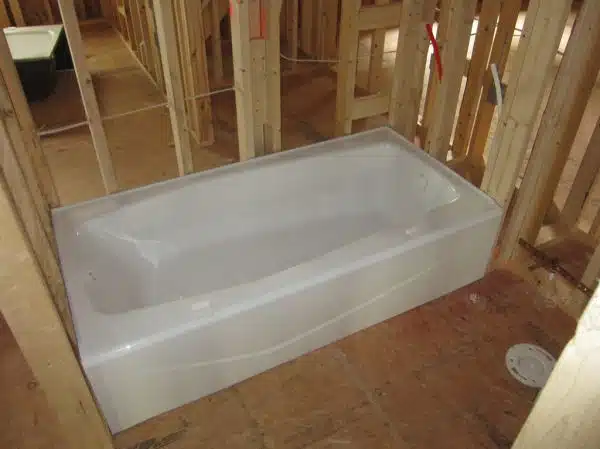
As a cast iron tub removal expert, I have come across numerous clients who are struggling to remove their outdated and bulky bathtubs. While cast iron tubs may have been popular in the past, they can be a real nuisance when it comes to removing them. The weight of the tub alone can make it seem like an impossible task, but fear not – with the right tools and techniques, removing a cast iron tub can be a manageable DIY project.
In this article, I will provide you with step-by-step instructions on how to remove a cast iron tub without damaging your bathroom or injuring yourself. From preparing your workspace to safely lifting and disposing of the tub, I will guide you through each stage of the process. Whether you are looking to update your bathroom or simply need to replace a damaged tub, this article will equip you with all the knowledge you need to successfully tackle this challenging task. So let’s get started!
Assessing The Condition Of Your Cast Iron Tub
When it comes to removing a cast iron tub, the first step is to assess its condition. The two main things you need to check for are rust and cracks. Both of these issues can make removing the tub more difficult and require additional steps before removal.
Assessing rust on a cast iron tub is fairly easy. You’ll want to look for any areas where the finish has worn away and exposed the metal underneath. Rust will often start in these areas and spread outwards if left unchecked. If you find rust, you’ll need to take extra care when removing the tub so that you don’t damage it further.
The other issue you need to check for is cracks. Cast iron tubs are notoriously brittle, which means they’re more prone to cracking than other materials. Look for any visible cracks or signs of stress around the drain or overflow area. If you find any cracks, you may need to take extra precautions when removing the tub so that it doesn’t break apart during the process. With careful assessment, proper tools, and techniques, removing a cast iron tub can be done safely and efficiently.
Gathering The Necessary Tools And Materials
After assessing the condition of your cast iron tub, it’s time to start planning how to remove it. This process can be challenging and time-consuming, but with the right tools and materials, it can be done efficiently. Before beginning the removal process, make sure you have all of the necessary equipment on hand.
Tools needed for removing a cast iron tub include safety goggles, work gloves, a reciprocating saw or hacksaw, adjustable pliers, a hammer, pry bars or crowbars, and a bucket. Materials required include a drop cloth or tarp to protect your floors from debris and water damage and some silicone caulk to seal any gaps that may occur after removal.
Once you have gathered all of your tools and materials, it’s time to start turning off the water supply. This is an essential step in the process because it ensures that no water will leak out during removal. Before turning off the water supply, locate the shut-off valve near your bathtub. Turn it clockwise until you feel resistance; this will turn off the water flow.
In summary, removing a cast iron tub requires several tools and materials that are readily available at most hardware stores. Gathering these items beforehand will ensure that you’re ready when it comes time to remove your bathtub. Additionally, turning off the water supply is crucial in preventing leaks during removal. With these steps complete, you’re now ready to begin removing your cast iron tub!
Turning Off The Water Supply
To remove a cast iron tub, it is crucial to follow the correct steps. The first step is to turn off the water supply and drain any remaining water in the plumbing system. Shutting off and draining water are critical as they prevent any leaks or damage to your bathroom during the removal process.
Removing plumbing fixtures is another important step when removing a cast iron tub. These fixtures include faucets, showerheads, and valves that connect the tub to the plumbing system. After shutting off and draining water, remove these fixtures carefully using appropriate tools such as wrenches or pliers. Ensure that all pipes are labeled for easy reassembly after removing them from the tub.
To make this process easier, consider using a table to keep track of different parts of your plumbing system. A 3 column by 4 rows table can be used to label each fixture’s location and any notes about its function or potential issues you may encounter during removal. This way, you can quickly identify missing pieces or damaged parts during reinstallation.
Now that you have shut off and drained water from your plumbing system and removed all necessary fixtures, it’s time to prepare your workspace for safe removal of your cast iron tub.
Preparing Your Workspace
- Before beginning the removal of a cast iron tub, it is essential to clear the area around the tub of any debris or furniture.
- Additionally, it is important to gather the necessary tools for the job, such as a crowbar, sledgehammer and an adjustable wrench.
- Once the area is cleared and the proper tools are obtained, the removal of the tub can begin.
- It is highly recommended to wear protective gear, such as safety goggles and gloves, when performing the removal of a cast iron tub.
Clearing The Area
One of the first steps in removing a cast iron tub is preparing your workspace by clearing the area. This means removing any obstacles or debris that may obstruct your path as you work. Before getting started, measure the space around the tub to ensure you have enough room to maneuver and remove it safely.
Depending on where your cast iron tub is located, you may need to clear out furniture or other items in the surrounding area. This is particularly important if you are working in a small bathroom or cramped space. Take some time to assess the situation and remove anything that could get in the way as you work. Once this is done, focus on removing any debris such as loose tiles, flooring materials, or fixtures that may be attached to the tub.
It’s also important to take safety precautions during this process. Wear protective gear such as gloves and goggles to avoid injury from sharp objects or flying debris. Additionally, consider using a dust mask if there is significant dust or debris present. By taking these steps to clear your workspace before beginning the removal process, you can ensure a safe and efficient experience without any unnecessary setbacks.
Gather Necessary Tools
As a cast iron tub removal expert, preparing your workspace is crucial to ensure a safe and efficient removal process. Once you have cleared out the area surrounding the tub, it’s time to gather necessary tools for the job. Choosing appropriate tools can make all the difference in how smoothly the process goes, so it’s important to have everything you need before getting started.
Some of the essential tools you’ll need for removing a cast iron tub include heavy-duty work gloves, safety goggles, a pry bar or crowbar, a reciprocating saw or angle grinder with metal cutting blades, a sledgehammer or mallet, and a dolly or hand truck. It’s important to choose high-quality tools that are designed for this type of work and can withstand the weight and pressure of a cast iron tub. Additionally, taking safety precautions during the removal process is vital to avoid injury.
Before beginning any work on the tub itself, take some time to inspect it thoroughly for any signs of damage or deterioration. This will help you identify any potential hazards that may arise during removal. Make sure you have all necessary safety gear on hand and ready to use before starting work on the tub. By following these steps and gathering appropriate tools ahead of time, you can ensure a successful removal process without any unnecessary setbacks or injuries.
Disconnecting The Drain And Overflow
Disconnecting the Drain and Overflow from a Cast Iron Tub
When it comes to removing a cast iron tub, disconnecting the drain and overflow is an essential step. Before starting this process, it’s crucial to turn off the water supply and remove any remaining water from the tub. Once you’ve done that, you can begin by unscrewing the drain cover plate using a screwdriver. Then, detach the stopper mechanism by twisting it counterclockwise.
Afterward, use pliers or a wrench to loosen and remove the nut that connects the overflow pipe to the tub’s drainage assembly. Be sure to have a bucket ready to catch any residual water that may come out of the pipe. Once you’ve disconnected both pieces successfully, inspect them for any damage or corrosion and replace them if needed.
To help you through this process safely and efficiently, here are some tips for disconnecting the drain and overflow from a cast iron tub:
- Use protective gear such as gloves and safety glasses to avoid injury.
- Apply penetrating oil on corroded nuts or screws before attempting to loosen them.
- Wait for at least 15 minutes before turning them again.
- If you’re unsure about anything or encounter any difficulties in disconnecting these parts, seek professional assistance.
Now that you’ve successfully disconnected the drain and overflow from your cast iron tub, let’s move on to removing the faucet and handles without causing damage or injury during this crucial step of your bathroom renovation project.
Removing The Faucet And Handles
As we continue with the process of removing a cast iron tub, we now move on to the next step – removing the faucet and handles. This is an essential part of the process as it will allow you to replace fixtures or make repairs as necessary. However, before you proceed with this step, ensure that you have disconnected the drain and overflow.
To remove the faucet and handles, start by turning off the water supply. Next, remove any screws that hold the handles in place and use a wrench to loosen the nuts that hold the faucet in place. Once you have removed these components, inspect them for any signs of damage or wear and tear. If necessary, replace them before reinstalling them in your new tub.
Replacing fixtures or repairing leaks during this stage should be done with caution. It is important to ensure that all plumbing connections are secure before proceeding with any repairs or replacements. Failure to do so could result in further damage or leaks down the line. With this in mind, it is advisable to seek professional help if you are unsure about how to carry out any plumbing tasks during this stage of removal.
Moving forward from here, our next step would be separating the tub from the surrounding tile or wall. This can be a tricky task but with proper guidance and tools, it can be done effectively without causing damage to your bathroom walls or floor tiles.
Separating The Tub From The Surrounding Tile Or Wall
In order to separate a cast iron tub from the surrounding tile or wall, the first step is to cut the tub from the mortar. This is typically done with an angle grinder with diamond blade attachments that can cut through the mortar. After the tub is cut away from the mortar, the next step is to remove the tiles from the tub. This typically requires a chisel for removing any remaining mortar, and a pry bar to remove the tiles from the tub.
Cutting Tub From Mortar
For those who want to remove a cast iron tub, knowing the cutting techniques is crucial. Cutting the tub from its mortar is one of the most important steps in separating it from the surrounding tile or wall. Before cutting, make sure that you have taken all necessary safety precautions such as wearing gloves, goggles, and a respirator mask to protect yourself from dust and debris.
To start cutting, mark the outline of your desired cut using a marker or chalk. Then use an angle grinder with a diamond blade to carefully cut along the marked line. The diamond blade can easily make cuts through the tough cast iron material and also helps reduce dust production. It’s important to keep your hands steady while cutting to prevent slipping or wobbling which could damage the tile or injure yourself.
Once you have finished cutting all around the tub, use a sledgehammer to break off any remaining pieces of mortar that still hold it in place. Make sure to wear protective gear as flying debris can be dangerous. With these techniques in mind, removing a cast iron tub will be a much easier and safer process.
Removing Tiles From Tub
When it comes to removing a cast iron tub, separating it from the surrounding tile or wall is a crucial step. However, this process can be intimidating for those who have never done it before. One of the key challenges in this process is removing tiles from the tub without damaging them or the surrounding area.
To start, use a utility knife to carefully remove any grout residue around the edges of the tiles. This will help protect them during the removal process. Next, use a pry bar and hammer to gently lift up each tile one at a time. Be sure to work slowly and methodically to avoid cracking or chipping any of the tiles. If there are any stubborn pieces that won’t come loose, you can use a chisel to carefully chip away at them.
It’s important to take your time while removing tiles from a cast iron tub so that you don’t cause any damage to the surrounding area. By following these tips and techniques, you can successfully separate your tub from its surrounding tile or wall without any mishaps along the way.
Loosening The Tub’s Anchors
Removing anchors is the next step in removing a cast iron tub. It’s essential to loosen the tub’s anchors before attempting to lift and maneuver it out of the bathroom. To remove the anchors, you will need a hammer, pliers, and a reciprocating saw.
To begin, locate the screws that are holding the tub to the wall and floor. Use your pliers to unscrew them and remove any nails or fasteners you find. Next, use your hammer to break apart any cement or adhesive that may be securing the tub to the floor.
Finally, use your reciprocating saw to cut through any remaining pipes or fixtures that may be attached to the tub. Be sure to wear appropriate safety gear when working with power tools. Once all of these steps are complete, you can move on to lifting and maneuvering the tub out of your bathroom.
Next, we’ll discuss how to lift and maneuver a cast iron tub out of your bathroom safely and efficiently.
Lifting The Tub And Maneuvering It Out Of The Bathroom
Prior to attempting to lift a cast iron tub, it is important to ensure that any necessary weight-bearing surfaces such as floors and walls are adequately prepared to bear the load.
To lift a cast iron tub, it is common to use a hoist or other lifting device, but in the absence of such equipment, a few people working together can lift the tub manually from below.
When maneuvering a cast iron tub, extra caution should be taken to ensure that its weight does not cause it to shift or tip unexpectedly.
Once the tub has been lifted and maneuvered, it should be moved slowly in a straight line towards its destination, making sure to keep it level as much as possible.
Preparing To Lift
As an expert in removing cast iron tubs, it is essential to highlight the importance of preparing to lift the tub. Before beginning the lifting process, ensure that you have all the necessary tools and equipment. This includes securing straps, gloves, and a dolly. The securing straps are an essential component in ensuring that the tub is lifted safely and without causing any damage.
When using securing straps, it is vital to ensure they are placed correctly to prevent any accidents. The best technique for placing the straps is by wrapping them around the bottom of the tub and then attaching them to a dolly or crane. This technique ensures that there is equal weight distribution and prevents any tipping when lifting. Additionally, you must wear protective gloves when handling the straps to prevent any injuries.
Finally, when lifting the cast iron tub, it is crucial to use proper lifting techniques. It would be best if you never lifted with your back as this can cause serious injuries. Instead, use your legs as they are stronger muscles in your body. Always keep your back straight and bend at your knees when picking up heavy objects such as a cast iron tub. Using proper lifting techniques reduces the risk of injury and ensures that both you and others involved in removing the tub remain safe throughout the process.
Lifting Tub
To successfully remove a cast iron tub, it’s essential to have the proper equipment and follow safety procedures. One of the most crucial steps in this process is lifting the tub. To do so safely, one must use proper lifting techniques and have the necessary tools on hand.
Firstly, when it comes to lifting the tub, there are a few tips to keep in mind. Before even attempting to lift it, make sure you have enough people present to do so safely. The number of individuals needed will depend on the size and weight of the tub. Additionally, try not to rush or force anything during this step as doing so could result in injury or damage to the tub.
Equipment needed for lifting includes sturdy straps and a dolly. The straps should be placed under the bottom of the tub and attached securely to a dolly or crane for equal weight distribution. It’s also important to wear protective gloves while handling these straps during the process.
When ready to lift, remember always to use proper lifting techniques. Lift with your legs, not your back, and keep your back straight while bending at your knees. This technique reduces strain on your body and helps ensure that everyone involved remains safe throughout the process. With these tips and equipment in place, maneuvering a cast iron tub out of a bathroom can be done efficiently and safely.
Clearing The Pathway And Removing Obstacles
To begin the process of removing a cast iron tub, it’s necessary to clear the pathway and remove any obstacles that may impede progress. This means organizing your workspace and ensuring that all debris is cleared away from the area. Any sharp or hazardous objects should be removed, as well as any items that could get in the way during the removal process.
Clearing debris also means taking care to protect yourself and your tools. Wear protective gloves and safety glasses to avoid injury, and make sure your tools are in good working order before you begin. It’s important to have a clear path from the tub to the disposal site, so take time to measure doorways and hallways to ensure that you can safely maneuver the tub through them.
Organizing your workspace is key when removing a cast iron tub. Make sure you have plenty of space around the tub itself, as well as room for any tools or equipment you may need during the removal process. Keep all tools within easy reach, but out of harm’s way, and make sure there are no tripping hazards in your workspace. By taking these steps, you’ll ensure that your work environment is safe and efficient, allowing you to focus on safely transporting the tub to its final destination.
As you prepare to move onto safely transporting the tub to a disposal site, remember that proper planning and organization are key elements in this process. By clearing debris from your workspace and organizing your tools and equipment properly, you’ll be able to work efficiently while minimizing potential safety hazards. With these important steps complete, you’re ready to move on with confidence towards removing your cast iron tub safely and effectively.
Safely Transporting The Tub To A Disposal Site
Transportation logistics for a cast iron tub can be tricky due to its weight and size. To safely transport the tub, it is important to have a vehicle that can handle the weight and enough space for the tub to fit securely. A pickup truck or trailer is recommended, and it should be equipped with proper straps or tie-downs to prevent movement during transportation.
When it comes to disposal options, there are several choices available. A landfill is one option, but it may not be environmentally friendly. Another option is recycling, which can be a more sustainable choice. Some municipalities offer bulk waste pickup services for large items like cast iron tubs, while others require residents to deliver them to a designated facility.
Regardless of the disposal method chosen, it is important to follow local regulations and guidelines. Some areas may require permits or fees for disposing of large items like cast iron tubs. By researching and understanding the disposal options in your area, you can ensure that the removal process goes smoothly and safely.
When the cast iron tub has been safely transported away from your home, it’s time to clean up and patch up the bathroom area where it was located. This step involves removing any remaining debris or fixtures that were attached to the tub and cleaning up any damage caused by its removal. In our next section, we will discuss in detail how to effectively clean and patch up your bathroom area after removing a cast iron tub.
Cleaning And Patching Up The Bathroom Area
After safely transporting the old cast iron tub to a disposal site, the next step in your bathroom renovation project is to clean and patch up the bathroom area. Removing a cast iron tub can be a messy process, leaving behind debris and potentially damaging the surrounding walls or flooring. Before installing your new tub, it’s important to properly clean and repair any damage caused by the removal process.
To begin, thoroughly clean the area where the old tub was removed. This includes removing any remaining debris or dust left from cutting or breaking apart the old tub. Use a vacuum cleaner to remove any small particles, followed by a damp cloth to wipe down surfaces. Depending on how long ago your bathroom was renovated, you may also want to consider deep cleaning any areas that were previously inaccessible due to the presence of the old tub.
Next, inspect the surrounding walls and flooring for any damage caused during the removal process. Cast iron tubs can be heavy and difficult to maneuver, which can lead to scratches or dents in nearby surfaces. DIY repairs may be possible for minor damage such as scratches or small holes, but more serious damage may require professional assistance. Be sure to address any repairs before moving forward with installing your new tub.
When all necessary repairs are complete, you’re ready to move onto installing your new tub. Whether you’ve chosen a brand new cast iron model or something completely different, make sure you follow manufacturer instructions carefully and consider hiring a professional if needed. With careful planning and execution throughout each step of your bathroom renovation project, you’ll have a beautiful new space in no time!
Installing Your New Tub
When installing a new tub, it is important to first measure the dimensions of your bathroom to ensure that you choose the right tub model. You will want to make sure that the new tub will fit comfortably within your bathroom and leave ample space for other fixtures. Take into consideration any doors or windows that may affect placement as well.
Choosing the right tub model can be overwhelming, but it is important to consider your needs and preferences. Do you prefer a soaking tub or one with jets? Will the tub be used primarily for relaxation or for practical purposes such as bathing children? Additionally, consider the style of your bathroom and choose a tub that complements its aesthetic.
In summary, when installing a new cast iron tub, measuring dimensions and choosing the right model are key steps in ensuring a successful installation. By taking these factors into consideration, you can enjoy your new tub for years to come. In the next section, we will discuss tips and tricks for successfully removing an old cast iron tub without causing damage to your bathroom.
Tips And Tricks For Successful Cast Iron Tub Removal
As a cast iron tub removal expert, I cannot stress enough the importance of assessing weight before attempting to remove a cast iron tub. These tubs can weigh upwards of 500 pounds and require a team of at least two people to safely remove them. Failure to assess the weight and plan accordingly can result in serious injury or damage to your home.
Another crucial step in successful cast iron tub removal is removing rust before attempting to lift the tub. Rust can weaken the structural integrity of the tub, making it more difficult to move and increasing the risk of injury. Use a wire brush or sandpaper to remove as much rust as possible before beginning the removal process.
Here are three tips for successful cast iron tub removal:
- Secure all loose items in the bathroom and create a clear path for tub removal.
- Use heavy-duty straps or ropes to secure the tub before attempting to lift it.
- Wear protective gear, including gloves and sturdy shoes, to avoid injury during the process.
As you prepare for cast iron tub removal, keep in mind that safety should always be your top priority. If you have any doubts about your ability to safely remove the tub, consider hiring a professional for assistance. In the next section, we will delve into some frequently asked questions about cast iron tub removal that may help guide you through this process with greater confidence.
Frequently Asked Questions About Cast Iron Tub Removal
As a cast iron tub removal expert, it is common to receive questions about the process. One of the most frequently asked questions is regarding common issues that arise during the removal process. One issue that can occur is damage to surrounding tiles and walls. This can happen if there is not enough space to maneuver the tub out of the bathroom or if there are obstacles in the way. It is crucial to carefully plan and prepare for the removal process to avoid these issues.
Another important question that arises is about safety precautions. Removing a cast iron tub can be physically demanding and dangerous if proper safety measures are not taken. It is crucial to wear appropriate safety gear such as gloves, goggles, and sturdy footwear. Additionally, having a second person assist with lifting and moving the tub can help prevent injury. Finally, ensuring that all plumbing connections have been properly turned off and disconnected will help avoid any accidents or flooding.
In summary, removing a cast iron tub requires careful planning and safety precautions to avoid damage or injury. Common issues such as damage to surrounding tiles and walls can be avoided by preparing thoroughly for the removal process. Safety precautions such as wearing appropriate gear, having assistance, and disconnecting plumbing connections are essential for a successful removal process. By following these guidelines, homeowners can safely remove their old cast iron tubs without incident or harm.
Conclusion
In conclusion, removing a cast iron tub can be a challenging and time-consuming task. However, with proper preparation and the right tools, it can be done successfully. It is essential to assess the condition of your tub beforehand and ensure that you have everything you need before beginning the removal process.
While removing a cast iron tub may seem daunting, the feeling of satisfaction when it is finally out of your bathroom can be incredibly rewarding. The empty space left behind allows for new possibilities and opportunities to create a fresh look in your home. So, take your time, follow these steps carefully, and soon enough, you’ll be ready to install your new tub. Remember, with patience and attention to detail, anything is possible – even removing a heavy cast iron tub.
Image Credits
- “cast iron tub” by jmrodri (featured)

