Removing a bathtub is an important task that requires proper planning and execution. It is a process that involves several steps, including disconnecting the plumbing, removing the fixtures, and breaking down the walls and floor surrounding the bathtub. As a professional plumber or bathroom remodeler, it is essential to have a thorough understanding of how to remove a bathtub safely and efficiently.
In this article, we will explore the step-by-step process of removing a bathtub in detail. We will provide you with expert advice on how to prepare for the removal process, what tools you need, and how to avoid common mistakes. Whether you are undertaking this project as part of a bathroom renovation or simply need to replace your old bathtub, our guide will equip you with the knowledge and skills necessary for successful removal. So let’s get started!
Assessing The Condition Of Your Bathtub
According to a recent survey, the average lifespan of a bathtub is around 15 to 20 years. However, this can vary depending on the quality of the tub, how often it’s used, and how well it’s maintained. Over time, bathtubs can become damaged due to wear and tear or from accidents that cause cracks or chips in the surface.
Before removing a bathtub, it’s important to assess its condition carefully. This will help you determine whether repair or replacement is necessary. Start by looking for any visible signs of damage such as cracks or chips in the surface. Check for leaks around the drain and faucet as well as any discoloration that may indicate water damage.
If your bathtub is damaged beyond repair or if you’re simply looking to update your bathroom, there are several replacement options available. You can choose a new bathtub made from materials such as acrylic, fiberglass, porcelain, or cast iron depending on your preferences and budget. Alternatively, you might consider replacing your bathtub with a shower enclosure or a combination shower/tub unit for added convenience.
Turning Off The Water Supply
Before removing the bathtub, it is crucial to turn off the water supply. Turning off the water supply helps prevent any unwanted leaks or water damage during the removal process. To turn off the water supply, locate the main shut-off valve and turn it clockwise until it stops. The shut-off valve may be located near the bathtub or in a different area of the house, such as the basement.
Safety precautions should be taken when turning off the water supply. Wear protective gloves to prevent any injuries while handling the valve. Additionally, make sure to check for any hot water that may still be circulating in the pipes before proceeding with shutting off the valve. This can be done by running hot water from a nearby faucet until it turns cold.
To emphasize further, here are some important things to keep in mind when turning off the water supply:
- Locate and identify where your main shut-off valve is located.
- Turn off all appliances that use water before shutting off the valve.
- Always wear protective gear when handling valves.
- Check for hot water circulation before proceeding with shutting off valves.
Next, after turning off the water supply, proceed with draining the tub to prepare for removal.
Draining The Tub
As a professional plumber or bathroom remodeler, it is crucial to know how to properly drain the water from your bathtub before removing it. This step is essential because it helps avoid damage to your plumbing system and saves you time and money in the long run. To begin, turn off the water supply to your bathtub and gather all the necessary tools such as pliers, wrenches, and a bucket.
Next, locate the drain stopper underneath the faucet and remove it using a pair of pliers or a wrench. Once you have removed the stopper, place a bucket underneath the drain to catch any remaining water. If there is still some water left in the tub, use a small cup or container to scoop it out until there is no more water.
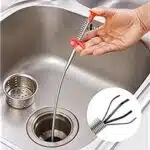
To further prevent damage to your plumbing system, it’s important to inspect the drain for any blockages or debris that may have accumulated over time. Clean out any visible debris using a wire hanger or plumbing snake. These tips for avoiding damage to your plumbing when removing your bathtub will ensure that this process goes smoothly without causing any unnecessary headaches down the line.
Transitioning into removing fixtures, now that the tub has been drained and inspected for blockages or debris, we can move on to removing any fixtures attached to it.
Removing The Fixtures
After draining the tub, it is time to assess any potential damage before proceeding with the removal of the bathtub. Check for any leaks or water damage that may have occurred during the tub’s use. If there are any signs of damage, it would be best to address them first before continuing with the removal process. This will ensure that your new bathtub installation will not be compromised in any way.
Once you have assessed any potential damages, it’s time to salvage fixtures that can still be used in your bathroom remodel. Fixtures such as faucets, showerheads, and drains can be removed from the old tub and used again on your new one. To do this, carefully detach these items with a wrench or pliers without damaging them. Be sure to store these fixtures safely until they are needed for installation on your new bathtub.
Removing a bathtub also requires disconnecting plumbing connections such as water supply lines and drain pipes. This step involves shutting off the main water supply to avoid accidents and unwanted water flow during the disconnection process. Once the water supply is turned off, proceed with disconnecting all plumbing lines connected to the old tub carefully. This will prevent damage to surrounding plumbing and ensure a smooth transition into installing your new bathtub.
Disconnecting The Plumbing
After removing the drain cover, it is time to disconnect the plumbing. Before starting this step, ensure that there is no water supply to the bathtub. You can turn off the water supply valve or shut off the main water supply to prevent any accidental flooding that can lead to potential hazards.
The next step is to remove all screws and nuts holding down any pipe connections. You can use a wrench or pliers to loosen them up and detach the pipes from their connections. Ensure you have a bucket underneath the pipes when disconnecting them as there may be residual water left in them. Once all pipes are disconnected, proceed with proper disposal of all materials in accordance with your local regulations.
If you are not confident in your abilities or if you encounter any issues while disconnecting plumbing, do not hesitate to seek professional help. A qualified plumber will have experience in safely disconnecting plumbing without causing damage and can offer advice on proper disposal of materials. DIY options may seem cost-effective, but they come with potential hazards that could end up being more expensive than hiring a professional.
Now that all plumbing has been disconnected and properly disposed of, it’s time for the next step: removing surrounding tiles.
Removing The Surrounding Tiles
Once the plumbing has been disconnected, the next step in removing a bathtub is to remove the surrounding tiles. This can be a tricky process, so it’s important to take precautions and use the right tools.
To remove tiles, you’ll need a few key tools: a hammer, chisel, putty knife, and tile removal tool. Before starting, it’s important to wear protective gear such as gloves and safety glasses. Start by using the putty knife to loosen any grout around the tiles. Then use the chisel and hammer to carefully break away each tile. Be sure to work slowly and methodically, as breaking tiles too quickly can cause damage to the underlying wall.
If removing tiles seems like too daunting of a task or if you’re worried about damaging the walls behind them, there are alternative options available. One option is to cut out sections of drywall around the bathtub instead of removing all of the tiles. This can be done using a drywall saw or rotary tool. It may also be possible to install an acrylic liner over existing tile instead of removing them completely. However, keep in mind that these options may not provide as clean of a finish as fully removing the tiles would.
Next up is breaking down the walls surrounding your bathtub without causing unnecessary damage or harm – this requires careful planning and execution.
Breaking Down The Walls
With the walls of the bathroom out of the way, it is now time to take on the next step in removing a bathtub. But before we dive into this process, let’s go over some important safety precautions that need to be taken. Firstly, ensure you have all the necessary tools needed for the job. Secondly, make sure to wear appropriate safety gear such as gloves and goggles to avoid any injuries.
The first tool you will need is a reciprocating saw with a metal blade attachment. This saw is used to cut through any nails or screws that may be holding the tub in place. Additionally, you will need a pry bar and hammer to help loosen any adhesive or caulk between the tub and the floor. Lastly, have a bucket nearby to collect any debris that falls during the removal process.
Keeping these safety precautions and tools in mind will make removing your bathtub an easier and safer experience. As we move forward in this process, our next step will focus on removing the tub drain. It is important to take this step carefully in order to avoid causing any damage to your plumbing system or surrounding fixtures.
Removing The Tub Drain
Removing the Tub Drain:
Before you start removing the tub drain, it is essential to have all the necessary tools ready. These include a pair of pliers, a screwdriver, and a drain wrench. Once you have these items in place, follow these step-by-step instructions to remove the tub drain successfully.
Step 1: Using your pliers or screwdriver, remove the drain cover. Step 2: Insert your drain wrench into the drain and turn it counterclockwise to loosen it. If needed, use pliers to hold onto the base while turning. Step 3: Once loosened, pull out the entire assembly from above.
How to Safely Dispose of the Old Bathtub:
Now that you’ve successfully removed your old bathtub, you need to dispose of it safely and legally. Most cities have specific regulations on how to dispose of large household items like bathtubs. Check with your local government for any such regulations before making any disposal arrangements.
There are several options available for disposing of an old bathtub. You could sell it if it’s still in good condition or donate it to a charitable organization that accepts used fixtures. However, if none of these options work for you, contact your local waste management service provider for information on how they handle large item disposal in your area.
Moving onto cutting sections without writing ‘step’:
With the tub drained and safely disposed of, now you can move onto cutting up any remaining sections that were too large or bulky for removal through doors or stairs. This step can be challenging as bathtubs are typically made from durable materials like porcelain-coated cast iron and fiberglass. Nevertheless, using a reciprocating saw or angle grinder with a diamond blade can make this task more manageable.
Cutting The Tub Into Sections
After successfully removing the tub drain, it’s time to move on to the next step of cutting the bathtub into sections. This is a delicate process that requires patience and precision. Using a reciprocating saw, start by cutting along the sides of the bathtub. It’s important to ensure that you’re wearing protective gear such as gloves and goggles throughout this process.
Once you’ve made your cuts, you can then proceed to remove the pieces of the bathtub from your bathroom. Proper disposal techniques should be followed when disposing of the various parts. You can consider donating the pieces to a construction recycling center or contacting your local waste management company for safe disposal options.
Removing a bathtub is not an easy task, but with proper planning and execution, it can be done efficiently and effectively. The next section will guide you through how to remove the bathtub from your bathroom without causing any damage to your home or injuring yourself in the process.
Removing The Bathtub From The Bathroom
Removing a bathtub from a bathroom can be a daunting task that requires careful planning and execution. The first step is to assess the weight of the bathtub, as this will determine the level of effort required to remove it safely. It is also important to consider any potential obstacles that may hinder the removal process, such as plumbing fixtures or tiling.
Once you have assessed the weight of the bathtub and identified any potential obstacles, you may decide that seeking professional help is necessary. Professional plumbers or bathroom remodelers have experience removing bathtubs and can ensure that the job is completed safely and efficiently. They also have access to specialized tools and equipment that can make the removal process easier.
If you decide to remove the bathtub yourself, it is important to take appropriate safety precautions. This may include wearing protective clothing, using gloves, and having someone assist you with lifting heavy objects. It may also be helpful to have a plan in place for disposing of the old bathtub once it has been removed from your bathroom.
List of 3 items:
- Don’t underestimate the weight of your bathtub; it could be much heavier than you think.
- Removing a bathtub can be dangerous – always take appropriate safety precautions.
- Seeking professional help can save time, money, and prevent injury during removal.
To properly dispose of an old bathtub after its removal from your bathroom, there are several options available depending on your location and local regulations. Some municipalities offer curbside pickup for large items like bathtubs, while others require special arrangements for disposal at a landfill or recycling center. It is important to research these options ahead of time so that you can dispose of your old bathtub safely and responsibly without causing harm to yourself or others around you.
Disposing Of The Old Bathtub
After successfully removing the bathtub from the bathroom, the next step is to dispose of it properly. One option is to donate it to a local charity or non-profit organization that specializes in home improvement projects. This not only helps someone in need but also reduces waste and benefits the environment.
Another option for disposing of an old bathtub is recycling. Many municipalities have specific recycling programs in place for large household items like bathtubs. If this is not available, there are companies that specialize in recycling materials from construction and demolition sites, including bathtubs.
It’s important to note that simply throwing away an old bathtub can have negative consequences for both the environment and public health. Many landfills are already overflowing with waste and hazardous materials can leach into the soil and water supply if not disposed of properly. Donating or recycling an old bathtub is a responsible way to get rid of it while also doing something positive for others and the planet.
As we look forward to installing a new bathtub, it’s crucial to prepare the area properly first. This involves removing any remaining debris or adhesive as well as repairing any damaged surfaces such as walls or flooring. Taking these steps will ensure a smooth installation process for your new bathtub and help avoid any potential issues down the line.
Preparing The Area For A New Bathtub
Before installing a new bathtub, it is crucial to prepare the bathroom area adequately. The first step in preparing the area for a new bathtub is to assess the bathroom layout. This assessment will help determine whether the current layout can accommodate the desired bathtub style or if any changes need to be made. It is also important to ensure that all plumbing and electrical systems are up-to-date and in proper working condition before proceeding.
Choosing the right bathtub style is another critical step in preparing the area for a new bathtub. There are various styles available, including freestanding, alcove, drop-in, and corner bathtubs. Each type has its unique features and advantages, so it’s essential to consider factors such as size, shape, material, and functionality when selecting one. It is also vital to choose a style that complements the overall design of your bathroom.
To create a more inviting atmosphere in your bathroom area, here are five tips to consider:
- Add lighting fixtures that provide ample illumination
- Incorporate natural elements such as plants or candles
- Install decorative tiles or backsplash
- Use soothing colors for walls and accessories
- Add storage space with shelving or cabinets
With these preparations completed, you can now proceed with installing your new bathtub into your freshly prepared bathroom area.
Installing A New Bathtub
The area has been cleared, and the old bathtub has been removed. It’s time to choose the right bathtub that will fit seamlessly into your bathroom design. There are many factors to consider when choosing a new bathtub, such as size, shape, material, and style.
When selecting a new bathtub, it is important to think about the purpose it will serve. Do you want a relaxing spa-like experience or just a functional tub for daily use? Consider the size and dimensions of your bathroom to ensure that the new bathtub fits comfortably in the space. Additionally, select a material that is both durable and easy to clean.
After choosing the right bathtub for your bathroom remodel project, hiring a professional installer is essential. A professional plumber or bathroom remodeler can ensure that your new bathtub is installed correctly and efficiently. They can also provide valuable advice on maintaining your new bathtub, so it lasts for years to come.
As you move forward with connecting the plumbing and fixtures for your new bathtub installation project, it is important to remember that proper installation is crucial in preventing leaks and water damage. By following these steps carefully and consulting with an expert if needed, you can enjoy your newly remodeled bathroom with peace of mind knowing that everything was done correctly.
Connecting The Plumbing And Fixtures
- To disconnect the supply lines, the water must first be shut off and the shutoff valves must be turned off.
- To remove the drainpipe, the slip joint pliers should be used to loosen the nuts and disconnect the trap from the wall.
- To install a new bathtub, the drainpipe must be connected to the drain flange and the supply lines must be connected to the shutoff valves.
- Proper installation of the bathtub requires the drainpipe to be secured with a threaded nut and the supply lines to be secured with supply line nuts.
- The bathtub must be properly leveled and connected to the studs in the wall with the appropriate anchors.
- To complete the installation, the bathtub should be sealed with a caulking material around the base and the drain flange.
Disconnecting The Supply Lines
Disconnecting the supply lines of a bathtub is a crucial step in removing it safely without causing any water damage. As a professional plumber or bathroom remodeler, you must ensure that the supply lines are disconnected properly before proceeding with any further removal steps. This article will provide you with tips on how to safely disconnect the supply lines and avoid any potential water damage.
Firstly, turn off the main water valve that supplies water to your home. This will prevent any water from flowing into the bathtub’s supply lines during the disconnection process. Next, use pliers to unscrew the nuts that connect the supply lines to the faucet handles and spout. It’s important to have a bucket or towel nearby as residual water may still be present in the lines and could spill out during disconnection.
Secondly, after removing all nuts and disconnecting both hot and cold supply lines, check for any remaining water in the pipes by turning on each faucet handle separately. If there is still some water coming out, use towels or sponge to soak it up completely. Once all residual water has been removed from both hot and cold sides, you can proceed with removing other components of your bathtub without worrying about causing any damage due to unwanted leaks.
In conclusion, disconnecting your bathtub’s supply lines may seem like an easy task but it requires precision and care to avoid unnecessary water damage. By following these tips for safe disconnection and being attentive throughout the process, you can ensure that your bathroom remodeling project goes smoothly without causing any damage.
Removing The Drainpipe
Connecting the plumbing and fixtures of a bathtub is a complex process that requires attention to detail and precision. As a professional plumber or bathroom remodeler, it’s important to understand the different steps involved in this process to ensure that your project is completed efficiently without causing any damage to your client’s property. One of these steps involves removing the drainpipe.
Replacing the drainpipe is essential if you’re installing a new bathtub or repairing drainpipe leaks. Before you begin, you must turn off the water supply and remove any standing water from the tub. Next, use pliers to loosen and remove the nuts that connect the drainpipe to the waste tee and overflow pipe. It’s important to have towels or a bucket nearby as residual water may still be present in the pipes and could spill out during disconnection.
After disconnecting both ends of the drainpipe, inspect it for any signs of wear or damage. If you notice any issues, replace it with a new one before proceeding with installing your new bathtub or making repairs. Once you’ve installed the new drainpipe, reassemble all components in reverse order while ensuring that all connections are tight and secure to prevent any future leaks. By following these steps, you can safely remove and replace your bathtub’s drainpipe without causing any damage or complications during your bathroom remodeling project.
Installing New Fixtures
As a professional plumber or bathroom remodeler, it’s important to understand the different steps involved in connecting the plumbing and fixtures of a bathtub. One of these steps is installing new fixtures, which can be a daunting task for those who are not familiar with the process. To begin, it’s essential to choose the right bathtub that meets your client’s needs and preferences. There are various materials available in the market, such as acrylic, fiberglass, porcelain-enameled steel, and cast iron. Understanding bathtub materials is crucial as each has its advantages and disadvantages.
Once you have chosen the appropriate bathtub material, it’s time to install new fixtures. This process involves connecting the drainpipe and overflow pipe to the waste tee while ensuring that all connections are tight and secure. It’s essential to follow manufacturer instructions carefully to avoid damaging any components during installation. Additionally, if your client wishes to update their faucet or showerhead, make sure that they are compatible with their existing plumbing system before starting any work.
Installing new fixtures in a bathtub requires attention to detail and precision. As a professional plumber or bathroom remodeler, it’s important to stay up-to-date with current industry trends and techniques to ensure that your clients receive high-quality service. By following these steps and guidelines when choosing the right bathtub materials and installing new fixtures properly, you can help your clients achieve their dream bathroom while keeping their property safe from potential damage or complications during your remodeling project.
Enjoying Your New Bathtub
Now that you have successfully removed your old bathtub, it’s time to enjoy your new one. However, before making a purchase, it’s important to consider some factors that will help you choose the perfect bathtub for your needs.
Firstly, think about the size of the tub and whether it fits comfortably in your bathroom space. You should also consider the material of the tub, as this can impact its durability and ease of maintenance. Additionally, think about any special features or add-ons that may enhance your bathing experience.
Once you’ve made a decision and installed your new bathtub, it’s important to properly maintain it to ensure its longevity. This includes regularly cleaning the tub with non-abrasive cleaners and avoiding harsh chemicals that can cause damage. It’s also important to promptly address any leaks or issues with the plumbing to prevent further damage.
- Tips for choosing the perfect bathtub:
- Consider size and material
- Think about special features or add-ons
- Take into account personal preferences and needs
By following these tips for choosing a perfect bathtub and properly maintaining it, you can enjoy a relaxing bath for years to come without worry or stress. Remember to always prioritize safety when using your new bathtub and seek professional help if necessary.
Conclusion
Removing a bathtub can seem like an overwhelming task for many homeowners. However, with the right tools and techniques, it can be accomplished successfully. Before beginning the process, it is important to assess the condition of your bathtub and turn off the water supply. Once these steps are completed, you can drain the tub and remove any fixtures. Disconnecting the plumbing is also a crucial step in removing a bathtub.
Before installing a new bathtub, it is important to prepare the area by cleaning and leveling the surface. Installing a new bathtub requires careful attention to detail and precision. Connecting the plumbing and fixtures must be done correctly to ensure proper functioning of your new bathtub.
Ironically, while removing a bathtub may seem like an arduous task for some, it is often necessary for bathroom remodels or repairs. As professional plumbers or bathroom remodelers, we understand that sometimes change is necessary in order to improve functionality and aesthetics in your home. Following these steps carefully will ensure that your new bathtub is installed correctly, providing you with years of enjoyable use.
Image Credits
- “Bathtub” by autowitch (featured)






![How To Get Hair Out Of A Bathtub Drain 9 2/365 [Bathtub Drain]](https://green-life.blog/wp-content/uploads/2023/05/cOEu5edpkejq-150x150.jpg.webp)
![How To Replace A Bathtub Drain In A Mobile Home 10 2/365 [Bathtub Drain]](https://green-life.blog/wp-content/uploads/2023/05/3ft8KAJsNnjq-150x150.jpg.webp)

