Removing a bathroom vanity cabinet can be a daunting task, but with proper guidance and tools, it is achievable. Whether you are renovating your bathroom or simply replacing an outdated vanity cabinet, knowing how to remove the old one without causing damage to the surrounding area is crucial. In this article, we will guide you through the step-by-step process of removing a bathroom vanity cabinet, from preparing the area to disconnecting plumbing fixtures.
Before beginning any home improvement project, it is important to have an understanding of the task at hand. Removing a bathroom vanity cabinet requires patience and attention to detail, as well as some basic knowledge of plumbing and carpentry. This article aims to provide a comprehensive guide for homeowners who wish to remove their own bathroom vanity cabinets. By following our instructions carefully and using appropriate tools, you can successfully remove your old vanity cabinet and make way for a fresh new look in your bathroom.
Assessing The Condition Of Your Bathroom Vanity Cabinet
A bathroom vanity cabinet is a functional and aesthetic fixture that occupies a significant amount of space in your bathroom. Before removing it, you need to assess its condition to determine whether it needs repair or replacement. Evaluating durability is the first step in assessing the condition of your bathroom vanity cabinet. Check if the cabinet is made of sturdy materials such as solid wood, plywood, or MDF (medium-density fiberboard). If the cabinet is made of particleboard or thin veneer, it may not withstand the weight of the countertop and sink.
Identifying structural damage is another crucial aspect of assessing your bathroom vanity cabinet’s condition. Look for signs of water damage, such as peeling paint or warped wood. If there are cracks or holes in the cabinet’s walls or base, this could indicate that it has suffered some impact damage. Additionally, check if the drawers and doors are aligned and functioning correctly. Loose hinges and broken knobs can cause further damage to the cabinet if not addressed promptly.
After assessing your bathroom vanity cabinet’s condition, you can decide whether to repair or replace it entirely. If there are minor issues that you can fix with simple repairs, then you may not have to remove the entire fixture. However, if there are significant structural damages that require replacement, then you will need to remove the vanity cabinet entirely before installing a new one. In the next section, we’ll discuss how to gather all necessary tools and materials for removing your bathroom vanity cabinet safely and efficiently.
Gathering The Necessary Tools And Materials
- To successfully remove a bathroom vanity cabinet, it is important to first gather the necessary tools. These tools can include a pry bar, screwdriver, and adjustable wrench.
- In addition to the necessary tools, it is also important to gather any materials that may be needed to complete the task, such as replacement screws and new sealing material.
- Furthermore, it is helpful to have a work light and a tarp to help protect the floor around the cabinet from any debris or damage.
- Lastly, it is important to have a helper on hand to assist in removing the cabinet as it can be a difficult task to accomplish by oneself.
Gather Tools
Are you planning to remove your bathroom vanity cabinet? Before getting started, it’s important to gather all the necessary tools and materials to ensure a smooth removal process. Choosing the right tools is essential for completing the task efficiently and safely.
Firstly, you’ll need a screwdriver or drill with different bits for removing screws and other fasteners that may be holding the vanity in place. Additionally, an adjustable wrench or pliers will come in handy for removing stubborn plumbing connections. It’s crucial to wear safety gloves and eye protection during the removal process as sharp edges, splinters, or dust particles can cause injury.
Secondly, consider using a pry bar or hammer and chisel to separate the vanity from the wall without damaging either surface. You may also need a utility knife or razor blade to cut any caulking around the edges of the vanity. Keep in mind that some vanities are heavy and may require more than one person to move them safely.
Lastly, make sure to turn off all water supply valves before disconnecting any plumbing fixtures. This will prevent any water leaks or flooding during removal. Safety precautions during removal will reduce your risk of injury and potential damage to your home.
In conclusion, by gathering these necessary tools and materials beforehand, you’ll be well-equipped for a successful bathroom vanity cabinet removal project. With patience, precision, and safety precautions in mind, you’ll be able to complete this task efficiently without causing any damage to yourself or your home.
Gather Materials
When it comes to removing your bathroom vanity cabinet, gathering the necessary tools is only half the battle. Choosing the right materials is equally important, especially when it comes to saving costs and ensuring a successful job. By taking the time to carefully consider your options, you can make sure that you have everything you need for an efficient and safe removal process.
Choosing materials for a bathroom vanity cabinet removal project requires careful consideration of both function and form. For example, you’ll want to select a sturdy pry bar or hammer and chisel that can withstand repeated use without bending or breaking. You may also want to opt for a utility knife with replaceable blades to ensure clean cuts throughout the process. By investing in high-quality materials upfront, you can save money in the long run by avoiding costly repairs or replacements down the line.
When it comes to saving costs during a bathroom vanity cabinet removal project, there are several strategies you can employ. One option is to borrow tools from friends or family members rather than purchasing them outright. Another is to shop around for materials, comparing prices at different home improvement stores before making your final selection. Whatever approach you take, remember that preparing ahead of time and choosing quality materials will pay off in terms of efficiency, safety, and overall satisfaction with the finished product.
Shutting Off Water Supply And Electricity
Before removing a bathroom vanity cabinet, it is important to properly shut off your water supply and electricity. This crucial step will ensure the safety of yourself and your home during the renovation process. Shutting off the water supply involves turning off both hot and cold valves located beneath the sink or at the main valve for your house, while shutting off electricity requires finding and flipping the switch in your circuit breaker labeled for the room you are working in.
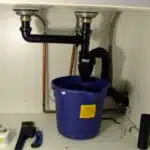
When disconnecting plumbing fixtures during a bathroom renovation, it is important to follow proper safety measures. Start by placing a bucket underneath the sink to catch any excess water that may spill out when disconnecting pipes. Next, use a wrench to loosen each connection slowly until they are completely disconnected. Remember to turn off the water supply before disconnecting any pipes to avoid unnecessary flooding or damage.
Tips for safely disconnecting plumbing fixtures also include labeling each disconnected pipe with tape or markers to avoid confusion when reconnecting everything later on. It is also best practice to take pictures of each fixture before taking it apart so that you can easily reference them later on if needed. Follow these tips and procedures carefully, as improper disconnection of plumbing fixtures can lead to costly damage and repairs in the future.
As you prepare for removing drawers and doors from your bathroom vanity cabinet, keep in mind that proper preparation is key to a successful renovation project. By following these steps for shutting off your water supply and electricity before beginning your project, you can rest assured knowing that you have taken all necessary precautions in keeping yourself and your home safe throughout this process. Now that we have discussed how to shut off utilities properly, let’s move onto how to safely remove drawers and doors from your bathroom vanity cabinet.
Removing Drawers And Doors
Before removing the vanity cabinet, you must remove the drawers and doors. This step is important because it makes it easier to move the cabinet without causing damage to other areas of your bathroom. Start by opening all the drawers and removing any items inside them. Next, remove the drawer fronts by unscrewing them from the drawer box. They may be attached with screws or clips, so make sure to check before pulling too hard.
Once you have removed the drawer fronts, you can take out the drawers themselves. Depending on your vanity cabinet model, they may slide out easily or require some wiggling to loosen them up first. If there are metal tracks holding them in place, lift each side of a drawer slightly while pulling it forward until it clears the track. Label each drawer as you go so that you can easily reinstall them later.
After removing all of the drawers, it’s time to remove any doors that are attached to your vanity cabinet. First, check for any screws or nails securing them in place and unscrew/extract these as needed. Once free of hardware, lift the door off its hinges carefully and set aside for disposal along with any other removed parts as well as old hardware.
Now that you have removed all drawers and doors from your bathroom vanity cabinet, it’s time to focus on Removing hardware next. But before we do that let’s discuss disposing of old cabinets and how best we can manage waste disposal in our homes sustainably!
Disconnecting Plumbing Fixtures
After removing the drawers and doors, it’s time to remove the bathroom vanity cabinet itself. Did you know that according to a recent survey, 62% of homeowners who renovate their bathrooms choose to replace their vanity cabinets? This means that you are not alone in this task.
Before removing the cabinet, assess your plumbing fixtures. Turn off the water supply and disconnect any pipes or hoses from the sink and faucet. It’s important to take care when handling these fixtures as they can easily break or become damaged.
After disconnecting the plumbing fixtures, you can start removing the cabinet. Here are three tips to make this process easier:
- Use a utility knife to cut through any caulking between the countertop and walls.
- If necessary, use a pry bar or crowbar to gently lift the countertop away from the cabinet.
- Unscrew any screws or nails holding the cabinet in place before lifting it away from the wall.
Once you have successfully removed your bathroom vanity cabinet, it’s time to move on to removing the countertop.
Removing The Countertop
After detaching the vanity cabinet from the bathroom wall, it’s time to remove the countertop. You’ll need a few tools for this step, including a putty knife, pry bar, screwdriver, and utility knife. It’s also essential to have someone assist you during this process, as countertops can be heavy and difficult to handle alone.
First, turn off the water supply valves located under the sink. Next, disconnect any plumbing connections between the sink and countertop using an adjustable wrench. Use a putty knife to loosen any adhesive or caulk along the edges of the countertop and wall. With an extra set of hands holding onto one end of the countertop, use a pry bar to gently lift up on one side of the counter until it begins to separate from the base cabinet.
Countertop replacement is a great opportunity to give your bathroom a fresh new look. Consider DIY refinishing techniques such as painting or resurfacing for an affordable update. When choosing a new countertop material, keep in mind durability and maintenance requirements. Granite and quartz offer long-lasting durability but require occasional sealing, while solid surface materials like Corian are low maintenance but may scratch more easily than natural stone options. In our next section, we will discuss removing the sink before installing a new vanity cabinet.
Removing The Sink
As you may have already completed the task of removing the countertop, it is now time to move on to the next step and remove the sink. Before starting this process, make sure that all plumbing disconnections are completed. This will prevent any potential water damage to your bathroom flooring or walls.
Removing the sink will require a proper lift technique. Begin by detaching any clips or mounting brackets that hold the sink in place. Once these are removed, carefully lift the sink straight up from its base, ensuring that it is not tilted or twisted during removal. If possible, have a helper assist with lifting to avoid any strain on your back or arms.
Now that your sink has been successfully removed, it’s time to move on to the final step of removing the vanity cabinet itself. Stay tuned for our next section where we will guide you through this process with helpful tips and tricks for a smooth and successful removal.
Removing The Vanity Cabinet
Assessing space is the first step in removing a bathroom vanity cabinet. Before attempting to remove the cabinet, ensure that there is enough space to maneuver and remove the vanity without damaging surrounding walls or plumbing fixtures. This can be done by measuring the distance between the cabinet and any other objects in the bathroom.
Once it has been determined that there is sufficient space, homeowners should consider disposal options for the old vanity cabinet. Some options include donating it to a local charity or selling it online. If neither of these options is feasible, homeowners may need to dispose of the vanity through their local waste management service.
It’s important to note that removing a vanity cabinet can leave behind adhesive or caulk residue on both the cabinet and surrounding walls. In order to fully remove any remaining adhesive or caulk, research safe and effective removal techniques before beginning this process. Taking proper precautions will help avoid damage to surrounding surfaces and ensure a smooth transition into installing a new bathroom vanity cabinet.
Removing Any Remaining Adhesive Or Caulk
Removing any remaining adhesive or caulk is a crucial step in the process of removing a bathroom vanity cabinet. Although it may seem like an easy task, it can be difficult to remove all the adhesive and caulk without damaging the surrounding walls or flooring. However, with the right cleaning techniques and alternative adhesives, this step can be completed with ease.
Firstly, use a scraper tool to remove as much adhesive and caulk as possible from the surface of your walls or flooring. Be sure to wear gloves and eye protection while doing this task. Once you have removed as much as possible, use a cleaning solution that is designed to break down adhesives and caulk residue. Use a soft scrub brush to gently scrub away any remaining residue.
If there are still spots of adhesive or caulk left after using cleaning solutions, consider using alternative adhesives such as double-sided tape or construction adhesive. Double-sided tape is a quick and easy solution that can be used on small areas where there isn’t much weight-bearing pressure. Construction adhesive is more robust and can be used on larger areas where extra support is needed.
In conclusion, removing any remaining adhesive or caulk can be achieved using simple cleaning techniques and alternative adhesives. Keep in mind that safety should always come first when working with tools and chemicals. Now that you’ve successfully cleaned up after removing your bathroom vanity cabinet let’s move onto patching and repairing walls and flooring by following the next section topic!
Patching And Repairing Walls And Flooring
After removing a bathroom vanity cabinet, you may find that the walls and flooring behind it are damaged or have holes. Repairing drywall is a simple task that can be completed with some basic tools and materials. Start by cutting out any damaged sections of drywall using a utility knife. Then, measure and cut a new piece of drywall to fit the opening. Secure the new drywall in place with screws, making sure to countersink them slightly below the surface of the drywall. Apply joint compound over the seams and let it dry completely before sanding smooth.
Floor tile replacement can also be necessary after removing a bathroom vanity cabinet if any tiles were damaged during removal or if there are gaps in the flooring where the cabinet used to be. Begin by removing any old adhesive or grout around the damaged tiles using a chisel or putty knife. Then, use a tile cutter or wet saw to cut new tiles to size and lay them in place with fresh adhesive. Once all of the new tiles have been laid, allow them to set for at least 24 hours before grouting.
To finish preparing your bathroom for installation of a new vanity cabinet, you should take some time to evaluate any other repairs that need to be made. Check for water damage on walls or ceilings and repair as necessary. Replace any outdated fixtures or hardware such as faucets or towel racks. Finally, consider giving your bathroom a fresh coat of paint or adding some decorative touches like new wallpaper or artwork.
- Replace outdated light fixtures to modernize your bathroom.
- Add storage solutions like shelves or baskets under your sink for added organization.
- Consider upgrading your toilet for improved efficiency and water savings.
- Install a ventilation fan if you don’t already have one to improve air quality in your bathroom.
With these repairs completed, you’ll have a refreshed and updated space ready for your new vanity cabinet installation.
Preparing For Installation Of New Vanity Cabinet
After all that patching and repairing, it’s time to move on to the next step: removing that old, outdated bathroom vanity cabinet. It’s time for a change, and with the right tools and know-how, you can take care of this task in no time.
First things first – make sure you have the proper tools for the job. You’ll need a screwdriver or drill, a hammer, a putty knife, and perhaps a pry bar. Once you have your tools ready to go, it’s time to measure the space where your new vanity cabinet will go. Measuring tips include measuring both height and width, as well as accounting for any obstacles such as plumbing or electrical outlets.
Now that you’ve successfully removed your old bathroom vanity cabinet, it’s time to start thinking about choosing the right one for your space. Color schemes are important to consider; do you want something light and airy or dark and dramatic? Think about functionality too – do you need lots of storage or just enough for basic items? Take your time and explore different options until you find the perfect fit for your bathroom.
Choosing The Right Vanity Cabinet For Your Bathroom
When it comes to choosing the right vanity cabinet for your bathroom, there are many factors to consider. One of the most important things to think about is the style of the vanity. There are various styles available, including traditional, modern, transitional, and rustic. Each style has its own unique features and can create a different look and feel in your bathroom.
Another factor to consider when choosing a vanity is the material that it’s made from. Common materials include wood, metal, glass, and stone. Wood is a popular choice because it’s durable and can be painted or stained in various colors. Metal vanities are sleek and modern but may scratch easily. Glass vanities can make a small bathroom appear larger but require regular cleaning to prevent smudges and fingerprints. Stone vanities are elegant and long-lasting but tend to be more expensive than other materials.
Ultimately, the vanity you choose should suit your personal preferences and match the overall style of your bathroom. Consider factors such as size, storage capacity, and ease of maintenance before making your final decision. With so many options available on the market today, you’re sure to find a vanity that meets all of your needs and complements the design of your space.
When it comes time to install your new vanity cabinet, proper measurements are crucial for ensuring a successful installation. In the next section, we’ll discuss how to measure and mark out the area where your new vanity will go. By following these simple steps, you’ll be well on your way to enjoying a beautiful new bathroom addition that will serve you well for years to come.
Measuring And Marking For Installation
As if removing a bathroom vanity cabinet wasn’t already enough of a hassle, getting ready to replace it is no walk in the park either. It’s like starting from scratch all over again, but this time you have the added pressure of measuring accuracy and cutting precision. Real talk: this is not the time to wing it.
First things first, measure twice, cut once. This old adage has been around for decades for good reason- it’s true! Measure the dimensions of your new vanity cabinet before making any cuts or modifications. Pay close attention to the width and depth measurements since these will be critical when installing the new unit. And don’t forget about height! You don’t want to end up with a cabinet that doesn’t fit under your mirror or above your toilet.
Once you have your measurements down pat, it’s time to get cutting. Using a saw with fine teeth will help achieve clean and precise cuts, especially when working with wood or other materials that tend to splinter easily. Remember to take your time and work slowly- haste makes waste! Before long, you’ll be ready to install your brand new vanity cabinet and enjoy all the perks that come with it.
Installing The New Vanity Cabinet
- To begin the installation of the new vanity cabinet, it is important to first gather the required supplies, such as a screwdriver, pliers, a level, and a wrench.
- After the materials are acquired, it is necessary to disconnect the plumbing from the old vanity cabinet before removal can take place.
- To prevent water damage and mess, it is advisable to turn off the water supply, close the drain, and use a bucket to catch any water that may come out during the process.
- Once the plumbing is disconnected, the old vanity cabinet can be safely removed and the installation of the new vanity cabinet can begin.
Gather Supplies
Before installing the new vanity cabinet, it is important to gather all necessary supplies. Choosing the right vanity is crucial in achieving a cohesive and functional bathroom design. Consider the size, style, and material of the vanity to ensure it fits both your personal taste and practical needs. Measure the space where the vanity will be installed beforehand to avoid any sizing issues later on.
Once you have chosen the perfect vanity, it’s time to gather installation supplies. You will need basic tools such as a screwdriver, adjustable wrench, and leveler. Additionally, purchase plumbing supplies like a P-trap and water supply lines if they are not included with the vanity. It’s always better to have extra materials on hand just in case something goes wrong during installation.
Lastly, don’t forget about safety gear! Installing a new vanity cabinet can involve heavy lifting and sharp tools, so protect yourself by wearing gloves and safety glasses. With these essential supplies gathered beforehand, you’ll be ready to tackle installing your new bathroom vanity with ease.
Disconnect Plumbing
Before installing the new vanity cabinet, it is important to assess the available space and plan accordingly. Once you have chosen the perfect vanity, the next step is to disconnect plumbing. This is a crucial step that must be done properly to avoid any damage or leaks.
To begin, turn off the water supply to the sink. This can usually be done by turning off valves beneath the sink or shutting off the main water supply. It’s important to take necessary precautions during this step to ensure no water leaks out and causes damage. Use a bucket or towel to catch any excess water in case there are any leaks.
Next, disconnect any plumbing connections between the old vanity and your home’s plumbing system. This may include removing nuts and bolts connecting the P-trap, drain pipe, and water supply lines. Be sure to have a bucket handy for any excess water that may spill out during this process. Once all connections have been removed, carefully remove the old vanity from its position.
In conclusion, disconnecting plumbing is an essential step when installing a new vanity cabinet in your bathroom. By taking necessary precautions and following proper procedures, you can ensure that this step is done safely and effectively. With these tips in mind, you’ll be one step closer to creating a beautiful and functional bathroom space.
Reconnecting Plumbing Fixtures And Finishing Touches
After removing the bathroom vanity cabinet, it’s time to reconnect plumbing fixtures and add finishing touches to your space. Choosing finishes that complement your bathroom style is an important step in completing this project. Consider using materials like brushed nickel or chrome for a modern look, or brass or copper for a more traditional feel. Adding new lighting fixtures can also enhance the ambiance of your bathroom.
Replacing hardware is another way to give your bathroom a fresh look. This includes drawer pulls, cabinet knobs, and faucet handles. When choosing new hardware, make sure they fit properly and are installed securely. You don’t want loose hardware that will cause frustration every time you use it.
Finally, take the time to inspect everything before calling it complete. Double-check all plumbing connections to ensure there are no leaks or issues with water pressure. Make sure all fixtures are properly aligned and functioning as intended. By taking these steps, you’ll be able to enjoy your newly updated bathroom for years to come.
Conclusion
Removing a bathroom vanity cabinet may seem daunting, but it can be done with the right tools and preparation. Before beginning, assess the condition of your current vanity cabinet to determine if any repairs need to be made before removal. Gather all necessary tools and materials such as a screwdriver, wrench, and pliers. Shut off water supply and electricity to avoid any accidents during the removal process.
Next, remove drawers and doors from the cabinet and disconnect plumbing fixtures. Choose a new vanity cabinet that fits your bathroom’s style and size requirements. Measure and mark for installation before installing the new cabinet securely in place. Finally, reconnect plumbing fixtures and add any finishing touches such as caulking around the edges.
In conclusion, removing a bathroom vanity cabinet requires careful planning, attention to detail, and patience. By following these steps, you can successfully remove your old vanity cabinet without causing damage or injury. Remember that removing a vanity is like pulling out a tooth – it may be uncomfortable at first but will ultimately lead to improved function and aesthetics in your home.
Image Credits


