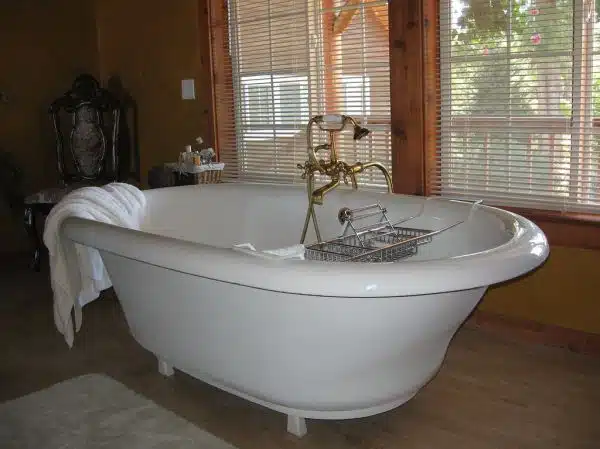
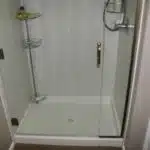
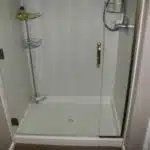
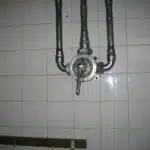
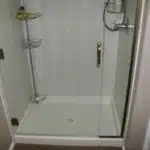
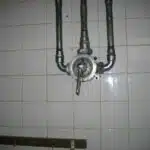
As a plumbing contractor, one of the most common requests we receive is to replace a bathtub with a shower. There are various reasons why homeowners make this choice, ranging from aesthetics to functionality. For instance, many people prefer showers because they are easier to clean and take up less space than bathtubs, making them ideal for small bathrooms or those with accessibility issues. However, the process of replacing a bathtub with a shower can be daunting for some homeowners who lack experience in plumbing and remodeling.
In this article, we will provide you with a step-by-step guide on how to replace your bathtub with a shower. We understand that this may seem like an overwhelming task, but it is not impossible. With proper planning and execution, you can transform your bathroom into a refreshing haven that meets your needs and preferences. Whether you are looking to update your bathroom or increase its functionality, our guide will equip you with the knowledge and skills needed to successfully replace your bathtub with a shower.
Assessing Your Bathroom Space
As a plumbing contractor, one of the most common requests I receive from my clients is to replace their bathtub with a shower. This not only maximizes space but also provides more convenience and accessibility for people who prefer taking quick showers over long baths. However, before jumping into the project, it is crucial to assess your bathroom space and consider design considerations.
Maximizing space means making the most of every inch in your bathroom. When replacing a bathtub with a shower, you need to think about how much space you have available and how you can use it efficiently. Consider installing corner showers or using glass walls instead of traditional curtains. Additionally, removing any bulky fixtures or cabinets that take up unnecessary space can also make your bathroom feel more spacious.
Design considerations are essential when creating a relaxing and functional shower area. Think about factors such as lighting, ventilation, and waterproofing to ensure that your shower area stays clean and dry while providing a comfortable experience. You may also want to consider adding features like built-in shelving or seating for added convenience.
When assessing your bathroom space for a new shower installation, remember to prioritize efficiency and comfort while considering design elements that will enhance its functionality. In the next section, we will discuss choosing the right shower system for your needs, which will depend on factors such as budget, style preference, and water pressure requirements.
Choosing The Right Shower System
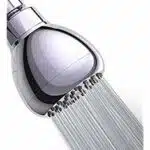
Having assessed your bathroom space, the next step in replacing your bathtub with a shower is to choose the right shower system. One of the key factors to consider is the showerhead options available. There are several types of showerheads, including handheld, fixed, rain, and massage showers. Each has its unique benefits and drawbacks, so it’s essential to choose one that suits your needs and preferences.
Another critical consideration when installing a shower is waterproofing techniques. This is especially important if you’re removing a bathtub from an existing bathroom. Moisture can quickly seep into walls and floors, leading to mold growth and costly water damage repairs. Proper waterproofing measures must be taken before installing your new shower to prevent future headaches.
In summary, choosing the right shower system involves selecting the best type of showerhead for your needs and ensuring proper waterproofing techniques are employed during installation. With these two factors addressed, you can move on to measuring and marking your shower area accurately. This step is crucial in ensuring that your new shower fits perfectly into the available space without compromising other features in your bathroom such as sinks or toilets.
Measuring And Marking Your Shower Area
To ensure a smooth and successful shower replacement project, proper measurement and marking of the designated shower area are essential. Accurate measurements help in choosing the right shower design, while markings provide precise guidelines for waterproofing techniques. To begin this process, gather your tools, including a measuring tape, level, and pencil.
Next, identify the location of your plumbing fixtures to determine where your new shower will be placed. Once you have established this location, use the level to ensure that the area is even and perpendicular to the wall studs. Using a pencil, mark along each side of the studs to indicate where the shower walls will be installed.
To create a clear visual representation of your new shower area, consider using tape to outline each wall’s position on the floor. This step helps identify any potential obstacles or issues that may arise during installation. Additionally, it allows you to visualize how much space you will have inside the enclosure.
Now that you have accurately measured and marked your designated shower area, it’s time to move on to removing your bathtub. But before we get into that step, let’s discuss some important considerations for this process.
Removing Your Bathtub
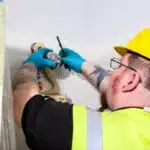
Before you begin removing your bathtub, it is important to consider safety precautions. This project can be dangerous due to the weight of the tub and the potential for water damage. Make sure to turn off all water sources and electricity before beginning the removal process. Additionally, wear gloves, eye protection, and closed-toe shoes to protect yourself from any sharp edges or debris.
Once you have taken necessary safety measures, you can begin removing your bathtub. The first step is to disconnect all plumbing connections by turning off the water supply and unscrewing any pipes connected to the tub. Next, remove any screws or nails securing the tub in place using a pry bar or hammer. Lift the tub out of place with assistance from another person as it can be heavy.
After removing your bathtub, it is important to dispose of it properly. Many cities have specific guidelines for disposing of large items like bathtubs. Check with your local waste management facility for disposal options such as curbside pickup or drop-off locations. By following these steps for bathtub removal safety and proper disposal, you can successfully move onto inspecting your plumbing and drainage in preparation for installing a shower in its place.
Table: Disposal Options
| Disposal Method | Pros | Cons |
|---|---|---|
| Curbside Pickup | Convenient | May require additional fees |
| Drop-off Locations | Environmentally friendly | Requires transportation |
| Private Disposal Companies | Flexible scheduling | Can be costly |
Inspecting Your Plumbing And Drainage
- First and foremost, it is essential to inspect the plumbing and drainage system for potential leaks.
- Careful inspection of the drain and its connections should be carried out to identify any faults.
- Additionally, the water pressure of the plumbing system should be assessed to determine if it is suitable for the replacement of the bathtub with a shower.
- By checking the fittings and connections, any potential issues can be detected before beginning any work.
- Careful consideration should be taken when inspecting and assessing the drainage system as any faulty components may need to be replaced.
- An overall assessment of the plumbing and drainage system is necessary to ensure that the bathtub is replaced with a shower in a safe and efficient manner.
Checking For Leaks
When it comes to inspecting your plumbing and drainage system prior to replacing your bathtub with a shower, checking for leaks is crucial. Common leaks can occur in various parts of the pipes such as joints, valves, and connections. As a plumbing contractor, I recommend thoroughly examining all components for any signs of water damage or rust. Even minor leaks can cause major problems down the line, so it’s important to address them as soon as possible.
If you do encounter leaks during your inspection, repairing them should be a top priority. Ignoring leaks can lead to increased water bills and potentially serious damage to your home’s foundation. As a contractor who values quality workmanship, I highly advise against DIY repairs unless you have experience in plumbing work. It’s best to call a professional who can accurately assess the situation and provide efficient solutions.
In conclusion, identifying and repairing leaks is an essential step before replacing your bathtub with a shower. A thorough inspection by a licensed plumber can help prevent future issues and ensure the safety and longevity of your new shower installation. Don’t hesitate to reach out for professional assistance when it comes to maintaining the integrity of your plumbing system.
Locating The Drain
Another crucial aspect of inspecting your plumbing and drainage system before installing a shower is locating the drain. This involves checking the compatibility of your existing drain with the new shower base, as well as accessing the pipes to ensure they are in good condition. As a plumbing contractor, I recommend measuring the dimensions of your existing drain and comparing them to those of the shower base to determine if any modifications need to be made.
Locating the drain also involves examining the pipes for any signs of damage or wear and tear. The condition of these pipes can affect the performance and functionality of your new shower, so it’s important to address any issues before installation. As a professional plumber, I have seen many cases where old or corroded pipes have caused serious problems for homeowners down the line. By identifying and addressing these issues early on, you can avoid costly repairs in the future.
In conclusion, locating the drain is a critical step in inspecting your plumbing and drainage system prior to replacing your bathtub with a shower. By checking compatibility and accessing pipes, you can ensure that your new shower installation will function properly and last for years to come. As always, it’s best to consult with a licensed plumber for expert assistance in maintaining the integrity of your plumbing system.
Assessing Water Pressure
Another crucial aspect of inspecting your plumbing and drainage system before installing a shower is assessing the water pressure. As a plumbing contractor, I recommend checking the water pressure in your home to ensure that it is adequate for a new shower installation. Low water pressure can lead to poor shower performance and can even damage your plumbing system over time.
To assess the water pressure, you can use a variety of tools such as a pressure gauge or flow meter. These tools will help you determine if the water pressure is within the acceptable range for a new shower installation. If your water pressure is low, there are several tips that you can follow to improve it, such as cleaning or replacing aerators and valves.
Assessing the water pressure is an essential step in inspecting your plumbing and drainage system before installing a new shower. By ensuring that your water pressure is adequate, you can avoid poor shower performance and potential damage to your plumbing system. As always, it’s best to consult with a licensed plumber for expert assistance in maintaining the integrity of your plumbing system and ensuring that your new shower installation functions properly.
Installing Your Shower Base
After inspecting your plumbing and drainage, you can now proceed with the installation of your shower base. There are various factors to consider when choosing the right shower base material for your bathroom. These include durability, maintenance requirements, style, and cost. Your choice will depend on your personal preferences and budget.
Once you have chosen the appropriate material for your shower base, it is time to waterproof the area where you will be placing it. Proper waterproofing techniques are essential to prevent water damage and mold growth in your bathroom. This process involves applying a waterproof membrane over the subfloor before installing the shower base. You can also apply silicone caulk around the edges of the base to seal any gaps.
Another important aspect of preparing your bathroom for a new shower is preparing the walls. This involves removing any tiles or other materials that are in place and repairing any damaged areas. Once this is done, you can install new waterproofing materials such as cement board or a vapor barrier over the walls. This will help to protect against moisture damage and ensure that your new shower is properly installed and functional.
- When choosing a shower base material, consider factors such as durability, maintenance requirements, style, and cost.
- Proper waterproofing techniques are essential to prevent water damage and mold growth in your bathroom.
- In addition to installing a waterproof membrane under your shower base, apply silicone caulk around its edges to seal any gaps.
With these steps completed, you are now ready to move on to preparing your shower walls for tile installation.
Preparing Your Shower Walls
After removing the bathtub, it is crucial to prepare your shower walls before installing new ones. Proper preparation involves waterproofing techniques to ensure that your shower area remains safe and free from water damage. Waterproofing materials such as cement boards, liquid membranes, and sheet membranes are commonly used to protect the walls from moisture.
Once you have decided on the type of waterproofing technique to use, you can choose from a variety of tile options for your shower walls. Popular tile choices include ceramic, porcelain, glass, and stone tiles that come in various colors and styles. The tiles should be selected based on their durability, slip-resistance, ease of maintenance, and aesthetic appeal.
Proper waterproofing techniques and tile selection are essential in ensuring that your shower area is functional and visually appealing. With these preparations done correctly, you can move on to installing your shower walls with confidence knowing that they will withstand years of use without any water damage or structural issues.
Installing Your Shower Walls
- When replacing a bathtub with a shower, it is important to carefully choose the materials for the shower walls.
- Accurate measurements should be taken and the walls should be cut accordingly.
- Fixtures such as shower valves, showerheads and grab bars should be installed as per manufacturer’s instructions.
- Waterproofing and sealing of the walls should also be taken into consideration.
- It is important to use the right tools when installing the shower walls.
- The walls should be installed in accordance with building codes and local regulations.
Choosing Materials
When it comes to installing your shower walls, choosing the right materials is crucial. As a plumbing contractor, I always consider the cost comparison and durability factors when recommending materials to my clients. One popular option is acrylic, which is affordable, lightweight, and easy to install. Acrylic also comes in a variety of colors and patterns, making it a versatile option for any bathroom design. However, it may not be as durable as other materials and can scratch easily.
Another option for shower walls is tile. Tile is known for its durability and can last for many years with proper maintenance. It also provides a high-end look that many homeowners desire. The cost of tile can vary depending on the type of tile chosen, but it generally falls in the mid-price range. However, installing tile can be more time-consuming than other options and may require professional installation.
Lastly, if you’re looking for an eco-friendly option, consider using natural stone such as marble or granite for your shower walls. These materials are durable and long-lasting while providing a luxurious look. However, they do come with a higher price tag than other options and require regular sealing to prevent staining or discoloration over time. Ultimately, each material has its own advantages and disadvantages that should be carefully considered before making a final decision on what to use for your shower walls.
Measuring And Cutting
Now that we have discussed the different materials available for shower walls, the next step is to measure and cut these materials to fit your bathroom. Measuring accurately is crucial in ensuring that your shower walls fit perfectly and look seamless. As a plumbing contractor, I always advise my clients to use precise cutting tools such as tile cutters or circular saws depending on the material selection. It’s important to be cautious when using these tools and follow safety guidelines to avoid any accidents.
When measuring and cutting your shower walls, it’s essential to consider any fixtures such as showerheads, faucets, or soap dishes that will be installed. These fixtures will impact the placement of your cuts and need to be accounted for in the measurements. Additionally, if you’re working with tiles, you’ll want to plan out your layout beforehand so that any cuts are made where they will be least noticeable.
The process of measuring and cutting may seem daunting at first, but with careful planning and precision tools, it can be done with ease. Taking the time to accurately measure and cut your materials will ensure a beautiful finished product that fits seamlessly into your bathroom design. Remember to take safety precautions when using cutting tools and plan ahead for any fixtures or layouts needed for a successful installation of your shower walls.
Installing Fixtures
After measuring and cutting your shower walls, the next step is to install any fixtures that will be included in your design. This can include showerheads, faucets, soap dishes, or any other accessories you plan on using. It’s important to consider these fixtures during the planning phase to ensure they’re installed in the proper location and don’t interfere with any waterproofing techniques.
When installing fixtures, it’s essential to follow manufacturer instructions carefully. This will ensure that everything is installed correctly and prevent any leaks or damage in the future. If you’re unsure of how to install a fixture properly, don’t hesitate to contact a professional plumber for assistance.
Tile options are especially popular for shower walls because they provide a durable and waterproof solution that is also aesthetically pleasing. When installing tile around fixtures, it’s important to make precise cuts so that everything fits snugly together. Additionally, make sure any grout lines are sealed properly using waterproofing techniques to prevent moisture from seeping in between tiles. By taking these steps, you’ll have a seamless and functional shower wall installation that will last for years to come.
Connecting Your Plumbing
Proper plumbing compatibility is crucial when replacing a bathtub with a shower. Before you begin, make sure that your existing plumbing system can accommodate the new shower fixtures. You may need to reroute or update your pipes to ensure that water flows correctly and at the right pressure. This will also affect your budget as additional materials and professional help may be required.
When it comes to installing your shower, you must decide whether to do it yourself or hire a professional plumber. While DIY installation may save you money, it’s important to consider the complexity of the project and your own skill level before deciding. Keep in mind that improper installation can cause leaks or damage to your home, which may end up costing more in repairs down the road. Additionally, water pressure considerations should be taken into account when choosing a showerhead and valves for optimal performance.
Remember that replacing a bathtub with a shower involves several steps beyond just removing the tub itself. Once you have completed the necessary plumbing updates and decided on whether to DIY or hire professional help, it’s time to move on to installing your shower fixtures. From selecting the right showerhead and valves to positioning them correctly for optimal water flow, attention to detail is key when creating a comfortable and functional shower space in your bathroom.
Installing Your Shower Fixtures
Now that you have removed your bathtub and have prepared the area for a new shower, it is time to install your shower fixtures. This step involves installing the showerhead, faucet handles, and other necessary plumbing components. These fixtures must be installed properly to ensure proper water flow and functionality.
Before choosing your showerhead options, it is important to consider factors such as water pressure, style, and personal preference. There are various types of showerheads available in the market today, including fixed-mount showerheads, handheld showerheads, rain showerheads, and body spray systems. Each type offers different features and benefits depending on your needs.
Waterproofing techniques are also essential when installing a new shower. This will help protect your walls from water damage and mold growth. You can use waterproof membranes or cement boards to create a barrier between the walls and the water source. It is best to consult with a professional plumber to ensure that all waterproofing measures are properly executed.
List of items:
- Consider water pressure, style, and preference when choosing showerhead options.
- Fixed-mount, handhelds, rain showers, and body sprays offer different features.
- Use waterproof membranes or cement boards when installing a new shower.
- Consult with a professional plumber for proper execution of waterproofing measures.
As a plumbing contractor committed to quality service delivery, we understand how important it is to provide our clients with excellent workmanship that meets their unique needs. With this in mind, we recommend that you take your time when selecting your desired fixtures for your new shower space. Remember to choose high-quality materials that will last long without compromising on functionality.
In the next section about adding finishing touches to your newly installed shower space, we will discuss how best you can improve its aesthetic appeal while making it more functional for everyday use. Let us now move forward into this exciting phase of the project!
Adding Finishing Touches
- Installing accessories for the new shower requires precision to ensure a secure fit, and any necessary hardware should be included in the package.
- Caulking of the shower area is essential to prevent water damage and to ensure a watertight seal.
- Grouting should be applied to seal the seams between the tiles for a professional look and to prevent the growth of mold and mildew.
- Further, tiling may be necessary to ensure a proper fit for the shower wall and to ensure the shower is properly waterproofed.
Installing Accessories
Choosing and installing the right accessories is crucial in converting a bathtub into a shower. The accessories you choose can determine the overall look and feel of your new shower. It is important to select accessories that match your personal style and complement the design of your bathroom. Some popular options include showerheads, faucets, soap dishes, and towel bars.
When it comes to maintaining accessories, it is essential to keep them clean and free from soap scum and hard water stains. Regular cleaning will not only keep your accessories looking new but also help prolong their lifespan. Avoid using abrasive cleaners or scrubbers as they may damage the finish of your accessories. Instead, use non-abrasive cleaners or gentle soap solutions to ensure that your fixtures remain in pristine condition.
In conclusion, choosing and maintaining the right accessories for your shower is an important part of converting a bathtub into a shower. By selecting fixtures that match your personal style while complementing the design of your bathroom, you can create a beautiful and functional space. Additionally, by regularly cleaning your accessories with gentle products, you can ensure that they remain in excellent condition for years to come.
Caulking And Grouting
When it comes to adding finishing touches to a shower conversion project, caulking and grouting play a significant role in ensuring the durability and appearance of the new shower. Common mistakes during this process can lead to water leaks and damage, which can be costly to repair. As a plumbing contractor, I recommend using high-quality caulk and grout products that are specifically designed for bathroom use.
One common mistake homeowners make is using cheap or inappropriate caulking materials. This can lead to cracks or gaps that allow water to seep through, causing damage to walls and floors. To avoid such issues, it’s best to use silicone-based caulk that is resistant to mold and mildew growth. Additionally, choosing a color that matches your tiles or fixtures will give your new shower a polished look.
Similarly, using low-quality grout can result in discoloration, cracking, or even crumbling over time. It’s important to choose the best products available when grouting your new shower. Opt for epoxy-based grout as it is more durable than traditional cement-based grout and less prone to staining from soap scum or hard water deposits.
In summary, taking care of the small details like caulking and grouting is crucial in creating a beautiful and functional shower after converting a bathtub. By avoiding common mistakes and using top-quality products designed for bathroom use, you can ensure that your new shower looks great while also being durable enough to stand up against daily wear-and-tear.
Testing Your Shower
As a plumbing contractor, it is important to test your newly installed shower thoroughly before handing it over to the client. Just like any other home improvement project, testing your shower ensures that everything is functioning as expected and prevents future headaches for both you and the client. To make testing more enjoyable, think of it as giving your new shower its first run around the block.
One crucial aspect of testing your shower is checking the water pressure. You want to ensure that there is enough water pressure to give a satisfying shower experience without being too strong or weak. There are different ways to test water pressure, but one of the simplest methods is using a pressure gauge. Connect the gauge to an outdoor faucet, then turn on the water and check if the reading falls within 45-55 PSI range, which is ideal for most showers.
Another important aspect to consider in testing your shower is determining what kind of showerhead options will work best with your setup. Some common types include fixed-mount, handheld, rain showerheads, and body sprays. Choose a style that meets the needs of your client while also ensuring it can be installed properly in their bathroom. Additionally, make sure to check for any leaks during installation to avoid potential damages.
Now that you have tested your new shower and confirmed everything works properly, it’s time for clean up! Cleaning up after yourself is an essential part of any home improvement project and shows respect for both the client’s property and time. Make sure all debris is removed from the work area and dispose of it properly. A clean work area leaves a good impression on clients and promotes a positive working relationship between you and them.
Cleaning Up
After testing your shower, it’s time to clean up the work area. This is an important step in any home renovation project, as it ensures that your newly installed shower remains pristine and free from debris. Deep cleaning the entire bathroom is recommended, especially if there was any dust or debris generated during the installation process.
Maintenance tips are also essential to ensure that your new shower stays in good condition for years to come. Regular cleaning of the shower walls and glass doors with a mild cleaner will prevent soap scum and hard water stains from building up. It’s important to also regularly inspect the plumbing fixtures and make sure they are functioning properly. Any leaks or drips should be addressed immediately to prevent costly water damage.
In addition to regular maintenance, troubleshooting common issues can help you avoid expensive repairs down the line. Some common problems with showers include low water pressure, clogged drains, and leaky faucets. These issues can often be resolved by cleaning out the drain or replacing a worn-out washer, but it’s best to consult with a professional plumber if you’re unsure about how to fix them yourself.
Markdown list:
Here are three ways you can maintain your new shower:
- Regularly clean the walls and glass doors
- Inspect plumbing fixtures for leaks or drips
- Troubleshoot common issues promptly , and consult with a professional plumber if you’re unsure about how to fix them yourself.
Troubleshooting Common Issues
When replacing a bathtub with a shower, it is important to be aware of common issues that may arise during or after the installation process. Waterproofing concerns are one of the most common issues that homeowners face when installing a new shower. Water can seep through cracks and gaps in the floor or walls, leading to moisture damage and mold growth. To prevent such issues, it is crucial to ensure that all surfaces are properly waterproofed before installing the new shower.
Another issue that can arise during a bathtub-to-shower conversion is uneven flooring. If the old bathtub was installed on an uneven surface, there may be gaps or bumps in the floor where the new shower base will be installed. This can cause water pooling or drainage problems, which can lead to more serious issues down the line. To avoid this problem, it is best to level out the flooring before installing the new shower base.
To troubleshoot these common issues, it is important to first identify the root cause of each problem. For waterproofing concerns, check for any visible cracks or gaps in the walls and floors around your shower area. Then apply an appropriate waterproofing sealant to fill any gaps and prevent water from seeping through. For uneven flooring issues, consider using leveling compounds or shims to even out any bumps or dips in your existing flooring.
Potential discussion ideas for Troubleshooting Common Issues:
| Issue | Cause | Solution |
|---|---|---|
| Waterproofing concerns | Cracks or gaps in walls/floors | Apply waterproof sealant |
| Uneven flooring | Old tub installed on an uneven surface | Level out flooring before installation |
If you are unable to address these issues on your own, seeking professional help may be necessary. A plumbing contractor can provide expert advice on how to fix common problems and ensure that your new shower is properly installed and functional for years to come. Remember that addressing these common issues early on can save you time and money in the long run, so don’t hesitate to troubleshoot any problems that arise during your bathtub-to-shower conversion project.
Seeking Professional Help
After attempting to troubleshoot common issues with your bathtub, you may have concluded that it’s time to replace it with a shower. While this may seem like an easy task to tackle on your own, it’s important to consider the potential risks and costs associated with DIY projects. As a plumbing contractor, I highly recommend seeking professional help when it comes to replacing a bathtub with a shower.
One of the biggest challenges of DIY bathtub replacement is finding contractors who are reliable, skilled, and affordable. It’s not uncommon for homeowners to hire inexperienced or unlicensed contractors who end up causing more harm than good. Additionally, you’ll need to ensure that all necessary permits are obtained and that the work complies with local building codes. All these factors can add up quickly in terms of time and money.
When weighing the costs between DIY and professional bathtub replacement, homeowners often underestimate the potential expenses associated with DIY projects. In addition to materials and tools, there may be unforeseen costs such as damaged pipes or walls that need repair. Hiring a professional not only ensures quality workmanship but also gives you peace of mind knowing that any issues will be addressed promptly without additional costs.
Ultimately, while DIY projects can be fulfilling for some homeowners, replacing a bathtub with a shower is best left to professionals who have the experience and expertise necessary for proper installation. By finding reputable contractors and comparing their prices, you can save yourself time and money in the long run while ensuring high-quality results that will last for years to come.
Conclusion
Assessing the space available in your bathroom is crucial before you begin replacing your bathtub with a shower. Consider the layout and size of your bathroom, as well as any obstacles that may impact installation. Once you have determined the appropriate shower system for your needs, measure and mark out the area where the shower will be placed. Removing your bathtub can be a challenging task, but ensure that all plumbing and drainage systems are inspected before proceeding.
Testing your shower is an essential step to ensure that it functions properly. In case of issues such as leakage or drainage problems, troubleshoot with patience and care. If you encounter problems beyond your expertise, consider seeking professional help from licensed plumbers who can provide expert guidance and support.
As a plumbing contractor, we recommend careful planning and execution when replacing a bathtub with a shower. It is important to choose the right system for your bathroom space, inspect plumbing and drainage systems thoroughly, test your shower regularly to avoid potential issues, and seek professional help if necessary. Proper installation of a new shower not only enhances the functionality of your bathroom but also adds value to your property investment.
Image Credits
- “giant bathtub” by Erica Nicol (featured)

