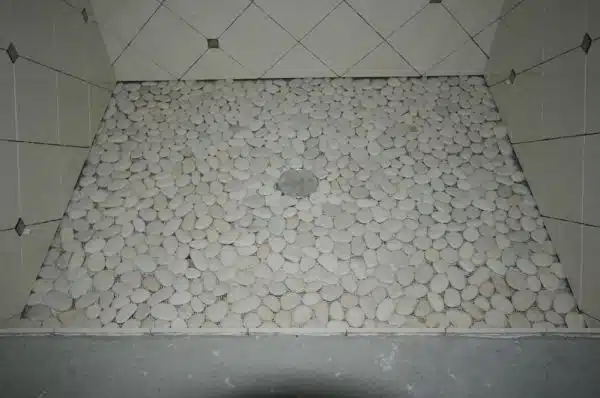
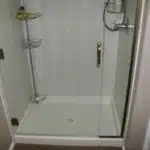
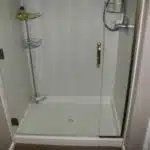
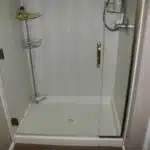
The process of building a shower pan can be intimidating for many homeowners. However, with the right tools and knowledge, it is possible to create a high-quality shower pan that meets your specific needs. As an expert in DIY shower pan installation, I have developed a step-by-step guide to help you build a custom shower pan that fits your bathroom design and budget.
In this article, I will share my knowledge and experience on how to build a DIY shower pan. From selecting the right materials to preparing the surface and creating a waterproof barrier, every step is critical for ensuring a successful installation. Whether you are remodeling your bathroom or starting from scratch, this guide will provide you with practical tips and techniques that will help you achieve professional-looking results. So grab your tools and let’s get started!
Tools And Materials Needed
Acquiring the right tools and materials is crucial in building a DIY shower pan. One of the most common mistakes that people make is not having all the necessary equipment before starting the project. This can lead to delays, additional expenses, and even substandard results.
To avoid this, it’s important to make a list of everything you need before beginning your DIY shower pan project. Some essential tools include a circular saw, drill, measuring tape, level, notched trowel, utility knife, and rubber gloves. Additionally, you’ll need materials such as cement backer board, waterproof membrane liner or paint-on waterproofing membrane, grout, tiles or other finish materials.
Cost considerations are also important when planning your DIY shower pan project. While it may seem like a cheaper alternative than hiring a professional contractor, there are still costs involved in purchasing tools and materials. Make sure to research prices beforehand and compare them with what professionals charge for their services. This will give you an idea of how much money you can save by doing it yourself while ensuring that quality is not compromised.
By having all the necessary tools and materials before starting your DIY shower pan project and keeping cost considerations in mind during planning stages, you can ensure that your bathroom renovation will be a success. In the next section, we’ll discuss how to measure and plan your shower pan layout effectively.
Measuring And Planning Your Shower Pan
Choosing a location should consider factors such as the proximity to existing plumbing systems, drainage, and the amount of available space. Measuring the space of the shower pan area is essential to determine the size and shape of the pan, as well as the necessary drain placement. Calculating the drain placement requires accurate measurements to ensure it is placed in the center of the pan for proper drainage. Estimating the materials needed should include the type of materials necessary for the pan, drain, and other necessary components to ensure the project is completed efficiently.
Choosing A Location
Designing and building your own shower pan can be a fulfilling and cost-saving DIY project. However, before you even begin measuring and planning for your shower pan, it’s important to carefully choose the location of your new shower. This decision may seem simple, but there are several design considerations and cost factors that need to be taken into account.
One of the most important design considerations when choosing a location for your DIY shower pan is the proximity to existing plumbing. It’s much easier and less expensive to install your new shower in a location that already has plumbing installed than it is to run new pipes from scratch. Additionally, think about the overall layout of your bathroom and how the placement of your new shower will affect traffic flow and functionality.
Cost factors are also an important consideration when choosing a location for your DIY shower pan. If you’re planning on moving or removing walls or other fixtures to make room for your new shower, this will add significant costs to your project. Additionally, consider any necessary permits or inspections that may be required depending on where you live. By carefully weighing these design considerations and cost factors, you can choose the perfect location for your DIY shower pan without breaking the bank.
Measuring The Space
Now that you’ve chosen the perfect location for your DIY shower pan, it’s time to take accurate measurements of the space. Measuring accuracy is essential when it comes to building a shower pan that fits perfectly in your bathroom. One of the most common mistakes people make is assuming that all walls and corners are perfectly straight and square. However, this is rarely the case, especially in older homes. Taking precise measurements will ensure that your shower pan fits snugly against all walls and corners.
If you’re not confident in your measuring skills, you may want to consider hiring a professional to measure the space for you. While this will add to the overall cost of your project, it can save you time and frustration down the line. A professional will have the tools and expertise needed to take precise measurements, which will help ensure a successful DIY installation.
Once you’ve taken accurate measurements of the space, it’s important to create a detailed plan for your shower pan installation. This should include sketches or diagrams of where each component of your shower pan will go, as well as any necessary cuts or adjustments that need to be made. By creating a solid plan before starting your DIY installation, you can avoid costly mistakes and ensure that everything goes smoothly from start to finish.
Choosing The Right Drain Assembly
After measuring and planning out your shower pan, the next step is to select the right drain assembly for your DIY project. It’s important to choose a drain assembly that is compatible with your shower pan design and size. Make sure to measure the diameter of the drain hole in your shower floor accurately and match it with the corresponding size of the drain assembly.
When selecting a drain assembly, consider its material, style, and functionality. There are different types of drain assemblies available on the market such as tile-in drains, center drains, linear drains, and more. Choose a style that complements your bathroom design and meets your needs. Don’t forget to check if the drain assembly comes with an adjustable height feature which can be helpful when installing it on uneven subfloors.
Selecting the right size of the drain assembly is crucial for proper drainage in your shower area. A larger diameter will allow water to flow quickly without clogging or overflowing while a smaller diameter may cause slow drainage or blockages. Additionally, ensure that you have enough clearance space around the drain assembly to make it easy for cleaning and maintenance purposes. Once you’ve chosen a compatible and correctly sized drain assembly, you’re ready to move onto preparing your subfloor for installation.
Transition: Now that you have selected the ideal drain assembly for your DIY shower pan project let’s move forward into preparing your subfloor before installation begins.
Preparing Your Subfloor
Before installing a shower pan, it is important to prepare the subfloor properly. This involves leveling and reinforcing the area where the pan will be placed. Begin by removing any debris or old flooring material from the subfloor, making sure it is completely clean before starting.
Next, check if your subfloor is level. If not, use a self-leveling compound or other leveling materials to ensure a flat surface for the shower pan. Reinforce weak spots in the subfloor with additional wood supports or plywood sheets as needed.
Once the subfloor is leveled and reinforced, you can move on to waterproofing techniques. Apply a layer of waterproof membrane over the entire subfloor area where the shower pan will be installed, overlapping at joints and edges. This will prevent water from seeping through and causing damage to your home’s structure. With proper subfloor preparation and waterproofing techniques in place, you’ll be ready to move onto installing the drain assembly for your new DIY shower pan.
Installing The Drain Assembly
As we move forward in the process of building a DIY shower pan, it’s time to focus on installing the drain assembly. This is a crucial step as it ensures that water flows out of the shower pan and into the drain without any leakage. To begin with, we need to install the drain flange. This can be done by applying a layer of plumber’s putty around the underside of the flange and inserting it into the hole in your subfloor.
Once you have installed the drain flange, it’s time to connect the drain pipe. It’s important to ensure that this connection is tight and secure so that there are no leaks. You can do this by using PVC cement to attach a short piece of pipe to the bottom of your drain, followed by connecting it to your existing plumbing using a coupling or elbow joint. Once you have completed this step, double-check that everything is connected correctly before moving on.
Now that you have installed your drain assembly, you can move onto creating a sloped base layer for your shower pan. This will ensure that water flows towards the drain and doesn’t pool in any one area. To create this sloped base layer, you will need to mix up some mortar and spread it over your subfloor, sloping it downwards towards your drain assembly. Be sure to follow specific instructions for mixing and applying mortar as each product may have slightly different requirements. With these steps completed, we’re one step closer to having our very own DIY shower pan!
Creating A Sloped Base Layer
Measuring: Accurately measuring all relevant dimensions is the first step in creating a sloped base layer for a diy shower pan. Cutting: Once the necessary measurements have been taken, the next step is to cut the materials, such as concrete board, to the correct size. Installing: The final step in creating a sloped base layer is to install the materials using appropriate adhesives and fasteners. It is important to ensure that the entire surface is level to ensure a successful installation.
Measuring
Measuring is an essential part of creating a sloped base layer for your DIY shower pan. Accuracy in measuring is crucial to ensure that water flows correctly towards the drain and prevents any pooling or leakage. Before starting, you must determine the size and shape of the shower pan required for your bathroom. It’s essential to measure accurately, as even small mistakes can cause significant problems later on.
One common mistake when measuring for a shower pan is not taking into account the thickness of the tile or other materials that will be used to finish the floor. Failing to do so can result in an incorrect slope, leading to water pooling due to lower height at the edges. Additionally, it’s essential to measure multiple times and verify each measurement before cutting any materials.
To ensure accuracy when measuring, use a straightedge and level to confirm that all measurements are consistent and level throughout. Take measurements from multiple points in the bathroom to ensure that there aren’t any irregularities in the floor surface that could cause issues with drainage. Remember always to measure twice and cut once; this simple rule will save you time and money by preventing mistakes that require costly repairs.
In conclusion, measuring accurately is critical when creating a sloped base layer for your DIY shower pan. Avoid common mistakes by accounting for tile thicknesses and verifying measurements using a straightedge and level from multiple points in your bathroom. Taking these steps will help ensure proper drainage, preventing issues such as water pooling or leaks later on down the line.
Cutting
Creating a sloped base layer for your DIY shower pan requires accurate measurements and precise cutting techniques. Cutting is an essential step in the process, as it involves shaping materials to fit your bathroom’s unique dimensions. To ensure success, you must use the right tools and techniques while avoiding common mistakes that can lead to costly repairs down the line.
When cutting materials for your shower pan, it’s crucial to use the correct tools. A circular saw or tile saw works great for cutting cement board or other thick materials. For smaller cuts, a jigsaw or handsaw may be sufficient. Always wear protective gear like goggles and gloves when cutting to prevent injuries.
One common mistake when cutting materials is not accounting for thickness variations caused by tile or other finishing materials. Failing to do so can result in uneven edges that affect drainage flow, leading to water pooling or leaks in your bathroom. Always double-check measurements before making any cuts to ensure accuracy and prevent costly mistakes.
As a DIY shower pan installation expert, I recommend taking extra care when measuring and cutting materials for your project. By using the right tools and techniques while avoiding common mistakes, you can ensure proper drainage flow and prevent any issues from arising down the line. Remember always to measure twice and cut once, take safety precautions when cutting, and account for thickness variations caused by finishing materials.
Installing
Now that you have successfully created a sloped base layer for your DIY shower pan, the next step is installing it. Installing a shower pan requires careful attention to detail and the use of appropriate tools. You will need a drain assembly, waterproofing membrane, and mortar mix to install the base layer properly.
Before installing the base layer, ensure that the floor is clean and level. Apply a layer of mortar mix evenly on the floor, covering any gaps or holes that may cause water leakage. Use the trowel to spread it evenly, making sure that it’s not too thick or too thin. Once done, place the waterproofing membrane over the mortar mix and press it down firmly.
Next, cut out a hole on the waterproofing membrane where you want your drain assembly to be installed. Install your drain assembly following the manufacturer’s instructions carefully. Finally, apply another layer of mortar mix over the waterproofing membrane and around your drain assembly. Smooth it out with a trowel and let it dry completely. The cost considerations when installing a shower pan vary depending on factors such as materials used and labor costs if hiring an expert. However, by following these steps with precision, you can save money in costly repairs down the line while ensuring proper drainage flow in your bathroom.
Waterproofing Your Shower Pan
One of the most important steps in building a DIY shower pan is waterproofing. Without proper waterproofing techniques, your shower pan will be prone to leaks and water damage. To avoid these issues, it’s essential to take the time to properly waterproof your shower pan.
There are several different waterproofing techniques that you can use when building a DIY shower pan. Some of the most common methods include using a liquid membrane or a sheet membrane. Regardless of which method you choose, it’s crucial to follow the manufacturer’s instructions carefully to ensure that your shower pan is properly sealed.
Common mistakes to avoid when waterproofing your shower pan include failing to adequately prepare the surface before applying the membrane and not allowing enough time for the membrane to dry before installing tile or other materials on top. By avoiding these mistakes and following proper waterproofing techniques, you’ll be able to create a durable and leak-proof shower pan that will stand up to regular use.
With your shower pan fully waterproofed, you’re now ready to move on to installing the shower curb. This step is essential for keeping water contained within your shower area and preventing leaks from occurring. In the next section, we’ll discuss everything you need to know about installing a high-quality and reliable shower curb.
Installing The Shower Curb
After waterproofing your shower pan, the next step is to install the curb. The shower curb serves as a barrier to prevent water from escaping onto the bathroom floor. Different curb styles include wood, tile, and stone. Wood curbs are not recommended for showers since they tend to rot over time due to constant exposure to moisture. Tile and stone curbs are more durable, but they require skilled labor during installation.
Before installing the curb, ensure that your shower pan slopes towards the drain to allow water to flow out easily. You can then proceed to measure and cut the curb according to your desired length and height. Once you have cut the pieces, align them on top of the shower pan and secure them in place using mortar or adhesive.
When it comes to waterproofing techniques for your shower curb, you can use either a liquid membrane or a sheet membrane. A liquid membrane requires multiple coats of waterproofing material applied with a brush or roller. On the other hand, sheet membranes are pre-cut and easy to install since they only require adhesive application before placing them on top of the curb.
Now that you have installed and waterproofed your shower curb, it’s time for pouring the final layer of mortar before tiling. This layer should be around 1/4 inch thick and should be smoothed out evenly using a trowel. Wait for this layer of mortar to dry completely before proceeding with tiling your shower walls and floor. Remember that proper installation is crucial in ensuring that your DIY shower pan will last long without any leaks or damages.
Pouring The Final Layer Of Mortar
Once you have completed the first two layers of mortar, it’s time to pour the final layer. It’s important to ensure that the consistency of your mix is just right. You don’t want it too wet or dry – aim for a mixing consistency similar to damp sand.
When pouring the final layer, start at the farthest corner from the drain and work your way towards it. Use troweling techniques to spread out the mortar evenly across the surface, making sure each area is covered with a consistent layer.
Once you have poured and spread out all of the mortar, use a straight edge or leveler to check that everything is flush and even. If there are any dips or uneven areas, add more mortar as needed. Next, wait 24 hours before beginning to smooth and level the surface in preparation for tiling in the next step.
Nested bullet point list:
- Tips for achieving proper mixing consistency:
- Start by adding water gradually until you reach a damp sand-like texture
- Mix thoroughly for several minutes until there are no lumps or dry spots.
- Troweling techniques for spreading out mortar:
- Hold your trowel at a 45-degree angle and use short strokes
- Apply even pressure while moving back and forth across each section – Use the notched edge of the trowel to create ridges in the mortar, which will help the tiles adhere better.
Smoothing And Leveling The Surface
- Prior to beginning the installation of a diy shower pan, the surface must be prepped to ensure a level and flush surface.
- The mixture of mortar should be consistent, with a ratio of one part Portland cement to three parts sand.
- The mortar should be thoroughly mixed with water until it is the consistency of peanut butter.
- The mortar should be applied in even layers, with a margin trowel or notched trowel.
- When applying the mortar, care should be taken to ensure the surface is level and smooth.
- If the mortar is applied too thickly, it should be scraped away with a margin trowel and additional mortar added to even out the surface.
Preparing The Surface
Before starting any installation process, it is essential to prepare the surface properly. In the case of building a DIY shower pan, surface preparation plays a crucial role in achieving a smooth and level finish. The first step in this process is to remove all debris and dirt from the area where you plan to build your shower.
Once the surface is free of debris, it’s time to begin leveling and smoothing it out. This can be done by using a self-leveling compound or sand mix, depending on what type of surface you’re working with. Before applying either product, make sure to follow the manufacturer’s instructions carefully. Additionally, it’s important to ensure that the entire surface is level before moving on to the next step.
After smoothing and leveling the surface, it’s time for waterproofing. There are several methods for waterproofing a shower pan, including using a membrane or liquid waterproofing material. Whatever method you choose, make sure to follow proper installation techniques and allow ample drying time before proceeding with tile installation or any other finishing touches. By taking these steps during surface preparation and waterproofing methods, you’ll be on your way to creating a functional and beautiful DIY shower pan that will last for years to come.
Mixing The Mortar
After successfully smoothing and leveling the surface, it’s time to mix the mortar. Mixing techniques play a crucial role in achieving the desired consistency of the mortar. An ideal consistency would be a smooth, uniform mixture that is easy to spread and work with. It’s essential to follow the manufacturer’s instructions on mixing, as different types of mortar may require specific ratios of water and powder.
When mixing the mortar, it’s important to take note of its consistency. If it’s too dry or too wet, it will not bond properly and can cause issues down the line. A good rule of thumb is to start by adding two-thirds of the recommended amount of water first before gradually adding more until you reach the desired consistency. You can always add more water if needed but never add extra powder as this will affect the overall strength of your shower pan.
To achieve proper bonding between layers, make sure that each layer is applied while the previous one is still wet. This ensures that each layer bonds together correctly and forms a strong base for your tiles or finishing touches. By paying attention to these details during mixing techniques and mortar consistency, you’ll be able to create a sturdy foundation for your DIY shower pan that will last for years to come.
Applying The Mortar
After achieving a smooth and level surface for your DIY shower pan, it’s time to apply the mortar. Mixing techniques play a crucial role in achieving the desired consistency of the mortar. To avoid common issues such as improper bonding or weak foundation, it’s important to follow the manufacturer’s instructions on mixing ratios.
When applying the mortar, start by spreading it evenly using a notched trowel. Be sure to work quickly but carefully as the mortar can dry out fast. When troubleshooting common issues such as uneven application or lumps, use a flat trowel to even out any bumps or ridges before moving on to the next layer.
To achieve proper bonding between layers, be sure to apply each layer while the previous one is still wet. This ensures that each layer bonds together correctly and forms a strong base for your tiles or finishing touches. By paying attention to these details during mixing techniques and application methods, you’ll be able to create a sturdy foundation for your DIY shower pan that will last for years to come.
In summary, applying mortar is an essential step in creating a reliable and long-lasting DIY shower pan. Proper mixing techniques and application methods are crucial in avoiding common issues such as improper bonding or weak foundation. By following these guidelines, you’ll be able to achieve a smooth surface that will serve both you and others well in the future.
Letting The Mortar Cure
As the saying goes, “patience is a virtue,” and this couldn’t be more true when it comes to letting your mortar cure. Rushing this step is a common mistake that many DIY enthusiasts make, and it can have disastrous consequences for your shower pan’s durability. It’s important to remember that the mortar needs time to dry completely before you move on to the next step of your DIY shower pan project.
To ensure that your mortar cures properly, you’ll need to give it at least 24 hours before you touch it again. This means no stepping on it, no applying pressure to it, and no adding any additional weight to the surface. Even if the mortar appears dry on the surface, there may still be moisture trapped underneath that could compromise its integrity if disturbed too soon.
Here’s a table outlining some common mistakes to avoid when letting your mortar cure:
| Mistake | Why It’s Bad | How To Avoid |
|---|---|---|
| Stepping On The Mortar Too Soon | Can Cause Cracks Or Weak Spots | Wait At Least 24 Hours Before Touching |
| Adding Weight To The Surface | Can Disrupt The Drying Process And Compromise Durability | Avoid Placing Anything Heavy On The Surface |
| Applying Pressure To The Mortar | Can Cause Uneven Drying And Weaken The Structure | Be Gentle When Moving Around Your Work Area |
By following these tips and avoiding common mistakes, you can ensure that your DIY shower pan will last for years to come. Once your mortar has cured completely, you’ll be ready to move on to installing tile or other finishing materials with confidence. Remember: patience is key!
Installing Tile Or Other Finishing Materials
Once the shower pan is installed, it is important to consider design options and cost considerations when choosing tile or other finishing materials. There are endless design options available with a variety of colors, sizes, and patterns to choose from. It is important to select a material that is durable and easy to clean in order to maintain the integrity of the shower pan over time.
Cost considerations should also be taken into account when selecting finishing materials for your DIY shower pan. High-end finishes such as natural stone or intricate mosaic patterns can significantly increase the overall cost of the project. However, there are more affordable options available such as ceramic or porcelain tiles that still offer a beautiful finish and long-lasting durability.
When installing tile or other finishing materials, it is essential to follow proper installation techniques and use appropriate tools and supplies. This includes ensuring that surfaces are clean, dry, and level before beginning installation. It is also important to carefully measure and cut tiles for precise fitting. Taking the time to properly install finishing materials will ensure a professional-looking finish for your DIY shower pan.
As you complete the process of installing tile or other finishing materials for your DIY shower pan, it’s important to remember that grouting and sealing the tile will be necessary in order to prevent water damage and preserve the lifespan of your project. By taking care during this final step, you can create a functional and aesthetically pleasing shower space that will provide years of use for you and your family.
Grouting And Sealing The Tile
Ironically, grouting and sealing the tile is both the most satisfying and tedious part of building a DIY shower pan. The satisfaction comes from seeing your carefully selected tiles finally come together to create a beautiful surface. However, the tediousness comes from the attention to detail required to ensure that every nook and cranny is filled with grout and properly sealed. But fear not, with some patience and diligence, you’ll have a beautifully finished shower pan in no time.
Before you begin grouting, it’s important to consider your tile selection. Not all tiles are created equal and some may require specific types of grout or sealant. Take into account factors such as size, texture, and water absorption rate when choosing your tiles. Additionally, consider grout color options that will complement or contrast with your chosen tiles. A contrasting grout color can make your tiles pop while a complementary one can create a seamless look.
Now onto the actual process of grouting and sealing. Here are four key steps to follow:
- Mix the grout according to instructions on the packaging.
- Apply the grout evenly over the tiled surface using a rubber float.
- Once applied, use a damp sponge to remove excess grout from the surface of your tiles.
- Once the grout has dried completely, apply sealant over all tiled surfaces to prevent water damage.
With these steps in mind, you’re ready to tackle this final stage of building your DIY shower pan like an expert! In our next section, we’ll cover installing shower fixtures so you can enjoy your new creation fully.
Installing The Shower Fixtures
Now that your shower pan is installed, it’s time to move on to the installation of shower fixtures. One important consideration when selecting fixtures is water pressure. If your home has low water pressure, you may want to choose a showerhead option that maximizes flow while conserving water. On the other hand, if you have high water pressure, you may want to opt for a showerhead with adjustable flow settings.
When installing the shower fixtures, it’s important to follow the manufacturer’s instructions carefully. This will ensure that the fixtures are installed safely and securely. Be sure to use appropriate tools and materials for the job. For example, use plumber’s tape on threaded connections to prevent leaks.
Showerhead options are numerous and varied, from rainfall-style heads to handheld models with massage settings. Choose a model that fits your needs and preferences. Once installed, test the system thoroughly for leaks and proper function before using it regularly. With the right fixtures in place, your DIY shower pan will provide a luxurious and refreshing experience every time you step inside.
As you begin enjoying your new DIY shower pan, remember that proper maintenance is key to keeping it functioning well over time. In the next section, we’ll discuss some tips for maintaining your shower pan so that you can enjoy many years of use without having to replace or repair it prematurely.
Maintaining Your Diy Shower Pan
After successfully installing your DIY shower pan, it is important to maintain it properly to ensure its longevity. Keeping your shower pan clean and free of debris is crucial in preventing any potential issues. Here are some cleaning tips to keep in mind:
- Regularly clean the surface of your shower pan with a mild soap and water solution. Avoid using abrasive cleaners or scrubbers as they can damage the surface.
- Use a squeegee or towel after each use to remove excess water from the surface of the shower pan. This will prevent water from pooling and potentially causing mold or mildew growth.
- Check for any signs of buildup in the drain and clean it out as needed. A clogged drain can cause standing water which can damage the shower pan over time.
Despite proper maintenance, there are still common issues that may arise with DIY shower pans. These include cracks, leaks, and discoloration. If you notice any of these issues, it is important to address them promptly to prevent further damage.
To fix small cracks or chips in your shower pan’s surface, you can use a repair kit specifically designed for this purpose. For larger cracks or leaks, it may be necessary to replace the entire shower pan.
In summary, proper maintenance is key to ensuring the longevity of your DIY shower pan installation project. By following these cleaning tips and addressing any common issues promptly, you can enjoy a beautiful and functional shower for years to come without worrying about costly repairs or replacements.
Conclusion
In conclusion, building a DIY shower pan can be a challenging but rewarding project for any homeowner. By following the steps outlined above and using the right tools and materials, you can create a custom shower pan that meets your specific needs and preferences.
However, it is important to remember that this project requires careful planning, precise measurements, and attention to detail. One small mistake could lead to leaks or other problems down the road. Therefore, if you are not comfortable with DIY projects or lack experience in this area, it may be best to hire a professional contractor.
Ultimately, whether you choose to build your own shower pan or hire someone else to do it for you, the end result should be a functional and beautiful addition to your home that provides years of enjoyment and relaxation.
Image Credits
- “Week 6 – Shower Pan” by mrjerz (featured)

