As a tuckpointing and brick mortar repair expert, I have witnessed firsthand the consequences of neglecting the maintenance of brick structures. Over time, weather conditions cause the mortar joints between bricks to deteriorate, leading to moisture intrusion and structural damage. Tuckpointing is an essential repair technique that involves removing damaged mortar and replacing it with fresh mortar to restore the integrity of brick walls. In this article, we will discuss everything you need to know about tuckpointing and how to repair brick mortar joints.
Tuckpointing is a skillful technique that requires precision and attention to detail. It involves grinding out old or damaged mortar by hand or with power tools, cleaning the joint thoroughly, and filling it with new mortar using a trowel. The key to successful tuckpointing is ensuring that the new mortar matches the existing color and texture of the surrounding bricks. Additionally, a proper mix ratio of sand and cement must be used to ensure strength and durability. In this article, we will provide step-by-step instructions on how to perform tuckpointing correctly while also discussing common mistakes to avoid.
Understanding The Importance Of Maintaining Brick Structures
Brick buildings have been widely used for centuries due to their durability and aesthetic appeal. The benefits of brick structures include being fire-resistant, energy-efficient, and low maintenance. However, neglecting the upkeep of brick structures can lead to long term effects that may compromise the safety and stability of the building.
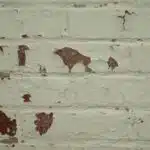
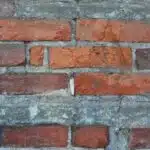
The deterioration of mortar joints is one of the most common issues in brick structures. Mortar joints hold the bricks together and protect them from moisture, which can cause decay over time. Neglecting these joints can lead to water infiltration, which can weaken the structure and cause damage to the interior walls.
The effects of neglecting brick structures can be costly in terms of repairs and even dangerous if left unaddressed. It is essential to maintain regular inspection and repair of mortar joints as it helps prevent further damage to your building. In the subsequent section, we will discuss some signs that indicate deteriorating mortar joints that homeowners or property managers should look out for.
Signs Of Deteriorating Mortar Joints
As we have discussed in the previous section, maintaining brick structures is crucial for their longevity. One of the most critical aspects of maintaining brick structures is repairing deteriorating mortar joints. Deteriorating mortar joints can be caused by various factors, including weathering, water damage, and poor craftsmanship.
Causes of deterioration can be prevented by taking certain measures to maintain the structure’s integrity. Firstly, it is essential to ensure that the drainage system around the building is functioning correctly to prevent water damage. Secondly, regular cleaning and inspection of mortar joints can help identify early signs of deterioration before they become severe. Thirdly, using high-quality materials during the construction process can significantly reduce the chances of deterioration.
Prevention methods for mortar joints are essential to avoid costly repairs or even complete replacement in the future. By taking proactive measures such as regular inspections and maintenance checks, property owners can extend their structure’s lifespan while keeping repair costs low. In addition to making sure that your drainage system is functional and using durable materials during construction, it’s also important to hire a professional tuckpointing expert who has experience in repairing mortar joints.
In summary, understanding the causes of deteriorating mortar joints and implementing prevention methods will help maintain your brick structure’s longevity. As a tuckpointing expert, I recommend hiring a professional for regular inspections and maintenance checks for your peace of mind. In the subsequent section, we will discuss the basics of tuckpointing as an effective method for repairing deteriorating mortar joints.
The Basics Of Tuckpointing
Tuckpointing is a technique used to repair brick mortar joints. It involves removing the old, damaged mortar and replacing it with new mortar. This process helps to improve the structural integrity of the brickwork while also enhancing its aesthetic appeal.
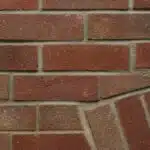
There are several tuckpointing techniques that can be used depending on the type of brickwork being repaired. For example, flat-joint tuckpointing is commonly used for flat or smooth brick surfaces, while grapevine tuckpointing is used for more irregular and textured surfaces. Regardless of the technique chosen, it is important to ensure that the new mortar matches the color and texture of the existing brickwork.
The historical significance of tuckpointing cannot be overstated. This technique has been used for centuries in various cultures around the world to preserve and enhance the beauty of brick structures. Today, it remains an essential skill for masons and contractors who specialize in repairing and restoring historic buildings. By learning how to properly perform tuckpointing, individuals can help to preserve these important cultural landmarks for generations to come.
Moving forward, understanding the tools and materials needed for tuckpointing is essential for achieving successful results. From specialized pointing trowels to high-quality mortar mixtures, there are many different products available on the market today that can help make this process easier and more efficient. In the next section, we will explore some of these tools in greater detail so that you can get started on your own tuckpointing project with confidence.
Tools And Materials Needed For Tuckpointing
As we have discussed in the previous section, tuckpointing is a process of repairing damaged brick mortar joints. It involves removing the old and damaged mortar and replacing it with new ones. In this section, we will discuss the tools and materials needed for tuckpointing.
To start with, you will need a pointing trowel to apply the new mortar to the joints. A margin trowel can also be used for mixing mortar. Next, you will need a grinder or chisel to remove the old and damaged mortar from the joints. A hammer can also be used for this task but is less efficient than a grinder or chisel. Lastly, safety equipment such as gloves, dust mask, safety glasses, and hearing protection are necessary to protect yourself while working.
When it comes to joint spacing, it is essential to maintain consistent spacing between each joint while applying new mortar to ensure uniformity in your work. Spacing commonly ranges from 3/8 inch to 1/2 inch apart depending on the size of bricks used in your project. Trowel techniques are also important when applying new mortar. It is recommended to use a diagonal motion when applying the new mortar instead of just pushing it straight into the joints.
Before starting any tuckpointing project, it’s crucial to take safety precautions seriously since there are many hazards associated with this type of work. In addition to wearing appropriate safety gear such as gloves and protective eyewear mentioned earlier, make sure that your ladder or scaffolding is secure before climbing up. Also, keep your workspace clean and free of debris that can cause slips or falls. With these safety measures in mind, you can proceed with confidence in executing successful tuckpointing projects.
Safety Precautions To Take Before Starting
Before starting any tuckpointing or brick mortar repair project, it is essential to take the necessary safety precautions. This will help prevent potential hazards and ensure the safety of everyone involved in the project. One important aspect of this is to wear proper safety gear such as gloves, goggles, and a dust mask.
When working with mortar, there are several potential hazards that you should be aware of. Mortar contains cement which can cause skin irritation and burns if it comes into contact with your skin. Additionally, mixing dry mortar can create a lot of dust which can irritate your eyes and respiratory system if you breathe it in. To prevent these hazards, always wear gloves, goggles, and a dust mask when handling or mixing mortar.
Another important safety precaution to take before starting a tuckpointing or brick mortar repair project is to ensure that the work area is clear of debris and obstacles. This will reduce the risk of accidents and injuries while you work. It is also important to keep children and pets away from the work area during the project for their own safety.
Now that you understand the importance of taking safety precautions before starting a tuckpointing or brick mortar repair project let’s move on to preparing the mortar mix. By following these simple steps, you can ensure that your project goes smoothly and safely without any incidents or injuries occurring along the way.
Preparing The Mortar Mix
Before starting with the actual tuckpointing process, it is important to ensure that all necessary safety precautions have been taken. This includes wearing protective gear such as gloves, goggles, and a dust mask to prevent inhaling harmful particles during the process. Additionally, it is important to ensure that the work area is clear of any debris or obstacles that may cause accidents.
Once safety has been ensured, the next step in tuckpointing is preparing the mortar mix. It is crucial to achieve the right mixing consistency for optimum results. The ideal consistency of mortar mix should be similar to toothpaste – not too dry or runny. To achieve this consistency, add water slowly and gradually while mixing until you reach the desired texture.
To test for mortar strength, use a small amount of mortar to press between your fingers. If it crumbles easily, then it needs more water. If the mixture feels too wet and sticky, add more dry ingredients until you get a smooth texture. Once you have achieved the perfect consistency and tested for strength, you are now ready to start removing old mortar without damaging the surrounding brickwork.
Removing Old Mortar
Before you start laying new mortar, it is important to remove old, damaged mortar first. Removing mortar safely is crucial to ensure that the surrounding bricks are not damaged or dislodged. There are several different types of mortar removal tools available, including chisels, grinders, and drills.
Chisels are a traditional tool used for removing old mortar. They come in different shapes and sizes and can be used for both horizontal and vertical joints. However, using a chisel requires skill and patience as it can be easy to damage the surrounding bricks if not done carefully.
Grinders and drills are power tools that are faster and more efficient than chisels. They work by grinding away the old mortar with a rotating disc or bit. While these tools can make the job easier, they also carry a higher risk of damaging the surrounding bricks if not used properly. It is recommended to use these tools only if you have experience using them or under the guidance of an expert.
Next step will be cleaning the joint after removing old mortar safely using appropriate tools mentioned above.
Cleaning The Joint
After removing the old mortar from the brick joints, it is time to clean the joint thoroughly. As they say, “cleanliness is next to godliness,” and this holds true for tuckpointing as well. Cleaning the joint is also an essential step for ensuring that new mortar adheres correctly to the bricks. It is essential to choose the right brush and cleaning solution to ensure that the job is done effectively.
Choosing the right brush: When choosing a brush, it’s important to select one with stiff bristles that can remove any remaining dust or debris from the joint. A wire brush or nylon bristle brush will work best for most applications. Be sure to select a size that fits comfortably in your hand and reaches all areas of the joint.
Applying the cleaning solution: Once you have chosen your brush, it’s time to apply your cleaning solution. There are many different types of solutions available, but a mixture of water and muriatic acid tends to work well in most cases. Be sure to follow all safety precautions when handling muriatic acid, including wearing gloves and eye protection. Use a spray bottle or watering can to apply the solution evenly over the entire joint, taking care not to saturate it too much.
Now that you have thoroughly cleaned out the joints, it’s time for the final step – applying new mortar. But before we get into that process, we need to let our cleaned joints dry completely. This may take anywhere from a few hours up to several days depending on weather conditions and humidity levels in your area. Once completely dry, you can begin preparing your new mortar mix and getting ready for application.
Applying New Mortar
Application techniques are crucial to the success of tuckpointing and repairing brick mortar joints. There are several methods for applying new mortar, including using a pointing trowel or a grout bag. A pointing trowel is ideal for larger sections of masonry, while a grout bag is better for precision work and smaller areas.
When applying new mortar, it is important to ensure that the consistency is correct. The ideal consistency should be similar to peanut butter, where it can be easily spread but not too wet or dry. If the mortar is too wet, it will shrink and crack when drying, while if it’s too dry, it won’t bond properly with the bricks.
Applying new mortar can be a challenging task, but with proper application techniques and consistent mortar consistency, it can be accomplished effectively. In the next section, we will discuss how to match mortar color and texture to achieve seamless repairs that blend in with existing masonry work.
Matching Mortar Color And Texture
Achieving a seamless tuckpointing job not only involves repairing the mortar joints but also ensuring that the color and texture of the new mortar match that of the existing bricks. This is where matching mortar color and texture come into play. The most crucial aspect of this process is selecting a suitable mortar consistency, which will determine how well it blends with the surrounding bricks.
One technique for achieving a perfect color match when repairing brick mortar joints involves analyzing the composition and color of the existing bricks. Once you have identified the base hue, you can start experimenting with different mixtures of sand, lime, cement, and pigments until you achieve an exact or near-perfect match. A professional tuckpointer will take care to use precise measurements to avoid deviating from the original shade.
Another method for matching mortar colors that have proven effective over time is brick staining. This technique involves applying a colored wash or stain to alter the appearance of both old and new bricks. It allows for more flexibility in creating custom shades since stains come in various hues and can be mixed to achieve unique blends. However, staining requires a high level of skill and precision to ensure that it does not affect adjacent surfaces or leave unsightly streaks on your masonry work.
Achieving an ideal match between newly repaired brick mortar joints and existing ones requires expertise in choosing appropriate mixtures of sand, lime, cement, pigments, as well as familiarity with various coloring techniques like brick staining. With these techniques at hand, it is possible to create beautiful masonry work that seamlessly integrates old and new materials. In our subsequent section about smoothing and finishing the joint, we will discuss how to give your tuckpointing job those finishing touches that make all the difference in achieving an outstanding outcome.
Smoothing And Finishing The Joint
Tuckpointing requires first cleaning the existing joints of any loose mortar or debris. The next step is to apply the new mortar while maintaining the same joint profile as the original. The mortar must be of the same composition as the original, and should be applied in a consistent thickness to ensure a uniform finished joint. Lastly, the mortar should be tooled to ensure a smooth, finished joint that is tight, strong and durable.
Clean Joints
In order to achieve a smooth and finished joint in tuckpointing, it is crucial to start with clean joints. The first step in cleaning the joints is to remove any loose or damaged mortar using a chisel or grinder. Once this is done, there are different types of brushes that can be used for cleaning the joints, such as wire brushes, nylon brushes or abrasive brushes. The choice of brush depends on the type of mortar and the level of dirt and debris present in the joints.
It is also important to consider using chemical cleaners for joints that are particularly dirty or have stubborn stains. These cleaners can be acidic or alkaline, depending on the type of mortar and stains present in the joints. Acidic cleaners are typically used for removing mineral deposits, while alkaline cleaners work well for removing organic stains like mildew or algae. It is recommended to test any chemical cleaner on a small area first before applying it to the entire joint.
By properly cleaning the joints before tuckpointing, you ensure that you have a clean surface to work with and that your new mortar will adhere properly. Neglecting this step could result in a less than satisfactory finished product that may not last as long as it should. Taking extra care in the cleaning process will ultimately result in a smoother and more professional looking joint that will add value and longevity to any brick structure.
Applying Mortar
Now that the joints have been cleaned, it is time to apply the mortar. One crucial factor in achieving a smooth and finished joint is ensuring the proper consistency of the mortar. The consistency should be workable and easy to apply, but not too wet or dry. If the mortar is too wet, it will shrink and crack as it dries, while if it is too dry, it will not adhere properly to the bricks.
When applying mortar, there are several techniques that can be used depending on the width of the joint. For narrow joints, a pointing trowel can be used to pack the mortar into the joint and level it off with a finishing trowel. For wider joints, a hawk and trowel can be used to apply and pack in more mortar at once. It is important not to overfill the joint as this will result in an uneven surface.
Proper application techniques also involve creating uniformity in color and texture by working in small sections at a time. This prevents any inconsistencies from occurring due to changes in temperature or humidity levels during application. Once applied, allow the mortar to dry for 24-48 hours before smoothing and finishing with a pointing tool or jointer. By following these steps for applying mortar with precision and care, you can achieve a smooth and professional looking finished product that will add value and longevity to any brick structure.
Curing And Protecting The New Mortar
After smoothing and finishing the joint, the next step in repairing brick mortar joints is curing and protecting the new mortar. This is a crucial step in ensuring long term durability of the repair work. Curing refers to the process of allowing the mortar to dry completely, which can take up to several weeks depending on the weather conditions.
Once the mortar has dried completely, it is important to protect it from moisture and other environmental factors that can cause damage. This can be achieved through the use of protective sealants. There are various types of sealants available on the market, each with its own set of advantages and disadvantages. It is important to choose a sealant that is compatible with the type of mortar used and that provides adequate protection against water infiltration.
In addition to using protective sealants, there are other measures that can be taken to ensure long term durability of tuckpointing work. These include proper preparation of surfaces before applying mortar, using high quality materials, and following best practices during installation. By taking these steps, homeowners can enjoy a strong and durable brick facade for many years to come.
As with any construction project, there are common mistakes that should be avoided when tuckpointing. These include using an incorrect ratio of sand to cement when mixing mortar, failing to properly clean and prepare surfaces before applying new mortar, and neglecting to protect newly repaired areas from moisture during curing. By avoiding these mistakes and following best practices for tuckpointing, homeowners can ensure that their brick facade remains sturdy and attractive for years to come.
Common Mistakes To Avoid In Tuckpointing
Using the wrong mortar can lead to a weakened bond between the brick and the mortar, which can cause the structure to become unstable. Incorrect tool selection for tuckpointing can lead to poor craftsmanship and an uneven surface. Poor surface preparation can lead to the mortar not properly adhering to the brick and eventually crumbling or cracking. Adhering to safety protocols is essential for any tuckpointing project, as not doing so can lead to serious injury or damage.
Using Wrong Mortar
Using the wrong mortar is one of the common mistakes that people make when it comes to tuckpointing. This mistake can lead to various consequences, including an unstable structure and a shorter lifespan of the repaired wall. It is important to choose the right type of mortar for the job based on factors such as climate, age and condition of the brickwork, and desired finish.
The consequences of using the wrong mortar can be severe. For instance, if you use a hard and brittle mortar in a region with high levels of freeze-thaw cycles, it can cause cracking and crumbling of bricks due to lack of flexibility. Similarly, if you use a soft and weak mixture in an area with extreme weather conditions or heavy foot traffic, it can cause premature wear and tear on mortar joints leading to structural instability. Therefore, it is crucial to consult with an expert before choosing the appropriate type of mortar for your tuckpointing project.
In conclusion, avoiding common mistakes such as using wrong mortar should be taken seriously when undertaking any tuckpointing project. Always seek professional advice on which type of mortar will work best for your particular situation. By doing so, you can ensure that your repair work lasts longer and remains structurally sound for years to come.
Incorrect Tool Selection
When it comes to tuckpointing, using the wrong tools can be another mistake that people often make. While DIY alternatives may seem like a cost-effective option, they can lead to more damage and expenses in the long run. It is important to understand that using the right tools for the job is crucial in achieving quality results.
One common tool selection mistake is not properly maintaining or cleaning them. Over time, tools can become worn out or rusty which can affect their performance and potentially cause damage to brickwork. Regular maintenance should be performed on all tools used in tuckpointing such as chisels, grinders, and jointers to ensure they are in proper working condition.
In conclusion, selecting the correct tools and maintaining them properly is crucial to ensuring a successful tuckpointing project. Avoid DIY alternatives and seek professional advice if necessary. By doing so, you can avoid costly mistakes that can result in further damage to your brickwork and ultimately save yourself time and money in the long run.
When To Call A Professional Tuckpointer
Hiring professionals for tuckpointing and brick mortar repair can be a wise decision in certain circumstances. While DIY projects can save money, they can also pose significant challenges, especially if the homeowner lacks the necessary skills or tools. In addition, poorly executed repairs can lead to further damage and costly fixes down the road.
One key factor to consider when deciding whether to hire a professional is the size and scope of the project. Small repairs that involve only a few joints may be manageable for homeowners with some experience in tuckpointing. However, larger projects that require extensive work on multiple joints or entire walls are best left to professionals who have the knowledge and equipment to handle them.
Another consideration is the condition of the brickwork itself. If there are underlying issues such as foundation problems or water damage, these will also need to be addressed before any tuckpointing can take place. Professionals are trained to identify these issues and make appropriate recommendations for repairs, while inexperienced homeowners may overlook them altogether.
Transition: While hiring professionals may be necessary in some cases, it’s important to remember that maintaining your brickwork after tuckpointing is just as crucial in preserving its longevity and appearance.
Maintaining Brickwork After Tuckpointing
When to Call a Professional Tuckpointer, we discussed the importance of hiring an expert for tuckpointing and brick mortar repair. Now that your brickwork has been restored to its former glory, Long term maintenance is crucial to ensure it remains strong and durable. Preventative measures can help minimize future damage and extend the lifespan of your brick masonry.
Regular inspections should be conducted to detect any signs of damage or wear and tear. This should include checking for cracks, crumbling mortar joints, and water damage. If you notice any issues, it’s important to address them promptly before they worsen and cause more extensive damage.
Another essential aspect of long-term maintenance is cleaning your brickwork regularly. Dirt, debris, and other pollutants can cause significant damage if left unchecked. Pressure washing is an effective way to remove grime build-up without damaging the masonry. However, it’s important to use the right equipment and techniques to avoid causing any harm.
Nested bullet point list in markdown format:
Regular Inspections
Check for cracks
Look for crumbling mortar joints
Detect water damage
Cleaning
Remove dirt
Eliminate debris
Use pressure washing
By following these preventative measures, you can ensure that your brickwork stays in excellent condition for years to come. Remember always to hire a professional tuckpointer when necessary and perform regular maintenance tasks regularly in accordance with industry standards.
In summary, long-term maintenance is critical after tuckpointing repairs have been completed on your brickwork. Regular inspections are essential in detecting any signs of damage or wear and tear early on so they can be addressed promptly before worsening further. Furthermore, cleaning your brickwork regularly will prevent dirt buildup from causing significant harm over time. By following these preventative measures outlined above, you’ll be able to extend the lifespan of your masonry while keeping it strong and durable for years to come.
Conclusion
Understanding the importance of maintaining brick structures is crucial for their longevity and safety. Signs of deteriorating mortar joints, such as cracks or gaps, should be addressed promptly to prevent further damage. Tuckpointing is a cost-effective solution for repairing brick mortar joints and restoring the structural integrity of the building.
To begin tuckpointing, it is necessary to gather the proper tools and materials while taking safety precautions. Curing and protecting the new mortar is also essential to ensure its durability. Common mistakes should be avoided during tuckpointing, but if unsure, it’s wise to call a professional tuckpointer.
As a tuckpointing and brick mortar repair expert, I strongly recommend that homeowners invest in regular maintenance to prevent costly repairs later on. By maintaining brickwork after tuckpointing, you can extend its life span and keep your property safe from potential hazards caused by weakened structures. Remember that prevention is always better than cure when it comes to preserving your property’s value and safety.
Image Credits
- “Cleaning the excess tuckpointing materials from the outside of the main library 2” by benchilada (featured)

