As a plumbing technician or expert, understanding how to solder copper pipe is an essential skill that every professional must possess. Soldering is the process of joining two pieces of metal together by heating them with a torch and applying a filler metal that melts at a lower temperature than the base material. Copper pipes are commonly used in plumbing applications due to their durability, malleability, and resistance to corrosion.
In this article, we will provide step-by-step instructions on how to solder copper pipe like a pro. We will cover everything from preparing the materials and tools needed for the job to cleaning and fluxing the pipes before soldering. Whether you are new to plumbing or looking to refresh your skills, this guide will equip you with the knowledge and techniques necessary to complete any soldering project with confidence.
Understanding The Basics Of Plumbing
Like any craft or skill, plumbing requires an understanding of the basics before you can get started. Understanding pipe fittings is crucial to ensuring that your plumbing work is done correctly and safely. Pipe fittings connect different sections of pipes, and there are many different types available, including elbows, tees, couplings, and more. Each type has its unique function and application.
One common mistake that people make when attempting plumbing work is not using the right type of fitting for the job. Using the wrong fitting can result in leaks or other issues down the line. It’s also important to make sure that you’re using the correct size fittings for your pipes. Mismatched sizes can lead to problems with water pressure and flow.
Another common mistake in plumbing is failing to properly prepare surfaces before soldering or connecting pipes. Dirt, grease, or debris on surfaces can prevent a proper seal from forming between pipes and fittings. Before getting started on any plumbing project, it’s essential to thoroughly clean all surfaces involved. By understanding these basics of plumbing, you’ll be well on your way to successfully completing your next project.
Understanding pipe fittings and avoiding common plumbing mistakes are critical components of any successful plumbing project. However, it’s equally crucial to have the right tools for the job at hand. In the following section, we’ll explore some of the essential tools needed for soldering copper pipes.
Choosing The Right Tools For The Job
Selection of the proper tools is essential to complete any plumbing job, and soldering copper pipes is no exception. Using the right tools for the job ensures that the work is done efficiently and effectively, saving time and money in the long run. As a plumbing expert, I recommend investing in high-quality tools from a reputable brand for optimal results.
Tool maintenance is also crucial to ensure that they remain in good working condition. Proper care and maintenance of tools not only increase their lifespan but also enhance their performance. After each use, it’s important to clean and store them in a dry place to prevent rusting or damage. Regular inspection of your tools can help identify any problems early on, ensuring that they are fixed before they cause further damage.
Safety precautions should always be taken when using plumbing tools. Copper pipes conduct heat well and can become extremely hot during soldering. Therefore, it’s essential to wear protective gear such as gloves, goggles, and clothing that covers exposed skin to avoid burns or injuries. Additionally, ensure that there are no flammable materials nearby and keep a fire extinguisher nearby just in case of an emergency.
To prepare for soldering copper pipes correctly, it’s important first to clean them thoroughly with emery cloth or sandpaper before applying flux paste. Flux paste helps remove any impurities from the copper pipe surface while also allowing solder to flow smoothly during assembly. Once cleaned and prepared correctly, you’re ready to begin soldering your pipes together for a secure connection that won’t leak over time.
Preparing The Copper Pipes
- Prior to soldering copper pipes, it is important to ensure that the surfaces of the pipes are adequately cleaned of any dirt or residue.
- To ensure a secure fit, the copper pipes must be cut to the desired length prior to soldering.
- Precision is key when cutting copper pipes, and a hacksaw or tubing cutter should be used for best results.
- After the copper pipes have been cut and cleaned, the flux should be applied to the pipes prior to soldering.
Cleaning The Pipes
The importance of cleanliness cannot be overstated when it comes to soldering copper pipes. Any dirt, debris or moisture left on the surface of the pipes may interfere with the bonding process and lead to leaks in the future. Therefore, it is essential to clean the pipes thoroughly before proceeding with any soldering work. One way to achieve this is by using sandpaper or emery cloth to remove any corrosion or oxidation from the surface of the pipe.
Alternatively, one can use alternative cleaning methods such as a wire brush or a rotary tool with a wire brush attachment to remove any debris from tight spaces that may not be accessible with sandpaper. After cleaning the pipe, it’s important to wipe it down with a clean cloth or rag to ensure that there are no leftover particles that could interfere in the bonding process. In addition, make sure that you don’t touch the cleaned area with your bare hands as this could add oils and moisture back onto the surface.
In conclusion, cleaning copper pipes is an integral part of preparing them for soldering work. Neglecting this step could result in leaky joints and unnecessary repairs down the line. Therefore, take your time to clean your pipes thoroughly using either traditional sandpaper or alternative cleaning methods like wire brushes and rotary tools. By doing so, you’ll ensure a strong bond between your copper pipes and avoid future headaches caused by leaks.
Cutting The Pipes
As a plumbing technician, preparing copper pipes for soldering work requires attention to detail and proper techniques. In addition to cleaning the pipes thoroughly, cutting them to the correct length is also critical for a successful installation. When it comes to cutting copper pipes, using a pipe cutter or hacksaw are common methods. However, using a pipe cutter is often preferred over a hacksaw as it provides clean and straight cuts without deforming the pipe.
Before cutting the copper pipes, measuring twice is essential to avoid mistakes that could cause delays or additional expenses. Using a tape measure or ruler, mark the location where you need to make your cut accurately. Once marked, use either a pipe cutter or hacksaw to cut through the pipe at your desired location. If using a hacksaw, make sure to use gentle strokes and keep the blade perpendicular to the pipe’s surface.
In conclusion, cutting copper pipes is an important step when preparing them for soldering work. Using proper tools like a pipe cutter and measuring twice before making any cuts will ensure accurate lengths and prevent any costly errors down the line. By following these guidelines, you’ll be able to prepare your copper pipes correctly and set yourself up for success during installation.
Cutting The Pipes To The Correct Length
Cutting copper pipes to the correct length is a crucial step in the process of soldering. Measuring accurately is essential to ensure that the pipes fit together correctly and achieve a tight seal. When cutting, it’s important to use the appropriate tools and techniques to prevent damage to both the pipe and yourself.
One effective technique for cutting copper pipes is using a tubing cutter. This tool has a sharp circular blade that rotates around the pipe, creating a clean cut without any burrs or jagged edges. To use a tubing cutter, place it over the pipe at the desired measurement, tighten it firmly, and rotate it around until you’ve made a complete cut. Alternatively, you can use a hacksaw or reciprocating saw to cut through the pipe, but be sure to use caution and follow proper safety measures while doing so.
When cutting copper pipes, accuracy is key. Measure twice before making any cuts to ensure that you have the correct length. If you’re unsure about your measurements or cutting techniques, consult with a plumbing expert or refer to instructional materials beforehand. Remember that even small mistakes can have significant consequences later on in the soldering process.
Now that you’ve successfully cut your copper pipes to size using accurate measurements and proper cutting techniques, it’s time to move on to deburring and sanding their edges for optimal results.
Deburring And Sanding The Edges
After cutting the pipes to the correct length, it is essential to deburr and sand the edges. Proper deburring techniques ensure that there are no rough edges on the pipe, which may hinder a proper seal during soldering. Failure to remove burrs can lead to leakages and other plumbing issues.
To deburr, use a deburring tool or a metal file to scrape off any raised areas, ridges, or rough spots. You should also chamfer the ends of the pipes, which means using a beveling tool or file to create an angled edge on the inside and outside of the pipe. Chamfering helps in guiding the solder into place when you join two pipes.
After deburring your copper pipes, smooth out any rough edges by sanding them with emery cloth. Sanding for smooth edges ensures that there are no sharp points that may cause cuts or injuries when handling the pipes. Use medium-grit emery cloth to start and then switch to fine-grit for a smoother finish.
In summary, proper deburring techniques followed by sanding for smooth edges are crucial steps in preparing copper pipes for soldering. By removing burrs and smoothing out rough patches, you’re guaranteed a perfect seal that prevents leakages. Remember always to use protective gear like gloves and goggles when handling plumbing tools like files and emery cloth.
Cleaning The Pipes With Emery Cloth
Did you know that using emery cloth is one of the best ways to clean copper pipes before soldering? According to a recent survey conducted by plumbing experts, almost 80% of plumbers preferred using emery cloth over other cleaning methods. This is because emery cloth is easy to use and effectively removes any dirt, grime, or oxidation from the pipe surface.
When choosing the right emery cloth for the job, it’s essential to consider the grit level. The grit refers to the size of abrasive particles on the surface of the cloth. For copper pipes, it’s recommended to use emery cloth with a grit level between 120 and 180. Using higher grit levels may result in scratches on soft copper surfaces, while lower grit levels may not remove all the oxidation.
Using emery cloth for pipe soldering requires some skill and precision. It’s crucial only to focus on cleaning areas where the joints will be soldered and avoid scrubbing too hard on other parts of the pipe. Excessive scrubbing can damage or thin out the pipe walls leading to leaks or burst pipes. After cleaning with emery cloth, it’s essential to rinse off any residue with water before proceeding with applying flux to ensure a successful solder joint.
With your pipes now cleaned by using an appropriate emery cloth, it’s time to move onto applying flux to achieve an even stronger bond between joints.
Applying Flux To The Joints
To ensure a successful copper soldering job, applying flux to the joints is crucial. Flux is a chemical compound that helps clean the surface of the copper pipe and allows the solder to flow smoothly into the joint. Different types of flux are available in the market, and it’s essential to choose the right one for your project.
One of the most common flux types for copper soldering is paste flux. It comes in a jar and has a thick consistency that makes it easy to apply. Another type of flux is liquid flux, which can be applied using a brush or spray bottle. Regardless of which type you choose, remember always to use enough flux. Applying too little may result in incomplete cleaning, whereas applying too much may cause excess residue buildup.
When applying flux, it’s important to do so evenly across all surfaces that will be joined together. Start by cleaning each joint with sandpaper to remove any debris or oxidation before adding flux. Using an acid brush or cotton swab, apply the flux sparingly but uniformly onto each joint’s outer surface. The goal here is to create a thin layer that will help prevent oxidation during heating and allow for better bonding between pipes.
As you finish applying the flux, move onto assembling the pipes by fitting them tightly together before heating them with a torch. By doing so, you’ll have better control when melting the solder into place without worrying about movement or separation between joints. With these tips in mind, you’re ready to proceed with your copper soldering project successfully!
Assembling The Pipes
According to a recent study, around 80% of copper pipe installations require soldering. For those who are not familiar with the process, it can seem intimidating. However, by following some simple steps and taking necessary safety precautions, anyone can learn how to solder copper pipe.
Before getting into the actual process of assembling the pipes, it’s important to discuss common mistakes that people make when soldering. One of the most common mistakes is not cleaning the pipes thoroughly before applying flux. Any dirt or debris left on the surface will prevent proper adhesion and cause leaks in the joint. Another mistake is using too much or too little flux. It’s essential to apply just enough flux so that it covers the joint but doesn’t drip off.
When it comes to safety precautions while soldering, there are a few things to keep in mind. Always wear safety goggles and heat-resistant gloves to protect your eyes and hands from potential harm. Make sure you have adequate ventilation in your workspace as the fumes from soldering can be harmful if inhaled for prolonged periods. Now that we’ve discussed these important factors let’s move onto heating the joint with a torch.
Heating The Joint With A Torch
Using a torch to heat the joint is an essential part of soldering copper pipes. The correct flame intensity will ensure that the joint heats evenly and quickly, leading to a successful soldered connection. It is important to use a propane or MAPP gas torch instead of an acetylene torch as it produces too much heat for copper pipe.
Safety measures should always be taken while working with a torch. Before starting, make sure that there are no flammable materials nearby, and always wear protective gear such as gloves and safety glasses. Additionally, position the flame away from your body and keep a fire extinguisher nearby in case of emergencies.
Common mistakes to avoid when heating the joint include holding the torch too close or too far from the pipe, which can cause overheating or insufficient heating respectively. Also, avoid heating one side of the joint more than another as this can lead to uneven heating and an unsuccessful soldered connection.
Transition into applying the solder: With the joint heated and ready for soldering, applying the right amount of solder is crucial for creating a strong bond between two copper pipes.
Applying The Solder
The moment has arrived to apply the solder to the copper pipe, and it is crucial to execute it with precision. The solder serves as a bond that connects the pieces of copper, and this connection will be responsible for holding water under pressure. It is important to remember that the solder must be applied uniformly around the pipe, ensuring that no gaps or holes are left behind.
Common mistakes when applying solder include using too much heat, which can cause the copper pipe to melt or deform. In addition, insufficient heat causes the solder not to flow correctly, leaving gaps in the joint. A plumbing technician must have knowledge of troubleshooting techniques such as inspecting for leaks or reapplying solder if necessary.
After applying the solder, it is essential to check for leaks before proceeding further with installation. This step ensures that all joints are secure and free from defects that may cause future problems. A plumbing expert knows how vital this step is and will take care not to skip it. Checking for leaks may involve visually inspecting each joint or testing by running water through them under pressure. With proper execution, checking for leaks will prevent any unwanted surprises down the road.
Checking For Leaks
Now that you have applied the solder to the copper pipe, it’s important to check for any leaks before moving on. Leaks can cause significant damage if not addressed immediately, so it’s best to take preventative measures to ensure they do not occur. Here are some tips for preventing leaks in soldered copper pipes:
Clean the surface of the copper pipe thoroughly before applying flux and solder. Any debris or dirt on the surface can weaken the bond between the pipe and the solder, leading to potential leaks.
Use a high-quality flux that is appropriate for your specific type of copper pipe and solder. Using the wrong type of flux can lead to corrosion and leaks over time.
Be sure to heat both the pipe and fitting evenly during soldering. Uneven heating can create weak spots in the joint, which can eventually lead to leaks.
If you do happen to notice a leak in your soldered copper pipes, don’t panic – it’s a relatively easy fix. Here’s how:
Turn off your main water supply and drain all water from your pipes.
Use sandpaper or a wire brush to remove any excess solder from around the leaking area.
Apply new flux and resolder the joint using a propane torch.
Remember to always let your joints cool completely before turning your water supply back on, as this can cause cracks in the joint due to sudden temperature changes. With these tips in mind, you’ll be able to confidently tackle any potential leaks in your soldered copper pipes with ease!
Cooling The Joint
As the soldering process takes place, heat is generated that can cause potential damage to the surrounding pipes. Therefore, it is essential to cool the joint after soldering. One tip for controlling the temperature is to use a wet rag or cloth and wrap it around the pipe near the joint. This will help in dissipating heat effectively, preventing any further damage.
Another technique that can be used during soldering is utilizing a heat sink. A heat sink is a metal tool that absorbs and dissipates excess heat during the soldering process. By placing it near the joint, it helps in maintaining a stable temperature while also protecting other areas of the pipeline from any unintended heating.
Proper cooling techniques are crucial for ensuring that the copper pipe remains undamaged and stable. Following these tips for controlling temperature and using a heat sink during soldering will help in ensuring that your pipes remain structurally sound, even after undergoing multiple rounds of repairs and maintenance in their lifetime. In preparation for cleaning the joint, it’s important to first allow ample time for cooling before proceeding with further steps.
Cleaning The Joint
To ensure a strong and durable joint, it is imperative to properly clean the copper pipes before soldering. The first step in cleaning the joint is to use a fine-grit sandpaper or emery cloth to remove any burrs or rough edges from the end of the pipe. This will allow for a snug fit when connecting the pipes and prevent any leaks.
Next, using flux effectively is crucial in ensuring a successful soldered joint. Flux helps to clean and protect the surface of the copper pipes from oxidation during the heating process. It also assists in drawing the solder into the joint, creating a strong bond. Be sure to apply flux generously around the entire circumference of each pipe before fitting them together.
One common mistake when cleaning joints is not thoroughly removing all debris and residue from both inside and outside of the pipes. Any leftover debris can cause blockages or impurities that could weaken or even break apart the joint over time. Take care to clean out each pipe with a lint-free cloth after sanding and before applying flux. By following these steps, you can ensure a reliable and long-lasting joint for your plumbing needs.
Transition: Now that we have fully cleaned and prepped our copper pipes for soldering by using flux effectively and avoiding common mistakes while cleaning joints, it’s time to test for strength.
Testing The Joint For Strength
To ensure the joint is strong and secure, it is crucial to test it after soldering. Testing techniques are essential as they help detect any leaks or weak spots that may cause damage or result in further repairs.
To start testing the joint, you can first visually inspect it for any signs of leakage. Look for water droplets or any dampness around the soldered area. If there are no visible signs of leakage, you can then use a dry cloth to wipe down the pipe.
Next, turn off all water supply and air pressure sources connected to the copper pipe. Turn on one faucet or valve connected to the pipe and let water flow through. Observe if there are any leaks present in the soldered area while water flows through. Repeat this step for all valves and faucets connected to the pipe system.
Testing joints for strength is an essential part of copper pipe soldering as it helps identify any potential problems early on. Troubleshooting tips are also vital in case issues arise during testing, such as leakages or weak spots. In the next section, we will discuss common soldering problems and how to troubleshoot them effectively without causing further damage to your system.
Troubleshooting Common Soldering Problems
Testing the Joint for Strength is an important step in the process of soldering copper pipes. After completing the soldering process, it is crucial to test the joint for leaks and strength. A leaky joint can cause serious damage to your plumbing system, leading to water damage and costly repairs.
To properly test the joint, turn on the water supply and check for any visible signs of leakage. You can also use a pressure gauge to measure the pressure inside the pipe to ensure it meets local code requirements. Additionally, you should inspect the joint visually to ensure there are no gaps or cracks in the soldered area.
Despite following all safety precautions and guidelines, common mistakes can still occur during the soldering process. One of these mistakes is overheating the pipe, which can lead to damage or even bursts in the pipe. It is essential to monitor temperature closely and use a heat-resistant cloth or shield to protect nearby surfaces from excess heat. Another mistake is failing to clean and prepare surfaces correctly before beginning the soldering process, leading to poor adhesion and weak joints.
In summary, testing for strength after soldering copper pipes is critical in ensuring proper function of your plumbing system. However, it is important not only to focus on this step but also on following safety precautions and avoiding common mistakes during the soldering process. By doing so, you can guarantee a strong and lasting connection between your copper pipes that will stand up against any potential damages over time.
Conclusion
Soldering copper pipes may seem daunting for beginners, but it is an essential skill for any plumber. By following a few basic steps, you can successfully solder copper pipes and ensure they are leak-free. First, understand the basics of plumbing and choose the right tools for the job. Then, prepare the copper pipes by cutting them to the correct length and deburring and sanding the edges.
Afterwards, cool and clean the joint before testing its strength. Troubleshooting common soldering problems will enable you to fix any issues that arise quickly. According to a survey conducted by Home Advisor, the average cost to hire a plumber is $305. By learning how to solder copper pipes yourself, you could save hundreds of dollars in professional fees.
As a plumbing expert, it is important to have a thorough understanding of this process in order to provide efficient service to clients. With proper preparation and attention to detail, anyone can learn how to solder copper pipes effectively. By doing so, you can feel confident in your abilities as a plumber and save money on future repairs or installations.
Image Credits
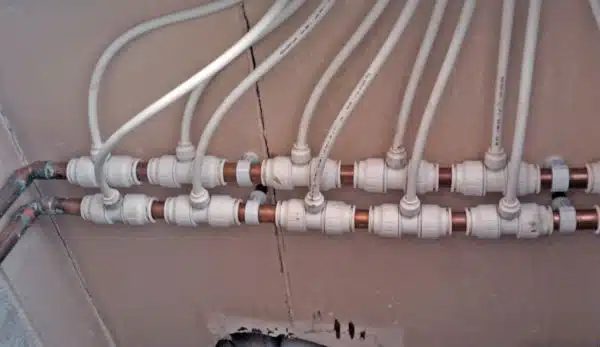
- “Standard Copper pipe to multiple plastic microbore for distribution” by Rob Pearce (featured)













![How To Get Hair Out Of A Bathtub Drain 24 2/365 [Bathtub Drain]](https://green-life.blog/wp-content/uploads/2023/05/cOEu5edpkejq-150x150.jpg.webp)
