The showerhead is an essential component of any bathroom, providing a relaxing and refreshing experience to start or end the day. However, a leaking showerhead can be frustrating and wasteful, not to mention the potential damage it can cause to your bathroom. As a plumbing expert, I have encountered many instances of leaking showerheads and have learned a variety of techniques for fixing them. In this article, I will provide step-by-step instructions on how to identify the source of the leak and repair it yourself.
Before attempting any repairs, it is important to understand the different types of showerheads and their components. Most modern showerheads have standard designs that consist of a head, arm, flange, and washer. The head is where water comes out while the arm connects it to the water supply line. The flange covers the hole in the wall where the arm enters while also serving as an aesthetic element. Meanwhile, washers are small rubber discs that prevent water from leaking out between two metal surfaces when they rub together. With this basic knowledge in mind, let us proceed with identifying and repairing leaks in your showerhead.
Types Of Showerheads
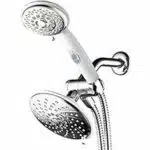
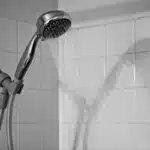
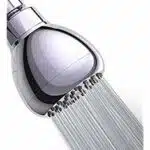
Showerheads come in different types and styles, and each has its own features and benefits. The most common types of showerheads are fixed-mount, handheld, rain, and dual-head. Fixed-mount showerheads are attached to the wall or ceiling and come in a variety of shapes and sizes. Handheld showerheads have a flexible hose that allows for easy mobility, making them useful for washing pets or children. Rain showerheads simulate the feeling of standing in the rain with their large surface area that disperses water over a wider space. Dual-head showerheads offer two types of streams: one from the fixed-mount head and another from a handheld head.
Top brands such as Delta, Moen, Kohler, and American Standard manufacture high-quality showerheads that are both efficient and visually appealing. These brands offer a wide range of showerhead styles to choose from, including contemporary, traditional, modern, rustic, etc. When purchasing a new showerhead, it is important to consider compatibility with your existing plumbing system.
The installation process for most showerheads is relatively easy and can be done without professional assistance. However, some models may require specialized tools or expertise. It is important to read the manufacturer’s instructions carefully before attempting any installation. In general, the installation process involves removing the old showerhead (if applicable), cleaning the threads on the pipe stem or arm where the new showerhead will be installed, applying Teflon tape to ensure a tight seal between the pipe stem or arm and the new showerhead base plate, then connecting the new showerhead securely onto the pipe stem or arm using an adjustable wrench.
Moving forward into discussing components of a showerhead…
Components Of A Showerhead
Showerheads are the most essential component of a shower system. They come in different shapes, sizes, and materials. Showerhead materials range from plastic to stainless steel, with chrome being the most popular choice. Chrome is preferred due to its durability, resistance to corrosion, and aesthetic appeal. However, some people prefer showerheads made from brass or bronze for their vintage look.
Showerhead design trends have changed over the years. Initially, showerheads were designed for function over form. But now there is a shift towards creating showerheads that not only provide an excellent showering experience but also add an aesthetic element to the bathroom space. Some modern showerheads come with LED lights and Bluetooth speakers that can be connected to smartphones or tablets for entertainment while taking a shower.
When choosing a new showerhead, it is important to consider the material and design trends that best suit your preferences and budget constraints. With proper maintenance and regular cleaning, your showerhead will last long without any leaks or other issues. However, if you do experience a leaky showerhead, it could be due to several reasons such as worn-out washers or cracked seals. In the subsequent section, we will discuss common causes of showerhead leaks and how to fix them effectively.
Common Causes Of Showerhead Leaks
According to a study conducted by the Environmental Protection Agency, a single household leak can waste up to 10,000 gallons of water per year. This is not only wasteful but also costly in terms of utility bills. A leaking showerhead is one of the most common sources of leaks in households. It may seem like a small issue, but if left unaddressed, it can lead to significant water wastage and even cause damage to your bathroom.
There are several causes of showerhead leaks that homeowners should be aware of. One of the primary reasons for showerhead leaks is worn-out washers or O-rings. These components are responsible for creating a watertight seal between the showerhead and the pipe. Over time, these parts can become damaged or corroded, leading to leaks. Another common cause of leaks is mineral buildup in the showerhead. Minerals such as calcium and magnesium can accumulate inside the showerhead and block water flow, causing pressure to build up and eventually result in a leak.
Prevention is key when it comes to avoiding showerhead leaks. Regular cleaning and maintenance can help prevent mineral buildup and prolong the lifespan of your showerhead components. It’s also essential to keep an eye out for signs of damage such as rust or cracks on the showerhead body or fittings. Early detection can save you from more significant problems down the road.
Transitioning into the next section about tools needed for repair, it’s important to note that fixing a leaking showerhead requires some basic plumbing tools such as pliers, a wrench, Teflon tape, and replacement washers or O-rings depending on what needs replacing. In the following section, we will discuss each tool’s function and how they contribute to repairing your leaking showerhead efficiently without having to call in a professional plumber.
Tools Needed For Repair
To fix a leaking showerhead, you will need the proper tools. Here are the essential tools needed to carry out the repair:
- Adjustable wrench – this tool is used to tighten or loosen nuts and bolts of different sizes.
- Teflon tape – also known as plumbers tape, it is used to seal threaded connections and prevent leaks.
- Screwdriver – both flathead and Phillips screwdrivers may be necessary to remove screws from the showerhead.
- Pliers – these are useful for holding small parts in place or removing small components.
Common mistakes made during showerhead repair include failing to turn off the water supply before beginning work and over-tightening connections, which can damage the thread on the pipe fittings. To avoid these issues, ensure that you have turned off the water supply before beginning any repair work and use an adjustable wrench to tighten connections just enough to eliminate leaks without causing damage.
If you encounter difficulties with repairing your showerhead, there are alternative solutions available such as hiring a professional plumber or replacing the entire showerhead altogether if it is too damaged for repair.
To proceed with your showerhead repair, it is time to turn off your water supply. This step is crucial as working with live water can cause further leaks and even flooding in severe cases. Follow these steps carefully to ensure that your repair goes smoothly without any unexpected interruptions or complications.
Turn Off The Water Supply
After gathering all the necessary tools for repairing a leaking showerhead, the next crucial step is to turn off the water supply. This action ensures that no more water will leak from the fixture and make the repair process easier. To do this, locate the main valve that controls the water supply in your home and turn it off.
Once you have turned off the water supply, it is time to perform some showerhead maintenance. Before disassembling it, clean any visible mineral deposits or debris that may have accumulated on its surface. You can use vinegar or a commercial cleaner to remove these deposits. Not only will this improve your showerhead’s performance but also prolong its lifespan.
To conserve water while using your repaired showerhead, consider implementing some water conservation tips. Use low-flow showerheads that limit water consumption to two gallons per minute or less. Also, take shorter showers and avoid leaving taps running unnecessarily. These simple measures can help reduce your household’s overall water usage and lower utility bills while conserving natural resources.
Moving forward, we will discuss how to disassemble a showerhead accurately without causing further damage or complications with the plumbing system.
Disassemble The Showerhead
To disassemble a showerhead, you must first turn off the water supply to the showerhead. This will help prevent any leaks or damage to your plumbing system. Once the water is turned off, use a wrench or pliers to loosen the nut that holds the showerhead in place. Be sure to hold onto the shower arm with one hand while removing the nut with the other, as it may be tightly secured.
After removing the nut, gently pull the showerhead away from the wall and inspect it for any signs of damage or wear. If you notice any cracks or rusting, it may be time to replace the entire showerhead. However, if there are no visible signs of damage, proceed with cleaning techniques such as using vinegar and baking soda to remove any mineral buildup that may be causing leaks.
When troubleshooting a leaking showerhead, it’s important to check for damaged washers and o-rings. These small components can often become worn over time and cause leaks in your plumbing system. By inspecting them regularly and replacing them when necessary, you can prevent larger issues from occurring down the line. In our next section, we’ll discuss how to properly inspect these components and make any necessary repairs.
Inspect Washers And O-Rings
Like a detective examining a crime scene, the next step in fixing a leaking showerhead is to inspect the washers and O-rings for any signs of damage. These small rubber or plastic seals are responsible for preventing water from leaking out of the showerhead when it’s not in use. However, over time they can become worn, cracked, or torn, leading to leaks.
To inspect the seals, start by unscrewing the showerhead from the pipe and carefully removing any screws or clips that hold it together. Once you have disassembled the showerhead, take a close look at each seal to identify any visible damage. Look for cracks or tears in the rubber or plastic material, as well as any signs of wear along the edges of each washer.
If you do identify damage to any of the washers or O-rings, your next step will be to remove and replace them with new ones. This process may require some special tools depending on your specific showerhead model, so be sure to consult your manufacturer’s instructions before proceeding. By replacing damaged seals promptly, you can prevent further leaks and ensure that your shower is working properly once again.
As you move forward with repairing your leaking showerhead, remember that identifying and addressing issues with individual components is essential for achieving long-lasting results. By inspecting seals carefully and taking steps to replace damaged parts as needed, you can take control of your home plumbing maintenance and keep your bathroom running smoothly for years to come.
Remove And Replace Damaged Washers
To fix a leaking showerhead, it is often necessary to replace damaged washers. Washers, which are small rubber or plastic pieces that sit inside the showerhead’s valve stem, can become worn or corroded over time due to exposure to water and other minerals. When this happens, they no longer form a seal against the valve seat, allowing water to leak out of the showerhead.
To remove and replace damaged washers in your showerhead, begin by turning off the water supply and removing the showerhead from its arm. Next, use pliers to carefully unscrew the valve stem from inside the showerhead. Once removed, you will be able to see the washer sitting inside the stem. Use a flat-head screwdriver or similar tool to gently pry it out.
When selecting replacement washers for your plumbing repairs, be sure to choose ones that match your original washer’s size and shape as closely as possible. This will ensure that they create a proper seal against the valve seat and prevent further leaks from occurring.
- Place a towel or cloth on the floor under your work area to catch any dripping water
- Keep all parts organized in order of removal for easy reassembly
- Take note of any additional damage or wear while inspecting the washers
- Consider using silicone grease on new washers for added protection against corrosion
Moving forward with fixing your leaking shower head requires more than just replacing damaged washers. Checking the shower arm is another crucial step in ensuring proper functionality of your plumbing system.
Check The Shower Arm
The first step in diagnosing a leaking showerhead is to identify the shower arm. It is the pipe that connects the showerhead to the wall and it is usually made of metal. To properly check the connection, one must inspect the joint between the shower arm and the wall for any signs of corrosion or damage. If any is found, the seal will need to be broken and then a new one will need to be put in place. Finally, the shower arm should be checked for any blockages in the pipe.
Identify The Shower Arm
Are you experiencing a leaky showerhead and want to fix it yourself? One important step in the process is checking the shower arm for any issues. Before doing anything else, you need to identify the shower arm. This may seem like a basic step, but it’s crucial to ensure that any repair or replacement is done correctly.
To identify the shower arm, look for the pipe that comes out of the wall and connects to your showerhead. The shower arm is usually made of metal and has threads on both ends: one end screws into the wall fitting, while the other end holds the showerhead. It’s important to note that not all shower arms are created equal – they come in different lengths and shapes depending on your specific bathroom setup.
When installing a new shower arm or replacing an old one, there are a few tips to keep in mind. First, make sure to use plumber’s tape on the threads before screwing it into place. This will help prevent any leaks from occurring. Additionally, be careful not to overtighten the shower arm as this can cause damage to both the arm and wall fitting. By following these installation tips and properly identifying your shower arm, you can effectively fix any leaks and enjoy a functional and efficient shower once again.
Check The Connection
To ensure that your showerhead is working efficiently, it’s important to inspect the connections between the shower arm and wall fitting. Over time, these connections can become loose and result in leaks or other issues. Before attempting any repairs on your showerhead, take a few minutes to thoroughly check the connection.
Start by inspecting the area where the shower arm connects to the wall fitting. Look for any signs of wear and tear or rust that may indicate a problem with the connection. If you notice any damage, it’s best to replace the entire shower arm rather than just tightening loose connections.
If there are no visible signs of damage, try tightening the connection between the shower arm and wall fitting using a wrench or pliers. Be careful not to overtighten as this can cause damage to both the arm and wall fitting. Once tightened, turn on the water and check for any leaks or other issues.
By regularly checking and tightening loose connections, you can prevent potential leaks and prolong the life of your showerhead. If you’re unsure about how to inspect or repair your showerhead, don’t hesitate to contact a plumbing expert for assistance.
Reassemble The Showerhead
With the showerhead now disassembled and cleaned, it is time to reassemble the parts. This step is crucial, as improper reassembly could lead to further leakage or even damage to the showerhead. Before beginning, ensure that all parts are thoroughly dry and free from debris.
Start by applying plumber’s tape to the threaded end of the shower arm. This will provide a secure seal between the arm and the showerhead. Next, align the holes in the showerhead with those on the gasket and screw them together tightly. It is important to use proper tightening techniques here; over-tightening can cause damage to both the showerhead and its fittings, while under-tightening can result in leaks.
Finally, attach any additional components such as a flow restrictor or filter, using caution not to over-tighten. Once everything is securely fastened, turn on the water supply and check for any leaks. If there are no leaks present, congratulations! Your showerhead should now be fully functional once again. If leaks persist, you may need to repeat some of these steps or seek professional assistance.
Test For Leaks
Leaks in a showerhead can be identified by noticing the presence of water on the floor or walls near the showerhead. To test for leaks, a pressure gauge should be used to measure the water pressure, which can be done by connecting it to the showerhead. A dye test can also be employed to detect any leaks, this involves inserting a dye into the system and looking for any discolouration around the showerhead. Finally, a hydrostatic pressure test should be done to confirm any suspected leaks, this involves filling the showerhead’s pipes with water and looking for any drops or pressure loss.
Identifying Leaks
Leaky showerheads can be a frustrating experience for homeowners. It is common to feel annoyed by the constant dripping sound or seeing your water bill skyrocketing. Identifying leaks is the first step in solving this problem. There are several causes of leaking showerheads, and understanding them can help prevent future leaks.
One common cause of a leaky showerhead is worn-out parts. Over time, the rubber washers and O-rings inside the faucet valve can become damaged, causing water to seep through. Another reason could be loose connections between the showerhead and pipe stem. If these connections are not tight enough, water may escape through gaps.
Prevention is always better than cure, so it’s essential to take steps in maintaining your showerhead regularly. One way to prevent future leaks is by cleaning your showerhead regularly from any mineral build-up that could clog the small openings of the head leading to pressure buildup, which can eventually lead to leakage. Another way is making sure you don’t overtighten any fixtures when installing new ones as it can damage parts leading to leaks.
Identifying leaks in a showerhead may seem like a daunting task, but with proper knowledge and preventive measures, it can be easily resolved. By paying attention to worn-out parts or loose connections and taking regular maintenance steps such as cleaning mineral buildup or not overtightening fixtures during installation, you can save money on your water bill while also enjoying a relaxing and leak-free shower experience.
Testing Equipment
As plumbing experts, we understand the importance of ensuring that your showerhead is leak-free. One crucial step in achieving this is testing for leaks using specialized equipment. This process involves measuring water flow and showerhead pressure to determine the source of the leak accurately.
To test for leaks, you will need specific tools such as a pressure gauge and flow meter. The pressure gauge measures the water pressure in your pipes, while the flow meter measures how much water flows through your showerhead per minute. By using these tools together, you can identify any discrepancies between the two measurements, indicating a possible leak.
When conducting these tests, it’s essential to be thorough and take note of any readings. If there are significant differences between the two measurements, it’s likely that there is a leak somewhere in your system. With this information in hand, you can take steps to address the issue and enjoy a leak-free shower experience once again.
Additional Tips For Showerhead Maintenance
After testing for leaks, it’s time to move on to fixing the showerhead. The most common cause of a leaking showerhead is mineral buildup or worn-out washers. These can be easily fixed by cleaning or replacing them respectively. To clean the showerhead, soak it in a mixture of equal parts water and vinegar for at least an hour before scrubbing with a brush and rinsing thoroughly. For washers, simply remove the showerhead and replace any worn-out ones.
Preventative measures can also be taken to avoid future leaks. One such measure is using thread tape when reattaching the showerhead after cleaning or fixing it. This helps create a tight seal that prevents leakage. Additionally, regularly cleaning the showerhead using appropriate cleaning methods can help prevent mineral buildup that causes blockages and leaks.
However, if you’ve tried all these solutions and your showerhead still leaks, it’s time to call in a professional plumber. They will have the tools and expertise necessary to diagnose the issue and fix it efficiently. Don’t hesitate to seek professional help as soon as possible to avoid further damage or costly repairs down the line.
When To Call A Professional
While fixing a leaking showerhead may seem like a simple task, some plumbing issues require the expertise of a professional. Homeowners should be aware of the signs that indicate they need professional assistance. Ignoring these signs can lead to more serious plumbing problems and costly repairs.
One sign that homeowners should consider calling a professional plumber is if they notice water damage on their ceiling or walls. Water damage can be an indication of a leak in the pipes behind the showerhead, which can cause significant damage to the structure of a home over time. Another sign is if the showerhead continues to leak after attempting DIY fixes, such as replacing the washer or tightening connections. A persistent leak may be due to more serious issues with the plumbing system.
If homeowners are experiencing any of these signs or have tried DIY fixes without success, it is time to call a professional plumber. A licensed plumber has the knowledge and experience necessary to diagnose and repair complex plumbing issues. They can also provide advice on how to prevent future problems and recommend upgrades for better efficiency.
- Signs that indicate you need professional assistance:
- Water damage on ceilings or walls
- Persistent showerhead leaks
- Attempted DIY fixes with no success
- Strange odors coming from drains
- Low water pressure throughout the house
In conclusion, while some minor plumbing issues can be fixed without professional help, certain signs indicate when it’s time to call in an expert. Homeowners should not ignore these signs as they could lead to more serious plumbing problems down the line. By contacting a licensed plumber at the first sign of trouble, homeowners can save themselves both time and money in costly repairs. The next section will explore troubleshooting other common plumbing issues homeowners may encounter.
Troubleshooting Other Plumbing Issues
When it comes to plumbing issues, there are several common problems that homeowners may encounter. One of these is clogged drains, which can be caused by a variety of factors such as hair, soap scum, and food waste. To prevent clogged drains from occurring, it is important to avoid putting anything down the drain that could potentially cause a blockage. Additionally, regular maintenance such as using a drain cleaner or snake can help keep drains clear.
Another common issue is a running toilet, which can be both annoying and wasteful. A running toilet is typically caused by a faulty flapper valve or fill valve. To fix this problem, it is important to first identify the source of the issue and then replace any parts that are not functioning properly. In some cases, it may be necessary to call in a professional plumber for assistance.
In addition to fixing specific plumbing issues, it is also important to maintain your plumbing system overall. Regular inspections and maintenance can help identify potential problems before they become major issues. This includes checking for leaks and ensuring that all fixtures are functioning properly. By taking proactive steps to maintain your plumbing system, you can save yourself time and money in the long run.
As we have seen, troubleshooting other plumbing issues involves identifying common problems such as clogged drains and running toilets. By taking measures to prevent these problems from occurring and maintaining your plumbing system overall, you can avoid costly repairs down the line. In the next section, we will wrap up our discussion on fixing a leaking showerhead with some final thoughts on how to tackle this issue effectively.
Final Thoughts On Fixing A Leaking Showerhead
A leaking showerhead can be a frustrating and wasteful problem for any homeowner. It’s like watching money go down the drain, quite literally. However, fixing this issue is not as challenging as it may seem, especially with the right tools and knowledge.
To prevent future showerhead leaks, it is essential to perform regular maintenance on your plumbing fixtures. This includes cleaning the showerhead of any mineral deposits or debris that can cause clogs and damage over time. Additionally, replacing worn out washers or gaskets in the fixture can significantly reduce the likelihood of leaks occurring.
Regular showerhead maintenance is crucial for maintaining water conservation efforts in your home. A dripping faucet or leaky showerhead can waste a significant amount of water over time, leading to higher utility bills and environmental harm. By taking preventative measures such as regular upkeep and repairs, homeowners can ensure their plumbing fixtures function efficiently while minimizing their environmental footprint.
Conclusion
Showerhead leaks can be a frustrating problem to deal with, but fortunately they are often easy to fix. Understanding the different types and components of showerheads, as well as the common causes of leaks, is essential for successful repair. With the right tools and techniques, most homeowners can fix a leaking showerhead themselves.
However, in some cases it may be necessary to call in a professional plumber. Additionally, ongoing maintenance is important to prevent future leaks and keep your showerhead functioning properly. By following these tips and troubleshooting any other plumbing issues that arise, you can enjoy a leak-free shower experience for years to come. As a plumbing expert, I recommend staying proactive when it comes to showerhead maintenance in order to avoid costly repairs down the line.
Image Credits
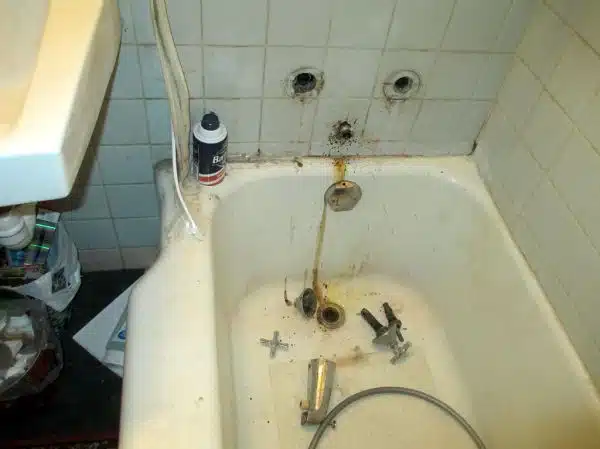
- “20160707 1739 – new showerhead install – IMG_0980 – gutted tub stuff” by Claire CJS (featured)

