Installing a handheld showerhead can be a game-changing addition to your bathroom. It provides versatility and convenience for those who want to enjoy a more flexible showering experience. Whether you need to wash your pets, rinse off soap from hard-to-reach areas or just want to relax under the soothing streams of water, having a handheld showerhead can make all the difference.
In this article, we will provide you with step-by-step instructions on how to install a handheld showerhead in your bathroom. We will also discuss some of the benefits of using a handheld showerhead and provide you with tips on how to maintain it properly. By following our guide, you can save money on costly plumber fees and enhance your showering experience at the same time.
Choose The Right Handheld Showerhead
Picture this: you’re standing in a hardware store, surrounded by countless handheld showerheads. They come in all shapes and sizes, each one with its own unique set of features. It can be overwhelming to choose the right one for your needs. But fear not! As a plumbing expert, I’m here to guide you through the process.
Before making any decisions, it’s important to compare features. Determine what you’re looking for in a showerhead – do you want multiple spray patterns? Adjustable water pressure? A long hose? Make a list of your must-haves and keep them in mind as you research brands. Some popular options include Delta, Moen, and Kohler.
Now that you have a general idea of what’s available on the market, it’s time to research specific brands. Read reviews online or ask for recommendations from friends and family members who have installed handheld showerheads themselves. Pay attention to any common complaints or issues raised by users – if multiple people report low water pressure or leaks, it may be best to steer clear of that brand.
With these tips in mind, you’ll be well on your way to selecting the perfect handheld showerhead for your needs. But before we dive into installation instructions, let’s make sure you have all the necessary tools on hand…
Get The Necessary Tools
A tape measure is essential for proper installation of a handheld showerhead as it will provide an accurate measurement of the necessary placement. A screwdriver is required to securely fasten the hardware of the showerhead in place. A wrench is necessary for tightening and loosening the pipes that are attached to the showerhead. Plumber’s putty may be needed to create a water-tight seal around the showerhead, and a drill may be necessary for drilling holes where needed.
Tape Measure
As a plumbing expert, it is crucial to have the proper tools when installing a handheld showerhead. One essential tool that you should always have on hand is a tape measure. With measuring accuracy being of utmost importance, using a tape measure ensures that you get precise measurements for holes and brackets, ensuring your installation will be perfect.
When choosing a tape measure, it’s important to consider the different types available. A standard tape measure is great for most jobs, but if you are working in tight spaces or need to take measurements around corners, a flexible or bendable tape measure may be more suitable. Additionally, some tape measures come with extra features like digital readouts or laser guides that can make measuring even easier.
Remember that having an accurate measurement is crucial for any installation project. Taking your time and double-checking your measurements can save you time and money in the long run. By using the right type of tape measure for your job and taking care to ensure accuracy, you can ensure that your handheld showerhead installation goes smoothly and without issue.
Screwdriver
As a plumbing expert, having the proper tools is crucial for any installation project. One essential tool that should always be on hand is a screwdriver. Screwdrivers come in various types and sizes, which makes it important to choose the right one for the job.
The most common types of screwdrivers are Phillips head and flathead screwdrivers. A Phillips head screwdriver has a four-pointed star-shaped tip that fits into screws with a corresponding cross-shaped indentation. On the other hand, a flathead screwdriver has a single flat blade tip designed to fit into slots on screws. It’s important to use the correct type of screwdriver when installing a handheld showerhead to avoid damaging the screws or fittings.
When using a screwdriver, it’s crucial to use it properly by applying equal pressure while turning it clockwise or counterclockwise. Applying too much force can strip or damage the screws or fittings, making them difficult to remove or replace in the future. By using the appropriate type of screwdriver and applying even pressure when tightening or loosening screws, you can ensure that your handheld showerhead installation goes smoothly and without issue.
Turn Off The Water Supply
To install a handheld showerhead, it is important to turn off the water supply first. This will ensure that you do not encounter any water-related accidents during the installation process. Water conservation is also a crucial aspect to keep in mind while working on your plumbing fixtures. Hence, turning off the water supply is an excellent way to conserve water.
To turn off the water supply, locate the shut-off valves for your bathroom or shower area. These valves are typically located near the pipes that run into your bathroom or shower room. You can either shut off the main valve for your entire home or just turn off the valves that are specific to your bathroom. Turning off these valves will prevent any water flow from coming into your bathroom and make it easier for you to work on installing your new handheld showerhead.
By turning off the water supply before installing a new handheld showerhead, you are taking an essential step towards conserving water and preventing any potential accidents. Shutting off valves is an easy task that anyone can perform with minimal knowledge of plumbing fixtures. Once you have successfully turned off the water supply, you can proceed with removing your old showerhead and move forward towards installing a new one without any worry of encountering unexpected water flow.
Next Step: Remove The Old Showerhead
Remove The Old Showerhead
After turning off the water supply and removing the old showerhead, it is time to install the new handheld showerhead. Before starting, ensure that all necessary tools are available, including a wrench, Teflon tape, and plumber’s putty. Safety precautions should also be taken to avoid any potential injuries during the installation process.
Firstly, attach the mounting bracket onto the shower arm using a wrench. This will hold the handheld showerhead in place and prevent it from falling off. Next, wrap Teflon tape around the threads of the shower arm to create an airtight seal between it and the new showerhead. Apply a small amount of plumber’s putty on top of the Teflon tape to further secure this connection.
Once these steps have been completed, it is now time to attach the handheld showerhead onto its mount. Ensure that it clicks securely into place before turning on the water supply again to test for any leaks or drips. If everything looks good, congratulations! You have successfully installed your new handheld showerhead.
To ensure that your new handheld showerhead continues functioning properly for years to come, don’t forget to clean the shower arm before attaching it onto its mount. Any debris or buildup can interfere with a proper connection and cause leaks or drips over time. Use a soft cloth or sponge to gently scrub away any dirt or grime before proceeding with installation.
Clean The Shower Arm
To properly install a handheld showerhead, it is crucial that you first clean the shower arm. Over time, mineral buildup and debris can accumulate on the shower arm, which can hinder water flow and reduce the effectiveness of your new showerhead. Cleaning the shower arm is a simple process that you can easily do yourself.
To begin cleaning the shower arm, turn off the water supply to your shower and remove any existing showerhead or attachments from the arm. Next, inspect the surface of the shower arm for any visible buildup or debris. You can use a soft-bristled brush or an old toothbrush to gently scrub away any buildup that you see. If there is significant buildup on the shower arm, you may need to use a solution of equal parts white vinegar and water to break down mineral deposits before scrubbing.
Once you have thoroughly cleaned the surface of the shower arm, rinse it with warm water to remove any remaining residue or cleaning solution. Then, dry the surface of the shower arm with a clean towel or cloth. This will ensure that there is no moisture left on the surface before moving on to applying thread tape, which will be discussed in the next section. By taking this extra step to clean your shower arm before installing your new handheld showerhead, you can ensure that your new fixture will function effectively and provide optimal performance for years to come.
Apply Thread Tape
- Thread tape is a type of adhesive tape used to seal the threads of a pipe joint.
- The type of thread tape used must be compatible with the material of the pipes being connected.
- The amount of thread tape used must be sufficient to prevent leaks, but not so much that the joint is difficult to tighten.
- Before application, it is important to ensure that all threads are free of dirt, debris, and any residual lubrication.
- Thread tape should be wrapped in a spiral pattern around the threads, taking care to ensure that no gaps or overlap occur.
- Once the thread tape has been applied, the joint should be tightened with a wrench until the connection is secure.
Types Of Thread Tape
Before installing a handheld showerhead, it is essential to know the different types of thread tape. Thread tape is used to create a tight seal between threaded connections, preventing leaks. Choosing the right type of thread tape for your specific installation needs is crucial for a successful and long-lasting plumbing project.
There are two main types of thread tape: Teflon and pipe dope. Teflon tape, also known as PTFE (polytetrafluoroethylene) tape, is a thin white tape that is easy to use and widely available. It works by creating a watertight seal between threaded connections. Pipe dope, on the other hand, is a paste-like substance that comes in a canister or tube. It has both lubricating and sealing properties and is ideal for larger threaded connections.
Once you have determined which type of thread tape you need, it’s time to apply it properly. Start by wrapping the tape around the threads in a clockwise direction, making sure not to overlap the edges. The number of times you wrap the tape will depend on the size of the threads and the thickness of the tape. Generally speaking, three to five wraps should suffice for most applications. After applying the thread tape, screw in your new handheld showerhead using an adjustable wrench until it’s snug but not too tight. With these simple steps, you can install your new handheld showerhead with confidence knowing that it won’t leak or cause any problems down the road.
Thread Tape Measurement
When it comes to plumbing projects, measuring thread tape is an essential step in ensuring a leak-free connection. The right amount of thread tape is crucial for creating a tight seal between threaded connections. If you use too little tape, the connection might leak, and if you use too much, the threads might not engage correctly.
To measure thread tape, start by determining the size of the threads you’re working with. You can do this by using a thread pitch gauge or measuring the diameter of the pipe’s threads with a caliper. Once you know the size, choose the appropriate width and thickness of thread tape. A good rule of thumb is to use thinner tape for smaller threads and thicker tape for larger ones.
When applying thread tape, it’s important to use proper techniques to ensure a secure and lasting connection. Start by cleaning and drying the threaded area before applying the tape. Wrap the tape around clockwise, covering all threads without overlapping the edges. Use three to five wraps for most applications but adjust this number depending on your specific needs. Finally, screw in your new handheld showerhead until snug but not overly tight using an adjustable wrench. By following these steps, you can install your new showerhead confidently knowing that it will be leak-free and provide years of reliable service.
Applying Thread Tape
When it comes to plumbing projects, applying thread tape is a crucial step in ensuring a leak-free connection. Thread tape provides several benefits such as preventing leaks and protecting threaded connections from rust and corrosion. However, common mistakes when applying thread tape can lead to the opposite result.
One of the most common mistakes when applying thread tape is using too little or too much tape. Using too little tape may cause leaks, while using too much tape may prevent threads from engaging correctly. To avoid these problems, start by determining the size of the threads you’re working with and choosing the appropriate width and thickness of thread tape.
Once you have the correct thread tape, follow proper application techniques for a secure and lasting connection. Clean and dry the threaded area before wrapping the tape around clockwise, covering all threads without overlapping edges. Use three to five wraps for most applications but adjust this number depending on your specific needs. By avoiding common mistakes and following these steps, you can install your new showerhead with confidence knowing that it will provide years of reliable service without any leaks or issues.
Attach The Bracket
Now that you have gathered the necessary tools and materials, it is time to attach the bracket to your shower wall. Properly attaching the bracket is crucial as it will hold the weight of your handheld showerhead. Here are some tips on how to properly attach the bracket for a handheld showerhead:
- Locate the desired height for your showerhead and mark it with a pencil.
- Use a drill and screws to install the bracket onto the wall. Make sure to choose screws that are appropriate for your type of wall material.
- Double-check that the bracket is level before tightening all screws.
Once you have successfully attached the bracket, you can now adjust its height to best fit your needs. Here are some additional tips for adjusting the height of your showerhead bracket:
- Loosen any screws or bolts that secure the bracket in place.
- Gently slide the bracket up or down until it reaches your desired height.
- Tighten all screws or bolts back into place and test its stability.
With these tips in mind, you can now easily attach and adjust the height of your handheld showerhead’s bracket. The next step would be installing the hose, which we will cover in detail in our subsequent section.
Install The Hose
Selecting the right hose material is essential to ensure optimum performance and durability of your handheld showerhead. The most commonly used materials for shower hoses are stainless steel and plastic. Stainless steel hoses are more durable and resistant to kinking, while plastic hoses come in a variety of colors and are less expensive. When selecting a hose, make sure it is compatible with your showerhead and plumbing fixtures.
Hose length options can vary depending on personal preference and the location of the showerhead in relation to the plumbing fixtures. Standard hose lengths range from 60 inches to 72 inches, but longer or shorter options are available. It’s important to measure the distance between your showerhead and plumbing fixtures before purchasing a hose to ensure you select the appropriate length.
Once you have selected the appropriate hose material and length, it’s time to install it. Before connecting the handheld showerhead, attach one end of the hose to the water supply outlet on your wall or fixture using Teflon tape or a rubber washer for a secure seal. Be careful not to overtighten as this can cause damage. In the next section, we will discuss how to connect the handheld showerhead to the other end of the hose for a complete installation.
Connect The Handheld Showerhead To The Hose
- Before attaching a handheld showerhead to the hose, it is important to measure the hose to ensure the showerhead is compatible.
- Once the correct showerhead is identified, the hose should be attached to the wall in a way that keeps it secure.
- Connecting the showerhead to the hose may require the use of an adapter or other fitting to ensure a watertight seal.
- To ensure a secure connection, the hose should be tightened with a pipe wrench or other appropriate tool.
- It is important to test the connection for any leaks before using the showerhead.
- If the showerhead is connected properly, the water pressure and temperature should be adjusted with the control valve.
Measure The Hose For Compatibility
Accurately measuring the hose of your handheld showerhead is essential before installing it. This subtopic is critical since it determines whether the hose will be compatible with your existing fixtures. A mismatch between the hose and fixture could lead to leakage or water damage, which would require costly repairs. Therefore, it’s crucial to approach this step with utmost care and precision.
To measure the hose for compatibility, you need a tape measure or ruler and a notepad to record the dimensions. Start by disconnecting your old showerhead from the pipe using adjustable pliers. Then, measure the length of the hose from one end to another while ensuring that you account for any bends or curves in the pipeline. Record these measurements accurately since they will determine whether your new handheld showerhead fits properly.
Finally, compare your measurements with those of your new handheld showerhead’s hose. Ensure that there are no significant differences between them such as an inch or more discrepancy since this could cause compatibility issues. If everything checks out correctly, then you can proceed with connecting your new handheld showerhead to the hose and enjoy a refreshing bath experience without any worries of leaks or damages.
In conclusion, measuring your handheld showerhead’s hose for compatibility is vital during installation as it ensures that everything fits together correctly without causing any issues in future use. By following these simple steps, you can achieve accurate measurements and avoid costly repairs due to mismatched plumbing fixtures. Always remember to double-check all measurements before proceeding with installation and enjoy a relaxing bath experience!
Attach The Hose To The Wall
After successfully measuring the hose for compatibility, the next step in installing a handheld showerhead is to attach the hose to the wall. This step is crucial since it determines where and how you’ll be using your new showerhead. There are several wall mounting options available, such as suction cups, adhesive brackets, or screws. It’s essential to consider which option works best for your bathroom setup and personal preferences.
Before attaching the hose to the wall, ensure that you have selected an appropriate hose length that allows for comfortable movement during use. A longer hose provides greater flexibility, while a shorter one may be more convenient for compact spaces. Once you have selected an appropriate length and mounting option, you can proceed with attaching the hose to the wall. Depending on your chosen method of attachment, follow manufacturer instructions carefully and securely fasten the hose in place.
In conclusion, attaching the hose to the wall is a critical step in installing a handheld showerhead that requires careful consideration of both mounting options and hose lengths. By selecting an appropriate length and secure attachment method, you can enjoy a comfortable and refreshing bath experience without worrying about any unexpected leaks or damages caused by improper installation.
Connect The Showerhead To The Hose
Once you have attached the hose to the wall, the next step in installing a handheld showerhead is connecting it to the hose. This process requires careful attention to ensure that there are no leaks or damages caused by improper installation. To begin, unscrew the old showerhead and remove any old tape or debris from the threads of the shower arm. It’s essential to clean these threads thoroughly before proceeding.
Next, attach a small piece of plumber’s tape to the threads of the shower arm to create a tight seal between the showerhead and hose. Then, screw on the mounting bracket that comes with your new showerhead onto the end of your hose. This bracket will provide support for your new showerhead and help prevent water leakage.
Once you have securely fastened the bracket, screw on your new handheld showerhead onto it and tighten it with pliers if necessary. Make sure that everything is tightly secured but avoid overtightening as it may cause damage to both parts. Finally, turn on your water supply and test out your new handheld showerhead for any leaks or malfunctions. Remember to regularly clean and maintain your hose by using mild soap and water or vinegar solution to prevent blockages caused by mineral buildup over time.
Test The Water Flow
Now that you have installed the handheld showerhead, it is essential to test the water flow. Testing the water pressure ensures that your new showerhead is working as expected and helps you adjust the flow rate if necessary. To do this, turn on the water supply and let it run for a few minutes before testing.
The first step in testing the water pressure is to check if there are any leaks or drips from the showerhead. If there are, tighten the connections until they stop leaking. Next, hold your hand under the water stream to feel its force. If it feels too weak or too strong, adjust the flow rate with the showerhead’s controls until you get the desired pressure.
Once you have tested and adjusted your handheld showerhead’s water pressure, you can move on to adjusting its height by adjusting the bracket holding it in place. By following these steps, you can enjoy a relaxing and satisfying shower experience every time you use your new handheld showerhead.
Adjust The Height Of The Bracket
After mounting the handheld showerhead, it’s important to adjust the height of the bracket to ensure maximum convenience and comfort while using it. There are several adjustment options available, depending on your preference and the design of your shower area.
One common mistake people make is installing the bracket too high or too low. This can lead to discomfort and inconvenience during use. To avoid this, start by positioning yourself in your usual showering stance and adjust the bracket accordingly. The ideal position should be at a comfortable height that allows you to easily reach and maneuver the showerhead.
Another option for adjusting the height of the bracket is to use an extension arm. This is particularly useful if you have a high ceiling or if you prefer a higher position for your showerhead. Extension arms come in different lengths and can be easily attached to the existing bracket.
By taking these simple steps to adjust the height of your handheld showerhead, you’ll be able to enjoy all its benefits without any inconvenience or discomfort. In our next section, we’ll discuss how to properly clean and maintain your showerhead for optimal performance and longevity.
Enjoy The Benefits Of A Handheld Showerhead
Upgrade Your Shower Experience with a Handheld Showerhead
Are you tired of standing under a fixed showerhead, unable to easily reach all parts of your body? A handheld showerhead may be just what you need to enhance your shower experience. Not only do they offer more convenience and flexibility, but they also provide a number of advantages over traditional fixed showerheads.
One advantage of handheld showerheads is the ability to customize the water flow according to your preferences. Whether you want a gentle rainfall or a high-pressure massage, handheld showerheads allow you to easily adjust the water flow to suit your needs. Additionally, they can help you save water by allowing you to direct the flow exactly where it’s needed, reducing wastage.
Another advantage of handheld showerheads is their versatility in comparison to fixed showerheads. They are not only great for washing pets and children, but also for cleaning hard-to-reach surfaces like tile walls and bathtubs. With a longer hose length than traditional showerheads, a handheld option provides more flexibility and control.
If you’re looking for an upgrade from your current fixed showerhead, consider investing in a handheld option. Not only will it give you more options for customization and versatility in the bathroom, but it can also improve your overall bathing experience. In the following section, we’ll discuss some tips on how to maintain your new handheld showerhead for optimal performance.
Tips For Maintaining Your Handheld Showerhead
Now that you have enjoyed the benefits of a handheld showerhead, it is important to maintain it properly. Regular cleaning will not only keep your showerhead looking new but also ensure that it functions optimally. One of the easiest ways to clean your showerhead is by soaking it in vinegar or a mixture of baking soda and water. This removes mineral buildup and unclogs any blockages.
In addition to cleaning, you can also adopt water-saving techniques when using your handheld showerhead. Using a low-flow showerhead or aerator reduces the amount of water you use without compromising on pressure. You can also set a timer for your showers or turn off the water while shampooing and conditioning your hair. These small steps go a long way in conserving water and reducing your utility bills.
In case you encounter any issues with your handheld showerhead, there are some common troubleshooting methods that you can employ. For instance, if the water pressure is low, try removing the aerator and cleaning it before replacing it back onto the showerhead. If there are leaks, check for loose connections or worn-out washers and replace them accordingly. With proper maintenance, your handheld showerhead will continue to provide you with an enjoyable bathing experience for years to come.
Troubleshooting Common Issues
- In order to troubleshoot a handheld showerhead with no water flow, one should check the shut-off valves to make sure they are in the open position and that the water is turned on at the source.
- Low water pressure from a handheld showerhead is often caused by a clog in the showerhead, so it should be disassembled and cleaned to restore normal water pressure.
- Leaks in a handheld showerhead can be caused by worn out parts that need to be replaced, or by loose connections that need to be tightened or replaced.
- In order to install a handheld showerhead, one should ensure that the shower arm is compatible and that the pipe sealant is the correct type.
- It is important to ensure that all connections are properly tightened, and that the showerhead is sealed with the appropriate pipe sealant to prevent leaks.
- Finally, a handheld showerhead should be tested to ensure that it is properly installed, and that there are no leaks or other issues with the installation.
No Water Flow
When it comes to installing a handheld showerhead, one common issue that can arise is no water flow. This can be frustrating for homeowners who are looking to upgrade their bathing experience. However, before giving up on the new installation, it’s important to troubleshoot the issue and identify the root cause.
The first step in troubleshooting a handheld showerhead with no water flow is to check for blockages. Over time, sediment and mineral buildup can accumulate in the showerhead and clog the flow of water. To address this issue, simply remove the showerhead from the hose and soak it in a solution of equal parts vinegar and water for several hours. Then rinse thoroughly with warm water and reattach to the hose.
If blockages are not the issue, then it may be necessary to troubleshoot the handheld showerhead itself. Check for any loose connections or damaged parts that could be preventing water flow. If everything appears intact, then it may be necessary to replace the showerhead altogether. By taking these steps to troubleshoot a handheld showerhead with no water flow, homeowners can enjoy all of the benefits of their new installation without any frustration or inconvenience.
Low Water Pressure
In addition to no water flow, another common issue that can occur with handheld showerheads is low water pressure. This can be frustrating for homeowners who are looking for a powerful and invigorating shower experience. However, before giving up on the new installation, it’s important to troubleshoot the issue and identify the root cause.
One potential cause of low water pressure in a handheld showerhead is a faulty water pressure regulator. This component regulates the amount of water that flows into your home’s plumbing system, so if it is not functioning properly, it can lead to reduced water pressure throughout the house. To address this issue, you may need to replace the regulator or adjust it to increase water pressure.
Another potential cause of low water pressure in a handheld showerhead is clogged pipes or fixtures. Over time, sediment and mineral buildup can accumulate in your plumbing system and restrict the flow of water. To address this issue, you may need to clean out your pipes or fixtures using a solution of equal parts vinegar and baking soda or hire a professional plumber to perform a thorough cleaning. By taking these steps to troubleshoot low water pressure in your handheld showerhead, you can enjoy a more satisfying shower experience without any frustration or inconvenience.
Leaking Showerhead
Leaking showerheads can be a common issue that many homeowners encounter. It not only wastes water, but also leads to higher utility bills. Fortunately, fixing dripping showerheads is usually a simple and straightforward process once the root cause is identified.
Identifying the cause of a leaking showerhead is the first step in troubleshooting this issue. One potential cause could be a worn-out washer or gasket inside the showerhead itself. To fix this, you will need to turn off the water supply and disassemble the showerhead to replace the damaged component. Another possible cause of a leaking showerhead is a loose connection between the shower arm and head. Tightening this connection with pliers or an adjustable wrench can often solve the problem.
In some cases, a leaking showerhead may indicate more serious issues with your plumbing system, such as corrosion or damage to pipes. If you have tried replacing washers or tightening connections without success, it may be time to call in a professional plumber for assistance. With their expertise and specialized equipment, they can diagnose and repair any underlying problems that are causing your showerhead to leak and restore peace of mind in your home.
Conclusion
In summary, installing a handheld showerhead in your bathroom is a straightforward process that can bring numerous benefits. First and foremost, it offers a more customizable and convenient showering experience compared to traditional fixed showerheads. With a handheld option, you can easily direct the water stream to specific parts of your body or even use it to clean hard-to-reach areas. Additionally, some models come with adjustable spray patterns, allowing you to switch between different intensities according to your preferences.
When it comes to choosing the right handheld showerhead for you, there are several factors to consider. The most common types include fixed-mount hand showers, slide bar hand showers, and corded hand showers. Fixed-mount options attach directly to the wall or existing shower arm and offer limited mobility but can still be adjusted vertically or horizontally. Slide bar hand showers come with an adjustable bracket that allows you to move the showerhead up and down along a vertical rail. Finally, corded hand showers connect directly to your existing faucet or spout via a hose and offer the greatest flexibility in terms of movement.
Overall, installing a handheld showerhead in your bathroom can provide many benefits that enhance your daily routine. From increased convenience and customization options to improved accessibility for those with mobility issues, there are plenty of reasons why this type of upgrade is worth considering. By weighing the different types available and selecting one that meets your specific needs and preferences, you can enjoy all the advantages of having a handheld showerhead in no time at all.
Conclusion
Installing a handheld showerhead can seem like a daunting task, but with the right tools and steps, it can be done easily. When selecting a handheld showerhead, consider the type of water pressure you need and the design that will work best in your bathroom. Once you have chosen the right showerhead, gather all necessary tools such as pliers, Teflon tape, and a wrench.
Before beginning the installation process, turn off the water supply to avoid any unwanted leaks. Remove the old showerhead and clean the shower arm thoroughly before attaching the new handheld showerhead. Enjoy the benefits of having a versatile and efficient addition to your bathroom routine.
To maintain your handheld showerhead, regularly clean it using vinegar or a mild soap solution to prevent clogs and buildup. Troubleshooting common issues such as low water pressure or leaks can be easily resolved by checking for loose fittings or cleaning out debris from the hose.
In conclusion, installing a handheld showerhead is an easy way to upgrade your bathroom experience. By choosing the right showerhead and following these simple steps, you can enjoy all of its benefits with ease. Remember to maintain your handheld showerhead regularly for optimal performance and efficiency in your daily routine.
Image Credits
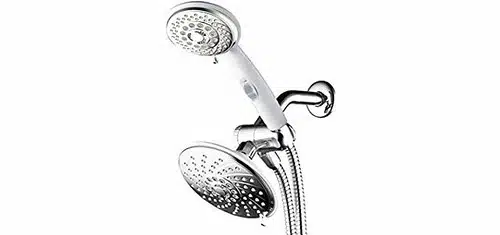
- “Best Showerhead Handheld Combo” by eve.summermail (featured)

