As a plumbing expert, I have seen homeowners struggle with changing their showerheads. While it may seem like a simple task, there are several important steps to consider before attempting to replace your showerhead. In this article, I will guide you through the process of changing a showerhead and provide helpful tips to make the task easier.
Changing a showerhead can improve the overall functionality and appearance of your bathroom. A new showerhead can enhance water pressure, conserve water usage, and add aesthetic value to your space. However, without proper knowledge and tools, replacing a showerhead can lead to frustration and potential damage to your plumbing system. With this in mind, it is crucial to follow the correct procedure when changing your showerhead to ensure that everything goes smoothly.
Gather Necessary Tools And Supplies
Imagine you are a sailor preparing to embark on a long journey. You would not set sail without ensuring that your vessel is equipped with all the necessary tools and supplies. Similarly, embarking on a DIY showerhead replacement project requires proper preparation. Before beginning, gather the necessary tools and supplies such as a new showerhead, adjustable wrench or pliers, Teflon tape, towels, and a bucket.
When it comes to purchasing a new showerhead, there are several options available. You can purchase one from your local hardware store or home improvement center, or you can order one online. Keep in mind that prices vary depending on the type of showerhead you choose. Additionally, consider whether you want to install the showerhead yourself or hire a professional plumber for installation.
DIY vs professional installation is a common dilemma when it comes to home improvement projects like changing a showerhead. While it may seem like an easy task, improper installation can result in leaks and other issues that could lead to costly repairs down the line. However, if you have some plumbing experience and feel confident in your abilities, replacing the showerhead yourself can save money and provide a sense of accomplishment. Regardless of which route you choose, make sure you have all the necessary tools and supplies before beginning the project.
Before diving into the actual replacement process itself, it is essential to turn off the water supply to your shower first. This will prevent any water from spilling out while removing the old showerhead and installing the new one. Once this is done, proceed with removing the old showerhead by following the manufacturer’s instructions or using an adjustable wrench or pliers if needed.
Turn Off Water Supply To Shower
After gathering all the necessary tools and supplies, it is important to turn off the water supply to your shower before starting with the installation process. Failure to do so can result in unwanted water damage and even injury. Therefore, it is crucial to know how to properly turn off the water supply.
Firstly, locate the valve that controls the water flow into your shower. This can usually be found behind a panel or access door near the showerhead. Turn the valve clockwise until it is fully closed. If you are unsure which valve controls your shower, consult your home’s plumbing diagram or seek assistance from a professional plumber.
Secondly, it is recommended to test that the water supply has been successfully turned off by turning on the shower faucet after closing the valve. If no water comes out of the showerhead, then you have successfully turned off the water supply. However, if there is still some water coming out of the faucet, then you may need to double-check that you have fully closed the valve.
Preventing water damage while changing a showerhead is important for maintaining a safe and functional bathroom environment. One tip for preventing potential leaks during this process is to place a towel or cloth underneath the area where you will be working to catch any excess water that may drip out during removal or installation. By taking these precautions and following proper procedures for turning off your shower’s water supply, you can ensure a successful installation process without any unwanted complications.
With the water supply turned off and precautions in place, it is now time to remove your old showerhead and begin installing your new one.
Remove Old Showerhead
A worn-out showerhead can cause water leakage, and it may not provide an adequate stream of water. To avoid such issues, it is necessary to replace the old showerhead with a new one. Removing an old showerhead is not as complex as many people think; all you need is a few tools and some basic knowledge about plumbing.
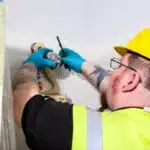
To remove an old showerhead, start by twisting the base of the showerhead counterclockwise using adjustable pliers or a wrench. It may be challenging to remove the showerhead if it has been in place for a long time. If you encounter resistance, use penetrating oil to loosen it up. Once loosened, continue unscrewing until the old showerhead comes off completely.
Tips for replacing a showerhead securely:
- Use Teflon tape on the threads of the new showerhead to ensure that there are no leaks.
- Tighten the new showerhead using your hands first before finishing it off with pliers or a wrench.
- Ensure that the rubber washer that comes with the new showerhead is placed inside before attaching it to the arm.
- Don’t overtighten; doing so could damage both your new shower head and your pipes.
- Double-check everything before turning on water flow from your faucet.
Now that you know how to remove an old showerhead let’s talk about preparing your clean and prepare your arm before installing your new one seamlessly.
Clean And Prepare Shower Arm
Before installing a new showerhead, it is crucial to clean and prepare the shower arm. This step ensures that the new showerhead will fit securely and function properly. There are cleaner alternatives available for this process that can be purchased at any hardware store. However, if you prefer a more eco-friendly solution, you can use vinegar and baking soda.
If your existing showerhead has been in place for several years, there is a possibility that the shower arm may be rusty. In this case, it is essential to remove the rust before installing a new showerhead. A quick and easy solution would be to use sandpaper or steel wool to scrub off the rust. You can also purchase rust remover products from most hardware stores.
Once the cleaning process is complete, it’s time to assemble the new showerhead onto the cleaned and prepared shower arm. Before doing so, make sure to apply thread seal tape to ensure a tight seal between the two components. The thread seal tape will prevent any leaks from occurring and ensure that your new showerhead functions correctly.
Apply Thread Seal Tape
Like a shield protecting the threads from water leaks, thread seal tape is an essential part of changing a showerhead. It is a thin, flexible film made of polytetrafluoroethylene (PTFE) that provides a watertight seal to threaded connections. The tape works by filling gaps between the male and female threads, preventing leakage when the joint is tightened.
Benefits of tape:
- Prevents leaks: Thread seal tape can prevent leaks in plumbing fixtures like showerheads.
- Easy to apply: Applying thread seal tape is easy and does not require any special tools.
- Cost-effective: Thread seal tape is an affordable solution for sealing threaded connections.
- Versatile: This type of tape can be used on different types of pipes and fittings.
Tips for applying tape:
- Clean the threads thoroughly before applying the tape.
- Wrap the tape around the male thread in a clockwise direction.
- Use 2-3 wraps around small diameter threads and 4-5 wraps around larger diameter threads.
- Smooth out any wrinkles or creases in the tape to ensure proper adhesion.
After applying thread seal tape, it’s time to choose and install your new showerhead. By following these steps carefully, you can ensure a leak-free and efficient plumbing fixture that will last for years to come without any hassle.
Choose And Install New Showerhead
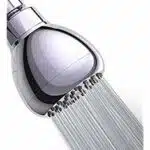
When choosing a new showerhead, there are a few options to consider. The first is the type of spray pattern you prefer, such as rainfall or massage. Another option is the material of the showerhead, with choices ranging from plastic to metal. Lastly, think about water usage and efficiency ratings when making your selection.
Once you have chosen your new showerhead, it is time to install it properly. Start by removing the old showerhead using pliers or a wrench if necessary. Use plumber’s tape on the threads of the pipe before attaching the new showerhead to prevent leaks.
When installing the new showerhead, be sure to follow any manufacturer instructions for proper installation techniques. A common mistake people make is over-tightening the connection, which can cause damage or leaks in the future. Instead, hand-tighten until snug and then use an additional quarter turn with pliers if needed for a secure fit. With these installation tips in mind, you will have a new functioning showerhead in no time.
As you begin to hand-tighten your new showerhead into place, remember that it should not require excessive force. Over-tightening can cause damage or leaks at the point of connection and lead to further problems down the line. Be sure to check for any signs of leaking after installation and address any issues promptly before they become more severe.
Hand-Tighten New Showerhead
To ensure that your new showerhead is installed properly, it’s important to hand-tighten it securely. This means tightening the showerhead by hand, without using any tools. You may be tempted to use pliers or a wrench to tighten the showerhead further, but this can damage the fixture and cause leaks.
Hand-tightening your showerhead will also make it easier to remove in the future for cleaning or replacement. When choosing a new showerhead, consider your needs and preferences. There are many different types of showerheads available, including fixed and handheld models, as well as low-flow and high-pressure options.
Additionally, keep in mind some tips for maintenance. Regularly cleaning your showerhead can help prevent buildup of mineral deposits and other debris that can affect water flow. Soaking the showerhead in vinegar or a specialized cleaner can be effective at removing buildup. By properly choosing and maintaining your showerhead, you can ensure a comfortable and enjoyable experience every time you step into the shower.
As you finish tightening your new showerhead by hand, remember not to use pliers or other tools to tighten it further. Doing so could cause damage to both the fixture and piping connections. In the next section, we’ll discuss how to check for leaks once installation is complete and what steps you should take if any issues arise during or after installation.
Use Pliers To Tighten Further
Using pliers to tighten the showerhead can be a useful step in ensuring that it is securely fastened. Once you have screwed the showerhead onto the pipe, use pliers to give it an extra turn or two. This will help to prevent any leaks from occurring and ensure that the showerhead remains firmly attached.
When using pliers, it is important to avoid overtightening as this can cause damage to both the showerhead and the pipe. Instead, use a gentle but firm grip on the showerhead while turning it with the pliers. Stop tightening once you feel resistance, as this indicates that the showerhead is securely in place.
To summarize, using pliers to tighten your new showerhead is a simple but effective way of ensuring that it stays put and doesn’t leak water. By following these steps carefully and avoiding overtightening, you should be able to enjoy your new showerhead with confidence for years to come.
Moving forward, it’s important to check for leaks before using your newly installed showerhead. Even if you’ve tightened everything perfectly with pliers, there may still be small gaps or cracks that could lead to leaks over time. In the next section, we’ll discuss how to check for leaks and what steps you can take if you do find any issues.
Check For Leaks
To ensure a successful showerhead replacement, it is crucial to check for leaks after installation. Leaks can lead to water wastage and potential damage to your bathroom. To check for leaks, turn on the water supply and observe the connections between the showerhead and the pipe. Check for any signs of water droplets or wet spots around the connection points.
If you notice any leaks, troubleshoot issues by examining each connection point thoroughly. Tighten loose connections with a wrench, but avoid over-tightening as this may cause damage to the showerhead or pipes. If tightening doesn’t stop the leak, consider replacing faulty parts such as washers or gaskets that may be causing the issue.
Checking for leaks and troubleshooting issues is an essential step in ensuring that your new showerhead functions correctly. It’s worth taking the time to do this properly to avoid future headaches caused by water damage or wastage. In the next section, we will discuss how to adjust for optimal height and angle to get maximum comfort during your showers.
Adjust For Optimal Height And Angle
To ensure a comfortable and efficient shower experience, it is crucial to adjust your showerhead to the right height and angle. Proper adjustment can prevent water from spraying outside the shower area and reduce strain on your neck and back. In this section, we will discuss some adjustment techniques that will help you achieve the perfect position for your showerhead.
To start, consider the height of the people who use the shower most frequently. The optimal height for a showerhead is usually between 72 to 78 inches above the floor, although taller or shorter users may require adjustments outside this range. You can use a measuring tape to determine this distance accurately. Once you have measured the desired height, mark it with a pencil before proceeding.
Next, adjust the angle of your showerhead to ensure that water sprays directly onto your body without hitting adjacent walls or objects. To achieve this, tilt the head slightly downward so that water flows in a straight line towards the drain. Avoid pointing it upwards as this can cause water to spray outside of the shower area. If you have a handheld showerhead, make sure that it is positioned at an angle that allows easy access for all users.
Common mistakes when adjusting a showerhead include improper height placement and incorrect angling. Some people also forget to tighten connections properly after making adjustments, which can cause leaks or other issues down the line. To avoid these problems, take your time during installation and double-check all measurements before proceeding.
Adjusting your showerhead is just one step towards achieving an optimal bathing experience. In the next section, we will discuss how to test water flow and pressure to ensure maximum efficiency and comfort while conserving resources.
Test Water Flow And Pressure
After successfully changing the showerhead, it is necessary to test the water flow and pressure to ensure everything is functioning properly. The first thing to do is to test the water temperature. Turn on the shower and allow it to run for a few minutes, making sure that both hot and cold water are at their expected temperatures. If there is a discrepancy in temperature, it may indicate an issue with the plumbing or water heater.
Next, check for rust in the water. This can be done by filling a glass with cold water from the faucet and examining it closely. If there are any signs of rust particles, it could mean that there is corrosion in the pipes or other plumbing fixtures. It is important to address this issue promptly as rust buildup can cause damage to your plumbing system over time.
To better understand if your showerhead is working efficiently, use this table as a guide:
| Water Flow | Water Pressure |
|---|---|
| Low | Low |
| High | Low |
| Low | High |
| High | High |
If you find that you have low water flow and low pressure, it may indicate a clogged showerhead or debris buildup in your pipes. Conversely, if you have high flow and high pressure, your new showerhead may be working perfectly fine.
To avoid any potential issues down the line, make sure to clean up your work area thoroughly before finishing up. This includes removing any tools or materials used during the installation process and wiping down surfaces around the tub or shower enclosure. By taking these steps after installing your new showerhead, you can ensure that everything runs smoothly going forward without any hiccups or complications.
Clean Up Work Area
Before proceeding with the next step in changing your showerhead, it is critical to ensure that your workspace is clear of any unnecessary materials or items. This will not only make the process more efficient but also reduce the likelihood of accidents or injuries occurring. Make sure to remove any tools or equipment from the area that could potentially cause tripping or slipping hazards.
It is also essential to remember to take safety precautions when dealing with plumbing work. Turn off the water supply before beginning any work, as well as releasing any remaining water pressure by turning on the shower faucet. Wear appropriate protective gear like gloves and goggles, especially when working with pipes and fittings that may contain hazardous substances such as lead or asbestos.
By following these simple steps, you can ensure that you are taking all necessary measures to keep yourself safe while changing your showerhead. With a clear workspace and proper safety precautions, you can proceed with confidence knowing that you are minimizing risks and preventing potential accidents from occurring. Next, we will discuss how to dispose of your old showerhead properly without causing harm to yourself or the environment.
Dispose Of Old Showerhead Properly
After cleaning up the work area, it’s time to properly dispose of the old showerhead. Did you know that in the United States, over 300 million tons of plastic waste is generated every year? Unfortunately, much of this waste ends up in landfills and takes hundreds of years to decompose. As responsible citizens, we must do our part in reducing plastic waste by recycling what we can.
Proper disposal of the old showerhead involves checking with your local recycling center for options. Some centers may accept metal showerheads for recycling while others may only accept certain types of plastic. It’s important to follow their guidelines to ensure that the materials are properly sorted and recycled.
If your local recycling center does not accept showerheads, consider contacting a scrap metal dealer or looking for an e-waste drop-off location. These options can help divert your old showerhead from a landfill and potentially even provide some monetary compensation for the materials.
By taking steps towards proper disposal and recycling options, we can make a positive impact on our environment. So go ahead and enjoy your new shower experience with peace of mind knowing that you’ve done your part in reducing waste.
Enjoy Your New Shower Experience
After successfully changing your showerhead, you can now enjoy a refreshing and revitalizing shower experience. Upgrading your showerhead can provide numerous benefits that will enhance the quality of your daily routine. Choosing the right showerhead is crucial in achieving optimal results.
Benefits of Upgrading:
- Improved water pressure and flow rate
- Increased energy efficiency, resulting in lower utility bills
- Reduction in water usage, leading to more sustainable living
- Enhanced aesthetics that can complement any bathroom design
- Variety of features such as massage settings or rainfall options that can cater to individual preferences
When choosing a new showerhead, it is important to consider factors such as shape, size, material, and spray pattern. There are various types of showerheads available in the market today, each offering unique features and advantages. It is recommended to seek expert advice from a professional plumber to help you make an informed decision.
In summary, upgrading your showerhead can greatly improve your daily routine by providing a refreshing and rejuvenating experience. With the right choice of showerhead based on personal needs and preferences, one can enjoy numerous benefits such as improved water pressure, increased energy efficiency and reduced water usage. Consult with a plumbing expert to ensure you choose the best option for your bathroom. In the next section, we will discuss common problems encountered during shower use and how to troubleshoot them effectively.
Troubleshooting Common Problems
Moving on from the previous section, you are now ready to enjoy your new shower experience after successfully changing your showerhead. However, as with any DIY project, there may be some common problems that can arise. Don’t worry, though – in this section, we will cover troubleshooting tips and solutions for those issues.
One of the most common problems that people encounter when changing their showerhead is leaks. This can occur if the threads on the pipe are damaged or if there is not enough plumber’s tape used during installation. To fix this issue, first turn off the water supply to the showerhead and then check if any of the threads are damaged. If they are not, add more plumber’s tape and tighten the connections.
Another issue that can arise after changing a showerhead is low water pressure. This can be caused by a variety of reasons such as clogged pipes or mineral buildup in the showerhead itself. To remedy this problem, remove the showerhead and soak it in a solution of vinegar and water to dissolve any mineral deposits. Additionally, check for any clogs in your pipes and clean them out accordingly.
| Problem | Solution | Preventative Measures |
|---|---|---|
| Leaks at connection points | Add more plumber’s tape and tighten connections | Use sufficient amounts of plumbers’ tape during installation |
| Low water pressure | Soak showerhead in vinegar solution to remove mineral buildup Check for clogs in pipes | Install a water softener to prevent mineral buildup |
As you can see from our table above, these issues have simple solutions that can easily be resolved with some DIY tips and tricks. By following these preventative measures during installation, you can avoid dealing with these problems altogether. Remember to always turn off the water supply before making any adjustments and don’t hesitate to call a professional if needed.
In summary, by familiarizing yourself with these common solutions and DIY tips for troubleshooting issues with your new showerhead, you can ensure that your shower experience remains enjoyable and hassle-free. Remember to take the necessary cautionary steps during installation to prevent these common problems from occurring in the first place.
Conclusion
Changing a showerhead can seem like a daunting task, but with the right tools and preparation, it can be an easy DIY project. Begin by gathering all necessary tools and supplies such as pliers, thread seal tape, and a new showerhead. Turn off the water supply to the shower before removing the old showerhead using pliers. Clean and prepare the shower arm before applying thread seal tape and attaching the new showerhead.
Remember to clean up your work area and dispose of the old showerhead properly. Troubleshoot any common problems such as leaks or difficulty removing the old showerhead. Enjoy your new shower experience with a fresh and updated look.
As plumbing experts, we know that changing a showerhead may seem intimidating, but it is actually quite simple when following proper procedures. With this guide, you can easily change your own showerhead without calling in a professional plumber. Remember to gather all necessary tools and supplies, turn off water supply, remove old showerhead using pliers, clean and prepare the shower arm before applying thread seal tape.
Finally, enjoy your new upgraded bathroom experience with a fresh new look! As they say in plumbing: “A good plumber is always in hot water.” Don’t let changing your showerhead put you in hot water – follow these steps for an easy DIY project!
Image Credits
- “showerhead” by gfairchild (featured)

