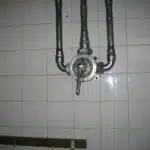
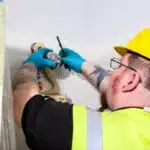
As plumbing repair experts, we understand the importance of having a functioning shower handle. A pull-out shower handle is a common fixture in many homes, but it can become faulty over time due to wear and tear. A damaged or broken shower handle can be frustrating and inconvenient as it prevents you from using your shower properly. However, repairing a pull-out shower handle is not as complicated as it may seem. With the right tools and knowledge, you can easily fix this issue on your own.
In this article, we will guide you through the process of repairing a pull-out shower handle step by step. We will explain the common causes of a faulty shower handle and provide solutions for each problem. We will also provide tips on how to maintain your shower handle to prevent future issues. By following our instructions, you will be able to save money on professional repairs and have a fully functioning shower once again. So let’s get started on learning how to repair a pull-out shower handle!
Tools Needed For Shower Handle Repair
Shower handle repair is a common problem that homeowners often encounter. A pull-out shower handle that no longer functions properly can be frustrating, especially when it prevents the user from enjoying a relaxing shower. In most cases, repairing the handle is an easy fix that requires minimal effort and basic tools.
Before beginning any repair work on the shower handle, it’s essential to have the right materials on hand. Some of the essential materials required for this type of repair include a screwdriver (both Phillips and flathead), pliers, a wrench, replacement parts such as O-rings or washers, and lubricant. It’s also important to have a clean workspace with adequate lighting.
One of the most common problems with pull-out shower handles is that they become stuck or difficult to move over time. This can be caused by mineral buildup or corrosion in the valve cartridge or stem assembly. In some cases, the issue may be due to worn out parts such as O-rings or washers. Having an understanding of these common issues and knowing which tools and replacement parts are needed can make the repair process more efficient and effective.
With the right tools and materials on hand, assessing the issue with your pull-out shower handle is straightforward. By following a few simple steps, you can determine what needs fixing and take action accordingly.
Assessing The Issue
As a plumbing repair expert, I have seen it all when it comes to shower handle issues. From loose handles to worn-out cartridges, the problems are endless. But fear not, for with the right tools and know-how, you can tackle this issue head-on and get your shower working as good as new.
First things first, let’s assess the issue at hand. Common causes of a pull-out shower handle include a broken cartridge or a worn-out rubber washer. Troubleshooting tips include checking for any visible damage or leaks around the handle area. It’s also important to ensure that the water supply is turned off before attempting any repairs.
Once you’ve identified the issue, it’s time to turn off the water supply. This step is crucial in preventing any further damage or leaks during the repair process. Simply locate your main shut-off valve and turn it clockwise until it stops. With the water supply off, you can now move on to disassembling the handle and fixing the problem at hand.
Turning Off The Water Supply
To repair a pull-out shower handle, the first step is to turn off the water supply. This is an important step that must not be skipped as it can prevent water damage and make the repair process smoother. Shutting off the water supply will ensure that there is no water flowing through the pipes while you work on the shower handle.
To do this, locate the main water valve in your home and turn it off. In most homes, this valve can be found near the water meter or where the main water line enters your house. Turn the valve clockwise until it is fully closed. If you cannot locate the main valve or if it is difficult to turn off, consider calling a professional plumber for assistance.
It is important to note that turning off the water supply does not guarantee that there will be no water flowing through the pipes. There may still be some residual water left in the pipes, so it’s a good idea to open up a nearby faucet to release any remaining pressure. With the water supply turned off, you can now move on to removing the shower handle and repairing any issues with it.
Removing The Shower Handle
- To repair a pull-out shower handle, it is necessary to gather the appropriate tools, such as a screwdriver, adjustable wrench, and a set of pliers.
- The set screws must then be carefully loosened to remove the handle from the shower wall.
- The handle is usually secured with two set screws, located on each side of the handle.
- To loosen the set screws, a flathead screwdriver or an adjustable wrench should be used.
- Once the set screws have been loosened, the handle can then be carefully removed from the wall.
- It is important to remember to use caution when removing the handle, as it can be easily damaged.
Gathering Tools
Choosing appropriate and affordable tools is a crucial step in removing a pull-out shower handle. This ensures that the repair process goes smoothly, without causing further damage. The right tools will also allow you to complete the job quickly and efficiently, saving you time and effort. Some of the essential tools you’ll need include pliers, screwdrivers, Allen wrenches, and a spanner wrench.
Preparing your workspace for shower handle repair is equally important. You want to ensure that your work area is clean and free from any clutter or obstacles that could hinder your progress. It’s also a good idea to lay down a protective cloth or mat to prevent any scratches or damage to the shower surface while working on it. Once you have cleared the space, gather all your tools and keep them within reach.
In summary, gathering appropriate tools and preparing your workspace are critical steps in removing a pull-out shower handle for repair. Choosing affordable yet reliable tools will help you save on costs while ensuring efficient repairs. Preparing your workspace by clearing all clutter and laying down protective materials will ensure smooth progress during the repair process. With these steps in place, you can confidently tackle any issues with your pull-out shower handle.
Loosening Set Screws
When it comes to removing a shower handle, one crucial step is loosening the set screws. These screws are responsible for holding the handle in place and can be found either on the underside of the handle or at the base of the decorative cover plate. To loosen these screws, you’ll need an appropriate tool such as an Allen wrench or screwdriver.
Before attempting to loosen the set screws, it is essential to ensure that they are not stripped or damaged. If they appear worn out, it may be necessary to replace them before proceeding with any repairs. Once you have verified that the set screws are in good condition, apply threadlocker to prevent future loosening.
Threadlocker is a type of adhesive that prevents fasteners from coming loose due to vibration or other factors. It is available in different strengths and should be chosen based on the specific application. Applying threadlocker to set screws will provide added security and ensure that your shower handle remains firmly in place.
Removing Handle
To continue with the process of removing a shower handle, the next step is to remove the handle itself. This can be accomplished by using lubricants such as WD-40 to loosen any adhesive or corrosion that may be holding it in place. Once the lubricant has had time to penetrate, gently wiggle and pull on the handle until it comes off.
Before proceeding with any further repairs or replacements, it is important to inspect all components of the shower handle, including the stem and cartridge. Check for any signs of wear or damage that may require replacement. If everything looks good, you can proceed with reinstalling the handle by following the reverse steps of removal.
When reinstalling the handle, ensure that all parts are properly aligned and seated before tightening any screws or fasteners. Use threadlocker on set screws if necessary to prevent future loosening. Finally, test your work by turning on the water and checking for any leaks or other issues. By following these steps carefully and attentively, you can successfully remove and reinstall your shower handle without encountering any complications.
Inspecting The Handle And Cartridge
After successfully removing the shower handle, it is time to check for any damages that may require repair. Inspecting the handle damage is essential in ensuring that the handle is not the cause of the issue. A damaged handle can cause problems when pulling or pushing it, thus affecting water flow. Additionally, inspecting it will reveal whether there are any cracks or chips in the plastic or metal components. This step is crucial in preventing future leaks and identifying whether a replacement handle is required.
Another aspect to check when repairing a pull-out shower handle is cartridge issues. The cartridge is responsible for controlling water flow and temperature, and any malfunction can lead to poor performance of your shower system. When inspecting the cartridge, look out for any signs of corrosion or damage around its edges or inner parts. If you notice visible signs of wear and tear, replacing it may be necessary to ensure optimal functioning of your shower system.
To further assess your pull-out shower handle’s condition, here are some sub-lists that will paint a picture for you:
Inspect Handle Damage
Look out for cracks or chips
Check if there are any loose components
Ensure all screws are tightly secured
Identify Cartridge Issues
Check for signs of corrosion on its edges
Examine the inner parts carefully
Ensure all connections are secure
Overall Assessment
Examine all other parts such as valves and seals
Test water pressure and temperature after reassembling everything
By following these steps diligently, you can identify whether your pull-out shower handle requires repair or replacement. In conclusion, inspecting both the handle damage and cartridges’ condition will provide insight into what needs attention when repairing a pull-out shower handle system.
Replacing The Cartridge
When it comes to repairing a pull-out shower handle, replacing the cartridge is often necessary. However, before doing so, it is important to ensure cartridge compatibility. Check the manufacturer’s specifications and purchase a compatible replacement cartridge. Failure to use a compatible cartridge can result in leaks and other issues.
If replacing the cartridge does not resolve the issue, troubleshooting cartridge issues may be necessary. The first step is to clean the cartridge thoroughly using a soft-bristled brush and vinegar or another cleaning solution. If this does not work, inspect the o-rings for any damage or wear and replace them if needed. Another common issue is mineral buildup on the cartridge, which can be removed with a descaling solution.
In summary, replacing the cartridge is often necessary when repairing a pull-out shower handle. It is important to use a compatible replacement cartridge to avoid further issues. If troubleshooting is required due to continued issues after replacing the cartridge, cleaning thoroughly with vinegar or another cleaning solution and inspecting o-rings for damage are recommended steps before moving on to further solutions such as lubricating the cartridge and o-rings.
Lubricating The Cartridge And O-Rings
After removing the shower handle, it is essential to lubricate the cartridge and O-rings. This process helps to ensure a smooth operation of the handle and prevent any future leaks. Before beginning the lubrication process, it is necessary to clean the cartridge and O-rings thoroughly.
To start with, use a soft cloth or brush to remove any dirt or debris from the cartridge and O-rings. Ensure that you do not scratch or damage them while cleaning. Next, apply a few drops of silicone lubricant onto the O-rings and cartridge. The lubricant will help reduce friction between these two parts, thus improving their functionality.
When applying silicone lubricant, ensure that you use just enough to cover all areas of the cartridge and O-rings evenly. Avoid using too much as this may cause clogging of the showerhead later on. Lastly, wipe off any excess lubricant using a clean cloth. This step ensures that there is no residue left behind on the handle after reassembling it.
Next up is reassembling the handle in its proper position. However, before doing so, it is essential to let the lubrication set in for at least an hour or so. This step allows for proper distribution of the silicone throughout all parts of the cartridge and O-rings. Once done, you can proceed with assembling your shower handle back in place securely without worrying about leaks or difficulty in handling it effectively due to friction between its parts.
Reassembling The Handle
One common issue with pull-out shower handles is that they can become loose or detached from the valve stem. In such cases, it is necessary to disassemble and reassemble the handle to repair it. Handle reassembly is a crucial step in this process, and if not done correctly, can worsen the problem.
To begin the handle reassembly process, carefully align the handle with the valve stem. It should slide onto the stem smoothly and without resistance. If you encounter any resistance during this process, stop immediately and troubleshoot the issue. Common issues include dirt or debris clogging the valve stem threads, worn out parts, or improperly aligned components.
Once you have successfully attached the handle to the valve stem, carefully tighten any screws or bolts that secure it in place. Be sure not to overtighten them as this can cause damage. Troubleshooting tips for this step include ensuring that all screws are properly aligned with their corresponding holes and using appropriate tools for tightening them. By following these steps closely, you will be able to reassemble your shower handle with ease and restore its functionality.
With your newly assembled shower handle in place, it’s time to test its functionality before finishing up repairs permanently. This ensures that everything has been put back together correctly and ready for use. Testing the handle requires turning on your water supply at low pressure levels first then gradually increasing pressure until you reach normal flow rates while checking for any leaks or malfunctions along the way. Remember to proceed with caution when testing new installations or repaired ones since water damage can be costly if anything goes wrong during use!
Testing The Handle
After reassembling the shower handle, it is important to test it thoroughly before declaring the repair complete. Testing techniques can vary depending on the type of shower handle and the specific issue that was repaired. However, some basic troubleshooting tips can be applied to any situation.
Firstly, turn off the water supply and ensure that all parts are tightened securely. Turn the water supply back on and test the handle for leaks or drips. If there are any leaks, tighten the affected area until they stop. Secondly, check if the handle is turning smoothly without any resistance or looseness. If there is resistance, examine if any parts were installed incorrectly or if there are still debris or mineral buildup within the system.
If everything appears to be in working order, run hot and cold water through the showerhead while adjusting the temperature with the repaired handle. This will help determine if any further tinkering is needed before considering a job well done. Remember to always take safety precautions when testing a shower handle, such as wearing gloves and eye protection.
Moving forward, it is important to understand common causes of a faulty shower handle to prevent future issues from arising. Read on for more information about what could be causing your shower woes.
Common Causes Of A Faulty Shower Handle
Causes of a Faulty Shower Handle
A faulty shower handle can cause inconvenience and frustration to many homeowners. Some of the common causes of a faulty shower handle include wear and tear due to frequent usage, accumulation of mineral deposits, and improper installation. When the handle is frequently pulled out or pushed in, it can lead to the loosening of screws, causing the handle to become wobbly or completely detach from its base.
Prevention is better than cure when it comes to dealing with a loose shower handle. One way to prevent this problem is by ensuring proper installation during the initial fixture setup. This involves securing all nuts and bolts tightly so that they remain intact even after extensive use. Additionally, regular cleaning using vinegar or other mineral deposit removers can help prevent buildup that may affect the functionality of your shower handle.
In summary, understanding the causes of a faulty shower handle is crucial in preventing potential issues such as leaks and water damage. Proper installation during setup and regular cleaning are simple yet effective preventive measures that you can take to ensure your shower handles remain functional for years to come. In the next section, we will delve into some practical solutions for fixing a loose shower handle.
Solutions For A Loose Shower Handle
When dealing with a loose shower handle, it is important to first identify the cause of the problem. Loose handles are typically caused by worn out screws or malfunctioning cartridges. In some cases, tightening the screws may be all that is needed to fix the issue. However, if this does not work, replacing the cartridge may be necessary.
To tighten the screws on a loose shower handle, you will need a screwdriver. Start by removing any caps that cover the screws and then use the screwdriver to tighten each screw until they are snug. Be careful not to over-tighten as this could cause damage to the handle or surrounding plumbing fixtures.
If tightening the screws does not solve the problem, it may be necessary to replace the cartridge. This can be done by turning off the water supply and removing any decorative covers or handles that may be in place. Once these are removed, locate and remove the old cartridge before installing a new one. It is important to ensure that you choose a cartridge that is compatible with your shower fixture.
Overall, fixing a loose shower handle can often be done through simple steps such as tightening screws or replacing cartridges. However, if these steps do not work, it may be necessary to seek professional assistance from a plumbing repair expert for further troubleshooting and repairs.
Transition: Now that we have addressed solutions for a loose shower handle let us discuss potential solutions for when your shower handle gets stuck.
Solutions For A Stuck Shower Handle
- Greasing the pull-out handle can be an effective solution to a stuck shower handle.
- To ensure successful lubrication, the grease should be applied to the handle shaft and the spindle, as well as the handle’s internal components.
- Additionally, it is important to lubricate the joints to ensure a smooth operation of the handle.
- Tightening the set screws is also a necessary step to ensure that the handle remains secure and does not slip or move.
- It is important to note that the set screws should not be over-tightened, as this can damage the handle.
- The use of a lubricant and applying the correct amount of torque to the set screws can help prevent a stuck shower handle.
Grease The Pull-Out Handle
Proper maintenance and regular cleaning of your shower handle can help prevent it from getting stuck. However, if you encounter a sticky or stuck pull-out handle, one solution is to grease the handle. Greasing the pull-out handle can significantly improve its operation and extend its lifespan.
One of the benefits of lubricating a pull-out shower handle is that it reduces friction between the metal parts, allowing them to move smoothly. This prevents unnecessary wear and tear on the handle parts that could lead to breakage in the future. Choosing the right lubricant for your shower handle is essential to ensure optimal performance. Silicone-based lubricants are recommended as they do not attract dirt and dust like oil-based lubricants.
To grease the pull-out shower handle, first turn off the water supply valves to prevent any accidents. Then remove the cover plate or cap from the valve stem to expose it. Apply a small amount of silicone-based lubricant directly onto the valve stem and spread it evenly with your finger or a cloth. Reassemble all parts carefully before turning on the water supply valves again.
In conclusion, greasing a pull-out shower handle is an easy and effective solution to a sticky or stuck valve. It provides several benefits such as reducing friction between metal parts and preventing premature wear and tear of your shower handle. By choosing the right lubricant for your shower handle, you can ensure that it operates smoothly for years to come.
Lubricate The Joints
Preventive maintenance is crucial in ensuring that your shower handle operates smoothly. One of the solutions to a stuck shower handle is to lubricate the joints. Lubricating the joints can help reduce friction between the metal parts, preventing wear and tear on your shower handle.
There are various common lubricants used for lubricating shower handles, such as silicone-based or petroleum-based lubricants. However, it is recommended to use silicone-based lubricants as they do not attract dust and dirt like oil-based lubricants. Before applying any lubricant, make sure to turn off the water supply valves to avoid any accidents.
To lubricate the joints of your shower handle, remove the cover plate or cap from the valve stem. Apply a small amount of silicone-based lubricant directly onto the joint and spread it evenly with your finger or a cloth. Reassemble all parts carefully before turning on the water supply valves again. By taking preventive maintenance measures such as regularly lubricating the joints of your shower handle, you can ensure that it operates smoothly for years to come.
Tighten The Set Screws
To further address the issue of a stuck shower handle, another solution you can try is tightening the set screws. Over time, these screws may become loose due to regular use and vibration, resulting in a wobbly or unresponsive handle. Adjusting the tension of the set screws can help stabilize the handle and prevent it from getting stuck.
To tighten the set screws, begin by locating them on the underside of your shower handle. Using a screwdriver that fits the head of the screw, turn it clockwise until it feels snug but not too tight. Be careful not to overtighten as this may cause damage to the threads or strip the screw head altogether. If you find that your set screws keep loosening even after tightening them, consider using Loctite as an additional measure to secure them.
Using Loctite is an effective way to reinforce the grip of your set screws and prevent them from coming loose over time. Simply apply a small amount of Loctite threadlocker onto each screw before tightening them. This will create a stronger bond between the threads and ensure that your shower handle remains stable for longer periods. By taking these measures, you can maintain the functionality of your shower handle and avoid having to deal with a stuck or wobbly one in future use.
Solutions For A Leaking Shower Handle
If your shower handle is pulling out from the wall, it can be a frustrating problem to deal with. However, there are solutions available to repair this issue and get your shower back to working order. Before calling a professional plumber, try these DIY solutions for fixing a pull-out shower handle.
First, turn off the water supply to your shower. This may involve turning off the main water valve to your house if you cannot locate a specific valve for your shower. Next, remove the handle itself by unscrewing any screws or bolts that are holding it in place. Check for any obvious signs of damage or wear on the handle or inside mechanism. If you see any issues, replace those parts as necessary. If everything looks fine, reattach the handle and turn on the water supply to test if the problem has been fixed.
If you are still experiencing issues with your pull-out shower handle after attempting these DIY solutions, it may be time to call in a professional plumber for further assistance. They can help diagnose and fix any underlying problems that could be causing the issue, such as leaking pipes or faulty valves. Don’t let fixing drips become a bigger problem – address them as soon as possible to avoid more costly repairs down the line.
In order to maintain your shower handle and prevent future problems from occurring, make sure to regularly check for any leaks or other issues with your plumbing system. Catching small problems early on can help prevent larger ones from developing over time. Additionally, consider investing in high-quality parts for your shower system that will last longer and require less maintenance overall. By taking these steps now, you can enjoy a functioning and efficient shower system for years to come.
Maintaining Your Shower Handle
Regular upkeep of your shower handle can prevent damage and prolong its lifespan. Cleaning techniques are essential in maintaining both the aesthetic appeal and functionality of your shower handle. It is recommended to use a mild soap solution for cleaning the handle, followed by wiping it dry with a soft cloth. Do not use harsh chemicals or scouring pads as they may cause scratches or damage to the surface of the handle.
Prevention methods are also vital in ensuring that your shower handle remains in good condition. When using your shower, avoid applying excessive force when turning the handle, as this can cause wear and tear over time. Additionally, it is recommended to avoid hanging heavy items on the handle, such as towels or clothing, which may cause it to loosen or become damaged.
Regular maintenance of your shower handle can save you money in the long run by preventing costly repairs or replacements. However, if you notice any signs of damage to your shower handle, such as leaks or difficulty turning it on/off, it may be time to call a professional plumber for further assistance.
Transition: Now that we have covered some tips on maintaining your shower handle let’s move on to discussing when it’s appropriate to seek help from a professional plumber.
When To Call A Professional Plumber
Maintaining your shower handle is an essential aspect of keeping your bathroom in good condition. However, sometimes you may encounter a problem with your shower handle that requires repair. One of the most common issues homeowners face is a pull-out shower handle. A pull-out shower handle is one that can be removed from its base when pulled too hard, making it difficult to control water flow. If you are experiencing this problem, there are several DIY troubleshooting tips you can try before deciding to call a professional plumber.
One DIY troubleshooting tip for fixing a pull-out shower handle is to tighten the set screw located on the side of the handle. This screw holds the handle in place and can become loose over time, causing the handle to pull out from its base. Another option is to replace the cartridge inside the valve body. The cartridge controls water flow and temperature and can malfunction if it becomes worn or damaged over time. Finally, you can also try lubricating the cartridge with silicone grease to ensure smooth operation.
Despite these DIY troubleshooting tips, some shower handle problems require professional attention. When to call a professional plumber depends on various factors such as your level of experience with plumbing repairs and the complexity of the issue at hand. If you have attempted all possible DIY solutions without success or lack confidence in your ability to fix the problem, it may be time to call in a professional plumber for assistance.
Remember that while it may be tempting to attempt DIY repairs to save money, incorrect handling of plumbing fixtures can lead to more severe damage and costly repairs down the line. In summary, knowing when to call a professional plumber for help with your pull-out shower handle problem is crucial for avoiding further damage and ensuring proper functioning of your bathroom fixtures.
Conclusion
Shower handle repairs are a common issue that homeowners encounter. Armed with the right tools and knowledge, you can tackle this problem yourself without the need for a professional plumber. However, it is important to assess the issue adequately before attempting any repair work.
Turning off the water supply and inspecting the handle and cartridge are essential steps in repairing a pull-out shower handle. Solutions for stuck or leaking handles vary depending on the cause of the issue. Proper maintenance of your shower handle can also prevent future problems from occurring.
In conclusion, repairing a pull-out shower handle can be an easy task with the right tools and knowledge. Remember to assess the issue thoroughly before proceeding with any repair work, and maintain your shower handle regularly to prevent future issues. If all else fails, don’t hesitate to call a professional plumber for assistance. As plumbing repair experts say, “a little prevention goes a long way in avoiding bigger problems down the line.”
Image Credits
- “cabinn_4.JPG” by dsearls (featured)

