Installing a shower pan in your bathroom is a crucial step in achieving an efficient and effective plumbing system. A shower pan serves as the foundation for your shower, preventing water leakage and protecting the structural integrity of your bathroom floor. While it may seem daunting to install a shower pan, with proper guidance and tools, you can easily do this yourself.
In this article, we will discuss the necessary steps and tools required to install a shower pan in your bathroom. From preparing the subfloor to waterproofing the area, we will guide you through each step of the installation process. As a plumbing installation expert, I have seen many DIY installations gone wrong due to lack of knowledge or poor execution. However, with proper guidance and attention to detail, you can successfully install a shower pan that will ensure longevity and functionality for years to come.
Assessing Your Bathroom Needs
Before proceeding with installing a shower pan in your bathroom, it is essential to assess your bathroom’s layout and determine the drain placement. The bathroom layout will affect the size and shape of the shower pan you need to install. It is crucial to ensure that there is enough space to accommodate the shower pan without compromising other fixtures’ functionality.
The drain placement is another critical factor to consider when assessing your bathroom needs. You need to locate where your existing drain is located and its distance from the intended shower pan location. If the drain location does not match with where you intend to place the shower pan, you may need to hire a plumber to relocate or install a new drain line. Failure to consider this factor can lead to significant problems later on during installation.
In summary, before embarking on installing a shower pan in your bathroom, take time first to assess your bathroom’s layout and determine the drain placement. This step is crucial as it will help you choose the right type of shower pan that fits perfectly well into your bathroom without any issues. In the next section, we will discuss how you can choose the right shower pan for your specific needs based on various factors such as material, size, style, and more.
Choosing The Right Shower Pan
Assessing your bathroom needs is the first crucial step in installing a shower pan. Choosing the right shower pan material is equally important, as it will determine the durability and longevity of your shower pan. According to a recent survey, fiberglass and acrylic are the most popular materials for shower pans due to their affordability and ease of maintenance.
While DIY installation may seem like a cost-effective solution, it is recommended to seek professional installation for your shower pan. A professional installer has the necessary skills and tools to ensure that your shower pan is properly installed, avoiding any potential leaks or damage to your subfloor. Additionally, professional installation typically comes with a warranty or guarantee for added peace of mind.
When it comes to measuring and cutting the subfloor for your shower pan installation, precision is key. The subfloor must be level and even to prevent any shifting or movement of the shower pan over time. It is also important to consider any plumbing or drainage systems that may need to be adjusted before installation begins. By taking these factors into account and working with a trusted professional installer, you can ensure a successful and long-lasting shower pan installation.
Measuring And Cutting The Subfloor
Subfloor preparation is crucial before installing a shower pan. A level subfloor ensures that the shower pan sits flat and doesn’t wobble. Begin by measuring the dimensions of the shower pan and marking them on the subfloor using a pencil or chalk line. Check to ensure that the measurements are accurate, particularly around the drain opening.
Once you have marked out the dimensions of the shower pan, use a jigsaw or reciprocating saw to cut out any excess subfloor material. Use caution when cutting around the drain opening in order not to damage any pipes underneath. If there are joists in your way, use a handsaw to cut them flush with the subfloor.
Cutting techniques for subfloor preparation depend on your type of flooring material. For example, if your bathroom has tile flooring, use a diamond blade or tile cutter to make precise cuts without damaging surrounding tiles. For wooden floors, use a circular saw to make straight cuts through multiple layers of plywood or OSB (oriented strand board). Always wear protective gear like safety goggles and gloves when cutting subfloors.
Preparing the drain assembly is an essential step for installing a shower pan properly. The next section will cover how to prepare and install this critical component of your shower system. Before moving forward with this step, double-check that you have accurately measured and cut out your subfloor according to your shower pan’s specifications. This will ensure that everything fits well together during installation and prevent future leaks or structural issues.
Preparing The Drain Assembly
Accurate measurements of the drain opening are essential for a successful installation of a shower pan. Utilizing a tape measure, the drain opening should be carefully measured in both the length and width directions. After the measurements have been taken, a jigsaw should be used to cut the drain opening to the appropriate size. To ensure a precise and even cut, a steady hand and a steady guide should be used.
Measuring Drain Opening
When preparing to install a shower pan in your bathroom, one of the crucial steps is measuring the drain opening. It is important to ensure that the shower pan’s drain fits perfectly with the bathroom’s existing plumbing system. To start, gather the necessary tools, including a measuring tape and a level.
Standard sizes are available for most shower pans, but custom options are also available if needed. Before measuring, identify whether you need a standard or custom-sized shower pan. If you choose a custom size, make sure to provide accurate measurements to avoid any fitting issues during installation.
To measure the drain opening accurately, use a measuring tape and record both its diameter and location from the wall. Ensure that you measure both horizontally and vertically from the wall so that the placement of your new shower pan is precise. Use a level to ensure that your measurements are accurate and double-check them before proceeding with installation.
In conclusion, taking accurate measurements of your drain opening before installing a shower pan is essential. This step can help ensure that your new shower pan fits correctly and works efficiently with your existing plumbing system. Use standard sizes or consider custom options if required, gather all necessary tools beforehand, and double-check all measurements for accuracy using a level before proceeding with installation.
Cutting Drain Opening
When installing a shower pan, ensuring that the drain assembly is prepared correctly is crucial to its functionality. One of the essential steps in preparing the drain assembly is cutting the drain opening. This process involves cutting an opening in the shower pan to accommodate the drain fitting.
Before beginning this step, ensure that you have all necessary tools on hand, including a jigsaw or reciprocating saw, drill with hole saw attachment, and measuring tape. It is important to use these tools correctly to avoid common mistakes such as inaccurate measurements or uneven cuts.
To start, measure and mark the center of your shower pan’s drain location using a measuring tape. Then, use a hole saw attachment on your drill to cut a pilot hole in the center of your marked spot. Once completed, use a jigsaw or reciprocating saw to cut along the marked line until reaching the desired size for your drain opening. Remember to double-check all measurements and ensure that your cuts are level and straight for optimal results.
In summary, cutting the drain opening is an integral part of preparing the drain assembly when installing a shower pan. Ensure that you have all necessary tools before starting and avoid common mistakes such as inaccurate measurements or uneven cuts. With proper preparation and execution, cutting the drain opening can be completed quickly and efficiently in just a few simple steps.
Installing The Drain Assembly
It is imperative to ensure drain assembly compatibility before installation. The drain system should fit perfectly with the shower pan or base. This can be achieved by purchasing a compatible set or measuring the dimensions of both components and confirming that they match. If there is any discrepancy, necessary adjustments should be made before beginning the installation process.
Troubleshooting leaks is a common issue associated with installing a shower pan drain assembly. To avoid this, all parts should be properly lubricated and tightly sealed during installation. Additionally, regular checks for leaks should be conducted, especially after completing the installation process. Any sign of leakage should be addressed immediately to prevent water damage to surrounding structures.
The shower pan drain assembly is an essential component of every bathroom and requires expert attention during installation. Ensuring compatibility and avoiding leakages are crucial steps in achieving a successful installation outcome. Once these steps have been completed, the subsequent section will entail placing and leveling the shower base for optimal use.
Placing And Leveling The Shower Base
After successfully installing the drain assembly, the next crucial step is to place and level the shower base. Start by choosing the right pan materials that will fit your bathroom’s design and needs. There are different kinds of shower pans available in the market, including acrylic, fiberglass, and tileable ones. Acrylic or fiberglass options are easy to install and maintain, while tileable ones offer more customization options but require more work.
Once you have chosen the right shower pan for your bathroom, it’s time to focus on leveling techniques. A properly leveled shower base is essential for preventing water from seeping out of the enclosure or pooling in one area. Before placing the pan, make sure that the floor surface is even and free from any bumps or debris. Use a spirit level to check if there are any uneven spots and adjust accordingly by adding or removing mortar under the pan until it sits flat.
In summary, placing and leveling a shower base requires careful attention to detail to ensure proper water drainage and prevent leaks. Choose a shower pan material that suits your needs best and make sure to check if it fits perfectly into your bathroom space. Additionally, use leveling techniques such as checking for an even floor surface and adjusting with mortar as needed to achieve a level installation that will last for years to come. In our next section, we will discuss securing the shower base in place for added stability during use.
Securing The Shower Base
- In order to properly secure a shower base, the shower area must first be adequately prepared.
- This involves ensuring that the subfloor is level, and that any existing plumbing is correctly positioned.
- Once the shower area is prepared, the shower base should be installed in accordance with the manufacturer’s instructions.
- All applicable fixtures must be correctly connected to the base and any necessary supports installed.
- After the base is installed, the perimeter of the pan should be sealed with a suitable waterproof sealant.
- Finally, the shower base should be checked for stability and any necessary adjustments made before use.
Preparing The Shower Area
Designing the shower area is an important aspect to consider when installing a shower pan. The space should be planned accordingly to ensure that the shower base fits perfectly. Measuring the dimensions of the shower area is necessary to determine the appropriate size for the pan. Additionally, it’s essential to account for any obstructions like pipes and drains that may affect the installation process. A well-designed shower area will ensure a smooth installation process and improve functionality.
Waterproofing techniques are critical when preparing the shower area for installation. Moisture can cause damage to your bathroom walls and floors if not appropriately managed. Applying waterproof membrane on surfaces where water may penetrate is crucial in preventing water damage. Additionally, ensuring that all seams are sealed correctly will prevent water from seeping through joints and causing leaks. Proper waterproofing techniques will not only protect your bathroom but also extend the lifespan of your shower base.
Lastly, before installing a new shower pan, it’s essential to inspect and repair any damages in the existing subfloor or framing structure. Ensure that all nails or screws are tightly secured before laying down any waterproof membrane or adhesive materials. Fixing any structural issues beforehand will provide a sturdy base for securing your new shower pan and prevent any potential problems down the line. Taking these preparatory steps will ensure a successful installation of your new shower pan and create an enjoyable bathing experience.
Output using more than three paragraph(s):
Designing your dream bathroom requires careful planning, especially when it comes to installing a new shower pan. Preparing the shower area involves several critical steps that require attention to detail to avoid future problems like leaks or water damage.
The first step in preparing your bathroom for a new shower base involves evaluating its design layout. Take accurate measurements of your intended space, including height, length, and width dimensions of where you want your new unit installed. Also, bear in mind other factors such as plumbing fixtures’ location, door openings, electrical outlets, and any other obstacles that may impede installation. A well-designed shower area will ensure a smooth installation process and enhance the overall functionality of your bathroom.
Waterproofing techniques are crucial in protecting your bathroom from water damage when preparing to install a new shower pan. Apply waterproof membrane on surfaces that come into contact with water, such as walls, floors, and around plumbing fixtures. Ensure you seal all seams correctly to prevent water from seeping through joints and causing leaks. Additionally, consider using adhesive materials like caulk or silicone to seal any gaps between the shower pan and surrounding surfaces. Proper waterproofing techniques will not only protect your bathroom but also extend the lifespan of your shower base.
Lastly, before installing your new shower pan, inspect and repair any damages in the existing subfloor or framing structure. Check for rotting wood or mold growth that may compromise the stability of your new shower base. Ensure all nails or screws are tightly secured before laying down any waterproof membrane or adhesive materials. Taking these preparatory steps will provide a sturdy base for securing your new shower pan and prevent any potential problems down the line.
In conclusion, preparing the shower area is an essential step when installing a new shower pan in your bathroom. Take accurate measurements of the space’s design layout, apply proper waterproofing techniques, and inspect for structural damages beforehand. By following these preparatory steps, you’ll create an enjoyable bathing experience while avoiding future problems like leaks or water damage in your bathroom.
Installing The Shower Base
When it comes to securing the shower base, there are several factors to consider. One of the most crucial is selecting the right shower pan materials. Different materials like acrylic, fiberglass, and tile require different installation processes and techniques. It’s essential to choose a material that suits your bathroom’s design and meets your personal preferences.
Another factor to consider when securing the shower base is whether to opt for a DIY or professional installation. While a DIY installation may seem cost-effective, it may lead to future problems like leaks or structural damage if not done correctly. A professional installation ensures that the shower base is secured correctly, reducing potential risks and extending its lifespan.
During the installation process, it’s vital to ensure that all components are leveled correctly and securely fastened. This includes checking that the drain flange aligns with the subfloor drainpipe and that any screws or nails used for support are tightly secured. By following these steps, you can guarantee that your new shower base is sturdy and well-secured for long-term use.
Installing a new shower base requires careful consideration of various factors like material selection, installation method, leveling, and secure fastening. Whether opting for a DIY or professional installation, ensure you follow all manufacturer instructions and industry standards for safety purposes. By doing so, you can create an enjoyable bathing experience while preventing future problems like leaks or structural damage in your bathroom.
Sealing The Shower Base
After securing the shower base, the next crucial step is sealing it correctly. Proper sealing techniques are essential in preventing water leaks and damage to the surrounding walls and floors. The type of shower pan materials used will determine the appropriate sealing method.
For acrylic or fiberglass shower bases, silicone caulk is an ideal sealing material. It’s flexible, waterproof, and easy to apply. Before applying the caulk, ensure that the area around the base is clean and dry. Apply a continuous bead of caulk along the joint between the shower base and walls/floor, smoothing it out with a caulking tool or finger.
For tile shower bases, grout is an excellent option for sealing. However, it’s essential to use a high-quality grout that’s resistant to water absorption and cracking. After laying down the tiles, apply grout between each tile joint using a rubber float. Allow it to dry for at least 24 hours before adding a sealer on top of it to provide additional protection against water penetration.
In conclusion, proper sealing techniques are critical in ensuring that your newly installed shower base is well-protected against water leaks. While silicone caulk works best for acrylic or fiberglass bases, grout provides an ideal seal for tile-based showers. Whichever method you choose, ensure that all joints are adequately sealed and regularly check for any signs of damage or wear over time to prevent costly repairs in the future.
Water Testing The Drain Assembly
Like the veins in our bodies, the drain assembly is the lifeline of your shower pan. Without proper maintenance and care, water flow optimization can be compromised, leading to unwanted leaks and damage. It’s imperative to test the drain assembly for any inconsistencies before proceeding with any installation to ensure a seamless shower experience.
Start by filling the shower pan with water and observe if there are any signs of leakage or slow draining. If there are, check if any debris is blocking the drain or if any parts need replacing. Regular maintenance of the drain assembly will also prevent clogs and buildup that can affect water flow optimization.
After confirming that the drain assembly is working correctly, proceed with applying the waterproofing membrane to further protect your shower from unwanted leaks. With proper installation and maintenance, you’ll be sure to enjoy your new shower pan for years to come without worrying about any water damage issues down the line.
Applying The Waterproofing Membrane
After testing the drain assembly for water tightness, the next step in installing a shower pan is waterproofing. Waterproofing techniques are crucial to ensure that water does not seep through the shower floor and cause damage to the subfloor or surrounding areas. There are several material considerations when it comes to choosing a waterproofing membrane such as liquid-applied, sheet membranes, or preformed shower pan liners.
Liquid-applied membranes are typically used for custom showers where there are irregular shapes or sizes. They require multiple coats and can take longer to dry than other types of membranes. Sheet membranes are easier to install but may not be suitable for custom designs. Preformed shower pan liners come in standard sizes and are easy to install but may not fit all shapes and sizes of showers.
When applying the waterproofing membrane, it is important to follow manufacturer instructions carefully and ensure that all seams and edges are sealed properly. This will help prevent any water from leaking through gaps or openings in the membrane. It is also important to consider any additional waterproofing measures such as sealing around plumbing fixtures or at corners where walls meet the shower floor.
In summary, proper waterproofing techniques are critical for ensuring a successful shower pan installation. Choosing the right type of membrane based on material considerations is important, as well as following manufacturer instructions carefully during application. Attention should be paid to sealing all edges and corners properly to prevent any water leakage through gaps or openings in the membrane. The next step in installing a shower pan involves sealing these edges and corners for added protection against water damage.
Sealing The Edges And Corners
As the old adage goes, “A job worth doing is worth doing well,” and this certainly applies to sealing the edges and corners of your shower pan. Proper sealing techniques are crucial for preventing water damage and ensuring a long-lasting installation. Here are some important tips on how to seal your shower pan like a pro.
First, make sure all surfaces are clean and dry before applying any sealant. Use a scrub brush and mild detergent to remove any debris or residue from the shower pan and walls. Then, use a clean towel to dry everything thoroughly. Any moisture left behind can compromise the effectiveness of the sealant.
Next, be careful not to make common mistakes when applying the sealant. One of these is over-applying the product, which can actually cause it to fail. Instead, use a small amount of sealant and spread it evenly along the edges and corners with a caulking gun or putty knife. Another mistake to avoid is using an incompatible product for your particular type of shower pan material. Be sure to choose a sealant that is compatible with your specific shower pan material.
Now that you know how to properly seal your shower pan, it’s time to move on to setting the tile or surround. This step will require even more precision and attention to detail than sealing, so be sure to plan accordingly and take your time. With these tips in mind, you’ll be well on your way to achieving a beautiful and functional new shower in your bathroom.
Setting The Tile Or Surround
To ensure that your shower pan is properly installed and functional, it is crucial to set the tile or surround correctly. This step will not only add aesthetic appeal to your bathroom but also provide a barrier against water damage. When choosing a tile design, consider the material’s durability, slip resistance, and ease of cleaning. Popular options include ceramic, porcelain, and natural stone tiles.
Once you have selected a tile design, it is time to choose the grout that best complements it. Grout serves to fill in the gaps between tiles and provides stability to the entire structure. There are different grout options available such as cement-based grouts and epoxy-based grouts. While cement-based grouts are cost-effective and easy to apply, they may require regular maintenance due to their porous nature. Epoxy-based grouts are more expensive but offer better stain resistance and durability.
To set the tile or surround, start by measuring and marking out where each tile will go. Apply an adhesive using a notched trowel on small sections of the wall at a time before placing each tile carefully in place. Once all tiles have been set firmly in place, allow them to dry for at least 24 hours before applying the grout with a rubber float tool. After filling in all gaps between tiles with grout, use a damp sponge to wipe off any excess residue on the surface of the tiles.
With your shower pan now fully tiled and sealed with appropriate grouting materials, you can move on to installing the shower fixtures without worrying about potential water damage from poorly laid tiles or unsealed joints.
Installing The Shower Fixtures
Moving forward with the installation process, the next step involves installing the shower fixtures. This stage is crucial in ensuring that the shower system works correctly and efficiently. To begin, it’s essential to consider water pressure when choosing your fixtures. Low water pressure systems may require specific fixtures that are designed to increase water flow.
When selecting a showerhead, there are several options available on the market. Some popular choices include fixed showerheads, handheld models, and dual showerheads that offer a combination of both. Fixed showerheads are an excellent option for those who prefer a traditional overhead experience, while handheld models provide greater flexibility for washing hard-to-reach areas or small children. Dual showerheads offer the best of both worlds and can be adjusted to suit individual preferences.
It’s important to take your time during this stage and ensure that each fixture is installed correctly. Once installed, it’s recommended that you test the system thoroughly for leaks before using it regularly. In the next section, we’ll discuss how to test your newly installed shower system for any potential leaks or issues.
Testing The Shower For Leaks
After installing the shower fixtures, it is crucial to test the system for leaks before proceeding with any further steps. Leaks can cause significant damage to your bathroom and its structures. Common leak causes in showers include poor waterproofing methods, damaged pipes or fixtures, and incorrect installation of shower pans. Therefore, it is essential to test your shower thoroughly to ensure that you have a fully functional and leak-free system.
To test your shower for leaks, start by blocking the drain with a stopper or towel. Fill the shower pan with water up to an inch below the rim of the curb. Let it sit for 30 minutes and check if there are any signs of leakage on the ceiling below or at the base of walls surrounding your bathroom. If there are no visible signs of leaks, then repeat this process while standing in the shower and shifting your weight around to simulate use.
If you notice any indications of leakage during either step, investigate further and identify where it’s coming from. Carefully inspect each sealant joint around tiles, fixtures, corners, drains, and pipes for gaps or cracks that could allow water to escape. Addressing these issues promptly will help prevent costly damage down the line. Once you’ve completed testing your shower for leaks successfully, continue onto cleaning and maintaining your new shower pan properly.
Cleaning and maintaining your newly installed shower pan is crucial in keeping it looking new and functioning correctly over time. In our next section, we’ll discuss effective ways to clean and maintain your new shower pan without damaging its surface or structure.
Cleaning And Maintaining The Shower Pan
Keeping your shower pan in top-notch condition is essential to ensure its longevity and prevent any costly repairs down the line. Regular cleaning and maintenance are necessary to keep your shower pan looking great and functioning correctly. Neglecting this crucial aspect of your bathroom can lead to significant problems that require professional intervention.
To clean the shower pan, start by removing any loose dirt or debris using a soft-bristled brush or a vacuum cleaner. Then, mix a solution of warm water and mild detergent, such as dish soap, in a bucket. Dip a sponge into the solution and carefully scrub the surface of the shower pan, paying particular attention to any stains or buildup. Rinse thoroughly with warm water and dry with a clean cloth.
To maintain your shower pan’s excellent condition, it’s recommended that you create a regular cleaning schedule. How often you need to clean will depend on how frequently you use the shower and the type of water in your area. Hard water may require more frequent cleaning than soft water because it leaves mineral deposits that can build up over time. By following an appropriate maintenance schedule, you’ll be able to keep your shower pan looking new for years to come.
As important as cleaning and maintenance are, sometimes issues arise that need troubleshooting. In the next section, we’ll discuss some common problems that can occur during the installation process and how to fix them quickly and efficiently so you can enjoy your new shower without any hiccups!
Troubleshooting Common Shower Pan Installation Issues
One common issue that occurs during shower pan installation is leaking. This can happen for a variety of reasons, such as incorrect sealing or improper installation of the drain. If you notice water seeping out from under the shower pan, it is important to take action immediately to prevent further damage. Common solutions include resealing the edges of the shower pan and ensuring proper installation of the drain.
Another issue that may arise during shower pan installation is an uneven base. This can cause the shower pan to shift or wobble, leading to potential leaks and instability. To prevent this issue from occurring, it is important to properly level the base before installing the shower pan. This can be done using shims or leveling compounds. It may also be helpful to double check that all measurements are accurate before beginning installation.
Lastly, a common problem during shower pan installation is cracking or damage to the pan itself. This can occur if the wrong type of adhesive or sealant is used, or if too much weight is placed on the pan before it has fully cured. Preventative measures include carefully selecting high-quality materials and allowing sufficient time for curing before use. If damage does occur, it may be necessary to replace the entire shower pan to ensure proper function and prevent future issues.
In order to successfully install a shower pan in your bathroom, it is important to be aware of these potential issues and take preventative measures where possible. By carefully selecting materials and following proper installation techniques, you can avoid many of these common problems and enjoy a functional and leak-free shower for years to come.
Conclusion
Installing a shower pan in your bathroom can be a challenging task, but it is not impossible. By following the steps outlined above, you can successfully install a shower pan that will last for years to come. The first step is assessing your bathroom needs and choosing the right shower pan for your specific situation.
Next, you should measure and cut the subfloor to fit the shower pan. Preparing the drain assembly is also crucial before beginning installation. Properly installing the drain assembly and shower fixtures are essential steps in this process. Testing for leaks and cleaning/maintaining the shower pan will ensure its longevity.
It may interest you to know that according to a study conducted by HomeAdvisor, the average cost of installing a shower pan ranges from $1,200 to $5,000 depending on various factors such as size and materials used. Therefore, it is essential to choose an appropriate budget before beginning this project.
As a plumbing installation expert, I recommend consulting with professionals or doing thorough research before attempting any plumbing projects yourself. Following proper instructions and safety measures will ensure successful completion of any project with minimal complications.
Image Credits
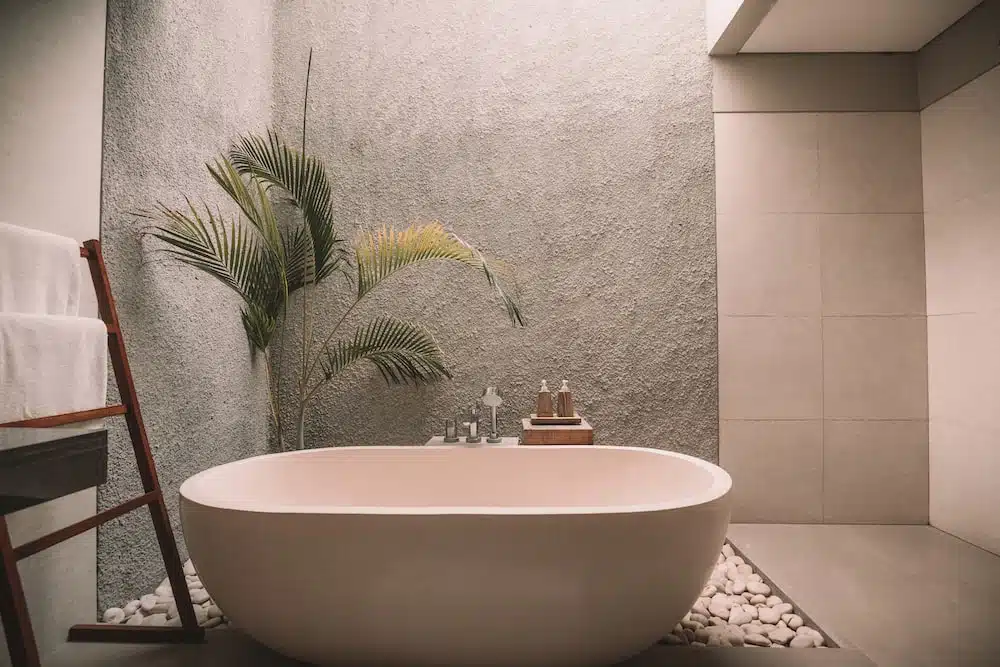
- “white ceramic bathtub” by Jared Rice (featured)

