Installing a washing machine can be a daunting task, especially for those who have no prior experience in dealing with household appliances. However, with the right tools and knowledge, this process can be done with ease and efficiency. As an expert in washing machine installation, I have encountered numerous cases where homeowners struggle to install their machines, resulting in costly repairs due to improper installation. In this article, I will provide a step-by-step guide on how to properly install a washing machine, ensuring that it functions optimally and prolongs its lifespan.
As individuals who take pride in serving others through our home maintenance skills, knowing how to properly install a washing machine is essential. This not only saves us from expensive repair costs but also allows us to help our friends and family members who may need assistance with installing their machines. Furthermore, proper installation ensures that the washing machine runs smoothly without any malfunctions or damages. By following the steps outlined in this article, you will be equipped with the necessary knowledge to confidently install your washing machine and help others do the same.
Preparing For Installation
Before installing a washing machine, it is important to prepare the space where it will be placed. Measuring the space is crucial in ensuring that the chosen model fits perfectly. It is recommended to take accurate measurements of the height, width, and depth of the area where you intend to place your washing machine. This will enable you to select a model that fits seamlessly into your living space.
Choosing the right model is also essential when preparing for installation. There are various types of washing machines available on the market, each designed with unique features that cater to different needs. A top-loading washing machine may be ideal for individuals who have limited mobility or back problems as they do not require bending over to load clothes. On the other hand, front-loading models are known for their energy efficiency and ability to handle larger loads.
Additionally, it is important to consider your budget before purchasing a washing machine as prices vary depending on features and quality. Once you have measured your space and selected a suitable model, it’s time to move on to checking the location and requirements necessary for successful installation.
Checking The Location And Requirements
Now that you have prepared the area where your washing machine will be installed, it’s time to check the location and requirements. First, start by measuring the space where your washing machine will be placed. You’ll want to make sure that there is enough room for the machine to fit comfortably and that there is also enough clearance for the door to open fully. Additionally, you’ll want to ensure that there is a nearby water source and drainage system.
Next, it’s important to check the electrical requirements for your washing machine. Most machines require a 120-volt electrical outlet, but some may require a 240-volt outlet. It’s essential to check with the manufacturer or read through the manual before installation. Also, make sure that there are no other appliances connected to the same circuit as your washing machine as this can cause an overload and potentially damage your machine.
Checking these location and electrical requirements beforehand will save you time and frustration during installation. By measuring the space and ensuring that all necessary electrical outlets are available, you can avoid any potential issues with fitting or powering up your new washing machine. Once you have completed this step, you can move on to gathering the necessary tools and materials for installation.
Gathering The Necessary Tools And Materials
As the saying goes, “having the right tool for the job makes all the difference.” When it comes to installing a washing machine, this couldn’t be more true. Before beginning any installation project, it’s important to gather all necessary tools and materials. This will save time and prevent frustration during the process.
Before choosing between top loading and front loading machines, it’s important to consider your specific needs. Top loading machines tend to be more affordable and have shorter wash cycles. However, front loading machines are typically more energy-efficient and use less water. Once you’ve made your decision, ensure that you have all required materials on hand such as hoses, clamps, and a power cord.
Understanding water pressure requirements is also crucial when installing a washing machine. Most machines require a minimum of 20 psi (pounds per square inch) of water pressure to function properly. If your home has low water pressure, consider purchasing a booster pump or contacting a plumber to increase pressure before installation. By taking these steps beforehand, you’ll ensure that your washing machine operates at its best capacity and prolong its lifespan.
As you prepare for installation, one critical step is turning off the water supply before connecting hoses to prevent leaks or damage. It’s important to locate the shut-off valve ahead of time so that you can easily access it during installation. By following these guidelines for gathering necessary tools and materials and understanding water pressure requirements, you’ll be well on your way to successfully installing your new washing machine with confidence.
Turning Off The Water Supply
To properly install a washing machine, one of the first steps is to turn off the water supply. This is important to ensure that there are no leaks or water damage during the installation process. To do this, locate the shut-off valve for your washing machine’s water supply. This valve should be near the plumbing for your washing machine and can typically be found behind the unit.
Once you have located the shut-off valve, turn it clockwise until it is completely closed. It is also recommended to turn on a nearby faucet to relieve any pressure in the pipes and drain any remaining water from the hoses. This will help prevent any accidental spills or leaks during the installation process. After turning off the water supply and draining any excess water, you can safely move on to installing your new washing machine.
Ensuring that your water supply is turned off before installing a new washing machine is crucial for preventing any accidents or damage. By following these steps, you can ensure that your installation goes smoothly and without incident. The next step in this process will be removing your old washing machine, which we will cover in more detail in the following section.
Removing The Old Washing Machine
As you prepare to install your new washing machine, it is important to first remove the old one. This may seem like a daunting task, but with the right tools and knowledge, it can be done efficiently and safely. Coincidentally, by removing your old washing machine, you are also presented with an opportunity to dispose of it in an environmentally friendly manner.
One option for disposing of your old washing machine is to hire a professional appliance removal service. These services will come to your home and remove the washing machine for you. While this option may be more expensive than other disposal methods, it ensures that the appliance is disposed of properly and safely.
Alternatively, you can look into local recycling programs or scrap metal yards that accept appliances. Some cities offer free pick-up services for large appliances such as washing machines. Before disposing of your old washing machine, make sure to properly disconnect all electrical and plumbing connections. This will ensure that there are no safety hazards during the removal process.
Now that you have successfully removed your old washing machine and disposed of it responsibly, it’s time to move on to installing the water supply hoses for your new one. But before we dive into that process, let’s take a moment to review some necessary precautions for working with plumbing connections.
Installing The Water Supply Hoses
Importance of Tightening the Water Supply Hoses
When installing a washing machine, it is crucial to ensure that the water supply hoses are properly tightened. Failing to do so can result in leaks and flooding, which can cause significant damage to your home. To avoid these potential issues, it is essential to use the correct tools and techniques when tightening the water supply hoses.
Choosing Hose Types for Your Washing Machine
There are two main types of water supply hoses available for washing machines: rubber hoses and stainless steel braided hoses. Rubber hoses are less expensive but may wear out more quickly and are more prone to leaks. Stainless steel braided hoses, on the other hand, are more durable and less likely to develop leaks over time. Choosing the right type of hose for your washing machine can help prevent future issues with leaks and ensure that your machine runs smoothly for years to come.
Three Tips for Installing Water Supply Hoses
Use proper tools: It is essential to use a wrench or pliers designed specifically for tightening water supply hoses. Using the wrong tools can lead to over-tightening or under-tightening, both of which can cause problems down the line.
Check connections regularly: Once you have installed your water supply hoses, be sure to check them regularly for signs of wear or damage. This will help you catch any potential issues before they become major problems.
Replace old or damaged hoses: If you notice any signs of wear or damage on your water supply hoses, it is important to replace them as soon as possible. This will help prevent leaks and other issues that can cause damage to your home.
As you move forward with installing your washing machine, it’s important to keep in mind how crucial it is that you properly install the water supply hoses by tightening them appropriately and choosing the right hose types. Next up, we’ll discuss connecting the drain hose – an equally important step in the installation process.
Connecting The Drain Hose
The drain hose is an essential component of your washing machine, as it ensures that wastewater flows out of the machine and into your home’s drainage system. To properly position the drain hose, start by locating the drain outlet at the back of the washing machine. Once you’ve found it, carefully insert one end of the drain hose into the outlet until it clicks into place. Then, thread the other end of the hose through any nearby openings or clips to ensure that it remains in place during use.
To prevent clogs in your washing machine’s drain hose, it’s important to take a few simple precautions. First, never overload your washing machine with laundry; doing so can cause excess lint and debris to build up in the hose over time. Additionally, avoid using too much detergent or fabric softener, as these products can also contribute to clogs. Finally, be sure to periodically inspect your drain hose for signs of wear or damage and replace it if necessary.
Properly connecting and maintaining your washing machine’s drain hose is crucial for ensuring efficient operation and preventing potential damage to your home’s plumbing system. In our next section, we’ll discuss how to level your washing machine to further optimize its performance and extend its lifespan.
Leveling The Machine
After you have connected the drain hose, it is time to level your washing machine. This step is essential for ensuring that your machine operates efficiently and doesn’t move around during operation. In a way, leveling your washing machine is like building a house – if the foundation isn’t stable, everything else won’t be stable either.
To level your washing machine, follow these steps:
- Adjusting height: Most washing machines have adjustable legs that allow you to change the height of each corner of the machine. Use a level to check if each corner is even. If it isn’t, adjust the leg until it is.
- Stabilizing feet: Once you have adjusted the height of each corner, use a wrench to tighten the locking nuts on each leg so that they stay in place. This will prevent them from moving and ensure that your washing machine stays level.
By taking these simple steps, you can guarantee that your washing machine will operate optimally and without any issues. It’s crucial to remember that even a small imbalance can cause significant problems down the line. Neglecting this step could lead to excessive vibrations, noise pollution, and even damage to other parts of your home.
Now that your washing machine is leveled properly, it’s time to move onto plugging in the machine. Ensure that you have all necessary tools at hand before proceeding with this next step.
Plugging In The Machine
After plugging in the washing machine, it is important to take some safety precautions. First, ensure that the outlet you are using is grounded and has a sufficient amperage rating for your machine. If not, contact an electrician to upgrade your electrical system. Secondly, avoid overloading the outlet by using other appliances simultaneously. Finally, make sure that the cord is not frayed or damaged in any way.
Common mistakes when plugging in a washing machine include choosing the wrong type of outlet or using an extension cord. It is important to use the correct type of outlet as directed by the manufacturer’s instructions. An extension cord may seem like a quick fix but it can cause problems with the machine’s performance and can even be a fire hazard.
Remember to always prioritize safety when installing a washing machine. By following these tips and avoiding common mistakes, you can ensure that your home remains safe from electrical hazards and that your new appliance operates efficiently. The next step is testing for leaks which will be discussed in detail in the subsequent section.
Testing For Leaks
After plugging in the washing machine, the next step is to test for leaks. According to a survey conducted by HomeAdvisor, 80% of washing machine repairs are due to water damage caused by leaks. This makes it crucial to properly install and maintain your washing machine to prevent any potential water damage.
To prevent common leaks, it is important to troubleshoot any issues that may arise during installation. One common issue is a loose connection between the hoses and the water supply valves or the back of the machine. To fix this issue, make sure all connections are tightened with pliers. Another common issue is a damaged or worn-out hose that needs to be replaced immediately to avoid any potential leaking.
In addition to troubleshooting tips, proper maintenance can also prevent leaks from occurring. Regularly inspecting hoses and valves for cracks or corrosion can help identify any potential issues before they cause damage. Additionally, replacing hoses every five years and avoiding overloading the machine can also help prevent leaks. By following these preventing leaks and maintenance tips, you can ensure that your washing machine runs smoothly without any water damage concerns.
Moving on from testing for leaks, the next step is securing the machine in place.
Securing The Machine In Place
After placing the washing machine in its designated area, the next step is to secure it in place. Anchoring bolts are crucial components that help to stabilize and prevent the machine from moving during operation. These bolts should be included with the washing machine and can be found in a plastic bag attached to the back of the appliance. Once you have located them, remove them from their packaging and insert them into the holes provided on the bottom of the machine.
Anti-vibration pads can also be used to provide additional stability and reduce noise during operation. These pads are typically made of rubber or a similar material and can be placed under each corner of the washing machine. They are particularly useful if your laundry room has a hard floor surface that may cause vibrations or noise.
Properly securing your washing machine not only ensures that it operates efficiently but also prevents any potential damage that may occur due to excessive movement during operation. Once you have installed anchoring bolts and anti-vibration pads, you can move on to installing transit bolts, which will help protect your appliance during transportation.
Next section: Installing Transit Bolts
Installing The Transit Bolts
- Transit bolts, also known as shipping bolts, are an essential part of installing a washing machine and must be handled with care.
- Identifying transit bolts is the first step in the installation process, as they typically come attached to the back, bottom, or sides of the washing machine.
- Once the transit bolts have been identified, the next step is to insert them into the appropriate slots on the floor or wall.
- It is important to use the correct tools to ensure that the transit bolts are inserted securely and safely.
Identifying Transit Bolts
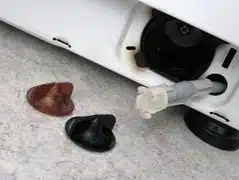
Upon delivery of a new washing machine, the first step towards installation is to identify the transit bolts that are used to secure the drum during transportation. These bolts are typically located at the rear of the machine and they are designed to prevent any movement that may result in damage while in transit. The transit bolts must be removed before installation to ensure proper functioning of the machine.
To remove the bolts, locate them at the back of the machine and use an adjustable wrench or pliers to loosen them. It is important to note that removing these bolts should only be done once you have safely positioned your washing machine in its final location as doing it beforehand may cause unnecessary movement and possible damage. Once all bolts have been removed, store them safely for future use or disposal.
Preventing damage during installation is crucial for ensuring optimal performance of your washing machine. By properly identifying and removing transit bolts, you can help prevent costly repairs down the line. Remember to always follow manufacturer’s instructions when installing your washing machine and seek professional help if needed.
Inserting Transit Bolts
After successfully removing the transit bolts from your washing machine, the next step is to insert them back in. It may sound counterintuitive, but it is crucial to re-insert these bolts before starting to use your machine. Failing to do so can lead to internal damage and render your washing machine unusable.
Inserting transit bolts is a simple process that requires you to align each bolt into their respective holes located at the back of the washing machine. This process should be done carefully, making sure each bolt fits snugly into its hole. Failure to properly insert transit bolts can result in severe damage or even void your warranty.
One common mistake with transit bolts is forgetting to remove them before starting the first wash cycle. Neglecting this step can cause significant damage to your washing machine’s drum, motor, and bearings, resulting in costly repairs or replacement. Therefore, it is crucial always to double-check that all transit bolts have been removed before beginning any wash cycles on your new washing machine.
Running A Test Cycle
After successfully installing your washing machine, it is important to run a test cycle to ensure that everything is working properly. This step should not be skipped as it is crucial in identifying any issues with the machine before doing your laundry. Running a test cycle also ensures that the washer is installed correctly and all connections are secure.
To run a test cycle, start by filling the washer with water and adding detergent. Choose a setting that will allow the machine to run through a complete wash cycle including rinse and spin. This process usually takes about 30 minutes, but may vary depending on the model of your washing machine.
Common issues that may arise during a test cycle include leaks, strange noises or error messages on the display panel. If you encounter any of these problems, consult your user manual for troubleshoot tips or contact an authorized service technician for assistance. Remember that running a test cycle after installation can save time and money in the long run by avoiding potential damage caused by malfunctioning machinery.
It is important to note that cleaning up and discarding packaging material should be done before running the test cycle. It is recommended to keep the packaging materials until you have confirmed that your washer works properly during this testing phase. After running a successful test cycle, you can proceed with using your washing machine as intended knowing that it has been properly installed and tested for optimal performance.
Cleaning Up And Discarding The Packaging
- Removing the packaging should be done carefully, ensuring all parts of the packaging are removed properly.
- Disposing of the packaging should be done promptly and according to regulations in the local area.
- All packaging materials should be separated into their respective recycling categories.
- All leftover pieces of packaging should be disposed of appropriately and with caution.
- Careful attention should be paid to cleaning up any mess caused by the removal of the packaging.
- All surfaces should be wiped down to remove any residue from the packaging materials.
Removing The Packaging
Before we begin discussing the removal of packaging, it is important to inspect the components of the washing machine. This will ensure that all necessary parts are present and in good condition before proceeding with the installation process. Any damaged or missing components should be reported to the manufacturer immediately.
Proper handling techniques must also be observed when removing the packaging. Carefully read and follow instructions on how to safely remove any straps, tape, or protective wrapping without damaging the machine or injuring oneself. Be cautious when using sharp tools such as scissors or knives and keep them away from children.
Once all packaging has been removed, it is important to properly dispose of it in an environmentally friendly manner. Recycling cardboard boxes and plastic wrapping is a great way to reduce waste, while also keeping our planet clean. By following these guidelines for removing and disposing of packaging, you can ensure a smooth and safe installation process for your new washing machine.
Disposing Of The Packaging
Once the washing machine has been installed, it is important to clean up and properly dispose of the packaging. Disposing of the packaging in an environmentally friendly manner not only helps keep our planet clean but also reduces waste. There are several recycling options available for disposing of cardboard boxes and plastic wrapping.
To properly dispose of the packaging, it is important to follow proper disposal methods. Recycling cardboard boxes and plastic wrapping is a great way to reduce waste. Cardboard boxes can be flattened and placed in your recycling bin, while plastic wrapping can be taken to a recycling center or disposed of according to local regulations.
Proper disposal methods are essential for maintaining a clean environment and reducing waste. By following these guidelines for disposing of packaging, you can do your part in preserving our planet while enjoying your newly installed washing machine.
Cleaning Up Any Mess
Properly disposing of the packaging after a washing machine installation is important, but it is equally important to clean up any mess caused during the installation process. One of the most common issues that arise during washing machine installations is spills and leaks. These can be caused by improperly connecting hoses or not tightening them enough. Cleaning up spills promptly can prevent water damage to your floors and walls.
To clean up spills, it is important to have a few essential tools on hand, such as towels, sponges, and a bucket. In case of larger spills, a wet-dry vacuum may also be necessary. It’s recommended to start by turning off the water supply and unplugging the machine before addressing any spills or leaks. Once you’ve cleaned up the spill, it’s important to thoroughly dry the area to prevent mold growth.
Preventing water damage during a washing machine installation requires careful attention to detail. It’s helpful to make sure all connections are secure and double check them before turning on the water supply. Additionally, placing a drip tray underneath your washing machine can help catch any small leaks that may occur over time. Taking these precautions can save you from potentially costly repairs due to water damage in the future.
In conclusion, cleaning up any mess caused during a washing machine installation is just as important as properly disposing of packaging materials. By promptly cleaning up spills and taking precautions against potential water damage, you can ensure that your new washing machine operates smoothly for years to come while keeping your home safe from harm.
Troubleshooting Common Issues
One of the most common issues that homeowners face with their washing machines is when it fails to spin or agitate. If you notice that your clothes are still sopping wet after a cycle, this could be due to a malfunction in the machine’s motor or belt. Common fixes for this issue include checking for any obstructions in the drain hose or pump filter, as well as ensuring that the machine is level and on stable ground. Preventative measures include not overloading the machine and ensuring that items are evenly distributed within the drum.
Another common problem that homeowners encounter is when their washing machine leaks water onto the floor. This can be attributed to a number of factors, such as a damaged hose, worn out door seals, or an improperly installed drain pipe. DIY fixes for this issue include inspecting all hoses and seals for any cracks or tears and tightening any loose connections. However, if you’re unsure about how to proceed with these repairs, it’s best to seek professional assistance.
When it comes to troubleshooting common issues with your washing machine, it’s important to weigh your options between DIY fixes versus seeking professional assistance. While many problems can be fixed through simple maintenance tasks like cleaning out filters or tightening loose connections, some issues may require more extensive repairs that are best left to professionals. Ultimately, taking preventative measures such as regular maintenance checks and properly loading your machine can help reduce the likelihood of experiencing common washing machine issues in the first place.
Conclusion
Installing a washing machine may seem like a daunting task, but with the right tools and preparation, it can be done easily and efficiently. In this article, we have outlined the necessary steps to successfully install a washing machine in your home.
Firstly, it is important to prepare for installation by checking the location and requirements of your new washing machine. You will need to gather the necessary tools and materials, turn off the water supply, remove the old washing machine, install the transit bolts, run a test cycle, and clean up and discard packaging. Additionally, we have provided troubleshooting tips for common issues that may arise during installation.
According to a recent study by Statista, the global market size of washing machines is projected to reach $61.8 billion by 2025. This statistic showcases how important washing machines are in our daily lives and emphasizes the need for proper installation to ensure their longevity. By following these guidelines and taking care during installation, you can enjoy a fully functional washing machine for years to come. As an expert in the field of washing machine installation, I highly recommend adhering to these steps for a successful and stress-free experience.
Image Credits
- “Washing machine” by 24oranges.nl (featured)

