Installing a toggle bolt can be a challenging task for many DIY enthusiasts. However, with the right tools and techniques, it can be done effectively and efficiently. Toggle bolts are commonly used to hang heavy objects on walls or ceilings where standard screws or nails may not provide enough support. In this article, we will discuss the step-by-step process of installing toggle bolts to ensure that your objects are securely mounted.
Before starting the installation process, it is important to understand what toggle bolts are and how they work. A toggle bolt consists of a long screw with a spring-loaded wing-like mechanism that expands behind the wall once inserted. This expansion creates a secure anchor point for the screw to hold onto and distribute weight evenly across a larger area of the wall. With this in mind, let’s dive into the steps required to install toggle bolts correctly and safely.
Understanding Toggle Bolts: What Are They And How Do They Work?
Toggle bolts are an excellent choice for anyone who wants to hang heavy objects on a wall. They are versatile, easy to install, and can hold up to 50 pounds or more depending on the size of the bolt. The unique design of toggle bolts allows them to distribute weight evenly across a larger surface area of the wall, making them ideal for use in drywall and other materials.
There are several different types of toggle bolts available on the market today. Some are designed for use with specific types of materials, while others can be used in a variety of applications. Toggle bolt sizes also vary depending on the weight and size of the object you want to hang. It’s essential to choose the right size and type of toggle bolt for your project to ensure that it is secure and safe.
When installing toggle bolts, it’s important to follow all instructions carefully and ensure that they are properly secured before hanging any objects. This will help prevent accidents and damage to your walls or belongings. In the next section, we will discuss how to choose the right toggle bolt for your project based on its weight and material type.
Choosing The Right Toggle Bolt For Your Project
When it comes to choosing the right toggle bolt for your project, there are many factors that need to be considered. The first thing you should consider is the type of toggle bolt you will need for your specific project. There are several types of toggle bolts available on the market today, each with their own unique features and benefits.
One type of toggle bolt is the winged toggle bolt. Winged toggle bolts are easy to install and provide a high level of stability and support. Another popular type of toggle bolt is the strap toggle bolt. Strap toggle bolts are ideal for heavier loads and can be used in a variety of materials, including drywall, plaster, and concrete.
When choosing the right toggle bolt for your project, there are several factors you should consider. These factors include the weight of the object you are hanging, the material you are hanging it on, and how much space you have to work with. It’s important to choose a toggle bolt that is strong enough to support your object without damaging your wall or ceiling.
In summary, choosing the right toggle bolt for your project requires careful consideration of several key factors. By understanding the different types of toggle bolts available and taking into account important variables such as weight and material, you can ensure that your project is safe and secure. In the next section, we will discuss what tools and materials you will need for installation.
Gather Tools And Materials Needed For Installation
Before beginning the installation process for toggle bolts, it’s necessary to gather the tools and materials required. One of the essential elements needed is the toggle bolt itself. There are different types of toggle bolts available in the market, and each type is designed for specific purposes. For instance, snap toggle bolts are ideal for mounting heavy objects on drywall or other hollow surfaces. Winged toggle bolts are better suited for light-duty applications.
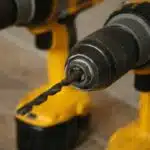
Apart from the toggle bolts, you’ll also need a drill bit that matches the size of your chosen bolt and an electric drill to make holes in the wall. Additionally, a pencil will be required to mark out where you want to place your fixture or object, and a measuring tape can help ensure that everything is level and positioned correctly. You may also want to have safety goggles on hand to protect your eyes when drilling into walls.
When it comes to purchasing toggle bolts, they can be found at most hardware stores or home improvement centers. It’s essential to select the correct type of bolt based on your specific needs as well as ensure that you purchase enough quantity for your installation project. Some recommended stores include Home Depot, Lowe’s, Ace Hardware, and Menards.
In summary, before starting with installing toggle bolts, it’s crucial to assemble all required tools and materials such as appropriate types of bolts, electric drills with matching drill bits, pencils, measuring tapes and safety goggles. Ensure that you choose the right kind of bolt based on your needs and requirements while purchasing them from reliable hardware stores such as Home Depot or Lowe’s. Now that we have gathered our tools let us move ahead with determining the correct location for installation in our subsequent section.
Determining The Correct Location For Installation
Determining the Correct Location for Installation is crucial in ensuring that your toggle bolts will provide enough support for your desired object. Before beginning, ensure that you have all the necessary tools and equipment, such as a drill, level, masking tape, and a pencil.
The first step in determining the correct location is to measure accurately. Use a measuring tape to determine the height and width of the object that you will be hanging on the wall. Then, use a level to mark where you want to install the toggle bolts. Common mistakes include not using a level or measuring tape, resulting in an uneven installation. Double-check your measurements before proceeding to avoid any mishaps.
Once you have marked where you want to install the toggle bolts, it is important to examine the wall’s structure carefully. If there are studs behind the drywall or plaster, it is recommended that you attach your object directly onto them instead of using toggle bolts. Failing to identify studs could result in an unsafe installation or damage to your wall. Take extra time during this step to ensure that you understand your wall’s structure properly.
Now that you have accurately measured and examined your wall’s structure, it is time to proceed with preparing the wall for installation. By following these steps carefully and avoiding common mistakes, you can ensure that your toggle bolt installation will be secure and safe for years to come.
Preparing The Wall For Installation
After determining the correct location for installation, it is important to prepare the wall for toggle bolt installation. To do this, you will need measuring tools such as a tape measure and level to ensure that your measurements are accurate. This will help prevent any mistakes and save time in the long run.
Before drilling the hole for the toggle bolt, it is crucial to repair any damage to the wall. Using wall repair techniques such as spackling or sanding can help create a smooth surface for installation. It is also important to make sure that there are no electrical wires or plumbing behind the area where you plan on installing the toggle bolt. If necessary, consult with a professional before proceeding with installation.
Once you have measured and repaired the area, it is time to drill the hole for the toggle bolt. This step requires precision and caution as drilling too deep can damage underlying structures such as pipes or wires. In the next section, we will discuss how to properly drill a hole for a toggle bolt while ensuring safety and accuracy.
Drilling The Hole For The Toggle Bolt
Before drilling the hole for the toggle bolt, it is important to measure the size of the bolt correctly. This will ensure that the hole is just the right size and not too small or too large. A hole that is too small will make inserting the toggle bolt difficult, while a hole that is too large will make it challenging for the toggle bolt to grip onto anything.
One common mistake that people make when drilling holes for toggle bolts is not using the correct drill bit size. It’s important to use a drill bit that matches the diameter of your toggle bolts so that you can create a hole that’s just enough to fit them perfectly. Another mistake is not drilling deep enough into the wall. The deeper you drill, the more secure your toggle bolt will be.
When drilling holes for toggle bolts, always aim for accuracy and precision. Use a level to ensure that your holes are straight and lined up with each other if you need multiple anchors. Additionally, always wear safety goggles and gloves during this process to protect yourself from flying debris and sharp edges. Once you have drilled accurately and safely, proceed with inserting your toggle bolt into the wall.
Inserting The Toggle Bolt Into The Wall
Now that you have prepared the hole, it’s time to insert the toggle bolt into the wall. There are different types of toggle bolts available in the market, such as snap toggle bolts and strap toggle bolts. Make sure to choose the appropriate type for your project depending on the weight of the object you will be hanging and the thickness of your wall.
To insert a toggle bolt, follow these steps:
- Thread the bolt through the fixture or object you will be hanging.
- Hold onto the bolt head and push it through the hole in your wall until it is flush against it.
- Use a screwdriver or drill to turn the bolt clockwise until it feels tight.
It’s important to avoid common mistakes when inserting toggle bolts, such as using too much force or not pushing them far enough into the wall. This can lead to an unstable installation and potentially damage your wall or object being hung. Take your time and ensure that you are following manufacturer instructions carefully for optimal results.
Next, we will move on to securing the wing mechanism of the toggle bolt in order to complete installation.
Securing The Wing Mechanism Of The Toggle Bolt
Did you know that using toggle bolts can provide 10 times more support than regular screws? That’s right! Toggle bolts are an excellent option for hanging heavy objects on drywall, plaster, and concrete walls. However, before installing them, it is crucial to understand how to secure the wing mechanism of the toggle bolt properly.
To secure the wing mechanism of the toggle bolt, first, drill a hole into the wall as per the required size of your toggle bolt. Once you have drilled the hole, fold up the wings of your toggle bolt and insert them into the hole. Push them inside until they pop open behind the wall surface. This will ensure that they are secure and stable enough to hold your object’s weight.
Common mistakes while securing the wing mechanism include drilling too big a hole or not pushing it in far enough behind the wall surface. If this occurs, it may cause instability in your installation and may even lead to damage or injury. To avoid these errors and ensure a successful installation, always read through your manufacturer’s instructions carefully and follow all safety precautions before starting any project. Troubleshooting techniques for any issues during this step may include removing and replacing damaged toggle bolts or filling in any gaps around them with spackle or caulk.
Moving on to tightening the screw into the toggle bolt itself; this step is essential as it ensures that your object stays securely attached to your wall without falling or wobbling off its position. Tightening too much may damage either your object or break off parts of your toggle bolt from behind the wall surface; hence it is critical always to use a torque driver instead of just a regular screwdriver while tightening your screws into place!
Tightening The Screw Into The Toggle Bolt
Now that the toggle bolt is inserted into the wall, it’s time to tighten the screw. Applying pressure on the screw is crucial in securing the bolt and preventing it from slipping out of place. To do this, use a screwdriver or drill to carefully turn the screw clockwise until it feels tight against the wall.
It’s important to note that over-tightening can cause damage to both the wall and the toggle bolt itself. To avoid this, use a tightening technique called “finger testing.” After turning the screw clockwise with a tool, use your fingers to gently test its stability. If it wobbles or feels loose, continue tightening until you feel resistance but not so much that it becomes difficult to move.
By applying even pressure when tightening and using finger testing for stability, you’ll ensure that your toggle bolts are properly secured into your walls. In the next section, we’ll cover how to check their stability before hanging any objects for added safety and peace of mind.
Checking The Toggle Bolt’s Stability
As you install your toggle bolts, it is essential to test their stability before mounting any object. Testing stability ensures that the toggle bolt can hold the weight of your intended object. To test the stability of the toggle bolt, gently pull on it once it is in place. If it wiggles or moves, it may not be secure enough to hold your object. In this case, you may need to remove the bolt and try again.
To determine the weight capacity of a toggle bolt, refer to its packaging. The packaging should include information on how much weight each size and type of toggle bolt can support. Ensure that you choose a toggle bolt with a weight capacity that exceeds the weight of the object you want to mount. Overloading a toggle bolt can cause it to fail, which can result in damage or injury.
Testing the stability of your installed toggle bolt and ensuring its weight capacity are crucial steps in safely mounting any object. Once you have confirmed that your toggle bolts are stable and have sufficient weight capacity for your intended object, you can proceed with confidence knowing that it will remain securely mounted. In the next section, we will discuss adjusting the position of the object to be mounted for optimal placement.
Adjusting The Position Of The Object To Be Mounted
Now that the toggle bolts are in place, it is time to adjust the position of the object to be mounted. This step is crucial to ensure proper stability and alignment. First, determine the desired height for the object and mark it on the wall using a pencil or masking tape.
To adjust the height, loosen the screws on the toggle bolts and slide them up or down as needed. Once in position, tighten the screws until they are snug against the wall. Use a level to ensure that the object is straight before tightening completely.
Testing stability is also an important part of adjusting the position. Gently push or pull on the object after it has been mounted to check for any movement or wobbling. If there is any instability, readjust as necessary until it is firmly secured to the wall.
Next: Removing and Reusing Toggle Bolts
Removing And Reusing Toggle Bolts
Now that you have successfully installed your toggle bolts, it is time to consider their removal. Perhaps you want to replace the item you secured with the toggle bolts, or maybe you need to make some adjustments. Regardless of your reason, removing toggle bolts can be trickier than installing them.
To remove a toggle bolt, start by locating the wing nut and unscrewing it until it’s loose. Once it’s loose enough, pull on the bolt head while keeping pressure on the wings behind the wall to prevent them from falling into the opening. If this doesn’t work, try gently tapping on the end of the bolt head with a hammer while pulling on it simultaneously. If all else fails, use a pair of pliers to grip onto the wings and pull them out slowly.
If you are planning on reusing your toggle bolts, be sure to inspect them thoroughly before reinstalling them. Check for any damage or wear and tear that may compromise their effectiveness. Additionally, make sure they are clean and free from any debris that may interfere with their operation. With these tips in mind, removing and reusing toggle bolts should be a breeze!
Moving forward, let’s address some common problems that may arise during toggle bolt installation.
Troubleshooting Common Problems With Toggle Bolt Installation
When installing toggle bolts, it is not uncommon to run into problems such as loose bolts and wall damage. Fortunately, there are steps you can take to troubleshoot these issues.
If you find that your toggle bolt is loose, one possible solution is to try tightening the bolt by turning it counterclockwise until it feels tight. If this does not work, you may need to remove the bolt and try a larger size. It’s important to choose a bolt size that matches the weight of the object you are hanging. Additionally, make sure that your hole is drilled deep enough so that the wings of the toggle bolt have enough space to open up and create a secure hold.
Another common problem with toggle bolts is wall damage. This can occur when the wings of the toggle bolt do not open up properly or when too much pressure is applied during installation. To prevent wall damage, make sure that your hole is drilled at the correct size and depth for your toggle bolt. Use a level to ensure that your object will hang straight and avoid twisting or forcing the bolt into place.
In summary, loose bolts and wall damage are common issues when installing toggle bolts. To troubleshoot these problems, make sure that your hole is drilled at the correct size and depth for your bolt, choose a size that matches the weight of your object, and avoid twisting or forcing the bolt into place. By following these tips, you can ensure a successful installation without causing any damage to your walls or objects. Next up we’ll go over some safety tips for installing toggle bolts to help keep you safe during the process.
Safety Tips For Installing Toggle Bolts
If you want to secure heavy objects on drywall, then toggle bolts are your best bet. Installing these devices can be tricky, but with the right technique, you can get the job done quickly and easily. In this section, we will discuss some safety tips that you should follow when installing toggle bolts.
Firstly, it is essential to supervise any installation involving toggle bolts. If you are a DIY enthusiast, then you should always have someone else with you while installing them. This way, if anything goes wrong, they can assist you. Also, ensure that there are no kids or pets around the area where you will be working.
Secondly, proper handling of toggle bolts is crucial for their successful installation. Before starting work, make sure that your hands are clean and dry. Grease or oil on your fingers can affect the grip of the toggle bolt and reduce its strength significantly. Also, handle these devices gently as they are delicate and can break easily.
Lastly, remember to follow all instructions carefully when installing toggle bolts. If you skip any step or don’t tighten them adequately, they won’t hold up heavy objects securely. Always use the correct size of drill bit or hole saw for the pilot hole; otherwise, it may weaken the drywall’s structure.
In conclusion: successfully installing toggle bolts for your DIY projects requires careful attention to detail and a focus on safety measures. By following these tips mentioned above and being cautious during installation time while having someone assist could save time and expense in potential damages from faulty installations.
Conclusion: Successfully Installing Toggle Bolts For Your Diy Projects
Installing toggle bolts can be a daunting task, especially for DIY projects. However, with the right tools and techniques, you can easily accomplish this task. Here are some tips to help you successfully install toggle bolts for your DIY projects.
Firstly, it is important to choose the right size of toggle bolt to use for your project. Using an undersized or oversized bolt can lead to common mistakes such as the bolt not being able to support the weight of the object or damaging the wall. To ensure that you select the right size of toggle bolt, measure the diameter of the hole and choose a bolt that is slightly larger.
Secondly, make sure that you drill a hole in the wall that is slightly larger than the diameter of your chosen toggle bolt. This will allow you to insert and expand the toggle bolt properly. Inserting a toggle bolt into a small hole may cause it to become damaged during installation.
Lastly, when installing the toggle bolt, apply even pressure as you tighten it into place. Over-tightening can damage both the wall and the anchor itself. Once installed, check that it is secure by gently pulling on it.
In conclusion, installing toggle bolts requires careful consideration of size and technique. By following these simple steps and avoiding common mistakes, you can safely secure objects onto walls without causing any damage or risking injury. If you are unsure about using toggle bolts, there are alternative options available such as molly bolts or anchors that may better suit your needs.
Conclusion
Toggle bolts are a versatile and reliable option for securing heavy objects to walls. By understanding how they work, choosing the right size for your project, and following proper installation techniques, you can successfully tackle any DIY project that requires toggle bolts.
When choosing toggle bolts, consider the weight of the object you plan to hang and the type of wall material you will be working with. Make sure you have all necessary tools and materials on hand before beginning installation. Determine the correct location for installation by using a stud finder or measuring from existing fixtures.
Properly preparing the wall for installation is crucial to ensuring a secure attachment. Use caution when removing and reusing toggle bolts, as they can become damaged over time. Troubleshoot common problems such as spinning or stuck bolts by adjusting your technique or switching to a different type of bolt.
Remember to always prioritize safety when installing toggle bolts. Wear protective gear such as goggles and gloves, and use caution when climbing ladders or working at heights. With these tips in mind, you can confidently install toggle bolts for all your DIY projects.
In conclusion, toggle bolts are an excellent choice for securing heavy objects to walls in any DIY project. By carefully selecting the right bolt size, taking proper safety precautions, and following best practices during installation, you can create a secure attachment that will last for years to come. So go ahead and tackle that home improvement project with confidence!
Image Credits
- “a couple toggle bolts and a paintbrush” by theilr (featured)

