Hanging a picture on the wall can be a simple task, yet it often requires attention to detail and precise execution. When using wire to hang your artwork, it is essential to understand the proper techniques to ensure that your pictures are level and securely mounted. Knowing how to hang a picture with wire can save you time and frustration while showcasing your favorite pieces in style.
In this article, we will go over step-by-step instructions for hanging pictures with wire. We will cover necessary tools, techniques for measuring and marking placement, and tips for ensuring your pictures are level. Whether you’re an experienced DIYer or a beginner looking to add some personal touches to your home decor, this guide is designed to help you achieve professional-looking results.
Gathering The Necessary Tools
Hanging a picture with wire may seem like an easy task, but it requires the right tools and technique to achieve a secure and balanced placement. To begin, gather the necessary equipment: a hammer, nails or screws, a measuring tape, a pencil or marker, and of course, the wire hanger. Avoid common mistakes such as using weak or thin wire that cannot support the weight of your picture frame. DIY alternatives include making your own wire hanger by twisting together thin gauge wires for added strength.
Once you have your tools ready, measure the distance between two points on the back of your picture frame where you will attach the wire. Mark these points with a pencil or marker then screw in two nails or screws into the wall where you want to hang your picture. Make sure they are level and at equal distances apart to ensure balance.
The next step is to attach the wire securely to both points on the back of your picture frame by wrapping it around each nail or screw several times. Pull gently on both ends of the wire to make sure it’s taut enough to hold up your picture without sagging in the middle. In summary, gathering proper tools and avoiding common mistakes such as using weak wires is essential for hanging pictures with wire. Next up is choosing the right type of wire for optimal results.
Choosing The Right Wire Type
When it comes to hanging a picture with wire, selecting the right wire type is crucial. This ensures that your photo stays securely in place and does not fall off the wall. The chosen wire gauge and weight capacity should match the size, weight, and material of your picture frame.
Here are some essential factors to consider when selecting the right wire type for your picture frame:
- Wire Gauge: The gauge of the wire determines its strength and thickness. A lower gauge number means a thicker and stronger wire. For example, 16-gauge wires are stronger than 20-gauge wires.
- Weight Capacity: Different wires have different weight capacities. Based on the weight of your picture frame, you must choose a wire that can hold its weight without breaking.
- Material: Wires come in various materials such as steel, stainless steel, or braided metal. Stainless steel wires are rust-resistant while braided metal wires offer flexibility.
- Purpose: Consider where you want to hang your picture – outdoors or indoors? Outdoor settings require more durable and weather-resistant wires.
Choosing the right wire type depends on several factors such as the size, shape, material of your photo frame, and where you want to hang it. Always ensure that the selected wire can bear the weight of your picture frame without breaking or sagging in any way possible. In our next section, we will discuss how to measure for proper placement before hanging your photo.
Measuring The Placement
- Before hanging a picture with wire, accurate measurements of the wall, picture and distance are essential.
- To measure the wall, use a level and a measuring tape to determine the exact spot where the picture will hang.
- To measure the picture, measure the length and width of the picture frame, allowing for any hooks that may be used to hang the picture.
- To measure the distance, use the measuring tape to measure the distance between the picture and the wall.
- Measure the height of the picture from the floor, as well as the distance between the top of the picture and the ceiling.
- All measurements should be taken twice to ensure accuracy, and all measurements should be recorded for future reference.
Measuring The Wall
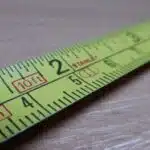
When it comes to hanging a picture with wire, measuring the wall is an essential step. Accurate measurements will ensure that your picture is centered and level, which can significantly enhance the overall aesthetic appeal of your room. Before starting this process, you need to gather the necessary tools such as a tape measure, a pencil, and a level.
Wall measurement is crucial when it comes to hanging pictures. First, determine the height at which you want to hang your picture. The average eye level for standing adults is around 57 inches from the floor. However, if you have high ceilings or are hanging art in a child’s room or hallway, you may want to adjust this measurement accordingly. Next, measure the width of your picture frame and divide it by two. Using this measurement as a guide, mark where the center of your picture will be on the wall.
Spacing considerations are also important when measuring for picture placement. If you plan on hanging multiple pictures in a row or grouping them together, make sure there is enough space between each one so that they don’t appear cramped or cluttered. Typically, a spacing of 2-3 inches between each frame works well. Once all measurements have been taken and marked on the wall using your pencil and level, you’re ready to start hanging your picture with wire!
Measuring The Picture
When it comes to hanging pictures, measuring the placement is just half of the equation. Measuring the picture itself is equally important to ensure that it fits in the desired space and complements other decor elements in the room. One common mistake that many people make when measuring their picture is measuring only the frame instead of the entire piece, including any matting or glass. This can result in an ill-fitting picture that looks out of place on the wall.
To measure your picture accurately, start by placing it face down on a flat surface. Measure both the width and height of the entire piece, including any matting or glass. Once you have these measurements, add an additional two inches to each side to account for wire placement and framing material. For example, if your picture measures 8×10 inches, you should add four inches to each side for a total measurement of 12×14 inches.
If you’re hanging multiple pictures together, it’s essential to measure each one individually before deciding on their placement. Alternative measuring methods such as using paper cutouts or painter’s tape can help visualize how multiple pieces will look together before committing to drilling holes in the wall. Taking time to measure both your wall space and pictures accurately can save you from costly mistakes and ensure that your decor looks polished and put-together.
Measuring The Distance
Measuring the placement of pictures is a crucial step when it comes to home decor. However, measuring accuracy does not only apply to the dimensions of the picture itself but also to its distance from other objects on the wall or furniture in the room. One common mistake that many people make is hanging their pictures too high or too low, resulting in an unbalanced and awkward look.
To measure the distance accurately, start by determining where you want your picture to hang. Use a tape measure or ruler to mark this spot on the wall with a small X or dot. From there, measure the distance between this point and any surrounding objects such as pieces of furniture, curtains, or other wall decor. This will help ensure that your picture is placed at an appropriate height and doesn’t clash with other design elements in the room.
Another thing to consider when measuring distance is how multiple pictures will fit together on one wall. It’s essential to space them evenly and create a cohesive look rather than having them appear scattered or cramped together. Using alternative methods such as paper cutouts or painter’s tape can help visualize how different arrangements will look before committing to drilling holes in the wall.
In conclusion, measuring accuracy plays a significant role in achieving a polished and put-together look for your home decor. When measuring picture placement, it’s crucial to consider both the dimensions of the picture itself and its distance from surrounding objects. Taking time to measure accurately can save you from costly mistakes and ensure that your decor looks balanced and visually appealing.
Marking The Wall
Imagine standing in front of an empty wall, ready to hang a beautiful piece of artwork. The first step in this process is to mark the wall where you want the picture to go. This can seem daunting, but with the right tools and technique, it’s a breeze.
Using anchors is crucial for properly securing your picture to the wall. Anchors provide added support and help distribute the weight of the picture evenly across the wall. To use anchors, start by selecting the appropriate size for your picture hanger based on the weight of your picture. Then, drill a hole into the wall at your desired location and gently tap the anchor into place.
Finding center is also important when marking your wall for hanging a picture with wire. Measure both vertically and horizontally from any nearby objects or furniture to ensure that your picture is centered on the wall both horizontally and vertically. Once you have found center, use a pencil to lightly mark where you want your picture hanger to go.
Now that you have found center and marked where you want your picture hanger to go, it’s time to move on to preparing the picture itself.
Preparing The Picture
After you have marked the wall where you want to hang the picture, it is time to start preparing the picture itself. This includes attaching hanging hardware, which is essential for securely hanging your picture. The most common type of hanging hardware that works well with wire is D-rings.
To attach D-rings to your picture frame, first, decide where you want them to be placed on the backside of your frame. Then, drill a small pilot hole into the frame and screw in the D-ring using a screwdriver. Repeat this process on the opposite side of the frame at an equal distance from the top.
Once both D-rings are attached to your frame, it is time to attach the wire. Thread a length of wire through one D-ring and twist it around itself tightly several times. Pull it taut and thread it through the other D-ring before twisting it again tightly around itself several times. Congratulations! You have now prepared your picture for hanging on the wall using wire. The next step will focus on how to properly attach the wire to your wall-mounted hook or nail without causing any damage or instability issues.
Attaching The Wire To The Picture Frame
To attach wire to the picture frame, you will need a pair of pliers and a length of wire that is approximately twice the width of the frame. Begin by folding the wire in half and twisting it together tightly with the pliers at the midpoint. This will create a loop that can be used to hang the picture.
Next, hold one end of the wire against the back of the frame at one-third of the way down from the top edge. Use your pliers to twist the wire around itself several times, creating a tight coil that will hold securely to the frame. Repeat this process on the other side of the frame, making sure that both coils are level with each other.
Once you have attached both ends of wire to your picture frame, adjust tension by pulling on each end until they are taut but not overly stretched. The picture should hang straight and level without tilting or drooping to either side. Twisting wire should be done carefully so as not to damage your picture or injure yourself.
Here are four tips for attaching wire to a picture frame:
- Start with enough wire – Make sure you have enough length of wire so that you can make two loops and attach them securely to your picture frame.
- Tighten coils – Twist each coil tightly around itself so that it holds securely against the back of your frame.
- Check levelness – Make sure that both coils are level with each other before adjusting tension.
- Adjust tension – Pull on each end of wire until it is taut but not overly stretched before hanging your picture.
With these tips in mind, attaching wire to your picture frame should be easy and hassle-free! Now it’s time to move on to determining where exactly you want your picture to hang on your wall.
Determining The Hanging Point
Accurately measuring the frame is essential in determining the hanging point for a picture with wire. By determining the dimensions of the frame, the amount of weight it can handle can be estimated. This is important for safety and to ensure the frame doesn’t pull away from the wall. It is recommended to use a stud finder to secure the hanging point for heavier frames.
Measuring The Frame
Determining the hanging point of a picture frame is essential for creating an aesthetically pleasing display. Measuring the frame is a critical step in this process, as it helps identify the precise location to hang the picture.
Common mistakes when measuring a frame include only measuring the width or height of the frame and not taking into account any protruding elements such as hooks or wire on the back. To avoid these mistakes, use a tape measure to measure both dimensions of the frame and add any additional depth from hooks or wire.
An alternative method for measuring a frame is to place it against the wall where you want it to hang and mark its top edge with a pencil. Then, measure from that line to where you want the hanging point to be and mark that spot with another pencil. This method takes into account any protruding elements on the back of the frame and ensures that your picture will be level when hung.
Estimating Weight
To ensure that your picture frame hangs securely on the wall, it’s important to estimate its weight accurately. Knowing the weight of the frame will help you choose the appropriate hanging hardware and ensure that it can support the load without damaging your wall. In this section, we’ll discuss some tips and techniques for estimating the weight of a picture frame.
One way to estimate the weight of a picture frame is to use a bathroom scale. First, weigh yourself while holding the frame, then weigh yourself again without holding it. The difference between these two weights is approximately equal to the weight of your picture frame. Another method is to use an online tool or app that calculates the weight based on the dimensions and materials used in your frame. These tools are especially helpful if you’re creating a custom frame with unique materials.
When estimating the weight of a picture frame, don’t forget to factor in any additional items that may be included, such as matting or glass. These elements can significantly increase the weight of your artwork and affect how you hang it. Always err on the side of caution when choosing hanging hardware, and make sure it’s rated for more than what you estimate as your item’s total weight. With these tips and techniques, you’ll have a better understanding of how to estimate your picture frame’s weight accurately and hang it safely on your wall.
Securing The Picture Hanger
Have you ever hung a picture with wire and found it drooping or tilting? This can be frustrating, but fear not! With the right technique, you can ensure your picture stays level and secure. In this section, we’ll discuss how to properly tension the wire and hook it onto the hanger.
Wire tension is crucial for keeping your picture straight and stable. To start, hold the wire in one hand and pull it taut with your other hand. You should aim for a tight but not overly strained wire. If you’re having trouble achieving proper tension, try using pliers to grip the wire while tightening. Once you have your desired tension, make sure to keep the wire held tightly as you prepare to hang.
Now that your wire is properly tensioned, it’s time to utilize the hooking technique. Begin by placing the picture hanger where you want it on the wall. Then take your wired picture and rest it against the wall at a slight angle, allowing one side of the hanger to touch first. Slowly lower the opposite side of the picture until both sides are evenly hooked onto the hanger. Make sure to double-check that everything is level before letting go!
With these tips in mind, hanging a picture with wire should be no problem at all! By ensuring proper wire tension and utilizing a steady hooking technique, your pictures will stay securely in place for years to come.
Hanging The Picture
Before hanging a picture, it is important to accurately measure the picture frame and determine the size of the hanging hardware needed.
Select the appropriate hardware, such as nails and wall anchors, for the type of wall and ensure that the size of the nails or screw is appropriate for the wall anchors.
Cut the wire to the desired length and use a pair of wire cutters to strip the ends of the wire and create a loop for the screws.
Use a level to ensure the picture is level and mark the wall with a pencil at the height and placement desired.
Secure the hanging hardware to the wall, such as nails or wall anchors, using a hammer or screwdriver.
Pull the wire loop through the hardware and twist the ends of the wire around each other to secure the wire.
Measuring The Picture
Achieving a perfectly leveled and centered picture on a wall can be a daunting task. Before starting the hanging process, measuring the picture is an essential step to ensure it is appropriately placed. Common mistakes such as eyeballing or guessing the placement may result in an unbalanced look. To avoid these errors, take precise measurements of both the picture and the wall space.
Start by measuring the width and height of the picture frame from one edge to another. Then, add an extra inch to each side to allow for wire slack when hanging it. Next, measure and mark the center of your wall where you want your photo to hang. Use a level tool to ensure that your marking is straight across. With this information, you can then calculate how far down from the ceiling you need to place the nail.
An alternative method for measuring involves cutting paper that matches your image’s width and height dimensions. Tape it onto your wall in various positions until you find an ideal spot. This technique allows you to visualize where your photo will hang before making any permanent marks or holes in your walls. Taking care with measuring will make sure that your pictures are precisely placed and offer an aesthetically pleasing look on display for years to come.
Installing The Hanging Hardware
After ensuring that your picture is correctly measured and marked, the next step in hanging it is installing the hanging hardware. Common mistakes when installing the hardware include using inappropriate or weak hardware, placing it too high or low, or not measuring correctly. To avoid these errors, use appropriate hanging hardware for the size and weight of your picture frame. For larger frames or heavier artwork, consider using heavy-duty hooks rated for higher weights.
Another alternative method for hanging pictures is using adhesive strips that require neither nails nor screws. These strips are ideal for lightweight pictures and offer an easy and damage-free installation process. However, it’s essential to follow the manufacturer’s instructions carefully to ensure a secure hold on your wall.
Before hammering any nails or screws into your walls, it’s best to create a template by tracing the location of your chosen hardware onto a piece of paper. With this template in hand, you can confirm that your measurements are accurate and ensure that your hardware placement aligns with your marks on the wall. Taking time to install high-quality hardware correctly will keep your pictures levelled and safely secured on display for years to come.
Securing The Wire
Now that you have measured and marked the wall, chosen appropriate hanging hardware, and installed it correctly, it’s time to secure the wire. This step is crucial in ensuring that your picture remains levelled and secure on display.
To secure the wire, start by crimping it tightly to prevent any slippage or loosening over time. Use pliers to pinch the wire firmly at the back of the frame, leaving no slack between the wire and frame. Make sure that there is enough slack in the wire to hang your picture at your desired height without touching the wall.
After crimping, tie a knot on each end of the wire for added stability. These knots will prevent the wire from slipping through hardware hooks or loops when hung on display. Ensure that each node is tight and securely tied before trimming any excess wire.
By taking these steps, you can ensure that your picture stays levelled and safely secured on display for years to come. Remember always to use appropriate hanging hardware and follow manufacturer instructions for adhesive strips or other alternative methods of hanging pictures.
Adjusting For Leveling
Once you have hung your picture with wire, it is important to adjust it for leveling. Using level tools such as a bubble level or laser level can help ensure that your picture is perfectly straight. A bubble level is a simple tool that can be placed on top of the picture frame and adjusted until the bubble in the center is centered between the two lines. A laser level, on the other hand, projects a straight line onto the wall and can help you align multiple pictures at once.
One common mistake when adjusting for leveling is relying solely on the eye to judge whether or not the picture is straight. Our eyes can often be deceiving, especially when dealing with uneven walls or floors. Another mistake is assuming that every wall in your home is completely vertical or horizontal – this may not always be the case. It’s important to use level tools to ensure accuracy.
By taking these steps to adjust for leveling, you can avoid having a crooked or off-center picture hanging on your wall. In addition to using level tools, it’s also important to check for stability by giving the picture a gentle push to make sure it doesn’t move or tilt. This will ensure that your picture remains secure and looks its best for years to come.
Checking For Stability
To ensure that your hanging picture stays in place, it is essential to check for stability. It would be a shame for your hard work to go to waste, and the picture falls off the wall. Checking for stability involves two things: the importance of weight and checking bracket compatibility.
Firstly, it is crucial to consider the weight of the picture you’re hanging. A heavier picture requires more support than a lighter one. If you’re unsure about how much weight your bracket can handle, consult the manufacturer’s instructions or seek advice from a professional. Overloading a weak bracket can lead to disastrous results, such as damage to your wall or injury.
Secondly, checking bracket compatibility is also important in ensuring stability. Not every bracket is suitable for every type of wall material. For example, drywall requires different brackets than plaster walls. Using an incompatible bracket can lead to instability and cause damage over time.
To further help you achieve optimal stability when hanging your picture, here are three sub-lists with tips on what you should do:
Choose an appropriate location based on wall strength
Use a stud finder tool to locate studs behind the drywall
Install brackets that are specifically designed for your wall material
Check for levelness using a spirit level tool
Ensure that both sides of the wire have equal tension
Use more than one hook for larger pictures
Test stability by gently pulling on the bottom corners of the picture
Make any necessary adjustments before hanging up the final product By following these guidelines and tips, you can rest assured that your hanging picture will remain stable and look great in its new location.
Making Adjustments
- To hang a picture with wire, the first step is to remove the hangbar from the back.
- The length of the wire should be adjusted to the desired hanging height by using a pair of pliers.
- When adjusting the wire length, it is important to be mindful of the amount of slack that is used to ensure the picture remains securely attached to the wall.
- It is advisable to leave a few inches of wire on either end to ensure the picture is hung at the desired level.
Removing The Hangbar
Have you ever hung a picture with wire, only to realize that it’s not level or centered? Don’t worry, making adjustments is easier than you think. One of the first steps in making adjustments is removing the hangbar from the back of the frame. This can be done by gently lifting up on one end of the bar and sliding it out of its slot.
If you find that your picture isn’t hanging straight, don’t panic. There are a few alternatives to consider before resorting to removing the hangbar altogether. One option is to use adhesive strips or hooks, which can be adjusted easily without leaving any holes in your wall. Another option is to use a leveling tool, such as a laser level or bubble level, to ensure that your picture hangs perfectly straight.
If you do need to remove the hangbar, be sure to hold onto it for future use. You never know when you might want to switch up your wall decor or rearrange your pictures. And remember, making adjustments doesn’t have to be daunting – with a little patience and creativity, you can achieve the perfect look for your space.
Adjusting The Wire Length
When it comes to hanging pictures, one of the main challenges is getting them level and centered on the wall. While using adhesive strips or a leveling tool can help with this, another important factor to consider is adjusting the wire length. By making small adjustments to the tension of the wire, you can ensure that your picture hangs straight and doesn’t tilt or lean to one side.
To adjust the wire length, start by removing any existing hooks or hardware from the back of your frame. Then, gently pull on one end of the wire to release it from its current position. Next, use pliers to twist the wire clockwise or counterclockwise to increase or decrease its tension. Keep in mind that if you twist too much or too little, you may end up with kinks in the wire which can make it difficult to hang your picture properly.
Once you’ve adjusted the wire tension to your liking, reattach any hooks or hardware and test out your new setup on the wall. If needed, make additional tweaks by repeating these steps until you achieve the perfect balance for your picture. With a little patience and attention to detail, adjusting wire length can be a simple yet effective way to improve your home decor and create a more visually appealing space.
Hanging Multiple Pictures In A Gallery Wall
When it comes to hanging multiple pictures in a gallery wall, there are a few important things to consider. First and foremost is choosing artwork that complements each other. This can be achieved by selecting pieces with similar themes, colors, or styles. It’s also essential to think about the size and shape of each piece and how they will fit together in a cohesive layout.
Once you have your artwork picked out, it’s time to start creating your gallery wall. One popular method is to lay out all of your pieces on the floor first and play around with different arrangements until you find one that works. Another option is to use paper cutouts of your artwork and tape them to the wall to get a better sense of how everything will look once hung.
When hanging your pictures, it’s important to keep in mind their weight and size. Lighter pieces can be hung with adhesive strips or small picture hooks, while heavier pieces may require anchors or special hooks designed for heavier loads. By taking these factors into consideration when creating your gallery wall, you’ll ensure that everything looks polished and stays securely mounted on the wall.
As you finish up your gallery wall project, keep in mind some tips for hanging heavy pictures. These might include using multiple anchors or hooks for added support, checking that the hook or wire is rated for the weight of the piece, and making sure the picture is level before hammering in any nails. With these extra precautions taken into account, you’ll be able to enjoy your beautiful new display without any worries about it falling off the wall.
Tips For Hanging Heavy Pictures
- When hanging heavy pictures, it is important to measure the weight of the picture so that you can choose the right hardware to ensure it is securely hung.
- Fasteners such as nails, screws, and anchors should be chosen based on the weight of the picture and the type of wall it is being hung on.
- The picture wire should also be chosen based on the weight of the picture to ensure that it is securely attached and able to hold the weight of the picture.
- It is important to consider the weight of the picture and the type of wall it is being hung on when choosing the appropriate hardware for hanging heavy pictures.
Measuring The Weight Of The Picture
Calculating weight is crucial when hanging large pictures. It ensures that the picture stays securely in place and prevents any damage to the wall or the artwork. To calculate the weight of a picture, you will need a weighing scale and a measuring tape. First, measure the width and height of the frame. Next, multiply these two numbers to get the total square inches of the frame. Then, weigh the frame in pounds and divide this number by 16 to convert it into ounces. Finally, multiply this number with the total square inches of the frame to get its weight.
Hanging large pictures can be challenging without proper planning and preparation. Measuring their weight beforehand helps determine what type of hanging hardware should be used. For example, if your picture weighs more than 20 pounds, you will need a heavy-duty hook and anchor to support its weight. Also, consider using multiple hooks for larger frames as they distribute the weight evenly across several points on the wall.
In conclusion, calculating weight is essential when hanging large pictures as it ensures their stability and prevents any unwanted accidents or damages. By following these simple steps, you can easily determine how much your picture weighs and select appropriate hardware for hanging it safely and securely on your wall. Remember to always prioritize safety above aesthetics when it comes to home improvement projects!
Choosing The Right Hardware
When it comes to hanging heavy pictures, choosing the right hardware is just as important as calculating their weight. The two main types of wire for hanging pictures are braided and twisted wire. Braided wire is stronger and less likely to break, making it ideal for heavier frames. On the other hand, twisted wire is more flexible and easier to work with but may not hold up well for larger pictures.
Another factor to consider when selecting hardware is weight capacity. Hardware that can support at least twice the weight of the picture should be used to ensure its stability. For example, if your picture weighs 30 pounds, choose hardware that can support at least 60 pounds. It’s also essential to use screws or anchors that are appropriate for your wall type (e.g., drywall vs. concrete).
In addition to wires and weight capacity, there are various types of hooks and hangers available for hanging heavy pictures. Some popular options include D-ring hangers, sawtooth hangers, and J-hooks. These options each have unique features that make them suitable for different types of frames and walls. By carefully considering these factors when choosing hardware, you can ensure that your picture stays safely and securely hung on your wall for years to come.
Troubleshooting Common Problems
Common mistakes can happen when hanging a picture with wire. One of the most common is not using the right type of hardware. It is important to choose the appropriate size and weight capacity for both the wire and hook or nail used. Another mistake is not properly securing the wire to the back of the frame, which can lead to an uneven hang or even cause the picture to fall.
Preventative measures can help avoid these mistakes. Before beginning, check that all hardware is appropriate for the weight and size of the picture being hung. Use a level to ensure proper alignment, and measure twice before making any holes in the wall. When securing the wire to the back of the frame, make sure it is taut and twisted securely to prevent slipping.
If you encounter problems while hanging your picture, there are solutions available. If your picture appears crooked, use a level to adjust its position. If your wire slips or causes your picture to tilt forward, try twisting it tighter or adding additional support hardware. By being aware of common mistakes and taking preventative measures, you can successfully hang your pictures with ease and confidence.
Conclusion
To conclude, hanging a picture with wire may seem daunting at first, but with the right tools and techniques, anyone can do it. Remember to choose the appropriate wire type based on the weight of the picture, measure and mark the wall accurately, and make adjustments as needed. For gallery walls or hanging multiple pictures together, plan out the arrangement beforehand and use a level to ensure alignment.
When dealing with heavier pictures, consider using a metal hook or anchor for added support. Troubleshooting common problems such as uneven placement or crooked pictures can easily be solved by making minor adjustments. With these tips in mind, you can confidently display your favorite artwork or photographs in your home or office space.
Image Credits
- “Picture Hanging” by fdecomite (featured)

