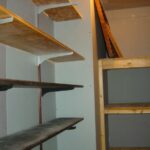
Hanging a shelf can seem like a daunting task for the average person, but with the right tools and techniques, it can be a simple and satisfying DIY project. Whether you’re looking to add some extra storage space or create an eye-catching display, there are a few key steps that you’ll need to follow to ensure your shelf is safely and securely mounted on the wall.
In this article, we’ll take you through everything you need to know about hanging a shelf. From choosing the right materials and tools for the job, to measuring and marking out your wall space, we’ll guide you through each stage of the process in clear and concise language. So whether you’re a seasoned DIY enthusiast or a complete novice, read on to discover our top tips for hanging shelves like a pro!
Choosing The Right Type Of Shelf
It goes without saying that adding a shelf to your living space can bring both style and functionality. However, before you start drilling holes in the wall, it’s important to choose the right type of shelf that will fit your needs. One crucial aspect to consider is the shelf materials available on the market. The most common types include wood, metal, glass, and plastic. Each material has its own unique properties that can either enhance or detract from the aesthetics of your room.
Another factor to take into account when selecting a shelf is its weight capacity. You want to make sure that the shelf can support the items you plan on placing on it without crashing down unexpectedly. A general rule of thumb is to choose a shelf with a weight capacity that exceeds what you plan on placing on it by at least 25%. Keep in mind that heavier items require sturdier brackets or supports.
By carefully considering both the shelf materials and weight capacity considerations, you’ll be able to select a shelf that not only looks great but also serves its intended purpose well. Now that you have chosen your ideal shelving unit, it’s time to move onto the next step: selecting the proper tools for the job.
Selecting The Proper Tools For The Job
- When selecting a shelf for a home project, one should consider the weight it needs to carry, the size of the wall area, and the style of the room.
- It is important to have the right tools on hand to ensure a successful installation.
- Necessary tools for hanging a shelf include a power drill, a level, a measuring tape, and wall anchors.
- To begin, measure the wall area to determine the size of the shelf and the number of anchors and screws needed for installation.
Identifying The Right Shelf
Are you planning to hang a shelf in your home? One of the essential steps in this process is identifying the right shelf for your needs. Choosing the right size and identifying the proper weight capacity are two factors that play a crucial role in selecting the perfect shelf.
Firstly, when choosing a shelf, ensure that it suits the size of your space. Selecting a shelf that is too large or too small can make it look awkward. Measure the area where you plan to hang the shelf and choose an appropriate size accordingly. Additionally, consider what items you plan to store on the shelf and select one that can accommodate their dimensions.
Secondly, identifying the proper weight capacity is critical for ensuring safety and longevity. You don’t want a heavy item to cause damage or harm when placed on an insufficiently supportive shelf. Check with your chosen manufacturer’s instructions or label to identify its maximum weight capacity and compare it with what you plan to store on it.
In conclusion, choosing the right size and identifying the proper weight capacity are crucial when selecting a suitable shelf for hanging purposes. Always prioritize safety when it comes to hanging shelves in your home by following these guidelines. With these tips in mind, you will be one step closer to creating functional storage solutions for your space!
Gathering The Necessary Tools
When it comes to hanging shelves in your home, selecting the proper tools for the job is crucial. One common mistake people make when gathering the necessary tools is assuming that any tool will do. However, using the wrong tool can lead to an unsafe installation and potentially cause damage to your walls or shelving unit.
To avoid this, it’s important to gather all of the necessary tools before beginning any installation project. Some alternative methods for gathering tools include purchasing a pre-made kit specifically designed for hanging shelves or creating a checklist of required items beforehand to ensure nothing is forgotten.
Some common tools needed for shelf installation include a stud finder, level, drill, screws, anchors, and brackets. It’s essential to choose high-quality tools that are suitable for the weight capacity and size of your shelf. By taking the time to gather the proper equipment, you can ensure a safe and secure installation that will stand the test of time.
Measuring Your Wall Space
Now that you have selected the proper tools for the job, it’s time to measure your wall space. Accurate measurements are crucial when you are installing a shelf. You don’t want to end up with a crooked or unstable shelf due to incorrect measurements. Therefore, you need to use precise measuring techniques to get the job done right.
One of the most common mistakes people make when installing shelves is not measuring the wall space correctly. This mistake can lead to an unstable shelf that can fall and cause damage. To avoid this problem, ensure that you measure the width, height, and depth of your wall space accurately. Make sure to account for baseboards and other obstacles on your wall.
After measuring your wall space, it’s time to find the studs so that you can secure your shelf onto them. Studs provide stability and support for heavy objects like shelves. A stud finder is a useful tool in locating studs behind drywall or plaster walls. Once you find the studs, mark their location on the wall with a pencil. This step will help you avoid drilling holes in areas without proper support and prevent any further damage to your walls.
Finding The Studs
Before hanging your shelf, it is essential to find the studs in the wall. Studs are vertical framing members that provide structural support to the wall and help distribute weight evenly across it. Hanging a shelf without finding a stud can lead to damage or even collapse of the shelf.
Stud Finder Alternatives:
If you don’t have a stud finder, there are other ways to locate studs in your wall. The first method involves using a flashlight and a measuring tape. Start by shining the flashlight at an angle against the wall and looking for any bumps or depressions. Measure 16 inches from one bump or depression to another, as this is typically where studs are placed.
How to Identify Load Bearing Walls:
Another way to locate studs is by identifying load bearing walls in your home. Load bearing walls carry the weight of your home’s structure, while non-load bearing walls do not. Typically, load-bearing walls run perpendicular to floor joists and parallel to beams or girders. You can consult with a professional contractor if you’re unsure which walls are load-bearing in your home.
Next up, marking the mounting holes…
Marking The Mounting Holes
Accurately measuring the wall where the shelf is to be hung is essential to ensure proper placement. Drill pilot holes with a drill bit that is slightly smaller than the screws that will hold the shelf in place. When drilling the pilot holes, it is important to ensure that they are level and that the screws will fit in the holes. To secure the shelf, the mounting screws should be screwed into the pilot holes and tightened with a screwdriver.
Measuring The Wall
When it comes to hanging a shelf, measuring the wall is a crucial step that shouldn’t be taken lightly. Common mistakes made during this process can lead to uneven shelves or even worse, shelves falling off the wall. As a DIY expert, I highly recommend taking your time when measuring and double-checking your measurements to ensure the stability of your shelf.
One alternative measuring method that I suggest is using a level tool. This will help you avoid any slanted or crooked shelves that can be an eyesore in your space. Additionally, if you’re unsure about the accuracy of your measurements, don’t hesitate to ask for help from a friend or family member with experience in DIY projects. It’s always better to err on the side of caution than risk damaging your walls or injuring yourself.
In conclusion, measuring the wall accurately and using alternative methods like a level tool or seeking assistance from someone with experience are essential steps when it comes to hanging shelves. Don’t rush through this process and take pride in creating sturdy and aesthetically pleasing shelves that will serve both yourself and others in your space.
Drilling Pilot Holes
When it comes to hanging shelves, marking the mounting holes is a crucial step that cannot be skipped. However, simply marking the holes is not enough to ensure stability and durability. To avoid splitting or cracking the wood, pre-drilling pilot holes is highly recommended. The benefits of pre-drilling include making it easier to screw in the screws, preventing wood from splitting or cracking, and reducing the risk of damaging your walls.
Some people may opt for alternatives to pilot holes such as using self-drilling screws or anchors. While these methods can work, they are not foolproof and may still cause damage to your wall or shelf. Self-drilling screws can strip out threads if used on hardwoods or when over-tightened, causing instability and possible collapse of the shelf. Anchors may fail over time due to wear and tear or changes in wall strength caused by temperature changes.
In conclusion, pre-drilling pilot holes is a simple yet effective method to ensure the longevity and stability of your shelves. While there are alternatives available, they may not always provide reliable results. As a DIY expert, I highly recommend investing in a drill bit set and taking your time when drilling pilot holes for best results. Your efforts will be rewarded with sturdy shelves that will serve you and others for years to come.
Preparing The Wall Surface
Marking the mounting holes is just the first step in hanging a shelf. After marking the holes, it’s important to prepare the wall surface for installation. This involves checking the condition of your wall and making sure it’s strong enough to support the weight of your shelf.
When preparing your wall surface, one important factor to consider is the type of paint used on the wall. If you have a glossy or oil-based paint, you may need to do some extra sanding or priming before drilling into the wall. On the other hand, if you have a flat or matte finish, you can usually skip this step. Additionally, if you have any cracks or holes in your wall, it’s important to repair them before installing your shelf. Wall repair techniques can include spackling or using joint compound to fill in any gaps.
Once you’ve prepared your wall surface, you’re ready to start drilling pilot holes for your shelf brackets. It’s important to choose the right size drill bit for your screws and make sure that your pilot holes are straight and level. By taking these steps and carefully following each part of this process, you’ll be able to confidently hang a shelf that will last for years to come.
Drilling The Pilot Holes
Drilling the Pilot Holes is an essential step in hanging a shelf. It is important to understand the significance of depth when it comes to drilling pilot holes. The depth of the hole should be slightly less than the length of the screw that will be used to fix the shelf bracket on the wall.
The proper use of a drill is imperative for this step. Using a drill bit that matches the size of your screws is crucial. When drilling, apply a moderate amount of pressure and ensure that you hold your drill steady, without any wobbling or shaking movements. This will give you clean and accurate holes for your screws.
Remember, drilling pilot holes can make or break your shelving project! A precise measure of depth and using your drill correctly will save you time and frustration in later steps. Once you’ve drilled your pilot holes, then you’re ready for mounting the shelf bracket.
Mounting The Shelf Bracket
- When selecting a shelf bracket, it is important to consider the weight of the shelf, the size of the wall, and the type of mounting hardware required.
- Once the right bracket has been chosen, the bracket must be securely attached to the wall using the appropriate anchors and screws.
- In order to ensure a secure fit, the screws should be placed directly into the wall studs, if possible.
- After the bracket is mounted to the wall, the shelf can be safely attached to the bracket and secured with screws.
Choosing The Right Bracket
Are you looking to hang a shelf in your home or office? One of the most important steps in this process is choosing the right bracket. Bracket materials and weight capacity considerations are key factors that should be taken into account when selecting a bracket for your shelf.
When it comes to bracket materials, there are several options available. The most common materials used for brackets include metal, wood, and plastic. Metal brackets tend to be the strongest and most durable, but they can also be more expensive than other materials. Wood brackets are a great option if you’re looking for something affordable and stylish, but they may not hold as much weight as metal brackets. Plastic brackets are typically the least expensive option, but they may not provide the necessary support for heavier items.
Weight capacity considerations are also crucial when selecting a bracket for your shelf. It’s important to choose a bracket that can support the weight of your items without bending or breaking. To determine how much weight your bracket will need to support, consider the weight of the items you plan to place on the shelf and add a safety margin of at least 25%. This will ensure that your shelf is sturdy and secure.
In summary, choosing the right bracket is an essential step in hanging a shelf. Consider materials such as metal, wood, and plastic, as well as weight capacity considerations when making your selection. By taking these factors into account, you can ensure that your shelf will be secure and stable for years to come.
Attaching The Bracket To The Wall
When it comes to mounting a shelf bracket, it’s important to ensure a secure and stable mount. One of the most crucial steps in this process is properly anchoring the bracket to the wall. This involves selecting the appropriate anchor for your wall type and ensuring that it is installed correctly.
To properly anchor a shelf bracket, start by selecting an appropriate anchor for your wall type. Different types of walls require different types of anchors, so be sure to choose one that is suitable for your specific wall. Once you have selected an anchor, follow the manufacturer’s instructions for installation. This typically involves drilling a hole in the wall, inserting the anchor, and tightening it with a screwdriver or drill.
Tips for ensuring a secure mount include using multiple anchors for heavier shelves and checking that all screws are tightened securely. It’s also important to use a level when installing the bracket to ensure that it is straight. By taking these precautions and following proper installation techniques, you can ensure that your shelf bracket is securely mounted and will provide reliable support for your items.
Attaching The Shelf To The Bracket
Now that the brackets are securely fastened, it’s time to attach the shelf to them. Begin by positioning the shelf on top of the brackets and ensuring that it fits snugly. Once you’re satisfied with its placement, mark the screw holes on the underside of the shelf using a pencil or marker.
Next, choose screws that are appropriate for your specific project. The screw size should be compatible with both the bracket and shelf material. In addition, consider the weight limit of your chosen screws and ensure that they can support the weight of your intended items. Using a drill, carefully insert the screws through each marked hole in the shelf and into the brackets.
Finally, double-check that everything is level before securing all screws tightly. A level is an essential tool for this step as it ensures that your shelf is straight and not crooked. If necessary, make any minor adjustments to achieve perfect alignment before tightening all screws completely. With everything securely in place, you can now enjoy your newly installed shelf!
- Ensure proper screw size compatibility with bracket and shelf material
- Consider weight limit of selected screws
- Use a drill for secure attachment
- Double-check for level using a level tool – Once you are confident that the shelf is level, tighten all screws to ensure stability and durability.
Checking For Level
Using a level properly is crucial in ensuring that your shelf is straight and secure. A level is a tool used to determine if a surface or object is horizontal or vertical. To use a level, simply place it on the surface you want to check and adjust until the bubble in the center of the level is in between the two lines.
Common leveling mistakes include not checking for level at all, relying solely on visual cues, and not using a long enough level. It’s important to check for level multiple times during installation as walls may not be perfectly straight. Additionally, if your shelf has multiple brackets, make sure each bracket is leveled before securing them to the wall.
Checking for level may seem like an extra step, but it will save you time and frustration in the long run. A straight and secure shelf not only looks better but also functions better. In the next section, we’ll discuss how to secure your shelf to the wall for maximum stability.
Securing The Shelf To The Wall
After ensuring that the shelf is level, it’s time to secure it onto the wall. This step is crucial as it ensures that the shelf stays in place and doesn’t topple over. One common mistake many people make is using screws that are too short or too thin. This can make the shelf unstable and increase the risk of it falling off. To avoid this, you should use screws that are at least 2 inches long and thick enough to hold the weight of the shelf.
An alternative method to using screws is using brackets. Brackets are perfect for adding extra support to your shelf, especially if you plan on storing heavy items on it. When using brackets, ensure that they are evenly spaced and level with each other. You can then place the shelf on top of them and secure it in place with screws.
Before moving on to adding decorative touches, it’s important to ensure that your newly hung shelf is sturdy and secure. Double-check all connections, making sure there are no loose parts or wobbly brackets. Once you’re confident that everything is in place, you can now add some personal flair by incorporating decorative touches such as plants or picture frames onto your new shelf. With these small details added, your new DIY project will be complete!
Adding Decorative Touches
Adding decorative touches to your newly installed shelf not only enhances the aesthetic appeal of your living space but also improves its functionality. There are numerous creative shelving ideas that you can use to personalize your shelf and make it stand out. One popular option is adding plants, which not only beautify the space but also provide a natural touch. You can choose to add potted plants or hang planters from the shelf.
Another way to add visual interest to your shelf is by displaying artwork or photographs. This not only showcases your personality but also gives a unique touch to your décor. To avoid a cluttered look, consider using uniform frames and spacing them evenly on the shelf. You may also mix in other decorative objects such as sculptures, vases, or candles.
When selecting decorative items for your shelf, ensure they complement the overall style of the room. If you have a minimalist décor scheme, opt for simple and streamlined items that blend in seamlessly with the rest of the room’s design elements. Conversely, if you have an eclectic style, don’t be afraid to mix and match various items for a vibrant look. Ultimately, adding decorative touches is an opportunity to showcase your creativity while enhancing the functionality of your new shelf.
As you add decorative elements to your newly installed shelf, remember to clean up after yourself as you go along. This will help prevent clutter from accumulating and ensure that you maintain an organized workspace throughout the process. Cleaning up as you work will also make it easier for you to visualize how each item will look on the finished product before committing fully to its placement.
Cleaning Up The Workspace
As we add decorative touches to our homes, it’s important to keep the workspace clean and organized. Having all of your tools in one place can make the process smoother and more efficient. One way to stay organized is by using a toolbox or storage container specifically for DIY projects. This will prevent you from misplacing important tools and save you time searching for them.
Once your project is complete, it’s important to create a cleaning routine for the workspace. This not only ensures that the area stays neat and tidy, but also prevents potential hazards from developing. Start by wiping down surfaces with a damp cloth to remove any dust or debris. Then, sweep or vacuum any excess materials on the floor. Finally, dispose of any leftover materials properly.
Organizing tools and creating a cleaning routine are essential steps in completing any DIY project. By doing so, you’ll save yourself time and make the experience more enjoyable overall. In the next section, we’ll discuss common problems you may encounter while hanging a shelf and how to troubleshoot them effectively.
Troubleshooting Common Problems
After following the steps for hanging a shelf, it is possible to encounter some common mistakes that can compromise the stability and safety of your installation. One of these is failing to use appropriate hardware for the weight and size of your shelf. This can lead to sagging or even falling off the wall. DIY solutions include ensuring you have enough brackets and screws, as well as checking the weight limit of each bracket.
Another mistake is not properly leveling your shelf before securing it in place. This can result in a crooked or uneven appearance, which may also affect its functionality. To avoid this issue, use a level tool during installation and adjust as necessary before tightening the screws. DIY solutions include using shims or adjusting bracket placement until level.
Safety precautions and best practices should also be taken into consideration when hanging a shelf. Always make sure to wear appropriate protective gear such as gloves and safety glasses when working with power tools or heavy materials. Additionally, be sure to follow manufacturer instructions for any hardware used in the installation process, including weight limits and installation techniques.
Moving forward, maintaining your shelf over time is essential for extending its lifespan and ensuring continued functionality. In order to do so effectively, it is important to regularly inspect brackets and screws for any signs of wear or damage. Additionally, avoid placing excessive weight on your shelf beyond its recommended limit and make any necessary adjustments if you notice sagging or instability over time.
Maintaining Your Shelf Over Time
Now that you have successfully hung your shelf, it is important to keep it in good condition for long-term use. The good news is that with regular maintenance, your shelf can last for years without showing signs of wear and tear. Here are some tips to help you maintain your shelf over time.
Firstly, keep your shelf clean by dusting it regularly. This will prevent dirt and grime from accumulating on the surface of the shelf, which can cause scratches and other damages. You can also wipe down the shelf with a damp cloth once in a while to remove any stubborn stains.
Secondly, consider investing in some shelf accessories such as brackets or hooks. These can help provide extra support for heavier items or prevent smaller objects from falling off the shelf. Additionally, using accessories like bookends or baskets can help you organize your items more effectively and reduce clutter on the shelf.
By following these simple maintaining tips and using appropriate accessories, you can ensure that your shelf remains functional and aesthetically pleasing for years to come. Remember to check your shelves periodically for any signs of damage or weakness, and make necessary repairs as soon as possible to avoid any accidents or injuries. With proper care, your DIY shelving project can be a practical addition to your home décor!
Conclusion
When it comes to hanging a shelf, there are several key components to consider in order to ensure a successful installation. First, selecting the right type of shelf for your needs is essential. You must also have the proper tools on hand and take accurate measurements of your wall space. Finding the studs and marking the mounting holes are crucial steps in the process.
Once you have hung your shelf, adding decorative touches can help elevate its appearance. It’s important to clean up your workspace and troubleshoot any common problems that may arise during installation. Maintaining your shelf over time will also help ensure its longevity and functionality.
By following these steps, you can successfully hang a shelf in your home or office with ease. Remember to take your time and exercise caution throughout the process, as safety should always be a top priority. With a little patience and attention to detail, anyone can become an expert at DIY shelving installations!
Image Credits
- “book shelf” by seo_gun (featured)


