Hanging a picture is an essential part of home decoration, and it can be daunting for those who are unfamiliar with the process. However, with a few simple steps, anyone can hang a picture like a professional. In this article, we will discuss the necessary tools and techniques required to hang a picture correctly and securely.
Firstly, it is crucial to choose the right location for your picture. Consider factors such as lighting, room layout, and wall space before deciding on where to position your artwork. Once you have decided on the location, it is time to gather the necessary tools. A hammer, nails or screws, a leveler and measuring tape are all essential items required for hanging pictures successfully. With these tools in hand, you’re ready to start hanging your pictures with confidence!
Choosing The Right Picture For Your Space
When it comes to decorating your home, choosing the right picture for your space can make all the difference. There are many types of pictures to choose from, including paintings, prints, photographs, and more. Consider the style of your room and the mood you want to convey when selecting a picture.
Another important factor is color coordination. You want your picture to complement the colors already in your room. Look for a picture that has similar hues or complementary colors to create a cohesive look. If you’re unsure about which colors work well together, consider consulting a color wheel or speaking with an interior designer.
Remember that the picture you choose should ultimately serve its purpose – to enhance the overall aesthetic of your space. By selecting a picture that fits with the style and color scheme of your room, you’ll be on your way to creating a beautiful and inviting space. In the next section, we’ll discuss how considering lighting and room layout can further enhance your chosen picture’s impact within the space.
Considering Lighting And Room Layout
After selecting the perfect picture for your space, it’s time to consider lighting placement and furniture arrangement. These two aspects play an important role in how your picture will be perceived by anyone who walks into the room. Proper lighting can enhance the colors and details of your picture, while furniture arrangement can either complement or clash with your artwork.
When it comes to lighting placement, think about where natural light is coming from and how it hits your picture. You want to avoid placing a picture in direct sunlight as this can cause fading over time. Instead, consider placing your picture on a wall that gets indirect light or invest in some adjustable lights to highlight specific areas of the artwork. Additionally, if you have other sources of light in the room such as lamps or overhead fixtures, make sure they do not cast unwanted shadows on your picture.
Furniture arrangement is also important when hanging a picture. You want to ensure that the piece is not competing with other elements in the room such as large pieces of furniture or busy patterns on curtains or rugs. Consider hanging your picture on a blank wall or above a piece of furniture that complements rather than distracts from the artwork. By taking into account these factors, you can create a cohesive and visually appealing space that showcases your favorite pieces of art.
Now that you’ve considered lighting placement and furniture arrangement, it’s time to measure your wall space for optimal placement of your picture. This step is crucial in ensuring that your artwork is centered and at eye level for maximum impact. Stay tuned for our next section where we will discuss tips for measuring wall space and properly hanging your picture.
Measuring Wall Space For Optimal Placement
Before hammering in any nails, it’s essential to measure the wall space accurately. Measuring accuracy is critical when determining where to hang your picture. A common mistake made by many homeowners is eye-balling the placement of their pictures. This often results in uneven spacing or pictures hung too high or low on the wall.
To achieve a professional-looking arrangement, take a tape measure and measure the horizontal and vertical distance between two adjacent walls. Next, identify the center point of the wall space; this will be your starting point when hanging your picture. Mark the center with a small pencil mark before proceeding to make additional measurements based on your desired height.
Wall texture considerations are equally important when measuring for optimal placement. If you have a textured wall, such as brick or concrete, ensure that you make allowances for the protruding surfaces when measuring your wall space. Additionally, if you have a wallpapered wall, consider hanging your picture on an area with little to no pattern to avoid visual distractions from competing patterns.
Now that you’ve measured your wall space correctly and accounted for any surface irregularities let’s move onto selecting the right tools for the job.
Selecting The Right Tools For The Job
When it comes to hanging a picture, selecting the appropriate hardware is crucial. The type of hardware you use will depend on the weight of the picture and the type of wall you are hanging it on. For lightweight pictures, such as small frames or canvases, you can use simple nails or picture hangers. However, for heavier pieces, like large paintings or mirrors, you will need to use more heavy-duty hardware such as screws or anchors.
Understanding weight limits is also important when selecting the right tools for hanging a picture. Before choosing which hardware to use, be sure to weigh your picture and check the weight limit of your chosen hardware. Overloading your hardware can lead to serious damage to your walls and even potential injury if the picture falls.
By taking the time to select appropriate hardware and understanding weight limits, you can ensure that your pictures are hung safely and securely. In the next section, we will discuss whether a hammer or drill is best for hanging pictures based on different types of walls.
Transition: Now that we have covered how to select appropriate hardware and understand weight limits for hanging pictures, let’s move on to discussing which tool is best for your specific wall type: a hammer or drill?
Hammer Vs. Drill: Which Is Best For Your Wall?
While selecting the right tools is crucial for any home improvement project, understanding how to use them safely and effectively is equally important. When it comes to hanging pictures, hammering nails or drilling screws into your wall are both viable options. However, there are pros and cons to each tool that you should consider.
Using a hammer and nails is the traditional method of hanging pictures. It’s simple, straightforward, and doesn’t require any special skills or equipment. The downside is that it can be difficult to get the nail in the right spot without damaging your wall. If you’re not careful, you could end up with an unsightly hole or even cause structural damage.
On the other hand, using a drill and screws allows for greater precision and control when hanging pictures. You can easily adjust the placement of the screw before securing it in place. Additionally, screws tend to be more secure than nails as they provide better support for heavier items. However, using a drill requires more skill and knowledge of safety precautions to avoid injury or property damage.
If you decide to use a drill for hanging pictures, it’s essential to follow proper safety procedures such as wearing protective eyewear and gloves. Always make sure your drill bit is sharp and the correct size for your screw. To avoid damaging your wall or accidentally hitting electrical wires or pipes behind it, use a stud finder before drilling.
Next up: nails vs. screws – which is more secure? We’ll explore this topic further in our next section on home decor basics.
Nails Vs. Screws: Which Is More Secure?
When it comes to hanging pictures, one important consideration is the type of hardware you use. Two popular options are nails and screws, but each has its pros and cons. Let’s take a closer look at both.
Nails are a classic choice for hanging pictures. They’re easy to use and don’t require any special tools or equipment. However, nails may not be the most secure option, especially for heavier items. Over time, gravity can cause the nail to slip out of place or the picture frame to shift on the wall. If you do choose to use nails, make sure they’re long enough to securely hold your picture in place.
Screws offer a more secure option than nails. They’re less likely to pull out of the wall or shift over time, making them ideal for larger or heavier pictures. However, using screws requires a bit more effort and some additional tools like a drill and screwdriver. To ensure maximum security when using screws, consider using anchors for added support. Anchors are small plastic or metal pieces that help distribute weight evenly across the wall and prevent screws from pulling out under heavy loads.
Using A Leveler For Straight Pictures
Achieving straight pictures can be challenging, especially if you’re not using the right tools. One of the most essential tools for hanging pictures is a leveler. A leveler helps you to ensure that your picture is straight and aligned with other objects in the room. However, using a leveler requires proper technique.
To use a leveler correctly, place it on top of your picture frame and adjust until it shows that the frame is level. Then, mark the wall with a pencil where you will hang your picture. It’s important to avoid common mistakes such as holding the leveler at an angle or not checking it twice to ensure accuracy.
When hanging heavy pictures, there are tips and tricks to follow that will make the process easier. For example, always use sturdy nails or screws that can support the weight of your picture. You should also consider using hangers designed specifically for heavy items. Remember that safety is key when hanging heavy pictures, so it’s important to take precautions such as wearing gloves and safety glasses.
Now that you know how to use a leveler properly and have some tips for hanging heavy pictures, it’s time to move on to marking the wall for precise placement without making any mistakes.
Marking The Wall For Precise Placement
Now that you have gathered all the necessary tools for hanging your picture, it is time to mark your wall for precise placement. This step is crucial as it will determine how well your artwork will look on the wall in the end. To begin marking the wall, you want to ensure that you are working with a clean and dry surface to avoid any smudging of marks.
When marking the wall, there are several DIY tips that can come in handy. First, use a pencil instead of a pen or marker as it allows for easier erasing should you make a mistake. Second, measure and mark where you want your picture to hang using a tape measure and ruler. Third, double-check your measurements before making any permanent markings on the wall.
To further ensure precision when marking the wall, here are five additional tips:
- Use a level to make sure your markings are straight
- Make small marks instead of large ones to avoid any visible mistakes
- Consider using painter’s tape to create an outline of where the picture will be placed
- Test out different placements by holding up the picture against the marked spot before making any holes
- Have someone hold up the picture against the marked spot while you stand back and assess if it looks even
With these DIY tips and wall markings complete, you can move onto hanging pictures with wire.
Hanging Pictures With Wire
To hang a picture with wire, start by measuring the distance between the top of the frame and where the wire is attached. Use this measurement to mark a spot on your wall where you want to hang your picture. Then, use a level to ensure that your mark is straight before starting to install any hardware.
Once you have marked your spot, it is time to install the hanging hardware. For heavier pictures, use two D-ring hangers attached to either side of the frame, and then attach your wire to these hangers. Adjusting tension is key when hanging heavy pictures, so make sure that your wire is taut but not too tight or too loose. Test this by gently pulling on the wire to see if it moves.
When you are ready to hang your picture, simply place the wire over a picture hook or nail that has been installed in the wall at your previously measured mark. Adjust as necessary until your picture is level and secure. With these steps in mind, you can easily hang any picture with wire and create a beautiful display in any room of your home.
To continue exploring different ways of hanging pictures, let’s move onto using sawtooth hangers instead of wires. Sawtooth hangers are great for smaller frames and are easy to install.
Hanging Pictures With Sawtooth Hangers
Accurately measuring and marking the wall space is a critical step in hanging a picture with sawtooth hangers. Care should be taken to ensure the drill bit is the correct size and type for the wall surface before drilling. After drilling, the sawtooth hangers should be placed into the wall and the picture hung securely. Finally, the picture should be checked to ensure it is level and that the hangers are securely holding the frame.
Measuring And Marking
Before hanging a picture with sawtooth hangers, it is essential to measure and mark the spot where you want to hang your artwork. One of the most common mistakes people make is not measuring correctly, which can lead to an uneven or crooked placement. To avoid this mistake, use a measuring tape to determine the exact height and width of where you want your picture to hang.
Once you have measured the spot, mark it with a pencil or painter’s tape. This step is crucial in achieving visual balance in your space. When determining the placement of your picture, consider the surrounding decor and furniture. You want to ensure that your artwork complements the rest of your interior design while also serving as a focal point in the room.
After marking the spot, it’s time to hang your picture using sawtooth hangers. Make sure that you position the hanger carefully so that it aligns with your markings. Once hung, step back and assess whether or not it is levelled correctly. If not, adjust accordingly until you achieve visual balance and satisfaction with its placement in your space. Remember, taking these extra steps will help ensure that you enjoy your artwork for years to come.
Drilling And Hanging
When it comes to hanging pictures with sawtooth hangers, drilling and hanging are essential steps in ensuring that your artwork stays securely in place. While sawtooth hangers are a straightforward and easy-to-install option, some alternative methods and DIY solutions can provide added stability for heavier frames. If you have a particularly large or heavy picture to hang, it may be worth considering using anchors or screws to ensure extra support.
To begin the drilling and hanging process, start by selecting the correct drill bit size for your anchor or screw. Whether you’re working with drywall or brick, it’s crucial to use the right type of anchor or screw for optimal stability. Once you’ve drilled your hole, insert the anchor or screw and make sure it is flush against the wall. Then attach your sawtooth hanger to the back of your frame before carefully lifting it onto the wall and securing it in place.
While hanging pictures can seem like a daunting task, taking these extra steps will help ensure that your artwork stays securely in place for years to come. By following these simple guidelines for drilling and hanging with sawtooth hangers, you can create a beautiful display that complements your home decor while showcasing your personal style. Whether you’re a seasoned DIY enthusiast or just starting out on your home decor journey, these tips will help you achieve professional-looking results every time.
Hanging Pictures With D-Rings
According to a recent survey, 57% of people prefer D-rings over sawtooth hangers when it comes to hanging pictures. D-ring placement is crucial for ensuring the stability and safety of your artwork. It’s essential to place the D-rings at the right height and distance from each other so that they can support the weight of your picture.
When it comes to D-ring placement, the general rule of thumb is to measure one-third down from the top of your frame and mark that spot on both sides. You should then attach D-rings at these marks, making sure they’re level with each other. The distance between them should be equal to the width of your frame.
It’s also important to consider weight limits when using D-rings. The maximum weight that a pair of D-rings can support is usually indicated on the packaging or in the product description. Be sure not to exceed this weight limit, as doing so could result in damage or injury. With proper placement and consideration of weight limits, hanging pictures with D-rings can be an easy and safe way to display your favorite artwork.
Transition: Now that we’ve covered hanging pictures with sawtooth hangers and D-rings, let’s take a look at another method: hanging pictures with adhesive strips.
Hanging Pictures With Adhesive Strips
When it comes to hanging pictures, there are a lot of options available. One popular method is using adhesive strips, which offer several advantages over other techniques. First of all, they are easy to use and eliminate the need for nails or screws, which can be difficult to work with. Additionally, adhesive strips are great for renters who don’t want to damage their walls or homeowners who don’t want to deal with the hassle of patching holes.
However, there are also some potential downsides to using adhesive strips. For one thing, they may not be strong enough for larger or heavier frames. Additionally, if the picture is hung in direct sunlight or high humidity areas, the strip may lose its adhesion and fall off over time. It’s important to read the manufacturer’s instructions carefully before using adhesive strips to ensure that you choose the right product for your needs.
If you do decide to use adhesive strips to hang your pictures, there are some tips you should keep in mind when it comes time to remove them. First of all, never pull the strip directly away from the wall; this can cause damage and leave residue behind. Instead, gently stretch the strip sideways until it releases from the wall. If any residue remains after removal, try using a mild soap and water solution or rubbing alcohol on a cotton swab to clean it up.
When you’re ready to move beyond hanging individual pictures and create a more complex display on your walls, creating a gallery wall is an excellent option. This technique involves grouping multiple frames together in an artistic arrangement that showcases your personal style and interests. In our next section, we’ll explore some tips for creating a gallery wall that is both beautiful and functional – without all the guesswork!
Creating A Gallery Wall
After successfully hanging your pictures with adhesive strips, it’s time to take your decor game to the next level with a gallery wall. Gallery walls are an excellent way to showcase multiple pieces of art and make a statement in any room. While creating a gallery wall may seem daunting, with some inspiration and creative layout ideas, you can create a stunning feature wall that reflects your personality and style.
Gallery wall inspiration can come from anywhere; it could be from your travels or even your favorite color scheme. You want to create a cohesive look that ties all the pieces together while still allowing each piece to stand out. One creative layout idea is to mix different sizes and types of frames for a more eclectic look. Another idea is to use similar colored frames but vary the artwork inside them. A symmetrical display of identical frames can also create a clean and sophisticated look.
When creating a gallery wall, it’s essential to think about the overall space where you will hang the pictures. You want to ensure that the placement complements the surrounding furniture and doesn’t overwhelm or overcrowd the area. Also, consider using hanging templates for precision when measuring where to place each frame.
Now that you have some ideas for creating your gallery wall let’s move on to hanging pictures on different wall types. Whether you have drywall, plaster, or concrete walls, there are specific techniques and tools needed for secure picture hanging without damaging your walls.
Hanging Pictures On Different Wall Types
Hanging pictures is a great way to add personality and character to any space. However, this task can become challenging when dealing with different wall types. Brick walls, for example, require special attention because they are tough surfaces that do not hold nails easily. To hang a picture on a brick wall, it is recommended to use masonry screws or anchors that will securely hold the weight of the picture.
On the other hand, plaster walls are softer surfaces that can crumble and crack if not handled properly. It is important to locate the studs before drilling holes in a plaster wall to ensure maximum support. If there are no studs available, using toggle bolts or anchors can help distribute the weight of the picture evenly across the surface.
Maximizing small spaces often requires unconventional ways of hanging pictures. One idea is to create a gallery wall by grouping smaller frames together in one area. This creates an illusion of a larger piece while adding visual interest to the space. Another option is to hang pictures from ceiling hooks or on floating shelves, which adds dimension and texture to any room.
As we have seen, hanging pictures on different wall types requires specific techniques and tools to ensure optimal results. However, even with proper installation, some common problems may arise such as crooked frames or uneven spacing between pictures. In our next section, we will troubleshoot these issues and provide solutions for achieving a perfectly hung display every time.
Troubleshooting Common Hanging Problems
After learning about the different wall types on which pictures can be hung, it’s time to address common hanging problems. Even with the right tools and materials, hanging a picture can sometimes prove challenging. However, don’t be discouraged as there are several common solutions to these problems.
One of the most common problems is a picture that doesn’t hang straight. This can be due to an uneven frame or wire, or even an uneven hook placement on the wall. A simple solution is to use a level when hanging your picture. If you don’t have one handy, you can easily download a level app on your phone. Another solution is to use adhesive strips instead of nails or screws as they allow for easier adjustments for leveling.
Another issue that may arise is a picture that keeps slipping down the wall. This could be due to an incorrect wire gauge size or weak adhesive strips. DIY alternatives include using fishing line instead of wire as it provides better support, or doubling up on adhesive strips for added strength.
In conclusion, while hanging pictures may seem daunting at first, there are always DIY alternatives and solutions to any problem that may arise. By following these tips and tricks, you’ll be able to successfully hang pictures in no time!
Conclusion
Hanging a picture can seem like a daunting task, but with the right tools and techniques, it can be done easily and efficiently. When selecting the right picture for your space, consider the lighting and room layout to ensure optimal placement. Measuring your wall space is crucial for achieving the desired look, and selecting the right tools will make all the difference.
When it comes to choosing between a hammer or drill for your wall type, be sure to do your research beforehand. Adhesive strips are also a great option for those who want to avoid damaging their walls. Creating a gallery wall is a fun way to showcase multiple pictures in one space, but be sure to take time to plan out the layout before hanging any pictures.
It’s important to remember that hanging a picture is not just about adding decoration to your space – it’s about creating an atmosphere that reflects your personal style and brings joy to your everyday life. As Albert Hadley once said, “Decorating is not about making stage sets, it’s not about making pretty pictures for magazines; it’s really about creating a quality of life.” So don’t be afraid to experiment with different techniques and styles until you find what works best for you and your home.
Image Credits
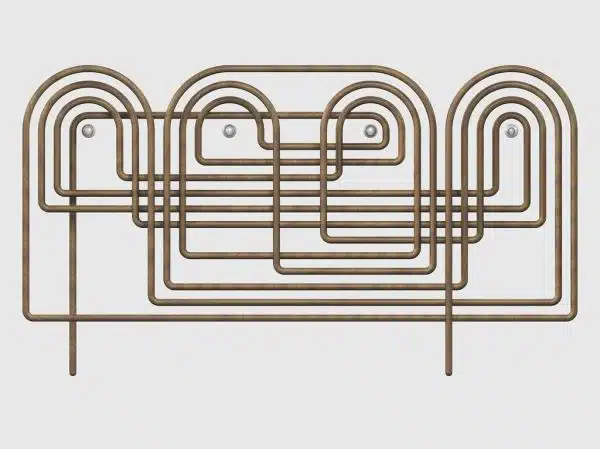
- “Picture Hanging” by fdecomite (featured)

