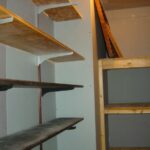
As a carpenter, one of the most common requests I receive from clients is for floor-to-ceiling shelves. These types of shelves are not only functional, but they can also be visually stunning and add architectural interest to any space. However, building these shelves requires careful planning, precise measurements, and expert carpentry skills.
In this article, I will provide step-by-step instructions on how to build your own floor-to-ceiling shelves that are both practical and aesthetically pleasing. Whether you want to create more storage space in your home or add a statement piece to your living room, this guide will help you achieve your goal. So grab your tools and let’s get started!
Assessing Your Space And Needs
Before embarking on building floor-to-ceiling shelves, it is vital to assess the space and needs of the area where the shelves will be built. Maximizing storage space is a primary goal of this project. Take measurements of the room’s dimensions and evaluate how much space you have available for your new shelves. This step is crucial in determining how many shelves you can fit in the room and how tall they can be.
Personalizing design is another important aspect to consider when building floor-to-ceiling shelves. Consider what items will be stored on the shelves and how they will be accessed. Will you need a ladder or step stool to reach items on higher shelves? What materials do you prefer for your shelving? Do you want open or closed shelving units? These are all questions that should be answered before proceeding with the construction process.
In summary, assessing your space and needs is an essential first step in building floor-to-ceiling shelves. Maximizing storage space while personalizing design options are critical elements that must be considered before starting any actual construction work. By taking this step seriously, you will avoid future issues and ensure a seamless process as you move forward with gathering necessary materials and tools for this project.
To proceed with constructing your floor-to-ceiling shelves, it’s time to focus on gathering materials and tools needed for this project.
Gathering Materials And Tools
Assessing your space and needs is a crucial step in building floor-to-ceiling shelves. It allows you to determine the dimensions of your shelves, how many you need, and where they should be installed. Once you have a clear idea of what you want, it’s time to move on to the next step: choosing materials and essential tools.
Choosing materials for your floor-to-ceiling shelves depends on your budget and personal preferences. For budget-friendly options, consider using MDF or plywood as they are inexpensive yet sturdy materials. If you’re looking for high-end choices, hardwoods like oak or cherry are durable and add a touch of elegance to any room. Essential tools for this project include a circular saw, drill, level, stud finder, measuring tape, and screws.
When selecting materials and tools for building floor-to-ceiling shelves, it’s important to choose wisely. Consider your budget and the amount of use the shelves will receive. Choose high-quality materials that will stand up to wear and tear over time. With the right tools at hand, you’ll be able to complete this project with ease. In the next section, we’ll discuss how to measure and mark your wall for installation.
Measuring And Marking Your Wall
Accurately measuring walls is essential for the successful installation of floor-to-ceiling shelves. The walls should be measured from the floor to the ceiling to determine the available length for the shelves. Once the measurements have been taken, the wall should be marked with a pencil or other suitable instrument to indicate the desired location of the shelves. It is important to ensure that the wall markings are accurate and evenly spaced.
Measuring Walls
Achieving measuring accuracy is crucial in building floor-to-ceiling shelves. It is essential to take precise measurements of your walls before purchasing materials and beginning the construction process. To ensure accuracy, use tools such as a measuring tape, level, plumb bob, and laser level. These tools will help you measure the height, width, and depth of the wall accurately. Adjusting for uneven walls is also vital when building floor-to-ceiling shelves.
When measuring your walls for floor-to-ceiling shelves, it’s important to avoid common mistakes that can affect your accuracy. These mistakes include measuring from the wrong side of a wall or not accounting for baseboard or molding thickness. Measuring twice to confirm your initial measurement can help prevent these errors. Additionally, adjusting for uneven walls can be achieved by using shims or sanding down high spots.
In summary, taking precise measurements of your walls ensures that your floor-to-ceiling shelving unit will fit correctly and be stable. Use tools such as a measuring tape, level, plumb bob, and laser level to achieve accuracy. Avoid common measurement mistakes by double-checking your measurements and accounting for baseboard and molding thicknesses. Finally, adjust for uneven walls using shims or sanding down high spots for a perfect fit.
Marking Walls
To build floor-to-ceiling shelves that are stable and functional, precision in measuring and marking your walls is essential. Measuring accurately using the right tools is the first step, but equally important is marking the walls correctly. Here are some tips for achieving precision when marking your walls.
Firstly, ensure that you use a pencil or marker that creates a clear and visible line on your wall. Textured walls can make it difficult to see markings, so using a chalk snap line or painter’s tape may be necessary. Secondly, when marking where you will install brackets or supports, take into account any baseboard or molding thickness as this can affect the positioning of the shelves. Finally, consider alternative methods for marking if you have difficulty seeing your markings on textured surfaces. For instance, use small pieces of masking tape to mark positions or draw temporary lines with a dry-erase marker.
Dealing with textured walls can be challenging when it comes to marking them for shelving installation. However, by following these tips for precision and using the right tools such as chalk snap lines and painter’s tape, you can achieve accurate markings even on textured surfaces. Additionally, accounting for baseboard or molding thicknesses will ensure that brackets and supports are positioned correctly. If all else fails, alternative methods like masking tape or dry-erase markers can help you achieve accurate markings on challenging surfaces.
Building Your Frame
Choosing the right materials for your floor-to-ceiling shelves is crucial to ensure durability and longevity. Opting for high-quality wood such as oak or maple will provide a sturdy foundation for your frame. You might also consider using MDF or plywood, which are cheaper alternatives but still offer the necessary strength to support your shelves.
Customizing the design of your frame can add a personal touch and make it unique to your living space. Consider incorporating decorative elements, such as trim or molding, that match the style of your home decor. You can also choose to add in extra features like cubbies or drawers that will enhance the functionality of your shelves.
Before installing any brackets, it is important to ensure that your frame is level and secure. Use a carpenter’s level to check for any discrepancies and adjust accordingly. Once you are satisfied with the stability of your frame, you can proceed with installing the brackets.
Installing Your Brackets
When installing floor-to-ceiling shelves, it is important to choose the right brackets to ensure the safety and integrity of the shelf. The thickness of the bracket, the weight capacity, and the installation hardware should all be taken into consideration when selecting the appropriate brackets. Installing the brackets is a crucial step in the shelf installation process. Leveling and securing the brackets to the wall are essential to make sure the shelves are evenly supported and remain safe for use.
Choosing The Right Brackets
When it comes to building floor-to-ceiling shelves, choosing the right brackets is a crucial step in ensuring the stability and aesthetic appeal of your shelves. Bracket materials and weight capacity are two important factors to consider when selecting the appropriate bracket for your project.
Bracket materials can vary from metal to wood, with each material offering different levels of durability and strength. Metal brackets tend to have a higher weight capacity than wooden ones, making them ideal for heavier items that will be stored on the shelves. On the other hand, wooden brackets offer more aesthetic options and color choices, allowing you to match them with the décor of your room.
Weight capacity is another important factor when choosing the right bracket for your floor-to-ceiling shelves. It is essential to ensure that your chosen bracket can support the weight of all items that will be placed on the shelf. Overloading your shelves can lead to buckling or even collapse, causing damage or injury. Therefore, it is crucial to carefully calculate the weight capacity needed and select a bracket that meets those requirements. By considering both bracket materials and weight capacity together, you can choose a bracket that not only provides sufficient support but also complements your room’s overall design aesthetic.
Installing The Brackets
When it comes to installing your brackets for floor-to-ceiling shelves, there are several important factors to consider. One of these factors is bracket spacing, which refers to the distance between each bracket that will hold up your shelf. The spacing of your brackets will depend on the weight capacity of each bracket and the overall weight that your shelves will need to support. By properly spacing your brackets, you can ensure that your shelves will be strong and stable.
Once you have determined the appropriate bracket spacing for your shelves, it’s time to install them. Start by measuring and marking where each bracket should be placed along the wall. Use a level to ensure that each mark is even and straight. Then, drill pilot holes into the wall studs at each mark before attaching the brackets with screws. Make sure that each bracket is securely fastened to the wall and can support its weight capacity before moving on to the next step.
After all of your brackets have been installed, it’s time to add your shelves. Place them on top of your brackets one at a time, making sure they are level as you go. Once all of your shelves are in place, give them a firm shake or two to test their stability. If any wobbling occurs, double-check that all brackets are securely fastened and adjust as necessary until everything feels sturdy and secure. With proper installation techniques like these in mind, you can create beautiful floor-to-ceiling shelves that not only look great but also provide reliable storage space for all of your belongings!
Attaching Your Shelf Boards
Choosing the Right Fasteners is crucial in attaching your shelf boards. The fasteners should be strong enough to support the weight of the shelves and their contents, so it is important to consider the thickness and type of material used for the shelves. For example, if you are using heavy hardwood boards, screws or bolts are recommended over nails. Additionally, make sure to use fasteners that are long enough to go through both the shelf board and into the supporting structure.
Alternative Attachment Methods can also be used when building floor-to-ceiling shelves. One option is to use a French cleat system where a strip of wood with a 45-degree angle is attached to both the back of the shelf and the wall. This allows for easy removal and adjustability of the shelves. Another alternative method is using metal brackets, which can provide additional support for heavier items. Whatever method you choose, make sure it fits with your design and supports the weight of your shelves.
Now that you have chosen your fasteners or alternative attachment method, it’s time to attach your shelf boards! Remember to measure twice before drilling any holes or making cuts. A level will also be necessary to ensure that each shelf is straight and even. Once attached, it may be necessary to Sand and Finish Your Shelves before placing any items on them. This will not only enhance their appearance but also protect them from wear and tear over time.
Sanding And Finishing Your Shelves
Like a blank canvas, your floor-to-ceiling shelves await an artist’s touch to bring them to life. Choosing finishes is the first step in adding color and personality to your shelves. Consider the overall aesthetic of your room and choose a finish that complements it. For example, if you have a rustic or farmhouse style, a distressed or weathered finish might be appropriate. If you prefer a more modern look, try a sleek gloss or matte finish.
Customizing color is another way to make your shelves stand out. You can choose from a wide range of stains and paints to achieve the desired look. Keep in mind that darker colors tend to make spaces feel smaller while lighter colors create an illusion of more space. Experiment with different shades until you find the perfect one for your shelves.
Once you’ve finished sanding and painting or staining your shelves, it’s time to add trim and molding for a polished look. This step involves measuring and cutting wood pieces to size, then attaching them to the edges of your shelves using nails or screws. Trim and molding not only add visual interest but also help protect the edges of your shelves from wear and tear over time. With these finishing touches complete, your floor-to-ceiling shelves are sure to become an eye-catching centerpiece in any room!
Adding Trim And Molding
Adding Trim and Molding Once you have built your floor-to-ceiling shelves, adding trim and molding can enhance the overall look of your finished project. To begin, determine the type of molding you want to use and measure the length needed for each section. Cut the pieces at a 45-degree angle using a miter saw, ensuring accuracy in size and angles.
Next, attach the trim to the shelves using glue and brad nails or finish nails. Start at one end and work your way across, ensuring that each piece is level and flush with the adjacent pieces. Once all sections are attached, fill any nail holes or gaps with wood filler. After allowing it to dry, sand any rough spots until smooth.
Painting techniques can be used to further accentuate your newly added trim and molding. Consider painting them a different color than the shelves themselves or incorporating decorative accents such as stencils or patterns onto them. This will add depth and personality to your shelves while also tying in with the overall design of the room.
To secure your shelves to the wall, begin by locating the studs behind where they will be placed. Mark these locations on both the shelf unit and wall before drilling pilot holes through each section into corresponding studs. Use long screws to secure each section in place, checking for levelness as you go. With proper installation, your floor-to-ceiling shelves will not only look great but also provide functional storage space for years to come.
Securing Your Shelves To The Wall
Before you start loading your new shelves with all your favorite books, it’s important to ensure that they are securely attached to the wall. The last thing you want is for your new shelves to come crashing down, potentially injuring someone or damaging your belongings. There are several types of wall anchors available, each designed for different types of walls and loads.
When it comes to choosing the right screws for securing your shelves to the wall, there are a few things you need to consider. Firstly, you need screws that are long enough to penetrate through the shelf and into the wall stud behind it. Secondly, you need screws that are strong enough to support the weight of your shelves and everything you plan on storing on them. Finally, make sure that the screws you choose have a wide enough head so that they don’t pull through the shelf.
Types of wall anchors also play an important role in securing your shelves. Depending on the type of walls you have and what load capacity is required, there are various options available such as toggle bolts or plastic anchors. It’s important to read and follow manufacturer instructions carefully when using any type of anchor or screw so that they are installed correctly and can perform as intended. With proper installation and attention paid to detail in selecting appropriate hardware, you can rest easy knowing that your floor-to-ceiling shelves will be safely secured in place.
Transition:
Now that we’ve covered how to securely attach your shelves to the wall, let’s move on to creating a ladder or library rail. This not only adds visual appeal but also provides accessibility for those hard-to-reach items on higher shelves.
Creating A Ladder Or Library Rail
1.When selecting a ladder for a library rail, consider its weight capacity, size and type. 2.For a library rail, a wall-mounted or ceiling-mounted ladder is ideal as it can be secured and stabilize. 3.Installing a library rail requires precise measurements and accurate cuts to ensure a secure fit between the wall and the ladder. 4.Mounting screws should be installed into studs to provide additional support for the library rail, as well as to ensure a secure installation.
Choosing The Right Ladder
It is essential to choose the right ladder when building floor-to-ceiling shelves. Ladder safety should be a top priority, and every carpenter must take necessary precautions to ensure their safety while working at elevated heights. It is crucial to select a ladder with a weight capacity that can support both the carpenter and the tools or materials they are carrying.
When selecting a ladder, it is important to consider its purpose and height requirements. An extension ladder is suitable for reaching elevated heights, whereas a step ladder may be more appropriate for lower shelves. The ladder’s material also plays a significant role in its weight capacity and durability. For instance, aluminum ladders are lightweight but may not support as much weight as fiberglass or wooden ladders.
Before using any ladder, it is crucial to inspect it thoroughly for wear and tear, loose parts or rungs, or other defects that could affect its stability. Always place your ladder on level ground and secure it before climbing up. By taking these necessary precautions, carpenters can ensure their safety while building floor-to-ceiling shelves effectively.
Installing A Library Rail
When building floor-to-ceiling shelves, it is important to consider all aspects of the project. One of these aspects is installing a library rail. A library rail helps keep books and other items from falling off the shelf, ensuring that they remain protected and organized. Choosing materials for your library rail is an essential consideration when designing your shelves. Common materials include metal, wood, or plastic.
When choosing materials for your library rail, consider what will best suit the overall design of your shelves. Metal rails can provide a sleek and modern look, while wooden rails can offer a more traditional feel. Plastic rails may be less durable than other options but can be more affordable. Additionally, design options for your library rail are endless, with various shapes, sizes, and finishes available to choose from.
Installing your library rail correctly is crucial for its effectiveness and longevity. To ensure proper installation, measure the length of the shelf where you plan to install the rail carefully. Once measurements have been taken and materials have been chosen, mark where you will install brackets or screws on both sides of the shelf’s interior wall. Be sure to use appropriate hardware for your selected material type when attaching brackets or screws to prevent damage or instability.
Installing Lighting For Your Shelves
Once you’ve built your floor-to-ceiling shelves, it’s time to consider installing lighting to illuminate your space. Choosing fixtures that provide adequate lighting while blending in with your overall design can be a challenge, but it’s worth the effort to maximize illumination and create a warm ambiance.
When selecting lighting fixtures for your shelves, consider LED strip lights or puck lights. These options are energy-efficient and easy to install. For a more decorative option, consider pendant lighting or wall sconces. Just make sure the fixtures you choose fit the size of your shelves and provide enough light for reading or showcasing decor.
Maximizing illumination is key when installing lighting for your shelves. Positioning the lights directly above each shelf will ensure even lighting throughout the entire unit. Additionally, using dimmers can allow you to adjust the brightness based on different times of day or activities in the room.
- Consider using LED strip lights or puck lights for energy efficiency
- Wall sconces and pendant lights can add decorative flair
- Ensure fixtures fit shelf size and provide adequate light
- Use dimmers to adjust brightness as needed
With proper installation of lighting fixtures, you’ll be able to showcase your books and decor with ease. The right amount of illumination can highlight specific items on display while creating an inviting atmosphere in the room. Once your shelves are well-lit, it’s time to move on to styling them with decor and books that reflect your personal taste and style.
Styling Your Shelves With Decor And Books
If you’ve built floor-to-ceiling shelves, you’re already well on your way to creating an impressive storage solution that will give any room a professional look. Now it’s time to style those shelves with decor and books. This is where the real fun begins.
Mixing textures is one of the easiest ways to create visual interest on your shelves. For example, if you have a lot of wood in the room, add some metal or glass objects to break up the monotony. Color coordination is also important when styling your shelves. Choose a color scheme that complements the rest of the room and stick with it.
When arranging objects on your shelves, think about creating focal points. This could be a larger object such as a vase or sculpture, or even a group of smaller items arranged together in an interesting way. Don’t be afraid to play around with different arrangements until you find one that works for you.
As a professional carpenter, I know that maintaining your shelves for longevity is just as important as building them in the first place. In the next section, we’ll discuss some tips for keeping your new shelves looking great for years to come.
Maintaining Your Shelves For Longevity
To ensure longevity of your floor-to-ceiling shelves, proper maintenance is necessary. Cleaning your shelves regularly will prevent buildup of dust and debris that can damage the wood or other materials. A soft cloth or feather duster can be used to gently wipe down the shelves, while a mild cleaner can be used for tougher stains. Avoid using harsh chemicals or abrasive materials as they may scratch or damage the surface.
Repair techniques are also important for maintaining your shelves. Over time, shelves can become damaged from wear and tear or accidental bumps. Small chips or scratches in the wood should be sanded down and re-stained to match the surrounding area. Loose screws or nails should be tightened or replaced as needed to keep the shelf securely in place. If a more significant repair is necessary, such as a broken shelf board, it may need to be replaced entirely.
In addition to cleaning and repairs, proper usage of your shelves can also help prolong their lifespan. Be mindful of weight limits and avoid overloading any one shelf. Use bookends or other organizers to keep items from sliding off and causing damage. With regular maintenance and care, your floor-to-ceiling shelves will continue to serve you well for years to come.
As with any piece of furniture, issues may arise with your floor-to-ceiling shelves despite proper maintenance. Troubleshooting common issues such as sagging shelves or misaligned brackets can often be resolved with simple adjustments or replacements. By staying aware of potential issues and addressing them promptly through diligent maintenance and repair techniques, you can ensure that your shelving unit remains functional and visually appealing for many years into the future.
Troubleshooting Common Issues
- Incorrect measurements are often the source of major issues when building floor-to-ceiling shelves.
- Levels should be checked at all stages of the project to ensure the shelves are correctly aligned.
- Structural damage such as wall cracks or weak joints must be addressed before continuing to build the shelves.
- It is important to use accurate measurements when cutting materials to ensure a secure and aesthetically pleasing structure.
- If the material is not properly leveled, the shelves may be unstable and dangerous.
- Thoroughly inspect the existing wall structure to ensure it can support the weight of the shelves.
Incorrect Measurements
Accurate measurements are crucial when building floor-to-ceiling shelves. As a professional carpenter, I have seen many DIY enthusiasts make the mistake of incorrect measurements, which can lead to significant issues in the final product. To avoid measurement mistakes, it is essential to use re-measuring tips and employ precision tools.
One of the most common mistakes made during measurement is not using the correct tools. Many individuals rely on tape measures, which can easily stretch or distort resulting in inaccurate readings. Therefore, as a carpentry specialist, I suggest using a combination square or a laser level to ensure precise measurements. Additionally, it’s important to re-measure multiple times before cutting any materials to avoid costly mistakes.
Another common issue with measurements is failing to account for irregularities in walls or floors. These imperfections may seem insignificant; however, they can cause significant errors when building shelves. A carpenter must take into consideration any variations that may exist and adjust accordingly. In such cases, I recommend taking multiple readings at different points along the wall or floor and averaging them out for greater accuracy.
In conclusion, avoiding measurement mistakes is vital when building floor-to-ceiling shelves. Precision tools and re-measuring tips are essential for obtaining accurate measurements that will result in a high-quality final product. By accounting for irregularities in walls and floors and taking multiple readings before cutting materials, carpenters can ensure their shelf-building projects go smoothly without any mishaps.
Leveling Issues
When building floor-to-ceiling shelves, leveling issues can be a common problem. Ensuring that the shelves are level is crucial to prevent items from sliding or falling off. Adjusting placement and using shims are two methods that can help solve this issue.
Dealing with uneven floors is one of the main reasons for leveling problems. When the floor is not level, it can cause the shelves to tilt and become unstable. To fix this issue, carpenters must first identify any high or low spots on the floor and use shims to adjust the placement of the shelves accordingly.
Shims are small wedges made of wood or plastic that are used to fill gaps between two surfaces. In carpentry, they are commonly used to level out cabinets, furniture, and shelving units. By placing shims under uneven areas of the shelf support structure, carpenters can ensure that their shelves are straight and level. With proper adjustments and attention to detail during installation, leveling issues can be easily resolved when building floor-to-ceiling shelves.
Structural Damage
As a professional carpenter, it is important to be able to troubleshoot common issues that may arise during construction projects. One such issue is structural damage. Assessing the extent of any damage and repairing any issues is crucial to ensuring the safety and stability of the structure.
Assessing damage involves identifying any weak spots or areas where the structure has been compromised. This can include cracks, warping, or other visible signs of damage. Depending on the severity of the issue, repairs may involve reinforcing existing supports or replacing damaged materials altogether.
Repairing issues often requires a combination of skills and tools. Carpenters must have a strong understanding of structural integrity and be able to use equipment such as saws, drills, and hammers to make necessary repairs. It is also important to take precautions such as wearing protective gear and working with a partner when handling heavy materials. By addressing structural damage in a timely and effective manner, carpenters can ensure that their work stands up to the test of time.
Celebrating Your Completed Project!
After completing the construction of your floor-to-ceiling shelves, it’s time to celebrate! Whether you’ve built them for practical or aesthetic purposes, these shelves are sure to add value and functionality to your space. Here are some celebratory ideas and decorating tips to make the most of your new addition.
First, consider hosting a small gathering with friends and family to show off your new shelves. Arrange some snacks and drinks on the shelves themselves, using them as both storage and display space. This is a great way to showcase their functionality while also enjoying some quality time with loved ones.
When it comes to decorating your new shelves, there are endless possibilities. Here are some tips to get you started:
- Mix up textures and materials: Incorporate items made from different materials like wood, metal, glass, or ceramics for added interest.
- Create balance: Distribute objects of varying sizes and shapes throughout the shelves for visual harmony.
- Add pops of color: Use books or decorative objects in bright colors to draw attention and add vibrancy.
- Use plants: Greenery not only adds visual appeal but can also improve air quality in your space.
Incorporating these decorating tips will help turn your floor-to-ceiling shelves into a focal point that complements your style and enhances the functionality of your space. Enjoy the process of making it uniquely yours, whether through hosting gatherings or experimenting with different decor arrangements.
Conclusion
In conclusion, building floor-to-ceiling shelves requires careful planning and execution. Assessing your space and needs should be the first step in this process. Gathering materials and tools is the next crucial step to ensure that you have everything you need to complete the project successfully.
Measuring and marking your wall accurately is also essential, as it will ensure that your shelves are level and secure. Building the frame and installing brackets may require some expertise, but with patience and attention to detail, anyone can accomplish this task. Finally, styling your shelves with decor and books will add a personal touch to your design.
Maintaining your shelves over time will help prolong their longevity. Troubleshooting any common issues early on can prevent future problems from arising. Ultimately, completing this project should be celebrated as an accomplishment that enhances both functionality and aesthetics of any space.
As a carpentry specialist, I strongly recommend taking the time to plan out each step carefully before starting the project. Remember that precision and attention to detail are key in creating a durable set of floor-to-ceiling shelves that you can enjoy for years to come.
Image Credits

