When it comes to household electrical installations, ceiling fans are a popular addition. They provide efficient air circulation, lower energy costs, and can add a stylish touch to any room. However, wiring a ceiling fan is not an easy task and should be approached with caution. Improper installation can lead to serious safety hazards, including electrical shock or fire.
As an electrician or electrical contractor, it is important to have a thorough understanding of how to wire a ceiling fan correctly. In this article, we will discuss the steps needed to safely and efficiently wire a ceiling fan in your client’s home. Our goal is to provide you with the knowledge necessary for installing these fixtures while ensuring the safety of your clients and their property.
Safety Precautions And Equipment
Safety should be your top priority when wiring a ceiling fan. Before you begin, make sure you have all the necessary safety gear, including gloves, goggles, and a hard hat. These items will protect you from any electrical shock or injury that may occur during the installation process.
It’s important to note that common injuries associated with wiring a ceiling fan include cuts and burns from contact with hot wires or electrical components. In order to avoid these injuries, ensure that the power is turned off before beginning work and double-check that there is no current flowing through the wires before touching them. Additionally, avoid using metal tools around live wires as they can conduct electricity.
By taking proper precautions and wearing appropriate safety gear, you can significantly reduce the risk of injury while installing a ceiling fan. Remember to always prioritize safety over speed when working with electrical equipment. With this in mind, let’s move on to choosing the right location for your fan.
Choosing The Right Location For Your Fan
When determining the right location for your fan, it is important to consider the ceiling height, as this will determine the length of downrod needed for installation. Additionally, it is important to ensure that there is adequate clearance from any walls or other obstructions to avoid potential safety risks. Installation of a fan will require a minimum of 7 feet of clearance from the floor and 6 inches from any ceiling beams and walls. When selecting a location for your fan, keep these guidelines in mind to ensure the installation is completed safely and correctly.
Choosing Ceiling Height
When installing a ceiling fan, choosing the right location is crucial. One important aspect to consider is the ceiling clearance in the room. The height of the ceiling determines how far down the fan should hang from the ceiling. For example, in a room with a low ceiling, a flush-mounted fan would be more appropriate as it does not require much clearance. On the other hand, in rooms with higher ceilings, fans that hang lower can provide better air circulation and cooling.
Another factor to consider when choosing the right location for your fan is the size of the room. Room size plays an important role in determining which type of fan to install. For smaller rooms like bedrooms or offices, smaller fans are more suitable as they do not take up too much space and can easily provide enough airflow to cool down the room. Larger rooms like living rooms or family rooms require bigger fans that can move more air around and provide adequate cooling.
In summary, choosing the right location for your ceiling fan involves considering both ceiling clearance and room size. Installing a fan that hangs too low in a small room or too high in a large one can lead to poor performance and reduced efficiency. As an electrician or electrical contractor, it is our duty to ensure that we recommend and install fans that are appropriate for each specific situation, so our clients can enjoy optimal performance and comfort from their new ceiling fan installation.
Location Clearance Requirements
When it comes to choosing the right location for your ceiling fan installation, considering the clearance requirements is crucial. The ceiling height of a room plays a significant role in determining the type of fan that can be installed. In situations where the ceiling is low, installing a flush-mounted fan that sits close to the ceiling would be more appropriate as it does not require much clearance. However, if the ceiling height is higher, hanging fans can provide better air circulation and cooling.
Another essential factor to consider when determining location clearance requirements is the size of the electrical box. Electrical boxes are mounted on ceilings to support and hold heavy fixtures like ceiling fans securely. An electrical box should be sized appropriately to accommodate both the weight of the fan and its movement without causing any damage or safety hazards. Ensuring that the electrical box meets the necessary size requirements is vital in preventing accidents such as fans falling from ceilings.
In conclusion, understanding location clearance requirements is crucial in determining where to install a ceiling fan effectively. As electricians or electrical contractors, we have a duty to ensure that our clients enjoy optimal performance and comfort from their new ceiling fan installation by recommending and installing fans that meet all necessary clearance requirements, including ceiling height and electrical box size. By doing so, we ensure our clients’ satisfaction with their new installations while guaranteeing their safety and well-being.
Shutting Off Power To The Circuit
Like a knight donning his armor before battle, shutting off power to the circuit is a crucial step in wiring a ceiling fan. It ensures your safety and prevents damage to the fan’s electrical components. Before proceeding with any installation, it is essential to verify that the power supply to the circuit is disconnected.
The first step in shutting off power to the circuit is checking voltage using a voltage tester. This tool helps you identify if there is still an active electrical current flowing through the wires. To use it, you need to turn on the voltage tester and place it near each wire of the circuit. If there’s no reading on the tester, it means that there’s no electrical current flowing through the wires.
Once you have confirmed that there’s no current running through the wires using a voltage tester, you can proceed with turning off power supply from your home’s main electrical panel. It would be best if you had an electrician or licensed electrical contractor do this for you as it involves working with live wires and requires specialized tools and knowledge. By doing so, you can confidently start removing the old fixture without worrying about electrocution or damaging your new ceiling fan.
Removing The Old Fixture
After ensuring that the power to the circuit is turned off, the next step in wiring a ceiling fan is to remove the old fixture. This requires taking out the screws that are holding it in place and disconnecting any wires. It is important to follow proper safety procedures when doing this, as there may still be electricity flowing through some of the wires.
To begin with, locate and remove any screws that are holding the old fixture in place. Depending on the type of fixture you have, this may require using a screwdriver or a wrench. Once all of the screws have been taken out, gently lower the fixture down so that you can access the wiring behind it.
Next, carefully disconnect all of the wires that are attached to your old fixture. These will likely include black and white wires for power, as well as green or bare copper grounding wires. It is important to keep these wires separated from each other once they have been disconnected in order to avoid confusion later on.
Removing screws and disconnecting wires can seem intimidating at first, but with a bit of care and attention it can be done safely and efficiently. Once your old fixture has been removed, you will be ready to move on to assembling your new ceiling fan and getting it installed.
Assembling The Ceiling Fan
Mounting the fan requires the use of a secure mounting bracket that should be securely attached to a ceiling joist.
Installing the wiring should be done using appropriate UL-rated wire and connectors in accordance with local electrical codes.
Wiring should be connected to the fan motor and light fixture, and secured with electrical tape.
Connecting to the power supply requires careful consideration of the correct voltage and wire size to ensure safe operation of the fan.
A properly rated wall switch should be installed and connected to the power supply to control the fan.
The fan should be tested after installation to ensure proper operation and safety.
Mounting The Fan
When it comes to assembling a ceiling fan, mounting the fan is an essential step that must be done correctly to ensure the safety and functionality of the fan. To start, it is crucial to gather all necessary tools and equipment before beginning the process. This includes securing hardware such as screws, brackets, and anchors. It is also important to have a sturdy ladder or stool to reach the ceiling where the fan will be mounted.
Once you have everything you need, the next step is to balance the blades of the ceiling fan. Balancing ensures that the fan runs smoothly without any wobbling or shaking. The easiest way to balance blades is by using a balancing kit provided by most manufacturers. It involves attaching weights on each blade until they are evenly balanced.
After balancing, secure the mounting bracket onto the electrical box using screws and anchors provided in your kit. Make sure that all screws are tightly secured as loose screws can cause wobbling or even falling of your fan which can be dangerous. Finally, attach the canopy cover over the bracket so that it covers all wires and connections for aesthetic purposes. A properly mounted ceiling fan should operate smoothly and quietly while providing comfort and style to your home.
Installing The Wiring
Assembling a ceiling fan requires careful attention to detail and proper installation techniques to ensure that it operates safely and efficiently. Installing the wiring is an essential step in this process that must be done correctly. To start, make sure the power supply is turned off before working with any electrical components. Then, connect the wires from the fan motor to the wires in the electrical box using wire connectors. It is important to follow the manufacturer’s instructions carefully to ensure that all connections are secure and properly aligned.
Next, it is crucial to ground the fan for safety reasons. This involves connecting a green or bare wire from the fan motor to a grounding screw or wire in the electrical box. Grounding helps prevent electrical shock and protects against damage to electronic devices caused by voltage surges.
Finally, carefully tuck all wiring into the canopy cover and attach it securely over the mounting bracket. Make sure all screws are tightened properly to prevent wobbling or shaking of the fan during operation. By following these steps for installing the wiring, you can ensure that your ceiling fan operates safely and efficiently for years to come while providing comfort and style to your home.
Connecting To Power Supply
Connecting the ceiling fan to the power supply is a crucial step in assembling it, and it requires careful attention to detail and proper wiring techniques. Before starting this process, it is essential to turn off the power supply to prevent electrical shock or damage to any electronic device. Once the power supply is off, you can proceed with connecting the wiring from the fan motor to the wires in the electrical box.
To start, carefully strip about ½ inch of insulation from each wire end and twist them together using pliers. Then, secure these connections using UL-approved wire connectors that are rated for your ceiling fan’s amperage. It is important to follow all manufacturer’s instructions carefully throughout this process.
After connecting all wires securely, you should check for any loose connections or exposed wires before turning on the power supply. Additionally, grounding the fan is an essential safety measure that involves connecting a green or bare wire from the fan motor to a grounding screw or wire in the electrical box. This helps prevent electrical shock and protects against damage caused by voltage surges.
In conclusion, connecting a ceiling fan to a power supply requires following proper wiring techniques and electrical safety measures. By taking these steps carefully and checking for any loose connections or exposed wires before turning on the power supply, you can ensure that your ceiling fan operates safely and efficiently while providing comfort and style to your home.
Connecting The Wires
Connecting the Wires:
Before you start connecting the wires, make sure that the power supply is turned off. Check the wires on your ceiling box for their color coding as this will help you identify which wire connects to what. The most common wire colors are black, white, green or bare copper. Black wires are for power supply; white ones are neutral while green or bare copper are used for grounding.
To begin with, connect the green or bare copper wire from your ceiling box to the green ground screw in your fan bracket. This is important as it provides a safe path for excess electricity to flow away from your fan and towards the ground. Next, connect the white wires together and secure them with a wire nut. Lastly, connect the black and blue wires from your ceiling box to their corresponding colored wires in your fan bracket.
Proper grounding techniques play a significant role when wiring a ceiling fan as they keep you safe from electric shocks and other electrical hazards. Make sure that all of your connections are tightly secured using wire nuts and have no exposed wiring. By following these steps carefully, you can now move onto attaching the fan mounting bracket securely onto your ceiling box without any worries of electrical accidents.
With all of your wires properly connected and grounded, it’s time to attach the fan mounting bracket onto your ceiling box using screws provided in the installation kit.
Attaching The Fan Mounting Bracket
As if connecting wires wasn’t enough of a challenge, we now move on to attaching the fan mounting bracket. But fear not, for this step is just as important as the previous one. The bracket serves as the foundation for the entire ceiling fan, and a faulty installation can lead to disastrous consequences.
Before beginning this step, it’s essential to make sure that your fan and mounting bracket are compatible with each other. Not all brackets are created equal, and using an incompatible one can cause serious problems down the line. Once you’ve confirmed compatibility, you’ll need to determine which screwing technique is best suited for your particular bracket and ceiling type.
When screwing in the mounting bracket, be sure to use sturdy screws that won’t give way over time. A loose or wobbly bracket will cause your fan to shake and rattle, leading to an unpleasant experience every time you turn it on. With the right tools and techniques, however, this step should be a breeze. Once completed successfully, we can finally move onto installing the fan blades.
Installing The Fan Blades
Fan blade selection is an essential aspect of installing a ceiling fan. The blades come in different sizes, materials, and colors, making it important to choose the right one that suits your preference and the room’s décor. When selecting fan blades, consider their pitch angle, which determines how much air they move. A steeper pitch angle moves more air but requires more power to operate.
Blade balancing is another crucial step when installing ceiling fan blades. Unbalanced blades can cause wobbling and unnecessary noise during operation. Before installation, check for any warps or bends on the blades’ surface and use a blade-balancing kit to align them properly. Balancing ensures the smooth and quiet operation of your ceiling fan.
Once you have selected the right fan blades and balanced them correctly, you can proceed with attaching them to the fan motor using screws provided in the manufacturer’s manual. Ensure that you tighten each screw firmly without over-tightening to avoid damaging the blades or causing imbalance. After attaching all the blades, check again for any wobbling or unbalance before turning on your ceiling fan.
Moving on to the next section of installing your ceiling fan involves attaching a light fixture if applicable. This step requires careful attention as it involves electrical connections that require prior knowledge of electrical wiring installation procedures. Therefore, it is imperative to follow all manufacturer instructions carefully when proceeding with this step to ensure proper installation and safe operation of your ceiling fan with a light fixture attached.
Attaching The Light Fixture (If Applicable)
Gathering Supplies: An electrical contractor or electrician should first gather all the necessary supplies required to attach a light fixture.
Attaching Fixture: Next, the fixture should be securely attached to the ceiling.
Connecting Wires: Then, the electrical wiring must be connected to the junction box and to the fixture.
Gathering Supplies: It is important to ensure that all the necessary tools and supplies are obtained before starting the project.
Attaching Fixture: The fixture should be secured with the appropriate hardware and screws.
Connecting Wires: The wiring must be connected in a proper manner, ensuring that the wires are securely fastened and that all electrical connections are properly insulated.
Gathering Supplies
When it comes to attaching the light fixture of a ceiling fan, there are several steps involved. One of the most important steps is gathering the necessary supplies. Shopping essentials for this task include wire strippers, electrical tape, wire nuts, a voltage tester, and a ladder. It’s important to ensure that all tools and materials are in good condition and properly functioning before starting any work.
Budget considerations should also be taken into account when gathering supplies for attaching the light fixture. While it may be tempting to cut corners and use cheaper materials, investing in high-quality supplies can save time and money in the long run by reducing the risk of errors or malfunctions. Additionally, purchasing reliable equipment will ensure that all safety standards are met during installation.
In summary, shopping for essential supplies is an important step in attaching the light fixture of a ceiling fan. By taking budget considerations into account and investing in high-quality materials, electricians can provide their customers with safe and efficient installations that will last for years to come.
Attaching Fixture
To attach the light fixture of a ceiling fan, it is important to follow a set of steps that will ensure a safe and efficient installation. One crucial step is attaching the fixture itself. This involves securing the fixture to the mounting bracket using screws and ensuring that it is level and secure. It is important to use the appropriate tools, such as a screwdriver or drill, to avoid damaging the fixture or causing it to become unstable.
Common mistakes when attaching the light fixture include overtightening screws, which can damage the mounting bracket or cause the fixture to become misaligned. Another mistake is failing to properly secure wire connections between the fixture and electrical wiring. This can result in malfunctions or even electrical fires. To avoid these errors, electricians should take their time and double-check all connections before moving on to the next step.
Once the light fixture is securely attached, it is important to test its functionality using a voltage tester before turning on power to the fan. This will help identify any potential issues before they become major problems. By following these steps and taking proper precautions, electricians can provide their clients with safe and reliable installations that will enhance their homes for years to come.
Connecting Wires
After securely attaching the light fixture to the mounting bracket, the next step in installing a ceiling fan is connecting the wires. This process involves making sure that all wires are properly connected and secured, which is crucial for ensuring the safety and functionality of the fan.
One common mistake when connecting wires is not tightening screws or wire connectors enough, which can result in loose connections that can cause electrical malfunctions or even fires. On the other hand, overtightening screws can damage wires or break connectors, so it is important to find a balance between being secure and not causing damage.
To avoid these issues, electricians should carefully follow manufacturer instructions and use high-quality wire connectors. They should also test each connection with a voltage tester to ensure that it is properly grounded and functioning before moving on to the next step of installation. By taking their time and being thorough, electricians can provide their clients with safe and reliable ceiling fan installations.
Testing The Fan And Light
If you have successfully attached the light fixture to your ceiling fan, it’s time to move on to testing the fan and light. According to recent statistics, a faulty ceiling fan causes around 31% of all electrical fires in homes. That is why it is crucial to test your ceiling fan thoroughly before using it.
To properly test your ceiling fan, you must first turn off the power supply from the circuit breaker. Once that’s done, switch on the wall control and check if both the fan and light are working correctly. If either of them is not functioning correctly, there could be an issue with the wiring or installation. Troubleshooting techniques can be used to identify and rectify any problems.
One common problem that people face when installing a new ceiling fan is securing the canopy. The canopy covers the wiring of your ceiling fan and prevents it from being exposed. In our subsequent section, we will discuss how to secure the canopy without damaging your newly installed ceiling fan while also providing some additional testing techniques and troubleshooting tips for a smooth installation process.
Securing The Fan Canopy
Attaching the canopy plate requires accurate measurements and secure fasteners such as screws to ensure the plate is properly secured. Connecting the fan wires will require wiring knowledge to ensure the wires are connected properly according to manufacturer’s specifications and local codes. It is important to ensure the correct wire size is used to prevent damage to the fan and ensure the wiring is up to standard. Moreover, the installation should be inspected by a qualified electrician to ensure the safety of the fan and the user.
Attaching The Canopy Plate
To secure your ceiling fan, attaching the canopy plate is a crucial step. Canopy plate alignment is essential to ensure that the fan hangs correctly and doesn’t wobble during operation. Before installing the canopy, make sure that the mounting bracket is securely attached to the ceiling box. Once you have done this, align the holes in the canopy plate with those on the mounting bracket.
After securing canopy plate alignment, you can proceed to attach it to the mounting bracket using securing screws. It’s important to tighten these screws firmly but not excessively as this could damage the ceiling box or even cause injury if they pull out of the ceiling. Ensure all screws are tightened evenly, and check that there are no gaps between the canopy and ceiling.
In conclusion, attaching the canopy plate is an essential step when wiring a ceiling fan. Properly aligning it and securing it with screws will ensure that your fan operates smoothly and safely for years to come. Remember always to follow manufacturer instructions carefully and consult a licensed electrician if you have any doubts about your ability to complete this task safely.
Connecting The Fan Wires
With the canopy plate secured, the next step in wiring a ceiling fan is connecting the fan wires. Before doing so, it’s essential to turn off power to the circuit that supplies electricity to the ceiling box. You can do this by turning off the corresponding breaker at your main electrical panel.
Once you’ve turned off power, remove the wire nuts from the wires protruding from the ceiling box and those attached to the fan motor. Using a twisting technique, connect each wire according to the manufacturer’s instructions. Typically, you’ll need to connect white wires with white wires, black wires with black wires, and green or bare copper wires with green or bare copper wires. You can make these connections using wire connectors designed for this purpose.
After connecting all of the fan wires, tuck them neatly into the ceiling box and attach any necessary covers before restoring power to the circuit. It’s important to test that your installation is functioning correctly by turning on your circuit breaker and testing your fan’s operation at various speeds. If everything appears to be working correctly, then you should feel confident that you’ve installed your ceiling fan safely and securely.
Installing The Wall Control (If Applicable)
Installing the wall control for your ceiling fan is an important step in ensuring proper functionality. Before beginning this process, it is essential to check the compatibility of the wall control with your ceiling fan. Many ceiling fans come with their own wall control, so it’s important to consult the manufacturer’s instructions and wiring diagrams before purchasing a separate wall control.
Once you have confirmed that your ceiling fan is compatible with a separate wall control, gather all necessary tools and materials. This typically includes wire strippers, electrical tape, a voltage tester, screws, and the new wall control itself. Make sure to turn off power to the circuit before beginning any wiring work.
Next, remove the cover plate from your existing switch box and use your voltage tester to double-check that there is no power running through the wires. Once you’ve done this, carefully remove each wire from its corresponding screw terminal on the old switch. Then, connect each wire to its appropriate screw on the new wall control. Remember to secure all connections with electrical tape and cover them with a wire nut for extra protection. Finally, attach the new wall control to the box using screws provided in its packaging.
Cleaning Up And Disposing Of Materials
Did you know that the average American generates 4.5 pounds of waste every day? When it comes to electrical projects, disposing of materials properly is crucial for both safety and environmental reasons. After completing your ceiling fan installation, it’s important to clean up any debris and dispose of materials in a responsible manner.
Here are some tips for cleaning up and disposing of materials after installing a ceiling fan:
Gather all tools and materials: Before starting the cleanup process, make sure all tools and leftover materials are accounted for and stored properly.
Recycle what you can: Most cities offer recycling options for cardboard, plastic, and metal materials commonly used in electrical projects. Be sure to check with your local recycling center to see what items they accept.
Dispose of hazardous materials responsibly: If you used any hazardous or toxic materials during the installation process (such as insulation or paint), be sure to dispose of them according to local regulations.
Consider donating or reusing excess materials: If you have any unused ceiling fan parts or extra wiring, consider donating them to a local community center or reusing them for future projects.
By following these guidelines for cleaning up and disposing of materials, you can ensure that your ceiling fan installation project is both safe and environmentally friendly. In the next section, we will discuss common issues that may arise during the installation process and how to troubleshoot them effectively.
Troubleshooting Common Issues
After cleaning up and disposing of materials, it is time to move on to the next important step in wiring a ceiling fan – troubleshooting common issues. As an electrician or electrical contractor, it is essential to know the most common problems that may arise during the installation process. Two of the most common issues that homeowners encounter with their ceiling fans are motor issues and remote control problems.
Motor issues can range from humming sounds to complete failure of the motor. This could be due to a number of reasons such as faulty wiring, incorrect installation, or lack of proper maintenance. Remote control problems can also be frustrating for homeowners who want to enjoy the convenience of remote operation. Some common issues include non-responsive remotes, malfunctioning buttons, or interference with other remote-controlled devices.
As an electrician or electrical contractor, it is important to have knowledge and expertise in troubleshooting these issues and offering practical solutions. Proper diagnosis and repair can save homeowners money and time in the long run. Additionally, educating homeowners on regular maintenance practices such as cleaning the blades and checking connections can prevent future problems from arising. Ensuring proper maintenance and inspection should always be a priority for both homeowners and professionals alike in order to keep ceiling fans functioning at their best capacity.
Ensuring Proper Maintenance And Inspection
Despite the ease of installation, a ceiling fan requires regular maintenance to keep it running efficiently and safely. Many homeowners neglect this aspect after the initial installation, assuming that the fan will continue functioning at optimal levels without intervention. However, without proper upkeep, a ceiling fan can quickly become a safety hazard.
Importance of regular maintenance cannot be overstated when it comes to ceiling fans. Regularly checking for wear and tear is essential in preventing potential hazards down the line. A simple misalignment or loosening of bolts can cause severe damage if left unchecked. Additionally, dust accumulation on blades or motor components can reduce efficiency and cause overheating.
Here are some significant signs of wear and tear to look out for:
- Wobbling or shaking: This could indicate loose blades or mounting hardware.
- Unusual noises: Grinding, humming, or clicking sounds could indicate issues with internal components.
- Reduced airflow: Dust buildup on blades or motor components can impede airflow.
- Burnt smell: Overheating motors can cause a burning odor; this should be investigated immediately.
By taking care of your ceiling fan through regular maintenance checks, you not only increase its longevity but also reduce the risk of malfunctions that lead to costly repairs or replacement. In conclusion, don’t overlook the importance of keeping your ceiling fan in good working condition by performing routine maintenance checks and addressing any issues promptly.
Conclusion
In conclusion, wiring a ceiling fan can be a straightforward process if done with the proper safety precautions and equipment. Before beginning any work, it is important to choose the right location for your fan and shut off power to the circuit. Once these steps are completed, the old fixture can be removed and the ceiling fan assembled.
It is crucial that all instructions are carefully followed, including installing any necessary wall controls and ensuring proper maintenance and inspection of the fan. Troubleshooting common issues may also be required, but with attention to detail and patience, any problems can be resolved.
As an electrician or electrical contractor, we understand that proper installation of a ceiling fan not only provides comfort but also adds value to a home. So do not hesitate to take on this project and enjoy the cool breeze of your new ceiling fan on those hot summer days – it’s like having your own personal indoor oasis!
Image Credits
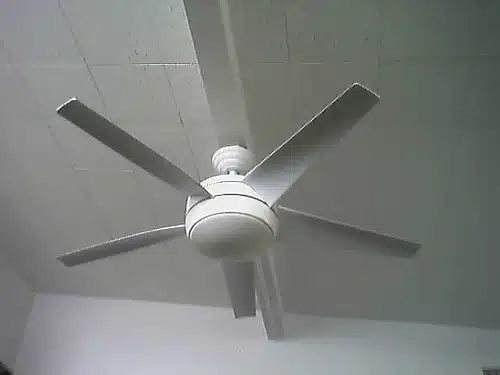
- “Ceiling Fan” by jeffk (featured)
















![How To Replace A Single-Pole Wall Switch 28 '... All in all it's just another [switch] in the wall.' ...](https://green-life.blog/wp-content/uploads/2023/05/17xmP5qMtVjq-150x150.jpg.webp)
