The installation of an electrical outlet receptacle is a task that requires a certain level of expertise and knowledge in electrical engineering. It involves handling electrical wires, understanding circuits, and ensuring safety measures are taken to prevent accidents. However, with the right tools, materials and guidelines, one can install an electrical outlet receptacle efficiently and safely.
In this article, we will provide a step-by-step guide on how to install an electrical outlet receptacle. We will cover the necessary tools and materials needed for the installation process as well as the safety precautions that need to be taken. By following our instructions carefully and attentively, even those with limited experience in electrical engineering can successfully install an electrical outlet receptacle without putting their safety or property at risk.
Tools Needed For The Installation Process
The installation of an electrical outlet receptacle is a task that requires a specific set of tools. It is crucial to have the right tools at hand to avoid common mistakes that could lead to safety hazards or damage to equipment. The primary tool needed for this task is a voltage tester, which ensures that the circuit is safe to work on.
Other essential tools include wire strippers, pliers, and screwdrivers. Wire strippers are particularly useful for removing insulation from wires without damaging the conductor itself. Pliers come in handy when bending, twisting, and cutting wires. Screwdrivers are necessary for loosening or tightening screws on the outlet receptacle.
There are cost-effective options available for those who are just starting with electrical work. Some alternative tools can be used instead of their more expensive counterparts without sacrificing quality or safety. However, it is important to invest in the best brands when buying tools as they usually last longer and provide better performance.
Materials Required For The Task
To properly install an electrical outlet receptacle, there are several materials that you will need to have on hand. These include:
- Electrical box
- Receptacle
- Cover plate
It is important to note that the type of materials needed may vary depending on the specific installation requirements and local building codes. It is best to consult with a licensed electrician or building inspector before purchasing any materials.
Common mistakes that people make when installing electrical outlets include improper wiring, failure to secure the box properly, and not using a GFCI (ground fault circuit interrupter) outlet in areas such as bathrooms, kitchens, and outdoor locations. It is important to follow all safety guidelines and regulations when working with electricity to avoid injury or damage to property.
Cost estimation for this project can vary greatly depending on the materials used and the complexity of the installation. It is recommended to obtain quotes from multiple contractors or suppliers before beginning work to ensure that you are getting a fair price for the job.
Before beginning any electrical installation project, it is imperative that proper safety precautions are taken. This includes turning off power at the source, testing wires with a voltage tester, wearing protective gear such as gloves and goggles, and ensuring that all tools and equipment are in good working order. Failure to take these precautions could result in serious injury or even death.
Safety Precautions To Take Before Beginning
As the famous adage goes, “measure twice, cut once,” a pre installation assessment is crucial before beginning any electrical work. This involves carefully examining the area where the outlet will be installed, identifying potential hazards such as nearby water sources or flammable materials, and ensuring that there is enough space for the receptacle box. It is also important to check if the circuit can handle the additional load from the new outlet.
Before starting any electrical work, proper safety gear must be worn at all times. This includes insulated gloves, safety glasses, and non-conductive footwear. Additionally, it is recommended to use a voltage tester to ensure that there is no power flowing through the wires before beginning work. Turning off the power at the circuit breaker or fuse box is also essential to prevent electrocution.
In summary, taking necessary precautions such as conducting a pre installation assessment and wearing proper safety gear can greatly reduce the risk of accidents while installing an electrical outlet receptacle. Always remember to turn off the power before beginning any electrical work and never hesitate to seek professional help if unsure about any aspect of the process.
Turning Off The Power
Now that you have gathered all the tools and materials needed to install an electrical outlet receptacle, the next step is to ensure your safety by turning off the power source. This will prevent electrocution or any other hazards that may occur during installation. Before proceeding with this step, it is essential to have knowledge of basic electrical safety measures.
To turn off the power, you need to locate your home’s circuit breaker panel or fuse box. The circuit breaker panel usually has a door enclosing it, while the fuse box has a removable lid. Once located, open the door or remove the lid and identify the switch or fuse that controls the power supply to the area where you intend to install your outlet receptacle. Switch off this breaker or remove this fuse from its socket.
After turning off the power source, it is necessary to double-check that there is no electricity flowing in your working area by using a voltage tester. You can use a non-contact voltage tester that will beep or light up if there is any electric current present in your work area. If there is no current detected, then you can proceed with installing your outlet receptacle safely.
- Check if there are loose wires in your circuit breaker panel.
- Look for any signs of frayed insulation on wires.
- Inspect if there are any signs of wear and tear on cables.
- Make sure all screws and connections are tight and secure.
Now that you have successfully turned off the power source and checked for any potential hazards, it’s time to move on to inspecting the wiring before installing your outlet receptacle. This step will ensure that everything is in order before proceeding with installation and reduce any chances of accidents occurring during use.
Inspecting The Wiring
As the saying goes, “an ounce of prevention is worth a pound of cure.” Before proceeding with the installation of your electrical outlet receptacle, it’s essential to inspect the wiring thoroughly. Testing the circuits ensures that they’re in good condition and will not pose a hazard to you or your property.
One way to test the circuit is by using a circuit tester tool. A circuit tester tool can identify if there are any live wires or open grounds present in the wiring. It’s crucial to ensure that all wires are de-energized before proceeding with any work on them. Additionally, some outlets may have two sets of wires, one set being hot and one neutral. Ensure that you’ve correctly identified which wire is which before making any connections.
Troubleshooting common wiring issues is also an important part of inspecting the wiring. Some common issues include reversed polarity, open grounds, and short circuits. These issues can be dangerous if left unaddressed and must be resolved before proceeding with the installation process. If you encounter any problems during this inspection process, it’s best to consult a licensed electrician for assistance.
Now that we’ve inspected the wiring and ensured that everything is safe and ready to go, it’s time to choose the right location for our electrical outlet receptacle.
Choosing The Right Location For The Outlet
After inspecting the wiring, the next step in installing an electrical outlet receptacle is choosing the right location for it. Outlet placement is crucial to ensure safety and convenience. The location should be easily accessible and not obstructed by furniture or other objects. It is also important to consider the aesthetic aspects of outlet placement, especially if it will be visible in a room.
When choosing where to install an outlet, there are several factors to keep in mind. First, think about what purpose the outlet will serve. If it will be used for appliances or electronics that require a lot of power, it may need to be installed near a larger circuit breaker. Additionally, consider how far away the nearest existing outlet is and whether you want multiple outlets in one area. Lastly, take into account any special requirements for specific rooms such as outdoor outlets needing GFCI protection.
Aesthetic considerations are also important when deciding on outlet placement. Outlets that are visible in living spaces or bedrooms can detract from the overall design of a room if they are not carefully placed. Consider hiding outlets behind furniture or using decorative covers that match wall colors or patterns. By taking both safety and aesthetic considerations into account when choosing where to install an electrical outlet receptacle, you can ensure a functional and visually pleasing addition to your home’s electrical system.
To proceed with measuring and marking the box location for your new outlet receptacle, first locate your studs within walls using a stud finder tool before drilling holes into them for wires or conduit runs. Use a template or draw out measurements with pencil onto drywall before cutting out openings with hole saws or reciprocating saw blades set at appropriate depths depending on thicknesses of materials being cut through (e.g., 1/2 inch drywall requires 1-1/4 inch saw depth). Mark screw holes on boxes so they align with wall studs then attach boxes securely using screws provided by manufacturer according instructions included with product.
Measuring And Marking The Box Location
To ensure that the electrical outlet receptacle is installed in the most appropriate location, measuring techniques should be utilized. These techniques involve using a tape measure or ruler to determine the height at which the box should be placed. Additionally, it is important to consider any obstructions or obstacles that may prevent easy access to the outlet. This includes furniture, appliances, and other fixtures that may be in close proximity.
Box placement considerations are also crucial during this stage of installation. The box should be positioned in a location that is easily accessible and does not interfere with any other electrical components or wiring. It is recommended to place the box on either side of a stud, rather than directly on top of it, as this can compromise its stability and safety. Moreover, the box should be placed at least 1/4 inch back from the wall’s edge to ensure proper fitting.
Once these measurements have been taken and placement considerations have been made, the next step is cutting the hole for the box. This involves using a drywall saw or keyhole saw to cut out an opening in the wall where the box will be placed. It is important to ensure that this hole is precise and matches up with the measurements taken earlier to avoid any issues during installation. By following these steps carefully and accurately, an electrical outlet receptacle can easily be installed in any home or building with minimal difficulty.
Cutting The Hole For The Box
After measuring and marking the box location, the next step is to prepare the drywall for cutting. This involves ensuring that there are no obstructions behind the wall and that the area is free of any debris. If necessary, a stud finder can be used to locate any studs or other obstacles in the wall.
When it comes to selecting the appropriate electrical box size, there are several factors to consider. One of these is the intended use of the outlet. For example, if you plan on using it for heavy-duty appliances or equipment, you may need a larger box to accommodate thicker wires and stronger connections. Additionally, you’ll want to ensure that the box is compatible with your chosen receptacle and that it meets local building code requirements.
To properly install an electrical outlet receptacle, it’s essential to carefully cut a hole in the drywall for the electrical box. This will require precise measurements and cutting tools such as a drywall saw or rotary tool. Once the hole has been cut, you can then proceed with securing the electrical box into place and making any necessary connections before installing your chosen receptacle.
Transition: With all preparations made for cutting out an opening in your drywall and selecting an appropriate electrical box size, let’s now move onto installing your chosen electrical box securely into place.
Installing The Electrical Box
To properly install an electrical outlet receptacle, it is important to first ensure that the electrical box is mounted securely. Mounting techniques will vary depending on the surface the box is being mounted to. For example, if the box is being mounted to drywall, it should be secured with screws that are long enough to reach the studs behind the drywall. If mounting to concrete or masonry, a special anchor will need to be used for secure attachment.
Once the electrical box is securely mounted, it’s time to consider outlet cover options. These covers not only add a finishing touch to your installation but also protect against accidental shocks and dust accumulation. There are a variety of options available including standard plastic covers or more decorative metal ones. It’s important to select one that fits properly and provides adequate protection.
With the electrical box mounted and a cover selected, you’re now ready for wiring the outlet. But before doing so, make sure to turn off power at the circuit breaker and double-check that there is no live current running through any wires in the area. Safety should always be your top priority when working with electricity.
Wiring The Outlet
Now that the electrical box is securely attached to the wall, we can proceed to wiring the outlet. Before anything else, it is important to turn off the power supply to avoid electrocution. Once you have done so, you can start making wire connections.
The first step in connecting wires is identifying which one is the ground wire. The ground wire should be connected to the green screw on the outlet or a grounding clip if there is no green screw available. This will prevent electrical shocks and ensure safety. There are also other grounding options such as using a metal conduit or grounding rod, but it’s important to consult with a licensed electrician before doing so.
After properly grounding your outlet, you can now proceed with connecting the wires to it. Connect the black wire (hot) to the brass-colored screw on one side of the outlet and connect the white wire (neutral) to the silver-colored screw on the other side of it. Make sure that all screws are tightened down securely and that no bare wires are left exposed. With proper installation and wiring techniques, your electrical receptacle should now be ready for use.
Connecting The Wires To The Outlet
After identifying the hot, neutral, and ground wires, use wire stripping techniques to expose about 1/2 inch of bare wire from the ends of each wire. To do this, use a pair of wire strippers and gently grip the insulation at the end of each wire. Next, twist and pull back the insulation to reveal a portion of the copper wire underneath. It is important not to nick or cut any of the copper wires during this process as this can weaken them and cause electrical problems.
Once all three wires are stripped, identify the outlet receptacle color codes: black is for hot wires, white is for neutral wires, and green or bare copper is for ground wires. Connect these wires to their respective screws on the outlet – black to brass screws, white to silver screws, and green/bare copper to green screws. Make sure that no loose strands of wire are exposed outside of their designated screws on the outlet.
After connecting all three wires, firmly attach them by tightening each screw with a screwdriver until they are snug against their respective wires. Be careful not to over-tighten as this can damage or break off the connector screws. Once all connections have been checked and tightened if necessary, proceed with attaching the outlet to the box using appropriate hardware without exerting too much force that could damage both components.
Attaching The Outlet To The Box
Is your box properly aligned with the outlet? This is an important question to consider when attaching the outlet to the box. Make sure that you have a level and flush fit between the two parts. If not, adjust accordingly until you achieve proper alignment for a secure installation.
Next, it’s time to strip the wires. Use wire stripping techniques to expose about 3/4 inch of copper on each wire. Be careful not to damage or break any part of the wire during this process as it can lead to electrical hazards in the future. Once stripped, use needle-nose pliers to form a hook on each end of the wire for easier attachment to the outlet.
With proper box alignment and wire stripping techniques, you are now ready to attach your outlet to the electrical box. Take your time with this step and ensure that all wires are securely attached before proceeding to testing the outlet for functionality.
Testing The Outlet
Once you have installed the electrical outlet receptacle, it is important to test it to ensure that it is working correctly. Testing the outlet involves checking the voltage and polarity of the outlet. Outlet voltage refers to the amount of electrical energy that is flowing through the outlet, while outlet polarity refers to whether the hot and neutral wires are connected correctly.
To test the outlet voltage, you will need a multimeter. Set your multimeter to measure AC volts and touch one probe to the hot wire screw terminal on the outlet and the other probe to the neutral wire screw terminal. The reading should be between 110-120 volts if your electrical system is operating at 120 volts. If you get a reading outside this range, there may be an issue with your wiring or your electrical system.
Next, you should check for correct outlet polarity. This involves ensuring that the hot wire connects to the brass-colored screw terminal and that the neutral wire connects to silver-colored screw terminal. To check for correct polarity, use a plug-in tester, which can be purchased at any hardware store or online. The tester will show whether your outlet has correct wiring or not according to its light indicator.
It is important to test an electrical outlet after installation because faulty wiring or incorrect voltage can lead to dangerous situations such as fires or electrocution. Once you have confirmed that your new receptacle is functioning properly, you can proceed with covering it with a plate using screws provided in its package without any hesitation.
Covering The Outlet With A Plate
Ironically, some people may view the installation of a decorative outlet cover as a minor detail. However, it is important to remember that these covers do more than just add to the aesthetic appeal of a room. They also serve as an added layer of protection for the outlet receptacle, helping to prevent dust and debris from entering and potentially causing damage or even electrical fires. Therefore, it is crucial to properly cover your newly installed outlet with a plate.
When selecting a decorative outlet cover, it is important to consider both style and functionality. The cover should match the overall design of the room while also being durable enough to withstand daily use and potential impacts. Additionally, it is important to periodically check the maintenance of the outlet receptacle itself, ensuring that it remains in good condition and free from any signs of wear or damage.
In summary, installing an electrical outlet receptacle involves more than just connecting wires and plugging in devices. It requires careful consideration of safety measures such as covering the outlet with a plate and regularly checking for maintenance needs. By taking these precautions, you can ensure that your electrical system functions properly while also adding style and convenience to your home. In our subsequent section, we will discuss final safety checks and precautions before using your newly installed electrical outlet receptacle.
Final Safety Checks And Precautions
Now that the electrical outlet receptacle has been installed, it is essential to ensure that all safety precautions have been taken. This will help prevent any electrical accidents and guarantee a safe installation. In this section, we will discuss some final safety checks and precautions that must be taken before using the outlet.
Firstly, it is crucial to check the wiring connections thoroughly for any loose connections or improper wiring. Common mistakes such as these can lead to electrical shocks or fires. Troubleshooting tips include checking for any flickering lights or irregular power supply upon connecting devices to the outlet. If such issues arise, it is recommended to turn off power immediately and call an electrician.
Secondly, important safety reminders include keeping the area around the outlet dry at all times, avoiding overloading with too many devices, and not using extension cords as a permanent solution. Post-installation care should involve regularly inspecting outlets for signs of wear and tear, ensuring that they are not damaged in any way.
In summary, installing an electrical outlet receptacle requires utmost care and attention to detail. By following these final safety checks and precautions, users can ensure a safe and efficient installation for years to come. Remember to always keep safety in mind when working with electricity!
Conclusion
In conclusion, installing an electrical outlet receptacle can be a simple and straightforward task if the right tools and materials are used, safety precautions are taken, and proper steps are followed. However, it is important to note that electricity can be dangerous if mishandled, which is why safety should always come first.
As an electrical engineer, I have seen firsthand the importance of taking safety seriously in any electrical installation or repair project. One anecdote that comes to mind is a client who attempted to install an outlet without turning off the power first. The resulting shock not only caused physical harm but also damaged their entire electrical system.
Just like a river’s current can be harnessed for energy while also being dangerous if not respected, electricity can provide power when handled properly but can also cause harm if not treated with caution. By following the proper steps and taking safety precautions seriously, anyone can successfully install an electrical outlet receptacle while avoiding potential hazards.
Image Credits
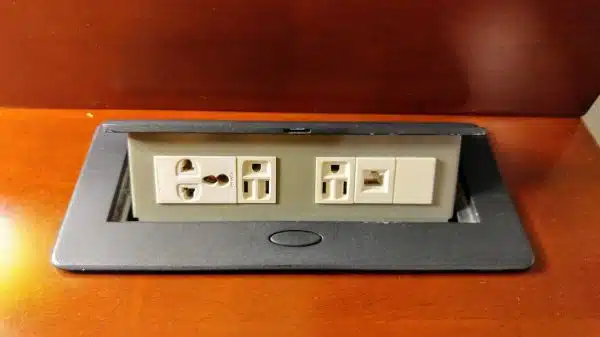
- “Electrical Outlet at the Hilton Seattle” by Evan Didier (featured)













![How To Replace A Single-Pole Wall Switch 22 '... All in all it's just another [switch] in the wall.' ...](https://green-life.blog/wp-content/uploads/2023/05/17xmP5qMtVjq-150x150.jpg.webp)

