The installation of a dryer electrical cord is an essential task for every homeowner who wants to ensure the proper functioning of their clothes dryer. The process is not complicated, but it requires technical expertise and knowledge of the electrical system. In this article, we will provide step-by-step instructions on how to install a dryer electrical cord safely and efficiently.
As an experienced electrician or technician, you understand that electrical work should be left to professionals who have the necessary skills and knowledge to complete the job correctly. However, if you are confident in your abilities and want to save money by installing a dryer electrical cord yourself, this article will guide you through the process. With our comprehensive guide, you’ll be able to install a dryer electrical cord like a pro and enjoy the benefits of a properly functioning clothes dryer.
Safety Precautions And Tools Needed
Before we proceed with the installation of a dryer electrical cord, it is imperative to understand that safety comes first. As the saying goes, “safety first, accidents last.” One common mistake that people make when installing an electrical cord is failing to switch off the power source. This can be fatal and may result in electrocution or even death. Therefore, ensure that you turn off the power source before embarking on this task.
Once you’ve switched off the power source, it’s time to gather all necessary tools and equipment needed for the installation process. Recommended brands for electrical cords include GE, Whirlpool, and Kenmore. You will also need a screwdriver, wire stripper or cutter, pliers, and a voltage tester. Ensure that all these tools are readily available before proceeding with the installation process.
Another common mistake when installing an electrical cord is failing to wear protective gear such as gloves and goggles. These safety gears protect you from injuries such as cuts from wires or electric shocks resulting from contact with live wires. Always remember that your safety is paramount while undertaking any electrical project. In the next section, we shall discuss how to shut off the power before moving on with the installation process.
Shutting Off The Power
After ensuring that all necessary tools are available and precautions have been taken, shutting off the power is the next step to take when installing a dryer electrical cord. It is important to understand that electrical hazards can occur if safety protocols are not followed. Therefore, before beginning any installation work, ensure that the power supply to your home has been turned off at the circuit breaker.
Power safety is critical when handling electrical appliances such as dryers. Electric shocks and burns can occur when dealing with live wires or working on circuits that have not been properly shut off. Shutting off the power before installation ensures your safety and prevents damage or destruction of property.
A crucial aspect of installing an electrical cord for your dryer is identifying the correct cord for your appliance. Using the wrong cord can pose a significant risk of electrical shock or fire. Furthermore, it can cause extensive damage to both the appliance and home wiring system. Properly identifying and selecting the right cord will guarantee a safe and seamless installation process.
Identifying The Correct Cord
It is imperative to choose the right cord when installing a dryer. The wrong cord could lead to electrical hazards, damage to the machine, and even fire. Therefore, understanding cord compatibility is crucial in this process.
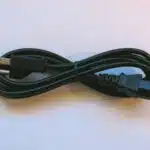
Choosing the right cord for your dryer requires identifying its needs. Firstly, check the dryer’s manual for specific instructions on which cords are compatible with it. Some dryers require a three-pronged cord, while others require four-pronged ones. Additionally, ensure that the cord matches the amperage rating of your dryer; using a lower-rated one could cause it to overheat or fail.
Understanding cord compatibility also means taking into account the electrical outlet’s specifications. If you have an older home with a three-pronged outlet, you may need to replace it with a four-pronged one that meets current safety standards. It is essential to consult an electrician if you are unsure about any aspect of this process.
Transition: Now that you have chosen the appropriate cord for your dryer, it is time to prepare the wires before installation.
Preparing The Wires
To prepare the wires for installation, it is important to have the right tools and techniques. Wire stripping tools are necessary to remove insulation from the ends of the wires. Stripping too much insulation can cause problems with connection stability, while leaving too little can lead to electrical shorts. It is essential that the wire cutter used is sharp and clean to ensure a precise cut.
Crimping techniques are also crucial in preparing wires for installation. The purpose of crimping is to create a secure connection between two pieces of metal or material. This process involves using a crimping tool to crush or deform a metal sleeve around the wire, which creates a tight bond that prevents accidental disconnection due to vibration or other factors.
It’s important to note that crimping should always be done with care and precision as it directly affects the safety and reliability of electrical connections. Properly preparing your electrical cord by using these tools and techniques will ensure you have a stable power supply, which is essential for safe operation of your dryer.
Moving forward, we will discuss removing the old cord before installing your new one.
Removing The Old Cord
- Before beginning any work, it is important to unplug the dryer from the wall outlet.
- Carefully remove the screws that secure the cord plate, which is located behind the dryer.
- Once the cord plate is removed, the existing cord should be disconnected and removed.
- After the old cord is removed, the new cord can be connected and the cord plate secured with the screws.
Unplugging The Dryer
Ensuring safety should always be the top priority when working with electrical appliances. Before attempting to remove the old cord of a dryer, one must take heed of certain precautions. The first and foremost step is to unplug the dryer from its power source.
As an electrical technician or electrician, I cannot emphasize enough the importance of unplugging dryers before any maintenance work. Failure to do so may result in electrocution or fire hazards. It is important to remember that even when a machine is turned off, there may still be electricity running through it. Therefore, it is recommended to unplug the dryer from the wall socket or turn off its circuit breaker before proceeding with any repair work.
For those who have a subconscious desire for serving others, unplugging the dryer may seem like a simple task but it can go a long way in ensuring their safety. One should make sure that they have enough space around them while unplugging the appliance and avoid coming into contact with any metallic parts or wires connected to it. Additionally, if one has any doubts or concerns about their ability to safely unplug the dryer themselves, they should seek assistance from a professional electrician.
In conclusion, before embarking on removing an old cord from a dryer, one must ensure safety by unplugging it first. Taking this precautionary measure will not only safeguard against potential accidents but also give peace of mind during the repair process.
Removing The Cord Plate
As an electrical technician or electrician, knowing how to remove the cord plate from a dryer is essential for any repair work. Before proceeding with this task, it is important to unplug the dryer from its power source and ensure that there is enough space around you. Removing the cord plate involves disconnecting the wires from the old cord and attaching them to the new one.
To safely remove the cord plate without damaging the dryer, one must first locate it at the back of the machine. It is usually held in place by screws or clips that need to be removed carefully using a screwdriver or pliers. It is important to avoid putting too much pressure on these parts as they can break easily.
Once the cord plate has been removed, one should take note of how the wires were connected to it before disconnecting them. It is recommended to take a picture or draw a diagram for reference later on. When attaching the new cord, make sure that each wire is connected securely and in its correct position. Finally, reattach the cord plate and secure it tightly with screws or clips before plugging in and testing the dryer.
Attaching The Strain Relief
According to the National Fire Protection Association, dryers are responsible for an estimated 2,900 home fires each year. Poor installation of dryer electrical cords is one of the leading causes of these fires. Proper grounding is essential to ensure that your dryer operates safely and efficiently. Here’s how to attach the strain relief:
- First, slide the strain relief over the cord and into position on the back of the dryer.
- Tighten the two screws on either side of the strain relief until it’s firmly in place.
- Ensure that there’s enough extra cord inside the dryer to connect it to the terminal block.
Cord length considerations are crucial when installing a new electrical cord for your dryer. Measure the distance between your outlet and where you plan to place your appliance before purchasing a cord. Make sure you purchase a cord that’s long enough to reach your desired location without being too long, which can create tripping hazards or other safety concerns.
To connect wires to the terminal block, first strip about 3/4 inch of insulation from each wire in your new electrical cord. Next, connect each wire to its corresponding terminal screw on your dryer using a screwdriver. Remember: white goes with white, black goes with black, and green goes with green (or copper). Once all wires have been connected securely, tighten all screws and replace any covers or access panels removed during installation.
Connecting The Wires To The Terminal Block
- First, it is important to identify and correctly label the wires according to their specific functions.
- After making sure the wires are correctly identified, the next step is to connect them to the terminal block.
- It is necessary to ensure that the right type of wire is used and that the connections are secure.
- The connections must be made in the correct order and with the right type of material.
- To ensure the connections are secure, it is important to use the right type of screwdriver and to make sure the screws are tightened properly.
- After the wires are connected, the final step is to secure the wires with the appropriate wire connectors or clamps.
Identifying Wires
Identifying wires is a crucial step when connecting the wires to the terminal block of an electrical cord for your dryer. Wire color coding is significant in identifying which wire goes where, and it’s essential to understand the code used in wiring your dryer cord. The most common wire colors found in a dryer cord are black, red, white, and green. Black and red wires carry the hot load, while the white wire carries the neutral load, and the green wire carries ground load.
Troubleshooting faulty wiring can be challenging if you don’t know how to identify wires correctly. It’s important to note that some manufacturers use different color codes in their dryers; therefore, you should always refer to the manufacturer’s manual or a professional electrician if you’re unsure about how to connect your dryer cord. Additionally, before installing your electrical cord, ensure that you have turned off power at the circuit breaker or fuse box.
In conclusion, correctly identifying wires is critical when connecting your electrical cord for your dryer. Understanding wire color coding and troubleshooting faulty wiring is essential in ensuring that your dryer operates safely and efficiently. By following these guidelines and seeking professional help when necessary, you can install your dryer electrical cord with confidence!
Connecting Wires
After identifying the wires, the next step is to connect them to the terminal block. Properly connecting wires is crucial in ensuring that your dryer operates safely and efficiently. As an electrical technician or electrician, there are tips for soldering wires and how to use wire connectors.
When soldering wires, it’s essential to have a clean work area and proper tools such as a soldering iron and flux. Begin by stripping off about 1/2 inch of insulation from each wire end. Place the two stripped ends together and apply heat using a soldering iron. Then add flux to the connection point and apply melted solder to the joint, ensuring that it covers both wires evenly.
Wire connectors can also be used to connect wires without soldering. Strip off about 1/2 inch of insulation from each wire end, twist them together, and insert them into the connector until they reach the bottom. Use a crimping tool to secure the connector onto the wires firmly. Lastly, tug on each wire gently to ensure that it’s held securely by the connector.
By following these tips for soldering wires or using wire connectors correctly, you can connect your dryer cord safely and efficiently. Remember always to refer to your manufacturer’s manual or seek professional help if you’re unsure about connecting your dryer cord properly!
Securing Wires
After successfully identifying and properly connecting the wires to the terminal block, the next step is to secure them. Securing wires is crucial in preventing any accidents or damage to the dryer. As an electrical technician or electrician, there are different ways of securing wires.
One way of securing wires is by twisting them together and using wire nuts. After stripping off about 1/2 inch of insulation from each wire end, twist them together clockwise until they’re tightly secured. Then insert a wire nut over the twisted ends until it’s fully seated on the wires. Finally, tug on each wire gently to ensure that it’s held securely by the wire nut.
Another way of securing wires is by using cable ties or clips. Cable ties can be used to bundle and hold multiple wires together while clips can be used to fasten single wires onto a surface. When using cable ties or clips, make sure not to overtighten as this may damage the insulation of the wires.
In conclusion, securing wires is an essential part of connecting your dryer cord safely and efficiently. By following these tips on how to twist wires together and use wire nuts or cable ties correctly, you can prevent any accidents or damage to your dryer caused by loose connections. As always, refer to your manufacturer’s manual or seek professional help if you’re unsure about securing your dryer’s wiring properly!
Tightening The Terminal Screws
Tightening the terminal screws is a crucial step in installing an electrical cord for your dryer. It ensures that the wires are securely connected to the terminal block and prevents any loose connections that may cause electrical hazards. To properly tighten the terminal screws, it is important to adjust the tension of each screw.
Adjusting tension involves using a screwdriver to turn the screws clockwise until they are snug against the wire. However, it is important to avoid over-tightening the screws as this may damage the wires or break them off from the connector. Over-tightening can also lead to stripped threads on the terminal block, which would require costly repairs.
To avoid over-tightening, it is recommended to use a torque screwdriver or a calibrated wrench when tightening the screws. These tools ensure that you apply just enough force on each screw without exceeding its maximum torque rating. By following these steps, you can safely and effectively tighten the terminal screws and complete your installation process with ease.
Transition: Now that you have tightened all of your terminal screws, it’s time to move onto attaching your cord clamp for additional security measures.
Attaching The Cord Clamp
To securely attach the dryer electrical cord, the next step is to install the cord clamp. This small but essential component ensures that the cord stays put and doesn’t get pulled out of the dryer socket. It’s important to note that different types of cord clamps are available, such as plastic or metal ones.
Here are four key steps to follow when attaching the cord clamp:
- Adjusting cord length: Before installing the clamp, ensure that you have adjusted the length of the cord according to your dryer’s specifications.
- Choose a suitable clamp: Depending on your preference, you can choose from a range of plastic or metal clamps available in hardware stores.
- Positioning: Once you have selected your preferred type of clamp, position it carefully over the end of your dryer’s power cord.
- Tightening: Finally, use a screwdriver or pliers to tighten the screws on either side of the clamp until it is firmly secured.
By following these steps precisely and carefully, you can ensure that your electrical connection is safe and secure for years to come. With this final installation step complete, it’s time to move onto testing the connections – an essential aspect of ensuring optimal performance and safety for your new dryer installation.
Testing The Connections
After securely attaching the cord clamp, the next step is to test the connections. Before plugging the dryer in, it is crucial to ensure that all wiring has been correctly installed. Testing your connections can help you identify and troubleshoot any errors before they become bigger problems.
To test your connections, you will need a multimeter. Set your multimeter to read volts AC and insert each of its probes into one of the two outer slots of the outlet. The reading should be around 240 volts; if it isn’t, then there may be an issue with your home’s electrical supply. If the reading is correct, then proceed to plug in your dryer and test its operation.
Once you have verified that everything is working correctly, you can move on to securing the cord to the dryer. This step involves tightening screws or bolts that hold the cord in place. It is important not to overtighten these screws as this could damage them or cause them to break off, leaving you with an unsafe connection. With these steps complete, your new dryer should now be fully operational and ready for use.
| Wire Color | Connection |
|---|---|
| Red | Left Slot |
| Black | Right Slot |
| White | Middle Slot |
| Green/Yellow | Ground Connection |
With all connections made properly according to their corresponding colors on both ends, you can rest easy knowing that both your home’s circuitry and new appliance are functioning correctly together. By following these instructions carefully and taking care during each step of installation, you’ll be able to install a new dryer’s electrical cord safely and effectively without incident or injury.
Securing The Cord To The Dryer
- The first step in installing a dryer electrical cord is to prepare the cord for attachment.
- This includes examining the cord for any signs of wear or damage, ensuring it is the correct length, and checking the insulation of the wires.
- Once the cord is prepared, the next step is to attach the cord to the dryer.
- This can be done by following the manufacturer’s instructions for the particular model of dryer.
- Once the cord is attached, the wires must be connected.
- This should be done following the relevant electrical code and regulations, and in accordance with the manufacturer’s instructions.
Preparing The Cord
When it comes to installing a dryer electrical cord, one of the most important steps is preparing the cord itself. This involves selecting the right gauge for your specific dryer model and ensuring that proper grounding techniques are used throughout the installation process.
Selecting the right gauge for your dryer electrical cord is crucial in preventing electrical fires or other hazards. It’s important to check your dryer’s user manual or consult with an electrician to determine what gauge of wire is required for your specific model. Using a wire that is too thin can result in overheating, while using a wire that is too thick can cause compatibility issues with your outlet.
Proper grounding techniques are also essential when preparing your dryer electrical cord. This involves connecting a ground wire to the metal frame of your dryer and then attaching it to a grounded outlet or circuit breaker box. Failure to properly ground your dryer can result in electrocution or damage to your home’s electrical system. By following these guidelines, you can ensure that your dryer electrical cord is safe and secure for years to come.
Attaching The Cord
After selecting the right gauge and preparing your dryer electrical cord, the next crucial step is securing the cord to the dryer. This involves attaching the cord’s wires to the terminal block on the back of your dryer, as well as using a strain relief to prevent damage to your cord from bending or twisting. As an electrician, it’s important to follow proper installation guidelines to ensure that your dryer operates safely and efficiently.
When attaching the cord’s wires to the terminal block, it’s important to match each wire with its corresponding color. Usually, there will be three wires: black or red for hot, white for neutral, and green or bare for ground. It’s essential to tighten each wire connection securely using a screwdriver so that they don’t come loose over time. Additionally, it’s important to take into account any length considerations when attaching the cord. The wire should be long enough to reach the terminal block without being stretched too tight or having too much slack.
Finally, using a strain relief can help secure your electrical cord against damage caused by pulling or tugging on it while in use. A strain relief is typically a plastic piece that fits around where the cord enters the back of your dryer and holds it in place with screws. This prevents any excessive force on the wires themselves and reduces wear and tear over time. By properly securing your electrical cord with a strain relief and following these other guidelines, you can help ensure safe operation of your dryer for years to come.
Connecting The Wires
When it comes to securing the cord to the dryer, connecting the wires is a crucial step that should be done with utmost care. As an electrician, it’s important to follow proper wire color coding to ensure that each wire is correctly matched with its corresponding color. For instance, black or red wires are for hot, white wires are for neutral, and green or bare wires are for ground. This helps prevent any electrical mishaps that can occur when wires are not connected properly.
In addition to proper wire color coding, grounding is also an essential aspect when connecting wires to the terminal block on the back of your dryer. Grounding helps protect against electrical shock by providing a pathway for electricity to flow into the ground in case of a short circuit or other fault. To ensure proper grounding, it’s important to connect the green or bare wire securely to the grounding screw on the terminal block.
Once you have successfully connected all three wires securely and grounded your electrical cord, it’s recommended to use a multimeter to test your work before plugging in and using your dryer. This will help ensure that there are no wiring issues or faults that could cause damage or pose a safety risk. Following these guidelines when connecting your dryer’s electrical cord can help prevent potential hazards and ensure safe operation of your appliance for years to come.
Re-Attaching The Access Panel
As you finish installing the electrical cord for your dryer, it is important to re-attach the access panel to ensure proper functionality and safety. The access panel is the cover that provides access to the internal components of the dryer. It is usually located at the back of the appliance and secured with screws.
Before re-attaching the access panel, make sure that it is properly aligned with the dryer’s body. Ensure that no wires or other components are pinched between the panel and the dryer’s frame. Any misalignment may cause damage to both the dryer and electrical cord, leading to potential hazards such as fire or electrocution.
Once you have ensured proper alignment, secure the screws in place using a screwdriver. Make sure they are not too tight or too loose as this can cause damage to either component. With everything secured in place, you can now move on to turning on your power supply so that you can test whether your newly installed electrical cord is functioning correctly.
Turning The Power Back On
Once the new dryer electrical cord is installed, it’s time to turn the power back on. This step is crucial for proper functioning of the dryer. As an electrician or technician, it’s important to ensure that the power is turned on safely and correctly.
Before turning the power back on, it’s important to double-check all connections. Make sure that all wires are securely connected and tightened down. If any loose connections are found, they need to be addressed before turning the power back on.
Once you’ve checked all connections and everything looks good, it’s time to flip the breaker switch back on. Be sure to follow all safety measures when flipping the switch. Troubleshooting tips should always be kept in mind in case any issues arise after turning the power back on.
- Ensure that the dryer is properly grounded
- Check that there are no frayed wires or damaged parts
- Use a voltage meter to test for proper voltage
- Confirm that the outlet is correctly wired
- Verify that there are no other electrical devices running off of the same circuit
With these safety measures and troubleshooting tips in mind, you can confidently turn your dryer back on and start using it again. Checking for proper functioning is key in ensuring that everything works as intended and addressing any issues before they become bigger problems.
Checking For Proper Functioning
To ensure proper functioning of your newly installed dryer electrical cord, it is important to conduct a thorough test. Testing for functionality will involve plugging in the dryer and turning it on to see if it’s working as expected. Before doing so, however, you should double-check all connections and ensure they are tight and secure. Loose connections can cause power fluctuations that can damage your dryer or even start a fire.
Once you’ve ensured all connections are tight and secure, plug in the dryer and turn it on. If everything is connected properly, the dryer should run smoothly without any issues. However, if the dryer doesn’t turn on or runs but isn’t heating up properly, there may be an issue with the electrical installation. In such cases, it is best to seek professional help from a licensed electrician.
To avoid any potential issues down the line, you should also pay attention to any warning signs that might indicate problems with your electrical installation. For example, if you notice unusual noises coming from your dryer or if it takes longer than usual to dry clothes, these could be signs of an underlying problem that needs addressing. It’s always best to address such issues as soon as possible before they become bigger problems that require more expensive repairs.
Next up: Troubleshooting common issues with your dryer electrical cord.
Troubleshooting Common Issues
Troubleshooting Common Issues:
When it comes to installing a dryer electrical cord, there are certain common mistakes that people make. One of the most common mistakes is not properly stripping the wires. If the wires are not stripped properly, they may not make proper contact with the terminal block, which can result in a poor connection or even an electrical fire.
Another common mistake is not tightening the screws on the terminal block. If the screws are not tightened properly, the wires may become loose over time and cause a poor connection or even an electrical fire. It is important to use a screwdriver that fits snugly into the screws and tighten them securely.
If you experience any issues after installing your dryer electrical cord, there are troubleshooting options available. First, check to make sure that all connections are secure and tight. If you find any loose connections, tighten them immediately. Additionally, check for any damaged wires or signs of wear and tear. Any damaged wires should be replaced immediately to avoid any potential safety hazards.
In summary, when installing a dryer electrical cord it’s important to avoid common mistakes such as improperly stripping wires and not tightening screws on the terminal block. In case of any issues after installation, it’s important to troubleshoot by checking for loose connections and damaged wires. By following these precautions, you can ensure that your dryer operates safely and efficiently for years to come without any incidents or accidents.
Conclusion
Installing a dryer electrical cord requires careful attention to safety and proper procedure. Before beginning, it’s important to gather the necessary tools and equipment, including wire strippers, pliers, and a screwdriver. It’s also essential to shut off power to the dryer before attempting any work.
Once the power is off, you can identify the correct cord and prepare the wires for installation. Removing the old cord and re-attaching the access panel are also important steps in this process. Once complete, be sure to turn the power back on and check for proper functioning. If any issues arise, troubleshooting common problems can help you identify solutions.
As an electrician or technician, it is crucial to follow all safety protocols when working with electrical appliances. Installing a dryer electrical cord may seem like a simple task, but it can be dangerous if not done correctly. By following these steps carefully and methodically, you can ensure that your dryer operates safely and efficiently for years to come. As the saying goes, “an ounce of prevention is worth a pound of cure.” Taking the time to install your dryer cord properly can save you from costly repairs or even injury in the future.
Image Credits
- “Hair dryer on white background” by wuestenigel (featured)









![How To Replace A Single-Pole Wall Switch 24 '... All in all it's just another [switch] in the wall.' ...](https://green-life.blog/wp-content/uploads/2023/05/17xmP5qMtVjq-150x150.jpg.webp)
