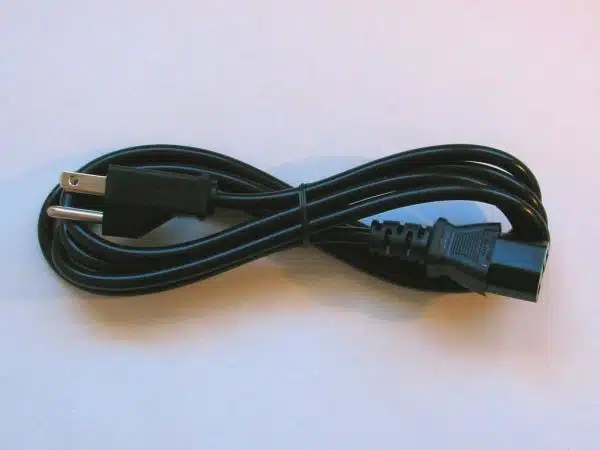
Connecting the power cord of an electric range is a crucial step in the installation process. As an electric range installation expert, I have seen many cases where improper connection of the power cord has caused damage to both the appliance and the electrical system of the home. In this article, I will guide you through the steps to safely and effectively connect the power cord of your electric range.
It is important to note that working with electricity can be dangerous if not done properly. Always turn off the power at the circuit breaker before beginning any work on electrical appliances. Additionally, it is recommended to have a licensed electrician assist with any electrical work if you are not comfortable doing it yourself. With that being said, let us discuss how to connect the power cord of an electric range in a safe and effective manner.
Turn Off The Power At The Circuit Breaker
To safely connect the power cord of an electric range, it is essential to turn off the power at the circuit breaker. This step is crucial for preventing electrical shock and other potential hazards. Before beginning any work on your electric range, ensure that you have turned off the power source.
It is important to follow a few safety measures when working with electricity. Always wear protective gear such as rubber soled shoes or boots, gloves, and safety glasses to protect yourself from possible electrical shocks. Keep in mind that even if you are familiar with working with electricity, accidents can still happen.
To turn off the power at the circuit breaker, locate the main circuit panel in your home or apartment. It is typically found near your electric meter. Open the panel door by removing any screws or latches and identify which switch controls the power supply to your electric range. Once you have located it, switch it off by moving it from its current position into the ‘off’ position. Remember to double-check that it has been switched off before continuing with any further work.
Now that you have safely turned off the power at the circuit breaker, it’s time to gather all necessary tools and materials for connecting your electric range’s power cord correctly.
Gather Necessary Tools And Materials
As an electric range installation expert, I’ve seen it all. From botched wiring to mismatched cords, there’s no shortage of common mistakes people make when connecting the power cord of their electric range. But with the right tools and materials, you can avoid these mistakes and ensure a safe and efficient installation.
Materials needed for this task include a power cord, wire stripper/cutter tool, Phillips screwdriver, and electrical tape. Make sure that the power cord matches the amperage rating of your range and has a three-prong grounded plug to prevent electrical shock. Also, check that your wire stripper/cutter tool is capable of cutting through the gauge wire you’ll be working with.
Common mistakes to avoid include failing to turn off power at the circuit breaker before beginning work or using an incorrect gauge wire for your particular range. Not only are these mistakes dangerous but they can also lead to costly repairs down the line. Take your time in gathering your tools and materials and double-check everything before starting work. In the next section, we’ll move on to removing the access panel for further installation steps.
Remove The Access Panel
Next, it is important to remove the access panel in order to connect the power cord of an electric range. This panel can typically be found on the back of the appliance and may be held in place by screws or clips. It is essential to follow manufacturer instructions and use caution when removing the panel to prevent damage to the range.
Common mistakes when removing the access panel include using too much force, which can result in bending or breaking the panel. Additionally, not keeping track of screws or clips during removal can make it difficult to reattach the panel later. Troubleshooting tips for this step include double-checking that all screws or clips have been removed before attempting to take off the panel.
Once the access panel has been successfully removed, it is time to identify the wires for connecting the power cord. This requires locating three wires: a white neutral wire, a black hot wire, and a red hot wire (in some cases, there may only be two wires present). It is important to note that improper wiring can cause serious damage or even injury, so it is crucial to refer to manufacturer instructions and proceed with caution when handling electrical components.
Identify The Wires
Wire identification techniques are crucial when connecting the power cord of an electric range. Before starting, it is important to identify the wires correctly to avoid any mishaps. One way of doing this is by checking the manufacturer’s manual for wire identification codes or colors. The manual provides a detailed diagram and explanation of the wiring system.
Another technique is to use a multimeter, which can measure voltage and resistance in wires. This tool will help you identify which wire connects to which terminal. Begin by turning off the power source and disconnecting the old range. Next, use the multimeter probes to test each wire’s voltage and resistance. Take note of each wire’s reading and label them accordingly.
Importance of proper wire labeling cannot be overstated when connecting an electric range’s power cord. Improper labeling may lead to electrical shock or damage to your appliance. To ensure safety, make sure that each wire is labeled correctly before proceeding with installation. Labeling should also include information about where each wire goes on the terminal block.
Now that you have identified the wires, it’s time to strip them properly before connecting them to your electric range’s terminal block. Follow these steps: [Markdown list begins here]
- Cut off any damaged parts of the wires using wire cutters.
- Use wire strippers to remove 3/4 inch of insulation from each end of every wire.
- Twist the exposed copper strands together tightly.
- Finally, insert each stripped end into its designated terminal block.
Correctly identifying wires and labeling them properly are essential steps in connecting an electric range’s power cord safely and efficiently. Now that you have done so, it’s time to strip those wires!
Strip The Wires
Now that we have identified the wires, it’s time to strip them. Wire stripping is an essential skill in installing an electric range. There are several wire stripping techniques that you can use, but the most common one is using a wire stripper tool. It’s important to note that not all electrical wires are created equal. Some wires are thicker than others, and some have different coatings or insulations.
Proper wire insulation is crucial when connecting the power cord of an electric range. The insulation on the wires protects you from electrocution and prevents short circuits from occurring. When stripping wires, make sure to leave enough insulation intact for protection while ensuring that there is enough exposed wire to make a good connection. If you accidentally nick or damage the insulation, it’s best to cut off the damaged section and start again with a new piece of wire.
Now that we’ve identified and stripped the wires, we can move on to connecting the neutral wire. The neutral wire is typically white or gray and connects to the center terminal on the range’s power block. It’s important to connect this wire correctly as it balances out the electrical load in your home’s wiring system. Make sure that all connections are tight and secure before turning on your electric range for testing purposes. Remember always to follow safety protocols when working with electricity – if you’re unsure about anything, consult with a licensed electrician for further guidance.
Connect The Neutral Wire
The neutral wire is an essential component when connecting the power cord of an electric range. It serves as a return path for the current, which helps balance the flow of electricity in a circuit. The importance of the neutral wire cannot be overlooked, and it is crucial to ensure that it is correctly installed.
However, there are common neutral wire issues that can arise during installation. One such issue is improper grounding, where the neutral wire is connected to a ground source, leading to electrical hazards. Another problem is loose or broken connections, which can cause intermittent power loss and pose safety risks. Therefore, it is critical to pay attention to every detail when installing the neutral wire.
To avoid these issues, follow the manufacturer’s instructions carefully and use appropriate tools and materials when connecting the neutral wire. Ensure that all connections are secure and tight, and test the circuit before turning on your electric range. By doing so, you can prevent hazardous situations from occurring while enjoying your newly installed electric range.
Now that you have connected the neutral wire successfully let us move on to connecting the ground wire. The ground wire provides an additional safety measure by redirecting any stray current away from people or equipment in case of electrical faults. It also helps prevent electrical shocks by providing a low resistance path back to earth ground.
Connect The Ground Wire
To ensure the safe and efficient operation of your electric range, it is essential to connect the ground wire properly. The ground wire serves as a safety feature that protects against electrical shock by providing a path for current to flow in case of a fault. Neglecting to install the ground wire can cause serious harm to individuals who come into contact with the appliance.
Ground wire importance:
- Connect the ground wire to a dedicated grounding terminal on the range.
- Ensure that the grounding terminal is clean and free from any debris before installation.
Ground wire installation tips:
- Use a pair of pliers or wrench to tighten the grounding screw securely.
- Avoid over-tightening, which can damage the screw or strip the threads.
- To prevent over-tightening, hand-tighten first and then use a tool to make small adjustments.
As an experienced electric range installation expert, I strongly advise against ignoring proper grounding procedures. By following these simple steps, you can help ensure that your electric range operates safely and efficiently. Remember that even if you have successfully installed other components of your electric range, neglecting proper grounding can lead to hazardous situations.
Next up is connecting hot wires, but let’s first take some time to understand why this process is just as important as connecting the ground wire.
Connect The Hot Wires
After connecting the ground wire, it’s time to connect the hot wires. Before starting this process, make sure that the range circuit breaker is turned off. It’s also important to be familiar with wire color coding for safety purposes. In most cases, black and red wires are hot while white is neutral. The colors may vary depending on the manufacturer or country.
To connect the hot wires, check the manufacturer’s instructions for specific details on how to do so. In general, connect one of the hot wires to L1 and another to L2. These terminals are usually located at the back of the range near where the power cord enters. Be sure to tighten the connections securely using a screwdriver. It’s essential to avoid common mistakes such as loose connections or mixing up the wires which can lead to electrical hazards.
After connecting both hot wires, double-check all connections before turning on the circuit breaker. Test your electric range by setting it in bake mode and checking if it heats up accordingly. If everything checks out okay, then congratulations! You have successfully connected your electric range power cord. Remember that safety should always come first when dealing with electricity, so if you’re unsure about anything during installation, don’t hesitate to ask for help from a professional electrician.
As mentioned earlier, tightening connections securely is an essential aspect of connecting an electric range power cord safely and efficiently. Loose connections can result in electrical hazards such as short circuits and electrical fires that can lead to severe damage or injuries. Therefore, it’s crucial to ensure that all screws are adjusted tightly enough using a screwdriver without over-tightening them, which can cause damage as well.
Tighten The Connections
Tightening the connections is an essential step when connecting the power cord of an electric range. This process ensures that the wires are securely fastened to their respective terminals, preventing any electrical accidents or malfunctions in the future. It is crucial to check and double-check all connections before turning on the power supply.
To tighten the connections, you will need a few tools such as a screwdriver or pliers, depending on the type of connection. A flathead screwdriver is typically used for securing wire connections to screws or terminals, while pliers may be required for tightening clamps. It is important to use these tools with care and precision to avoid damaging any components or causing harm to yourself.
While tightening the connections may seem like a small step in the installation process, it can make all the difference in ensuring your electric range functions correctly and safely. Neglecting to check these connections could lead to poor performance, malfunction or even worse- electrical fires. Remember always to take your time when tightening each connection and ensure that every wire is properly secured before proceeding with installing other parts.
Moving forward, after ensuring that all connections are tightly secured, it’s time to replace the access panel. This component covers up all internal wiring within your electric range and should be placed back into position once you have checked everything else.
Replace The Access Panel
- The first step in replacing an access panel on an electric range is to remove the old panel.
- This is done by unscrewing the screws that hold the panel in place and then carefully lifting the panel off.
- Next, the new access panel should be installed in its place, lining up the holes in the panel with the holes in the range.
- Once the panel is in place, the screws should be firmly tightened to secure the panel to the range.
- It is important to ensure that the panel is properly secured before proceeding.
- After the panel has been secured, the power cord should be connected to the back of the range.
Remove Old Access Panel
Replacing the access panel of an electric range is a crucial task that should be carried out with care. One of the first steps in this process is to remove the old access panel before installing a new one. Access panel maintenance is important as it ensures that your electric range functions optimally and remains safe to use.
To remove the old access panel, locate the screws that hold it in place on the back of your electric range. You can do this by referring to your product manual or by checking for visible screws at the rear of the appliance. Use a screwdriver to unscrew each screw and gently pull off the old access panel. It’s important to handle this part carefully so as not to damage any wires or connections.
After successfully removing the old access panel, you can proceed with replacing it with a new one. Installing a new access panel will help keep dust and debris from entering your electric range, which may cause issues over time. Regularly maintaining your access panel will not only protect your appliance but also ensure that you get optimal performance from your electric range for years to come.
Install New Access Panel
As an electric range installation expert, it is important to emphasize the significance of access panels, not only for aesthetic purposes but also for safety and functionality. Access panels are crucial components that enable easy access to the internal parts of your appliance, making it easier to perform maintenance or repairs. There are different types of access panels available in the market, such as top-mounted or rear-mounted ones, each designed to suit different models and brands of electric ranges.
When replacing an old access panel with a new one, you must first ensure that you have chosen the right type that fits your electric range model. Before starting the installation process, make sure that you have all necessary tools and equipment readily available. Begin by aligning the new panel in its appropriate position on your electric range’s backside and secure it using screws provided with the panel. Tighten the screws firmly but be careful not to over-tighten them as this may cause damage.
After successfully installing the new access panel, double-check its alignment and connection to make sure that everything is in order before turning on your electric range. Regular maintenance of access panels is essential as it helps prevent dirt and debris from entering your appliance’s internal parts which could lead to damage or malfunction over time. With proper care and maintenance, your electric range will function optimally and last longer than you expect.
Secure Panel To Range
Now that you have chosen the appropriate access panel and aligned it with your electric range, the next step is to secure it properly. This process involves attaching the panel to the back of your appliance by screwing it in place. However, it is important to use the proper technique for securing the panel to ensure optimal functionality and safety.
Different types of access panels require different installation techniques. For top-mounted panels, it’s best to tilt the panel towards you while aligning it with your electric range’s backside. Once you’ve done this, secure the panel using screws provided with it. Rear-mounted panels, on the other hand, require a direct alignment onto the range’s backside before securing them using screws.
When tightening screws for both types of panels, be careful not to over-tighten them as this could cause damage or crack your access panel. Tighten them just enough so that they are securely in place and flush against your electric range’s backside. By following these instructions and taking care in securing your access panel, you can ensure its longevity and preserve your appliance’s functionality for years to come.
Test The Connections
Did you know that improper installation of an electric range can result in over 4,000 injuries per year in the United States alone? It is crucial to follow the correct procedure when connecting the power cord of your electric range to ensure not only your safety but also the longevity of your appliance.
To test the connections, start by turning off the main power supply to avoid electrocution. Then, verify that all connections are secure and properly screwed in place. Next, check for any frayed or damaged wires and replace them immediately if found. Finally, use a voltage tester to confirm that electricity is flowing through the wires as expected.
It is essential to emphasize the importance of proper insulation while installing an electric range. Any exposed wires can lead to electrical shocks or short circuits. To prevent this from happening, cover all exposed wire connections with insulating tape and ensure that they are tucked tightly away from any metal objects.
Tips for troubleshooting include checking for tripped circuit breakers or blown fuses if there is no power reaching your range. Additionally, make sure that your outlet can handle the voltage required by your electric range; otherwise, it may trip frequently.
With these guidelines in mind, you can safely connect your electric range’s power cord without worrying about any potential hazards. In the next step, we will discuss how to plug in the range and perform a final inspection before using it for cooking purposes.
Plug In The Range
- Before plugging in the cord of an electric range, it is necessary to check the outlet to ensure that it is compatible with the voltage requirements of the appliance.
- Once the outlet is confirmed, the power cord of the range can be inserted into the outlet.
- It is important to ensure that the cord is firmly connected, and that the plug is properly secured in the outlet.
- If the plug is not properly secured, the connection could become loose and cause a risk of electrical shock or fire.
- To secure the connection, the strain relief clamp should be used to secure the cord to the back of the range.
- After the connection is secure, the power cord should be checked for any signs of damage or fraying before the range is powered on.
Check The Outlet
As an electric range installation expert, checking the outlet is a crucial step in plugging in the range. Before plugging in the power cord, it’s important to make sure that the outlet is compatible with your electric range. You can check this by looking at the outlet’s voltage and amperage rating in your user manual or on the back of your range. If the outlet doesn’t match your electric range’s requirements, you may need to hire a licensed electrician to install a new outlet.
If you’ve determined that the outlet is compatible with your electric range, it’s still important to troubleshoot any issues before plugging it in. One common issue is that the circuit breaker may trip when you turn on the range. This could be caused by a damaged power cord or a faulty appliance. To troubleshoot this issue, try unplugging other appliances from nearby outlets and resetting the circuit breaker before plugging in your electric range.
Another issue you may encounter when plugging in your electric range is that there isn’t enough clearance between the wall and the appliance for the power cord. This could cause damage to both your wall and power cord if not addressed properly. To troubleshoot this issue, measure how much clearance is needed and assess if moving furniture or adjusting cords can provide more space. By taking these steps to check and troubleshoot any potential issues with your outlet before plugging in your electric range, you can ensure a safe and successful installation process.
Plug In The Cord
Now that the outlet has been checked and any potential issues have been resolved, it’s time to plug in the cord. However, even this seemingly simple step can be a source of common mistakes during electric range installation. One of these mistakes is not properly aligning the prongs of the power cord with the outlet before inserting it. This can cause damage to both the outlet and power cord, as well as create a safety hazard. To avoid this mistake, make sure to properly align the prongs before plugging in the cord.
Another common mistake when plugging in the cord is not securing it properly to prevent it from accidentally being pulled out of the outlet. This can cause interruptions in power supply or create a safety hazard if someone trips over the loose cord. To troubleshoot this issue, consider using cable ties or clips to secure the power cord to nearby furniture or walls.
If you encounter any issues after plugging in your electric range, there are troubleshooting tips that can help identify and resolve them. For example, if your range isn’t turning on despite being plugged in properly, check if any fuses have blown or if there are any issues with your circuit breaker. If you notice any unusual smells or sounds coming from your range after plugging it in, immediately unplug it and contact a licensed electrician for assistance. By following these guidelines and taking necessary precautions during electric range installation, you can ensure a safe and successful experience for yourself and others around you.
Secure The Connection
When it comes to electric range installation, one of the most crucial steps is plugging in the cord. However, this seemingly simple task can present potential hazards if not done properly. In order to ensure safety, it is important to use proper methods for securing the connection between the power cord and outlet.
One method to ensure a secure connection is to use cable ties or clips to fasten the power cord to nearby furniture or walls. This prevents accidental disconnection which can lead to interruptions in power supply or create a tripping hazard. Additionally, it is important to properly align the prongs of the power cord with the outlet before inserting it. This will prevent damage to both the outlet and power cord, as well as eliminate any potential safety hazards.
Another important consideration during electric range installation is proper grounding techniques. Ensuring that your electric range is grounded properly can prevent electrical shocks and fires from occurring. Always refer to manufacturer’s instructions for specific grounding requirements and seek assistance from a licensed electrician if necessary.
By following these methods for ensuring a secure connection and proper grounding techniques during electric range installation, you can help create a safe environment for yourself and those around you. It is always better to err on the side of caution when dealing with electricity, so take your time and follow all precautions carefully.
Turn On The Power
Once the power cord of your electric range is properly connected, it is time to turn on the power. Before doing so, double-check that everything is installed correctly and there are no loose connections. This will help prevent any electrical hazards or damage to the appliance. It is important to note that turning on the power prematurely can cause irreparable damage to the electric range.
Common mistakes when turning on the power include not checking for any loose connections or forgetting to turn off the circuit breaker before connecting the power cord. These mistakes can lead to a malfunctioning appliance, electrical shock or even a fire hazard. Troubleshooting tips include checking all wires and connections for tightness, ensuring that all components are in their correct positions, and verifying that circuit breakers are turned on.
Turning on the power of an electric range should be done with caution, especially when dealing with electricity. Always be sure to follow safety protocols such as wearing protective gear like gloves and safety goggles when installing appliances, including electric ranges. In addition, it’s important to never touch live wires or exposed metal parts while working with electricity. By taking these safety measures into consideration, you can successfully turn on your electric range without causing any harm to yourself or others.
Moving forward, safety tips for working with electricity will be discussed in further detail in order to ensure a safe installation process for anyone who wishes to install an electric range themselves.
Safety Tips For Working With Electricity
As an electric range installation expert, I cannot emphasize enough the importance of proper insulation when working with electricity. The insulation serves as a barrier to protect you from electrical shock and prevent fire hazards. Always make sure that your hands, tools, and the area around you are dry before handling any electrical components. Additionally, double-check that the power source is switched off before you begin any work.
There are several common electrical hazards that you should avoid while working with an electric range. Firstly, never touch an energized component or wire with your bare hands or any metal tool. Secondly, do not attempt to repair or modify any electrical component unless you have received specialized training in this area. Lastly, be aware of the potential for electrocution when working in wet environments.
In conclusion, even though it may seem easy to install an electric range yourself, there are many risks involved. By following safety precautions such as proper insulation and avoiding common electrical hazards, you can minimize these risks. However, if at any point during installation you feel unsure or uncomfortable about what to do next, it is best to call a licensed electrician who can ensure safe and proper installation of your electric range without putting yourself or others at risk.
When To Call A Licensed Electrician
When it comes to installing or connecting electrical appliances, safety should always be the top priority. While some may choose to tackle the job themselves, it is important to know when it is appropriate to call a licensed electrician. Electrical work can be dangerous if not done correctly and can result in serious injury or even death.
One of the biggest safety precautions for electrical work is ensuring that the power source is turned off before beginning any work. This means turning off the breaker or unplugging the appliance from the wall. It is also important to wear protective gear such as gloves and safety glasses. If you are unsure about how to properly handle electrical wiring, it is best to leave it to a professional.
Knowing when to call a licensed electrician can save you time and money in the long run. If you are not comfortable working with electricity or have little knowledge on how to do so safely, it is best to seek help from an expert. A licensed electrician has years of experience and training in handling electrical work, making them better equipped for any situation that may arise.
- Signs that indicate you need a licensed electrician:
- Frequent tripping of circuit breakers
- Flickering lights
- Burning smell coming from outlets or appliances
- Outdated wiring
- Electrical shocks when touching appliances
It is always better to err on the side of caution when dealing with electricity. Remember that safety should be your top priority when working with any electrical appliance or wiring. When in doubt, don’t hesitate to call a licensed electrician who can handle the job safely and professionally without putting yourself at risk.
Conclusion
Connecting the power cord of an electric range may seem daunting, but with the right tools and knowledge, it can be done safely and efficiently. First, turn off the power at the circuit breaker before beginning any work. Then, gather the necessary materials such as wire strippers and a screwdriver.
Remove the access panel to identify the wires and strip them before plugging in the range. Finally, turn on the power and test that everything is working properly. Remember to always practice safety when working with electricity and call a licensed electrician if unsure or uncomfortable with any part of the process.
One anticipated objection to this process is that it may seem intimidating or complicated for those without experience in electrical work. However, by following these steps carefully and staying aware of safety precautions, anyone can successfully connect their electric range’s power cord. Don’t be afraid to seek help from professionals if needed, but know that with proper guidance and a little patience, this task can be accomplished easily.
Image Credits
- “Power Cord” by oskay (featured)











![How To Replace A Single-Pole Wall Switch 28 '... All in all it's just another [switch] in the wall.' ...](https://green-life.blog/wp-content/uploads/2023/05/17xmP5qMtVjq-150x150.jpg.webp)
