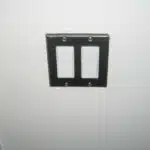
Electrical junction boxes are a crucial component of electrical wiring systems, providing a safe and secure location for splicing wires together. Proper installation of these boxes ensures that the electrical system operates efficiently and safely. As an electrical engineer, it is imperative to have a comprehensive understanding of the installation process for these boxes.
In this article, we will discuss the steps required to install an electrical junction box. From selecting the appropriate location to mounting the box securely and making connections, we will cover all aspects of this important task. By following these guidelines, you can ensure that your installation meets safety standards and provides reliable service for years to come. Whether you are a professional electrician or a DIY enthusiast, this guide will provide valuable insights into the proper installation of electrical junction boxes.
Understanding Electrical Junction Boxes
Electrical junction boxes are an essential component of any electrical system. They are used to connect and protect electrical wires and cables, as well as provide access for maintenance and repairs. There are several types of junction boxes available on the market, including plastic, metal, weatherproof, and explosion-proof options.
One critical aspect of installing an electrical junction box is ensuring proper grounding. Grounding provides a safe path for electrical current to flow in the event of a fault or surge. Without proper grounding, there is a risk of electrocution or fire. It is important to follow local building codes and regulations when installing junction boxes to ensure proper grounding.
In addition to proper grounding, selecting the appropriate type of junction box for your application is crucial. Different types of boxes have different features, such as the number of ports or knockouts available. It is essential to choose a box that meets your specific needs and requirements. Proper selection and installation of a junction box can help prevent electrical hazards and ensure the safety and reliability of your electrical system.
Moving forward with planning for installation, it is important to consider factors such as location, accessibility, and load requirements before proceeding with the physical installation process.
Planning For Installation
Understanding electrical junction boxes is an essential part of any electrical installation. As a junction box serves as the connection point for various electrical wires or cables, it helps distribute electricity to different areas in a circuit. Before planning to install a junction box, it is crucial to consider budget considerations and if you will hire a professional electrician or do it yourself.
Budget considerations must be taken into account when planning to install an electrical junction box. The cost of the materials and tools required depends on the size and complexity of the project. If you plan on hiring a professional electrician, the cost will be higher due to labor expenses. However, if you choose to install the junction box yourself, you can save money but bear in mind that safety should always be your top priority.
DIY vs professional installation is another factor to consider when installing an electrical junction box. If you are not experienced with electrical work, it may be safer to consult with a licensed electrician. A professional electrician has the necessary knowledge and experience needed to ensure that your installation meets safety standards and regulations. On the other hand, if you have prior experience with electrical work and feel confident in your abilities, installing a junction box yourself can save money.
Planning for installation requires gathering necessary tools and materials before starting the project. You will need wire strippers, pliers, screwdrivers, wire connectors, nuts/bolts/screws for mounting purposes, conduit pipes (if applicable), and other materials specific to your project needs. It is important to ensure that all tools are in good condition before beginning work as faulty equipment can pose a risk during installation. By gathering all necessary tools and materials ahead of time, you can avoid delays or interruptions during your installation process.
Gathering Necessary Tools And Materials
Choosing materials is an essential part of installing an electrical junction box. The first material to consider is the box itself, which comes in different sizes and shapes. It is important to choose a box that fits the wires comfortably and has enough space for any future additions. Another consideration is the type of wiring you are using, as some boxes are designed for specific wiring types.
Safety precautions must be taken when gathering tools and materials. It is crucial to ensure that all equipment is in good condition before use, as damaged tools can cause accidents or injuries. When choosing materials, it is important to check for safety certifications such as UL (Underwriters Laboratories) listings. Additionally, protective gear such as safety glasses and gloves should be worn during installation to prevent exposure to live electricity.
Before beginning any work on an electrical junction box, it is important to turn off power and test circuits. This step ensures that no live wires are present during installation and prevents electric shock. Turning off power involves locating the circuit breaker panel and flipping the switch corresponding to the area where you will be working. Testing circuits involves using a voltage tester tool to verify that there is no electrical current flowing through the wires. Only after these steps have been completed can installation begin with confidence.
Turning Off Power And Testing Circuits
Before beginning any electrical work, it is essential to turn off the power and test circuits. Electricity can be a dangerous force, so safety should always be your top priority. To ensure that you are safe while working on the electrical system in your home or workplace, it is imperative to follow a few simple steps.
Firstly, make sure that you turn off the power to the area where you will be working. This can typically be done at the circuit breaker box. It is important to check that all of the appropriate switches have been turned off before proceeding with any work.
Next, use a circuit tester to check for voltage in the wires you will be working on. This tool will alert you if there is still current running through the wires and allow you to take necessary precautions before starting your work.
Once you have confirmed that there is no electricity flowing through the wires, it’s time to plan your wiring route. You should carefully consider where you want your junction box located and how many wires will need to run through it. By taking these factors into account beforehand, you can ensure that installing the junction box goes smoothly and meets your needs.
Now that we have discussed turning off power and testing circuits, let us move onto choosing the right box for your needs.
Choosing The Right Box For Your Needs
When it comes to choosing an electrical junction box, size and material options are critical factors to consider. Box size is a significant factor that can impact the safety of your electrical installation. If you choose a box that’s too small, it may not be able to hold all the wires safely, which can lead to overheating or fire hazards. On the other hand, if you opt for a box that’s too large, it may be challenging to fit in tight spaces.
Material options are another crucial factor in determining the effectiveness and safety of your electrical junction box. Common materials used for electrical boxes include metal, plastic, and fiberglass. Metal boxes offer excellent durability and protection against accidental damage and environmental elements like moisture and dust. However, they can be more expensive than plastic or fiberglass options.
Plastic boxes are less expensive than metal ones but still offer good durability for most applications. They’re also lightweight and easy to install with common household tools. Fiberglass boxes provide excellent protection against corrosion and chemical damage but tend to be more expensive than both metal and plastic options. Ultimately, your choice of material will depend on your specific needs and budget constraints when selecting an electrical junction box for installation.
Moving forward into selecting a location for installation, it is essential to consider the specific requirements of your project before deciding on a specific spot for your electrical junction box.
Selecting A Location For Installation
When selecting a location for installing an electrical junction box, there are several factors to consider. The first and foremost is safety. Ensure that the location you choose is free from any potential hazards such as water, moisture, heat sources or flammable materials. A good practice is to keep the box away from any combustible materials like wood or paper.
Another important consideration is accessibility. Installing the box in an easily accessible location will make it easier to inspect and maintain when needed. For instance, if the box is located behind drywall, it may be difficult to access in case of a malfunctioning circuit. Moreover, proximity to electrical appliances should also be taken into account. It’s best to avoid installing the box near high wattage appliances like ovens or heaters.
Common mistakes associated with selecting a location include failing to consider safety and accessibility concerns. Other common mistakes include placing the box where it cannot accommodate all necessary wires, or choosing a location that clashes with local building codes. Additionally, failing to ground electrical connections properly can lead to electrocution hazards.
When it comes to safety considerations for electrical junction boxes, never work on them while they are live; always turn off power before working on them. Furthermore, ensure that your hands are dry when working with electricity and wear protective gear like rubber gloves and goggles if needed.
With these considerations in mind, you can now proceed confidently in marking and cutting holes for the junction box installation.
Marking And Cutting Holes For The Box
Accurate measurements are essential for successful installation of an electrical junction box. Marking the wall for the location of the box should be done using a pencil or marker, taking care to ensure that the markings are visible and clearly delineated. After the measurements have been taken and the marking is complete, the hole can be cut using a reciprocating saw, taking precautions to avoid damage to the surrounding area. Cutting the hole should be done with precision, as any mistakes can result in a faulty connection or a hazard to the user.
Measuring
Accurately measuring the dimensions of the electrical junction box is crucial before cutting holes for installation. Measuring techniques include using a tape measure, ruler, and square to ensure precision. Before measuring, it is important to consider the type of box that will be installed and its location. For example, if installing a ceiling box, measurements must be taken from the floor.
Tools for accurate measurement are essential for proper installation. A digital caliper or laser distance measurer can provide precise measurements up to 1/100th of an inch. These tools eliminate human error and ensure accuracy when measuring small or hard-to-reach areas. It is also recommended to use a stud finder to locate studs or joists behind walls before marking and cutting.
When taking measurements, it is important to take into account any obstructions such as pipes or wires that may interfere with installation. Additionally, it is best practice to always measure twice before cutting once to avoid mistakes that could result in costly repairs. By utilizing proper measuring techniques and tools for accurate measurement, the installation of an electrical junction box can be done confidently and correctly.
Marking
Once the dimensions of the electrical junction box have been accurately measured, the next step is to mark and cut holes for its installation. It is important to select the appropriate tools for marking, such as a pencil or marker, depending on the material of the wall or ceiling. The type of junction box being installed must also be considered as it may require specific markings or hole sizes.
When marking for a junction box installation, it is best practice to mark slightly larger than necessary to allow room for adjustments during installation. Additionally, it is crucial to check for any obstructions such as pipes or wires before marking and cutting holes. This will prevent costly mistakes and ensure that the installation proceeds smoothly.
After marking, it is time to cut holes for the electrical junction box. The method used will depend on the material of the wall or ceiling. For example, if working with drywall, a keyhole saw can be used to carefully cut along marked lines. If working with a plaster wall or ceiling, a rotary tool may be more suitable. By utilizing proper techniques and tools and taking into account any obstacles during marking and cutting holes, an efficient and successful installation of an electrical junction box can be achieved.
Cutting
When it comes to installing an electrical junction box, marking and cutting holes for its installation is a crucial step. However, cutting can be a complex process that requires careful consideration of the material being worked on, as well as the appropriate tools and techniques to use. As an electrical engineer, it is important to understand the best cutting techniques and safety precautions to follow during this process.
One important aspect of cutting when installing an electrical junction box is selecting the right tools. For example, when working with drywall, a keyhole saw or jab saw may be the best option for making precise cuts along marked lines. However, if working with a plaster wall or ceiling, a rotary tool such as a Dremel may be better suited for creating clean cuts. Safety should also be taken into consideration when choosing tools, such as wearing gloves and eye protection.
Another factor to consider when cutting holes for an electrical junction box is taking proper safety precautions. This includes checking for any potential hazards or obstructions like pipes or wires before making any cuts. It’s also important to ensure that power has been turned off in the work area to avoid electrocution or other accidents. By following these safety measures and utilizing proper cutting techniques and tools specific to the material being worked on, an efficient and successful installation of an electrical junction box can be achieved.
Mounting The Box Securely
After cutting the required hole, the next step is to mount the electrical junction box securely. This will ensure that it remains in place even when subjected to external forces. Choosing appropriate materials for securing the box is crucial. The material should be strong enough to withstand any pressure from cables and wires passing through it.
One way of mounting an electrical junction box is by using screws. The screws should be long and thick enough to hold the box firmly in place. Alternatively, you can use toggle bolts or wing nuts if you have a hollow wall where you want to install the box. A 3 item numeric list of materials to secure the box may include:
- Screws
- Toggle bolts
- Wing nuts
Proper sealing techniques are essential when installing an electrical junction box. This will prevent moisture from seeping into the box and causing short circuits or other dangerous situations. One common sealing technique is using silicone caulking around the edges of the box before securing it with screws or bolts. Another way is by using a gasket that fits tightly around the edges of the box.
After mounting and sealing the electrical junction box, it’s time to connect wires inside it securely. The wiring connections inside the box must be done correctly because any mistake can lead to short circuits or electrocution hazards. In our subsequent section, we will discuss how to make proper wiring connections inside an electrical junction box without risking your safety or damaging your equipment.
Wiring Connections Inside The Box
Studies show that electrical fires account for a significant number of home fire incidents each year. Faulty wiring connections are one of the leading causes of these fires. It is essential to ensure that every wiring connection inside an electrical junction box is appropriately made to prevent any potential hazards.
Wire stripping techniques must be precisely executed when making wiring connections. The correct wire size must be identified, and the insulation should be stripped off without damaging the copper conductor. A combination stripper tool can effectively strip wires while providing clean cuts for each wire size, minimizing the risk of damaging the wire strands.
Proper grounding methods must also be observed when connecting wires inside an electrical junction box. The grounding system provides a safe path for current to flow in case of a short circuit or overload scenario. Grounding hardware such as screws, washers, and nuts should be used to connect ground wires securely. It is crucial to check that there is no paint or other insulating materials between the grounding hardware and the metal surface where it connects.
Ensuring proper wire stripping and grounding methods when making wiring connections inside an electrical junction box reduces the risk of electrical hazards such as shocks, electrocution, and fires. Once all connections have been properly made, installing a cover plate over the junction box secures everything in place while providing easy access for future maintenance or repairs without compromising safety measures.
Installing A Cover Plate
Cover Plate Options:
After completing the electrical junction box installation, it is time to install a cover plate. Cover plates are available in various sizes, shapes, and materials. The most common types of cover plates are made of plastic or metal. The selection of the cover plate depends on the type and location of the electrical junction box.
Installation Tips:
Before installing the cover plate, ensure that all wiring connections are properly secured inside the junction box. Use a screwdriver to attach the cover plate to the junction box. Tighten each screw slowly and evenly until they are snug but not over-tightened, as this can damage the cover plate or strip the screws. Once installed, turn on power to verify that all connections are working correctly.
Transition:
A crucial step after installing an electrical junction box and cover plate is testing the connections and circuit. This ensures that your electrical system is safe for use and prevents any potential hazards or accidents from occurring.
Testing The Connections And Circuit
- Before beginning installation of a junction box, it is necessary to ensure that the power to the location is turned off.
- The wiring should be tested for continuity and to verify that it is properly connected to the junction box.
- All connections should be checked for insulation damage and to ensure that they are securely fastened to the junction box.
- The circuit protection should be verified to ensure that it is the appropriate size and type for the branch circuit.
- A circuit tester should be used to verify the polarity of the wiring and to detect any shorts or ground faults.
- Once installation and testing of the junction box is complete, the power should be restored to the circuit and the junction box should be inspected for proper operation.
Checking For Power
Before installing an electrical junction box, it is crucial to ensure that the power has been cut off to the area where you will be working. Checking voltage is a critical step in this process as it helps you ascertain if there is any live current in the wires or not. A voltage tester can be used for this purpose, but it must be checked first to ensure that it is functioning correctly. To test for voltage, place one lead of the tester on a known ground point and touch the other lead to each wire in turn.
Once you have ensured that there is no power running through the wires, testing continuity becomes necessary. Continuity testing helps establish if there are any breaks or gaps in an electrical circuit. This can occur when wires are damaged or connections are loose. A multimeter can be used for continuity testing by setting it to the ‘continuity’ or ‘ohms’ setting and touching one lead to each end of a wire or connection. If there is continuity, the meter will beep or show a reading close to zero.
Checking for power and testing continuity are essential steps before connecting any wires in an electrical junction box. These steps help prevent accidents and ensure that all connections are correctly made before restoring power to the area. By following these procedures with care, you can ensure that your installation meets safety standards and operates efficiently without any issues.
Testing The Wiring
After checking for power and testing continuity, the next step is to test the wiring. This process helps identify any faulty wiring that may cause issues in the circuit. When checking the wiring, it is important to visually inspect it for any damage or wear and tear. If there are any visible signs of damage, replacing the wire is necessary before proceeding with installation.
After visually inspecting the wiring, a wire tester can be used to check for faults in the wires. This tester works by sending a signal through each wire to check if there are any breaks or interruptions in the flow of electricity. The tester will beep or show an error message if there is an issue with the wiring. If there are multiple wires in a circuit, it is best to test each one individually to ensure that all connections are secure and functional.
Identifying faulty wiring before connecting them in an electrical junction box is crucial for ensuring that your installation operates safely and efficiently. Faulty wiring can cause short circuits or even start fires, leading to injury or property damage. By carefully testing and checking all aspects of your electrical system, you can prevent these issues from occurring and ensure that your system meets safety standards.
Verifying Circuit Protection
After testing the continuity and wiring of an electrical circuit, the next step is to verify circuit protection. This involves checking if the circuit has adequate grounding and proper wire insulation. Grounding is crucial for ensuring that any excess electricity flows into the ground instead of through a person or other objects, preventing serious injuries or even death. Proper wire insulation prevents electrical shocks by keeping the current contained within the wires.
To check for adequate grounding, an electrical engineer can use a ground fault circuit interrupter (GFCI) tester. This device checks if there are any issues with the grounding system by simulating a ground fault in the circuit. If there is no tripping of the GFCI, then it indicates that there is adequate grounding in place. Proper wire insulation can be checked by visually inspecting all wires to ensure they are not frayed or damaged in any way.
Verifying circuit protection is essential for ensuring that your electrical installation operates safely and efficiently. Failure to properly ground your electrical system can result in severe injury or death from electric shock, while improper wire insulation can cause fires or short circuits. By carefully verifying circuit protection, you can prevent these hazardous situations from occurring and ensure that your system meets safety standards.
Troubleshooting Common Issues
How do you troubleshoot common issues that may arise when installing an electrical junction box? One of the most common mistakes is not properly securing the connections within the box. Loose connections can cause a variety of problems, including sparking, overheating, and even fires. To avoid this issue, ensure that all connections are tightly secured and that wires are properly stripped before being inserted into the box.
Another issue that may arise is incorrect wiring. This can be caused by using the wrong type of wire or by incorrectly connecting wires to one another. To troubleshoot this issue, double-check all connections and consult a wiring diagram if necessary. Additionally, ensure that all wires are labeled correctly to avoid confusion.
A third common issue is issues with grounding. Improper grounding can cause equipment to malfunction or even become dangerous to use. To troubleshoot grounding issues, check that you have a proper grounding system in place and that all components are properly connected. Additionally, check for any signs of wear or damage on your grounding components and replace them as needed.
- Troubleshooting Techniques:
- Double-check all connections
- Consult wiring diagrams if necessary
- Label wires correctly
- Check for signs of wear or damage on grounding components
By following these troubleshooting techniques and avoiding common mistakes during installation, you can ensure safe and effective use of your electrical junction box. However, it’s important to remember that ensuring safety and compliance with electrical codes is essential for any electrical work. In the next section, we will discuss steps you can take to ensure compliance with these regulations and keep yourself and others safe when working with electrical systems.
Ensuring Safety And Compliance With Electrical Codes
Proper grounding is an essential aspect of electrical safety, and it plays a crucial role in ensuring that your electrical junction box functions as intended. Grounding helps to prevent electrical shock and provides a safe path for electricity to flow in case of a fault. To ensure the proper grounding of your electrical junction box, ensure that you use a grounding wire and connect it to the metal frame of the box. The grounding wire should also be connected to an earth ground.
Choosing the right size for your electrical junction box is also critical. A junction box that is too small can lead to overcrowding, which may result in overheating and even fires. On the other hand, a box that is too large may leave too much space, which could allow wires to move around and potentially come into contact with each other, thus creating a short circuit. When selecting a junction box size, consider the number of wires that need to be connected within the box and choose one that provides enough space for all these wires.
In summary, ensuring safety and compliance with electrical codes is vital when installing an electrical junction box. Proper grounding and choosing the appropriate size are two critical factors to consider when installing your electrical junction box. By taking these factors into account during installation, you can help prevent potential hazards such as fires or electrocution. In the next section, we will discuss how regular maintenance and upkeep can help keep your electrical junction boxes functioning efficiently over time.
Maintenance And Upkeep Of Electrical Junction Boxes
- Inspecting electrical junction boxes should include a thorough evaluation of all components for potential damage, corrosion, and other signs of wear that could reduce the safety and performance of the system.
- Cleaning electrical junction boxes should be done regularly to remove dust, dirt, and other debris that can accumulate over time and reduce the effectiveness of the box.
- Securing electrical junction boxes should include mounting the box to a secure surface, ensuring all wires and connections are properly tightened, and checking for any potential hazards that could lead to a safety issue.
- When inspecting electrical junction boxes, it is important to check for signs of current leakage that could indicate a need for further maintenance.
- Electrical junction boxes should be cleaned with a soft cloth and mild detergent to make sure that any residue from previous projects is removed.
- Securing electrical junction boxes also includes checking that the box is properly grounded and that the wiring is secure and in good condition.
Inspecting
When it comes to the maintenance and upkeep of electrical junction boxes, one of the most crucial steps is inspecting them regularly. Junction box inspection involves thoroughly examining the box for any signs of damage or wear and tear that could pose a safety hazard. It is essential to perform this inspection on a routine basis to ensure that your electrical system remains safe and reliable.
During a junction box inspection, several safety considerations must be taken into account. First and foremost, it’s important to turn off the power supply before opening the box to avoid electrocution. Additionally, wearing proper protective gear such as gloves and goggles can prevent injuries from any debris or sharp edges inside the box. Finally, it’s critical to look out for any loose wires or connections that could cause a short circuit or fire.
Regular junction box inspections are necessary for maintaining the safety and functionality of your electrical system. By staying vigilant and taking appropriate precautions during these inspections, you can identify potential issues early on and address them before they become more significant problems. As an electrical engineer, I highly recommend performing these checks at least once every six months to mitigate risks associated with faulty wiring or other hazards.
Cleaning
In addition to regular inspections, cleaning electrical junction boxes is also an essential aspect of their maintenance and upkeep. Over time, dust, debris, and other contaminants can accumulate inside the box, potentially leading to connectivity issues or even fire hazards. Therefore, it’s crucial to implement proper cleaning techniques to ensure that these boxes remain functional and safe.
When cleaning electrical junction boxes, several safety precautions must be taken into account. First and foremost, as with inspections, it’s essential to turn off the power supply before opening the box. Additionally, wearing protective gear such as gloves and goggles can prevent injuries from any debris or sharp edges inside the box. Furthermore, using appropriate cleaning materials and avoiding the use of water can prevent damage to wires or connections.
There are several effective cleaning techniques that can be used for electrical junction boxes. One common method is using compressed air to blow out any debris or dust that may have accumulated inside the box. Alternatively, a soft-bristled brush or vacuum cleaner can also be used to remove any loose particles without damaging wires or connections. By incorporating these cleaning techniques into your regular maintenance routine and adhering to safety precautions, you can help ensure that your electrical junction boxes remain safe and reliable for years to come.
Securing
Maintenance and upkeep of electrical junction boxes is crucial to ensure their optimal performance and safety. Apart from regular inspections and cleaning, securing the box is also an essential aspect of maintenance. Securing the box involves using fasteners to keep the lid in place and applying waterproofing techniques to protect it from external elements.
There are different types of fasteners that can be used for electrical junction boxes, such as screws, bolts, or latches. The type of fastener used depends on the specific application and the size of the box. For instance, larger boxes typically require more significant fasteners to keep them securely in place. It’s essential to use high-quality materials that can withstand environmental factors like temperature changes, vibrations, or mechanical stress.
Waterproofing techniques are also crucial for securing electrical junction boxes. These techniques involve sealing the box’s edges with a waterproof material to prevent water or moisture from entering it. Silicone sealants, gaskets, or foam tapes are commonly used waterproofing materials that can provide a reliable seal around the edges of the box. Applying these techniques can help prevent corrosion and damage caused by exposure to water or other external elements.
In conclusion, securing electrical junction boxes is a critical aspect of their maintenance and upkeep. Using appropriate types of fasteners and waterproofing techniques can help keep the box secure and protect it from external elements’ damaging effects. Regular inspections, cleaning, and securing practices can help ensure that electrical junction boxes remain safe and functional for an extended period while providing efficient service to its users.
Seeking Professional Help When Needed
As an electrical engineer, I must emphasize the importance of safety precautions when installing an electrical junction box. While there are many resources available online and in books that provide step-by-step instructions on how to install a junction box, it is crucial to understand that electrical work can be dangerous if not executed correctly.
Even with the most thorough research and preparation, there may come a time when seeking professional help is necessary. It’s essential to recognize when you’re out of your depth and to call in a qualified electrician when needed. This could include situations where you lack the necessary experience or tools, or if the job involves complex wiring or high voltage circuits.
To further drive home the importance of safety and knowing your limitations, here are three key reasons why seeking professional help with electrical work may be necessary:
- Electrical wiring can be complicated: If you’re unsure about how to properly wire your junction box or navigate your home’s circuitry, it’s best to leave this task to a licensed electrician.
- Protecting yourself and others: Incorrectly installed wires or damaged electrical components can cause fires or electrocution hazards. A professional electrician has the knowledge and training required to prevent these dangers.
- Saving money in the long run: Attempting DIY electrical work without proper knowledge can lead to costly mistakes that may require additional repairs down the line. In contrast, hiring a licensed electrician will ensure that the job is done correctly from the outset.
In summary, it’s important to prioritize safety above all else when working with electricity. While some tasks may seem manageable at first glance, always know when to seek professional help before attempting any electrical installation on your own. Remember: Your safety and that of those around you should always come first.
Conclusion
In conclusion, understanding how to install an electrical junction box is essential for any homeowner or electrician. Proper installation of electrical junction boxes is crucial in ensuring the safe and efficient functioning of any electrical system. By following the steps outlined in this article, one can effectively install an electrical junction box and troubleshoot common issues that may arise.
For example, a hypothetical scenario could be a homeowner who wants to add a new light fixture to their home but realizes they do not have enough wiring connections in their current junction box. By installing a new junction box and properly connecting the wires, they can safely add the new fixture without overloading the existing circuit.
It is important to note that if one is unsure about any aspect of installing an electrical junction box, it is recommended to seek professional help. Electrical codes and regulations must be followed to ensure safety and compliance. Regular maintenance and upkeep of electrical junction boxes are also necessary to prevent any potential hazards. As an electrical engineer, it is crucial to prioritize safety when working with electricity.
Image Credits
- “Sponge Bob Square Electrical Junction Box” by Leo Laporte (featured)













![How To Replace A Single-Pole Wall Switch 25 '... All in all it's just another [switch] in the wall.' ...](https://green-life.blog/wp-content/uploads/2023/05/17xmP5qMtVjq-150x150.jpg.webp)

